

Results 1 to 20 of 114
Thread: K-member swap and upgrades
-
02-17-2012, 05:37 PM #1Veteran


- Join Date
- Feb 2009
- Location
- Mansfield, PA
- Posts
- 22,146
Black & Blue- '02 WS.6 / '07 Suburban
K-member swap and upgrades
It's finally time to start on the winter upgrades... despite the complete lack of anything "winter" happening in the northeast, so far. Lots of parts to swap out this time as I just placed a couple of more orders this morning. The list looks something like this:
UMI Tubular K-member
UMI Tubular Upper and Lower Control Arms
Prothane Motor Mounts
New GM Replacement Fender Liners
R1 Concepts Premium Slotted Rotors
Hawk HPS Brake Pads
Russell Performance Braided Brake Lines
B&M Deep Transmission Pan
GM Oil Pan Gasket
GM Oil Drain Plug
If all goes well, I may add the Burkhart Chassis tubular front bumper support and longer wheel studs on the front to the list as well. I'd like to shed a few more pounds off the front end for the track. Also, after hearing how Chris broke a couple of front wheel studs last year at Numidia, the new studs would be more for future insurance than anything else.
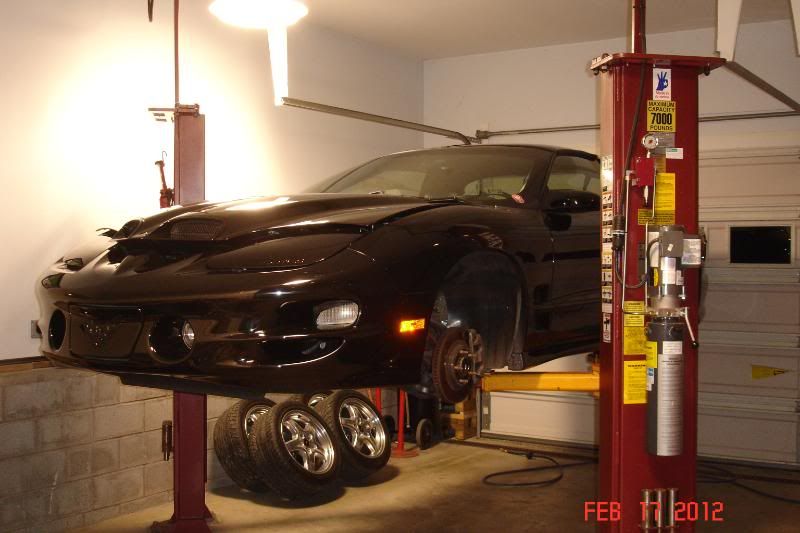
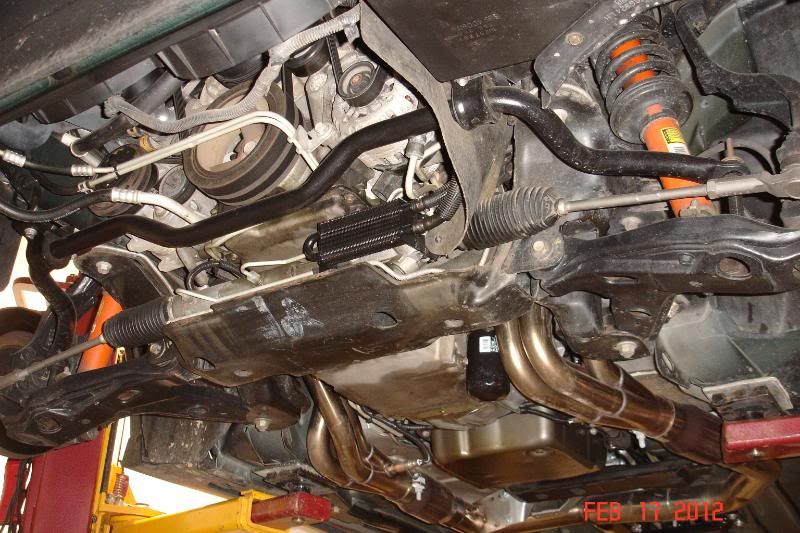
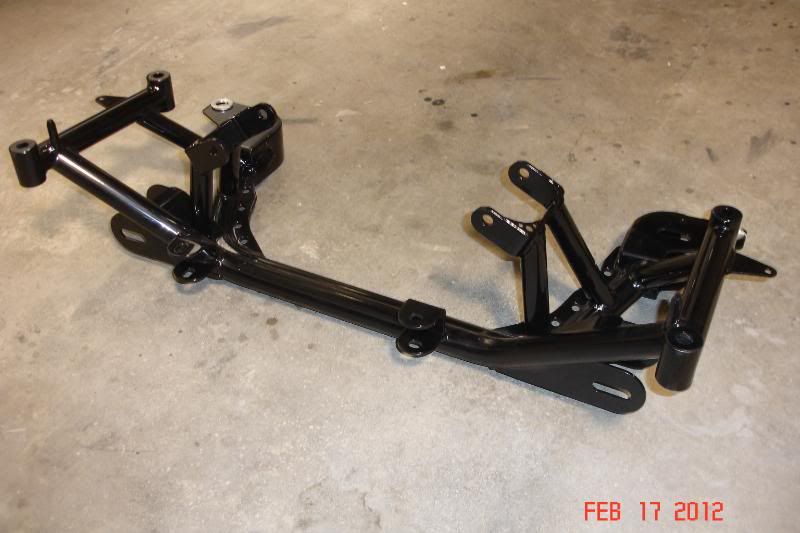
I started a couple of days ago by washing the car and rolling it into the lift bay. After removing the wheels, I photographed the areas that will be worked on just to note the location of the brake lines and wire harnesses. The stock K-member is a large piece of stamped and welded steel that takes up quite a bit of real estate under the front of the car. UMI's K-member is an absolute work of art and I am looking forward to a side-by-side comparison with the stock piece. I'll also be dropping both on the scale to see the difference, along with the control arms. The oil pan gasket turned out to be the source of a weep that I originally thought might be my rear main seal. While swapping the transmission last year, I found that the rear of the motor was bone dry and that it was actually the pan gasket leaking. I will need to fabricate a brace to hang the engine from in order to change out the gasket -- probably use a piece of rectangular steel tubing or something.
-
02-17-2012, 07:05 PM #2None Shall Pass


- Join Date
- Jan 2010
- Location
- East of Cleveland, Ohio
- Posts
- 3,827
Black- 99 WS.6 - Modified
Subscribed!
-
02-17-2012, 08:12 PM #3Veteran

- Join Date
- Oct 2008
- Location
- Wherever life takes me
- Posts
- 12,526
Red- 02 35th LE Camaro SS
In!
-
02-17-2012, 09:26 PM #4Spaz is My Mentor


- Join Date
- Feb 2009
- Location
- Florida Man Status Acheivement
- Posts
- 11,808
Navy Blue Metallic- 98 T/A, 00 FBVert, 78T/A
Me too
-
02-17-2012, 10:36 PM #5autoconnectionllc.com

- Join Date
- Nov 2008
- Location
- Montgomery,Ala
- Posts
- 2,434
2007 Corvette- Ebony
Here we go!
2007 Corvette...stock...
-
02-18-2012, 06:04 AM #6Veteran
- Join Date
- Feb 2009
- Location
- Mansfield, PA
- Posts
- 22,146
Black & Blue- '02 WS.6 / '07 Suburban
Ordered a set of Moog upper ball joints and poly tie rod boots from Advance Auto Parts. On-line orders through today had 15% off with a $50 coupon coming on my next order over $100. Not a bad deal.
-
02-18-2012, 08:33 AM #7Senior Member

- Join Date
- May 2010
- Location
- Wilkes-Barre, PA
- Posts
- 1,547
Black/Black- 98 WS6/04 Sierra Dmax
I'm in! Looking foward to seeing the weight difference between the stock parts and the tubluar parts.
-
02-18-2012, 02:35 PM #811 years of bangin gears

- Join Date
- Jan 2009
- Location
- North Jersey
- Posts
- 11,496
Phantom Black Metallic- 2004 GTO M6

I'm watching this one as well. Rectangular steel tubing with two heavy duty chains should help. I dunno if your engine has the same setup as mine with the one loop in the front and rear though.

-
02-18-2012, 06:29 PM #9Senior Member

- Join Date
- Oct 2008
- Location
- Coral Springs, Fl
- Posts
- 5,774
Sunset Orange Metalic- 2001 Camaro SS
In this one, would like to see what you shed off
-
02-18-2012, 07:50 PM #10Member

- Join Date
- Oct 2010
- Location
- Wilkes-Barre Pa.
- Posts
- 135
Red/Black- 1989 Camaro IROC
Wish I had a lift like that in my garage. It's not much fun trying to put a tranny in laying on your back in a puddle of fluid. UMI makes great stuff. Have fun with the swap!
1989 IROC: 6.0 LQ4/T56, Torquer V2, PRC Stage 2.5 5.3L Heads, FAST 78mm TB, SPEC stg. 2, Stainless Works LT's, e-cutout, Magnaflow, Moser 12blt w/4.11's, BMR subframe connectors, strut tower brace, UMI lca's, panhard, torque arm
-
02-18-2012, 08:22 PM #11Spaz is My Mentor
- Join Date
- Feb 2009
- Location
- Florida Man Status Acheivement
- Posts
- 11,808
Navy Blue Metallic- 98 T/A, 00 FBVert, 78T/A
Jeff you figure out how you're going to support the motor up yet or are you going to drop the whole thing and use a engine lift?
-
02-19-2012, 05:07 AM #12Veteran
- Join Date
- Feb 2009
- Location
- Mansfield, PA
- Posts
- 22,146
Black & Blue- '02 WS.6 / '07 Suburban
That's my next step -- now that I have looked everything over and read through the installation instructions I am going to come up with a way to hang the engine. But for the fact of the oil pan gasket issue, I would simply support the engine on my transmission jack.
-
02-19-2012, 07:06 PM #13Veteran
- Join Date
- Feb 2009
- Location
- Mansfield, PA
- Posts
- 22,146
Black & Blue- '02 WS.6 / '07 Suburban
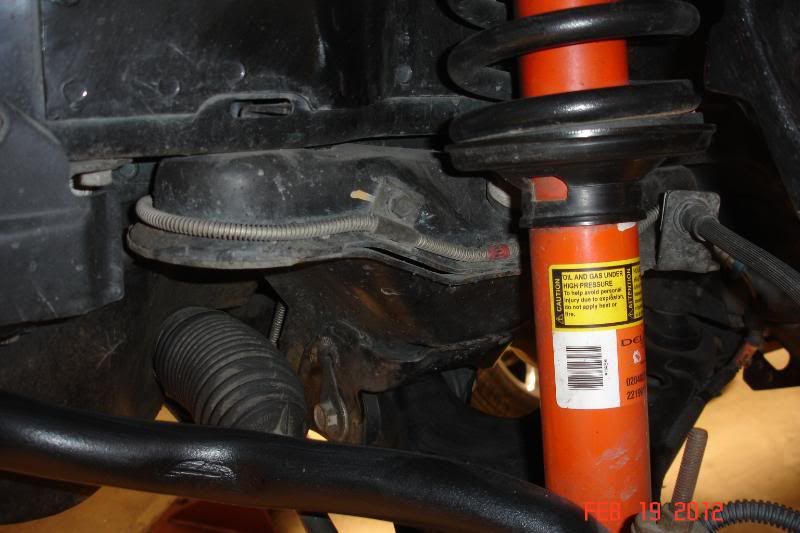
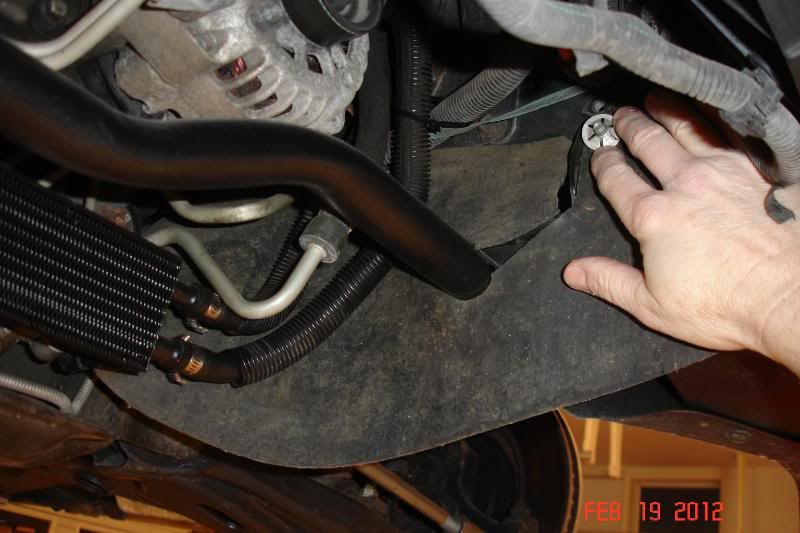
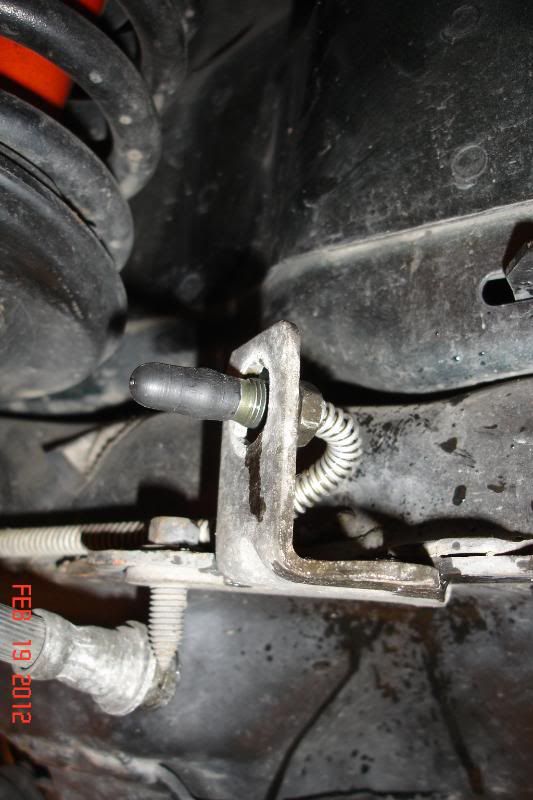
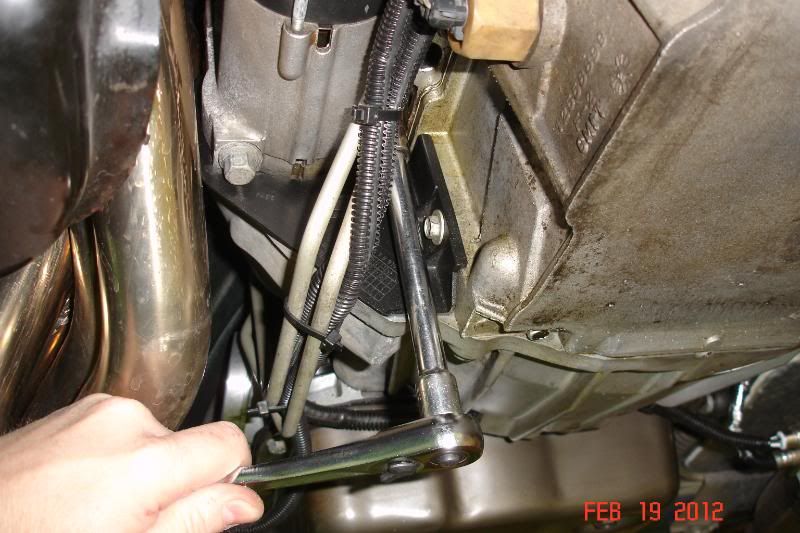
Kind of a late start today, but made some good progress on the tear down. I looked everything over one more time before beginning with the sway bar end links. Although it is not required, I elected to remove the sway bar as well to free up some working space under the car. The end links were unbolted and after removing them I then pulled the rubber splash guard and the metal bracket on the driver side that sandwiches the sway bar bushing bracket. The sway bar is hollow and weighs a lot less than what it would appear. The K-member is attached to the unibody by 6 large bolts, 3 on each side that run along the frame rail just inside the suspension. These will be unbolted right before the K-member is dropped -- so for now they stay put. I removed the cotter pins from the tie rod ends and also removed the wire harnesses for the ABS on each side while I was working in that area. The small cooler you see in the pic is for the power steering fluid. I previously removed the cooling unit from the upper radiator hose (as they have been known to fail) and installed this one in its place.

Once the sway bar was dropped from the car, I began removing the brakes. I unscrewed the lines at the union with the rubber brake hose and then quickly plugged them off with a rubber vacuum cap. I also unbolted the brake line clamps and the brackets at the K-member. As I am removing everything, I simply unbolted the caliper brackets and pulled the brakes as an assembly. The rotors were then removed and set aside as they will be replaced with new pieces from R1 Concepts.
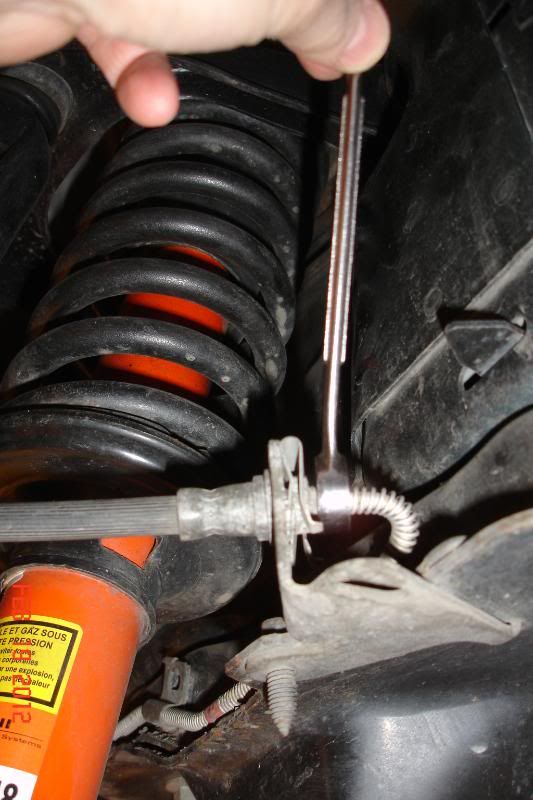
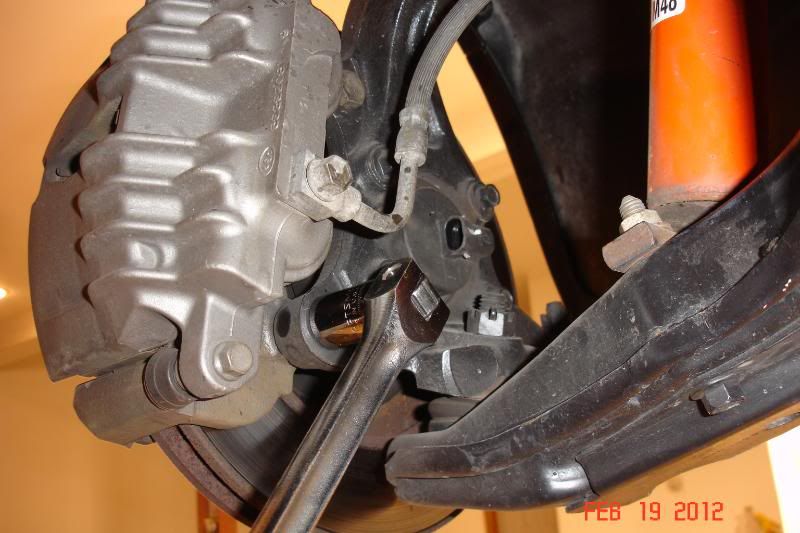
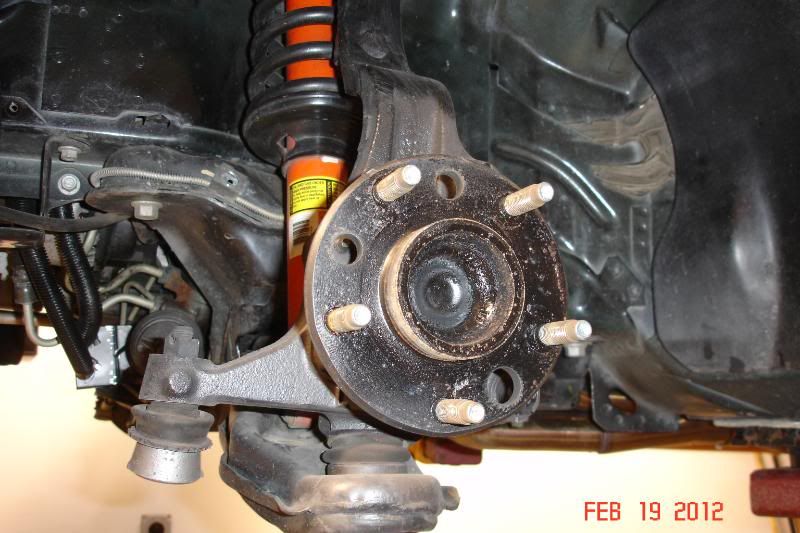
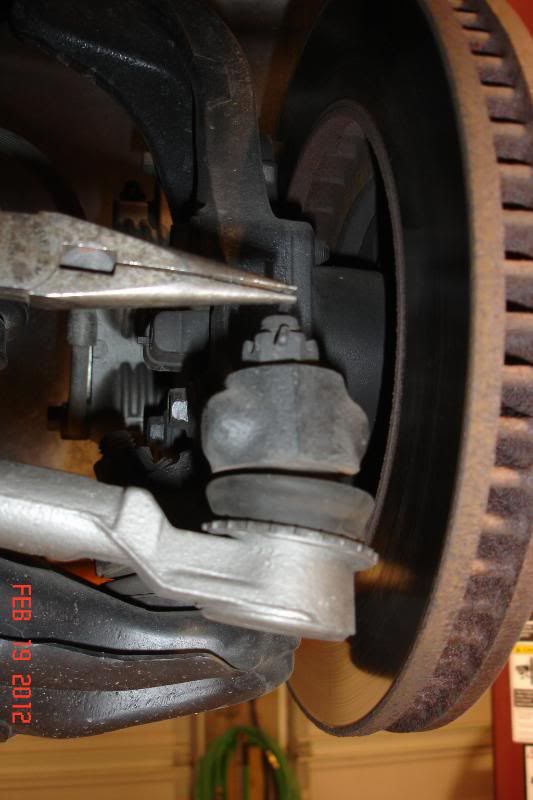
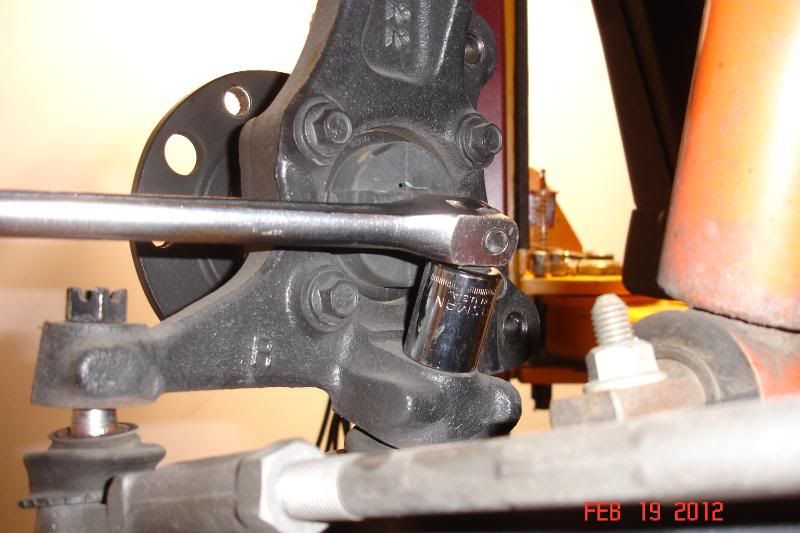
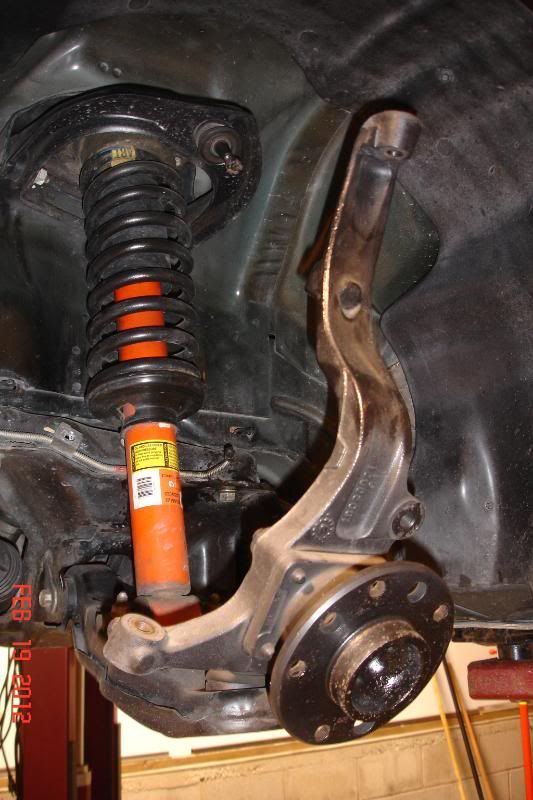
I also knocked the wheel studs out of the axle flange as they will be replaced with 2-1/2" long aftermarket studs. I sharp blow with a large hammer is all that is needed to pop them loose. The replacement studs have larger splines and I will install them with stud and bearing mount style Loc-Tite. I backed the nuts off on each of the tie rods until they were flush with the stud. A sharp blow with a hammer popped them both free and does no damage. I do have the tools for removing them as well in the event they refuse to break free. The tie rod ends were then removed and angled up into the wheel well opening to keep them out of the way. I removed the cotter pins from the upper and lower ball joints and then loosened all of the nuts. With the upper ball joint nuts backed off, I then tapped the end of the stud with a hammer and popped them free as well. The spindle arms were then pulled free of the upper control arm and the shocks were unbolted. There is very little pressure on the suspension when it is at full drop so there is little danger -- unlike most other vehicles where you have to compress the spring to remove the suspention components.
-
02-19-2012, 07:15 PM #14Veteran
- Join Date
- Feb 2009
- Location
- Mansfield, PA
- Posts
- 22,146
Black & Blue- '02 WS.6 / '07 Suburban
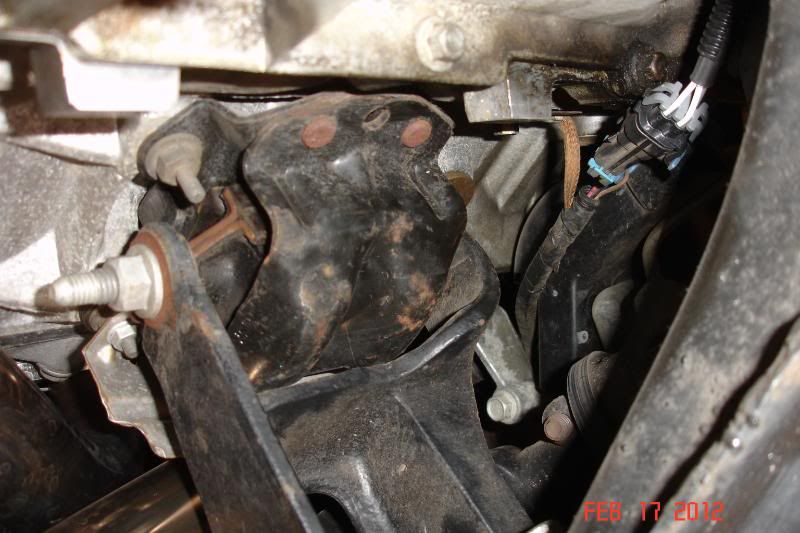
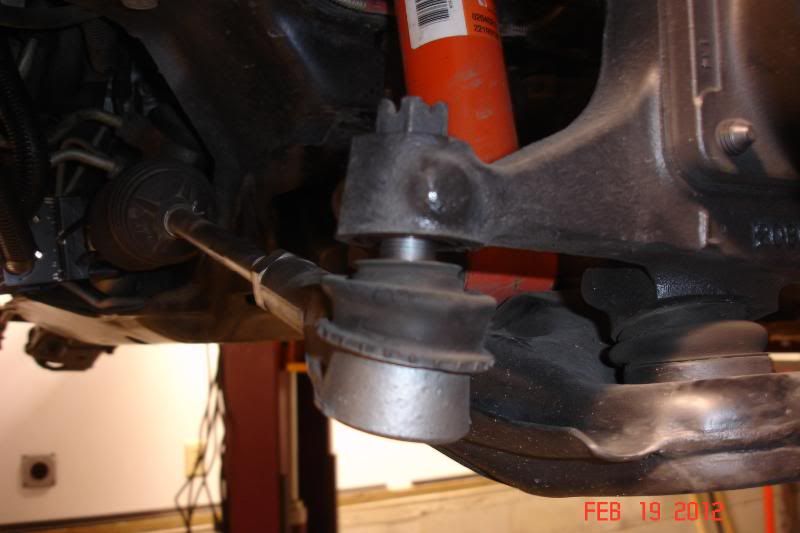
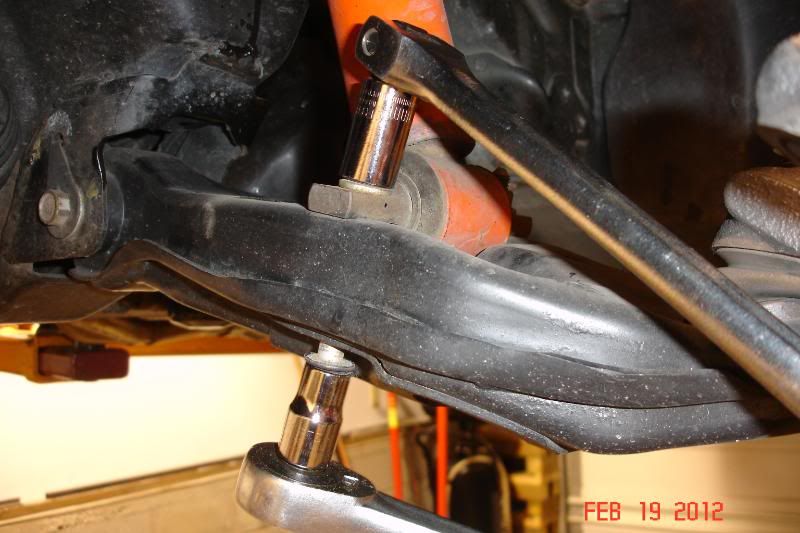
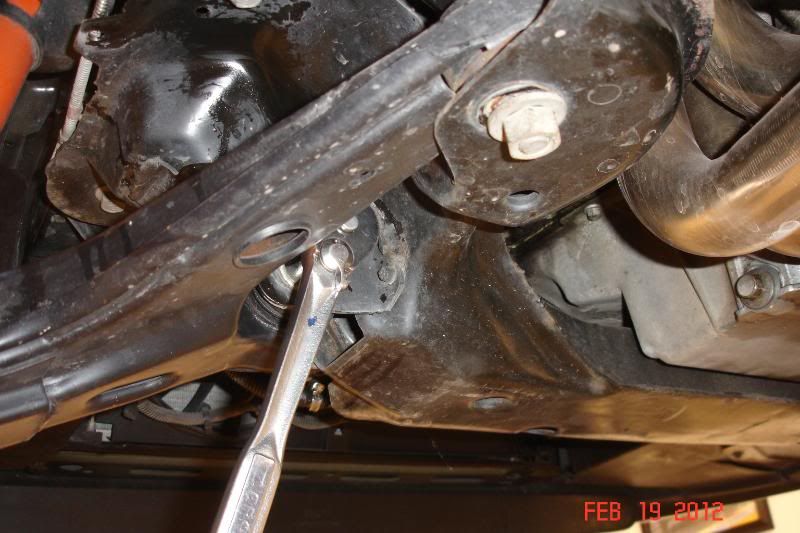
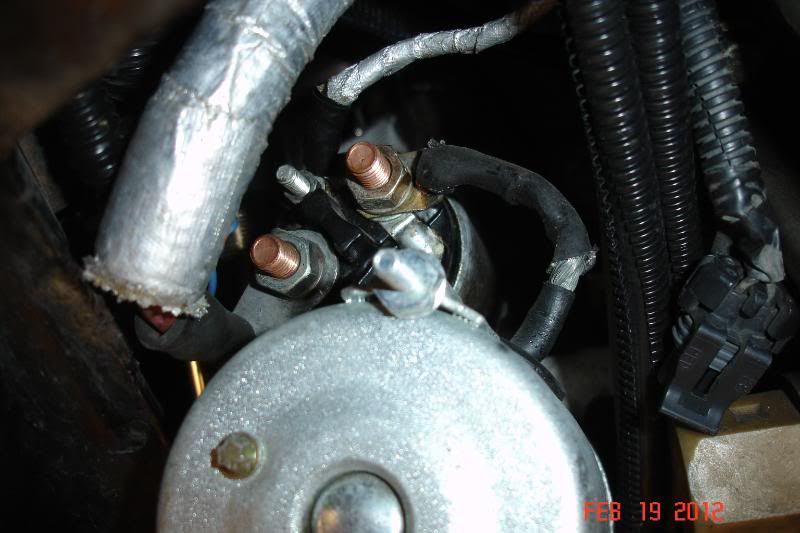
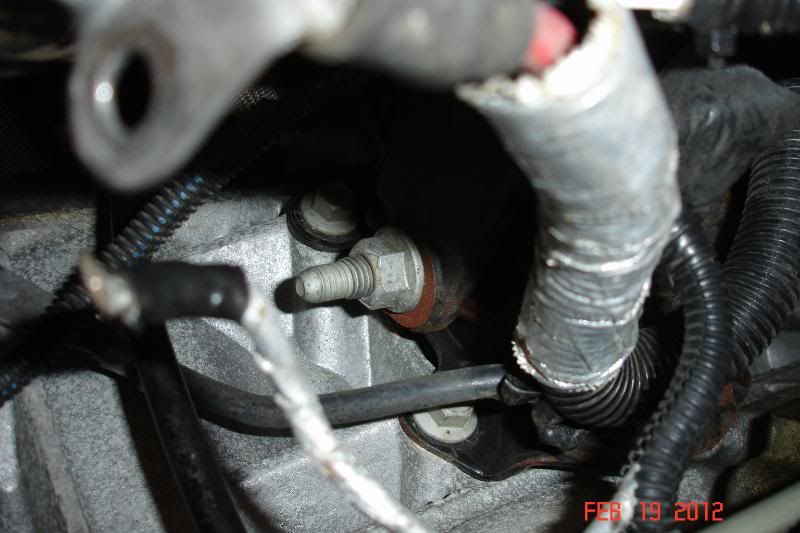
I also unbolted the lower control arms, but it appears that the K-member has to be lowered to remove the rearmost bolts. Therefore, they were simply left hanging for now and I then moved on to the motor mounts. The front of the motor mount bolts are about impossible to get to. On the driver side the alternator is in the way and on the passenger side the AC compressor sits in front of it. Also, on the passenger side the starter blocks access to the nut, so it must be removed. Two 13mm bolts secure the starter in place and need to be removed. Also, the low oil level sensor harness needs to be unplugged to create room to drop the starter. Once free, the starter was then pulled out of the bellhousing and angled up to allow access to the wiring. The large 13mm nut on the left and smaller 8mm nut in the center must be removed to release the wires before the starter can be pulled out. Do not allow the starter to hang from the wire harness!
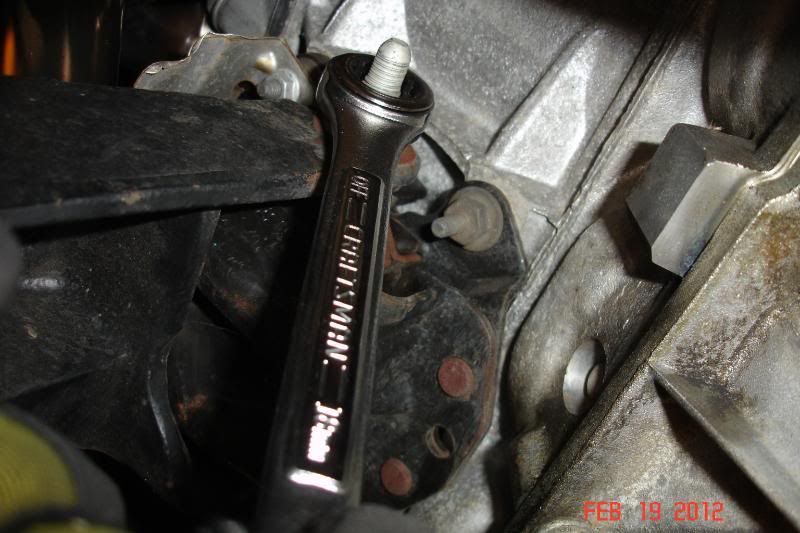
Once the starter was removed, I tried a variety of extensions, swivels and sockets in an attempt to get at the engine mount bolts. Nothing seemed to work and I was contemplating the effort that would be required to remove the alternator and starter... but then decided to try my ratcheting 18mm wrench. Using a piece of pipe, I was able to get enough leverage to break the nuts both free and with the weight of the engine on the mounts, the bolts did not turn at all. Although it was slow going, the nuts eventually backed off enough that I could turn them by hand. This proved to be a good stopping point for the night as I now need to come up with a way to hang the engine in the bay.
-
02-20-2012, 08:32 AM #15Veteran
- Join Date
- Feb 2009
- Location
- Mansfield, PA
- Posts
- 22,146
Black & Blue- '02 WS.6 / '07 Suburban
I ordered up a set of Moser P/N 8255 wheel studs this morning. Summit now stocks them and with free shipping they were around $22.50. The studs are 2-1/2" long (about 1" longer than stock) and will match the wheel studs installed in my rear axle last year. With the stock wheels mounted to the car the black plastic lug caps can still be installed.
-
02-20-2012, 12:01 PM #16ʢ ൧ ൨ ൩ ൪ ൫ ൬ ൭ ൮Ր Ց Ւ Փ

- Join Date
- Feb 2009
- Location
- Pittsburgh
- Posts
- 9,962
White- 2008 Hummer H3
Looking good Jeff!
What sway bar end links are your going with?
I changed up to the Moog HD units they are much heavier than stock and come with harder link bushings.
-
02-20-2012, 12:16 PM #17Veteran
- Join Date
- Feb 2009
- Location
- Mansfield, PA
- Posts
- 22,146
Black & Blue- '02 WS.6 / '07 Suburban
I have the stock links with a set of poly bushings for right now.
-
02-20-2012, 12:58 PM #18ʢ ൧ ൨ ൩ ൪ ൫ ൬ ൭ ൮Ր Ց Ւ Փ
- Join Date
- Feb 2009
- Location
- Pittsburgh
- Posts
- 9,962
White- 2008 Hummer H3
I see, well imho for the 9 bucks or so I'd get the Moog links and use them with your poly's. Originally Posted by pajeff02

I easily broke all 4 stock links when I went to auto-x tires.
I know you don't run that type of tire but I was really surprised how easily the stockers broke.
-
02-20-2012, 02:39 PM #19Veteran
- Join Date
- Feb 2009
- Location
- Mansfield, PA
- Posts
- 22,146
Black & Blue- '02 WS.6 / '07 Suburban
Good idea -- I'll see if I can get a set locally. Thanks!
-
02-20-2012, 02:46 PM #20ʢ ൧ ൨ ൩ ൪ ൫ ൬ ൭ ൮Ր Ց Ւ Փ
- Join Date
- Feb 2009
- Location
- Pittsburgh
- Posts
- 9,962
White- 2008 Hummer H3
Sure! I got mine through advanced auto, sorry I don't think I have the part numbers anymore. Originally Posted by pajeff02


 Reply With Quote
Thread Information
Users Browsing this Thread
There are currently 1 users browsing this thread. (0 members and 1 guests)
Similar Threads
-
NEED HELP!! LS1 swap, HP upgrades
By spoonman4 in forum General HelpReplies: 13Last Post: 10-25-2013, 06:58 PM -
what upgrades should i do?
By Talon_II in forum Firebird / WS6Replies: 11Last Post: 03-04-2011, 11:26 AM -
Wanted: LS1 Swap K-Member 3rd Gen
By HP52TA in forum Parts Wanted / TradeReplies: 0Last Post: 11-10-2010, 06:44 PM -
Need help with some upgrades for an a4
By 02_WS6 in forum Automatic TransmissionReplies: 12Last Post: 04-17-2007, 07:49 PM

Bookmarks