
Results 81 to 100 of 113
Thread: My Head/Cam Install
-
11-18-2010, 11:38 PM #81Member


- Join Date
- Jan 2007
- Location
- Zona
- Posts
- 600
Red- 1998 Camaro Z28 Conv. M6
Much respect to you buddy. You're undertaking a serious project here. I'm proud your making good progress. I took on a similiar project myself earlier this year (plus I changed my rod bolts!). The bottom line is this: When you finally get EVERYTHING buttoned back up and the moment of truth arrives (start up), and the engine turns over perfectly, you will feel a new respect and appreciation for your vehicle.
If I could go back I wouldn't change a thing about my install. You end up learning a plethra of info on YOUR OWN and sort of become a mini expert on the LS1 engine/assembly etc....keep it up!!!Last edited by jb3golf; 11-18-2010 at 11:40 PM. Reason: N/A
-
11-20-2010, 03:45 PM #82Senior Member

- Join Date
- May 2007
- Location
- Bartlesville, Oklahoma, United
- Age
- 36
- Posts
- 1,264
Bright Rally Red- 2000 Camaro SS #5075 M6
 Thank you very much I appreciate that. I cant wait to start it up!!
 Originally Posted by jb3golf


-
11-20-2010, 03:54 PM #83Senior Member
- Join Date
- May 2007
- Location
- Bartlesville, Oklahoma, United
- Age
- 36
- Posts
- 1,264
Bright Rally Red- 2000 Camaro SS #5075 M6
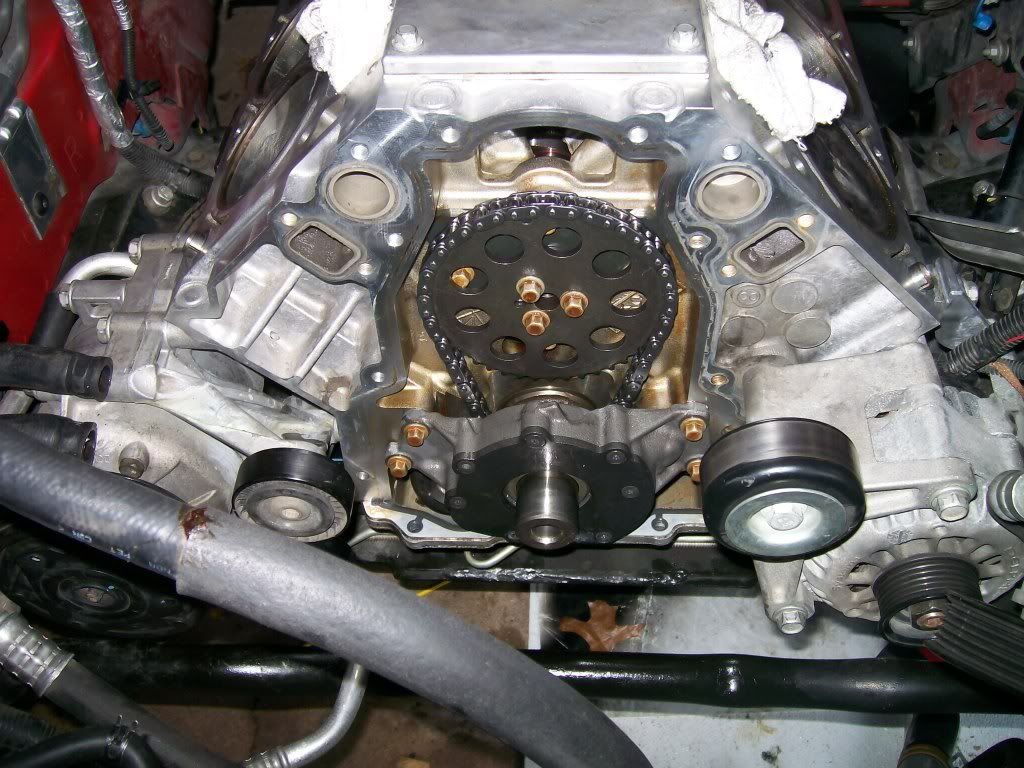
Had a pretty good day today. Got the new timing chain and oil pump installed. That bolt on the pick up tube sure is a fun one lol. I did tie some fishing line to the bolt as I was taking it out just as a precaution. All in all it went well. I am currently installing the new UD pulley. Question? What exactly do I need to do to get the timing cover "centered?" Ive heard people talk about this but im not really sure how to do this. It seems that you just re install and tighten all the bolts.
 Also I rented a powerbuilt pulley installer from advanced auto and it doesnt seem to have the correct installer screw with the set.
  O well I suppose I will search for another one. Btw the whole dot to dot process took like 30 seconds. I was very suprised how easy that was. Here are a few progress pics. Thanks for all the help!!
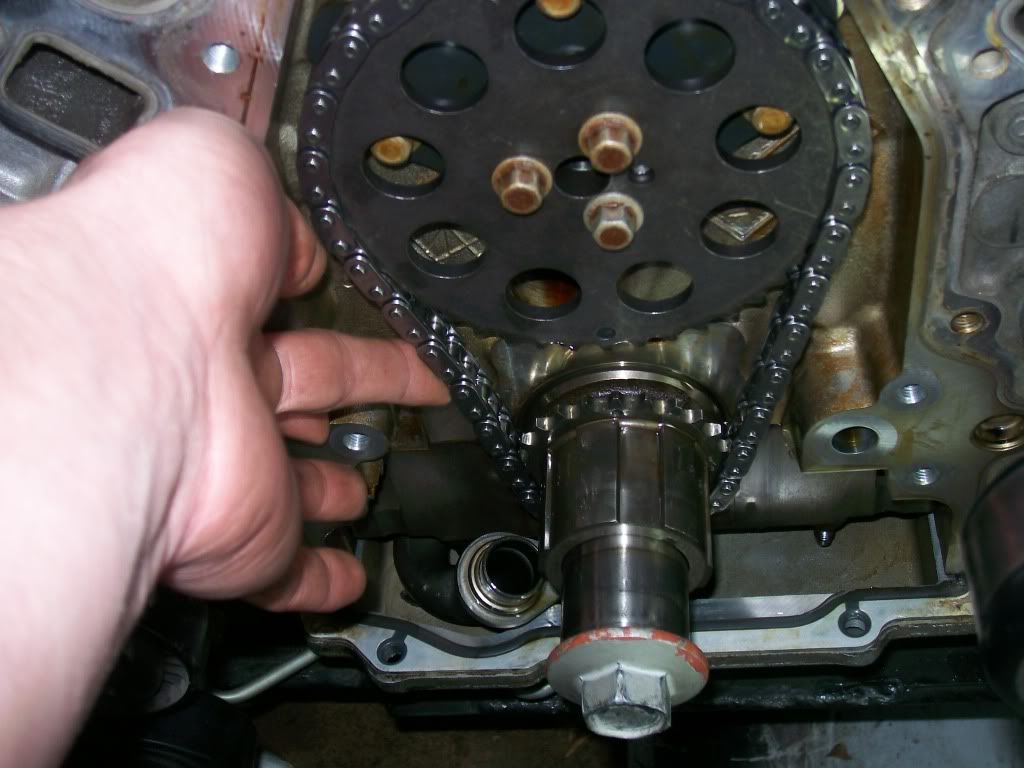
Dot to dot
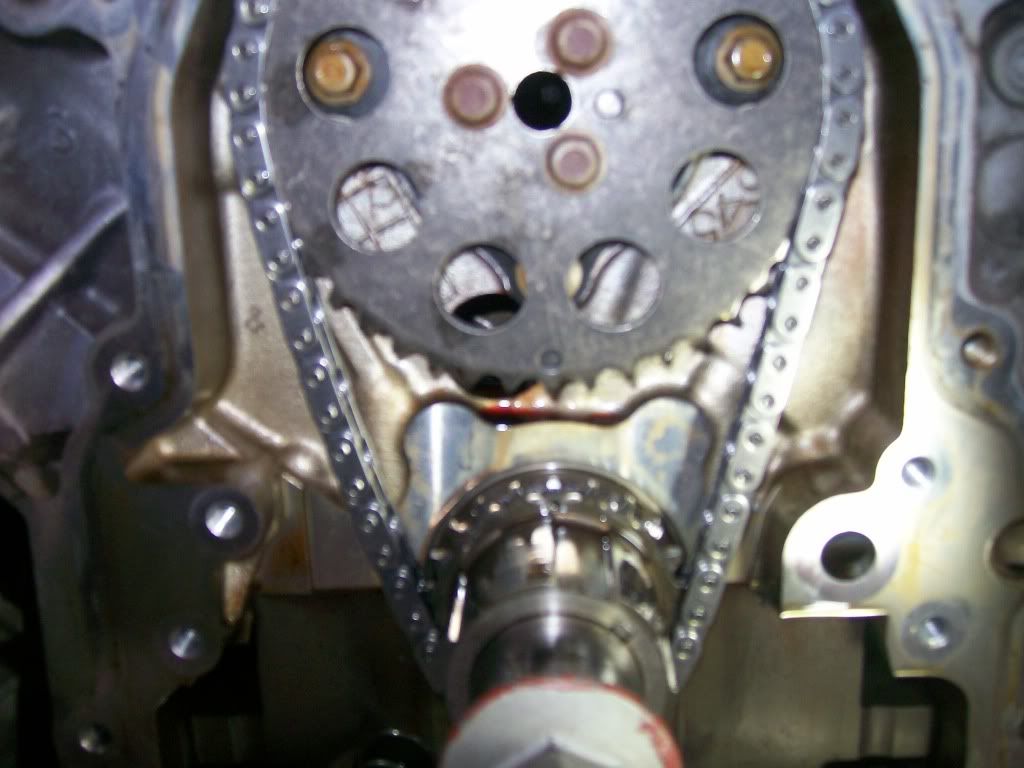
Is this slack in the chain ok?
New oil pump
-
11-21-2010, 03:29 PM #84Senior Member
- Join Date
- May 2007
- Location
- Bartlesville, Oklahoma, United
- Age
- 36
- Posts
- 1,264
Bright Rally Red- 2000 Camaro SS #5075 M6
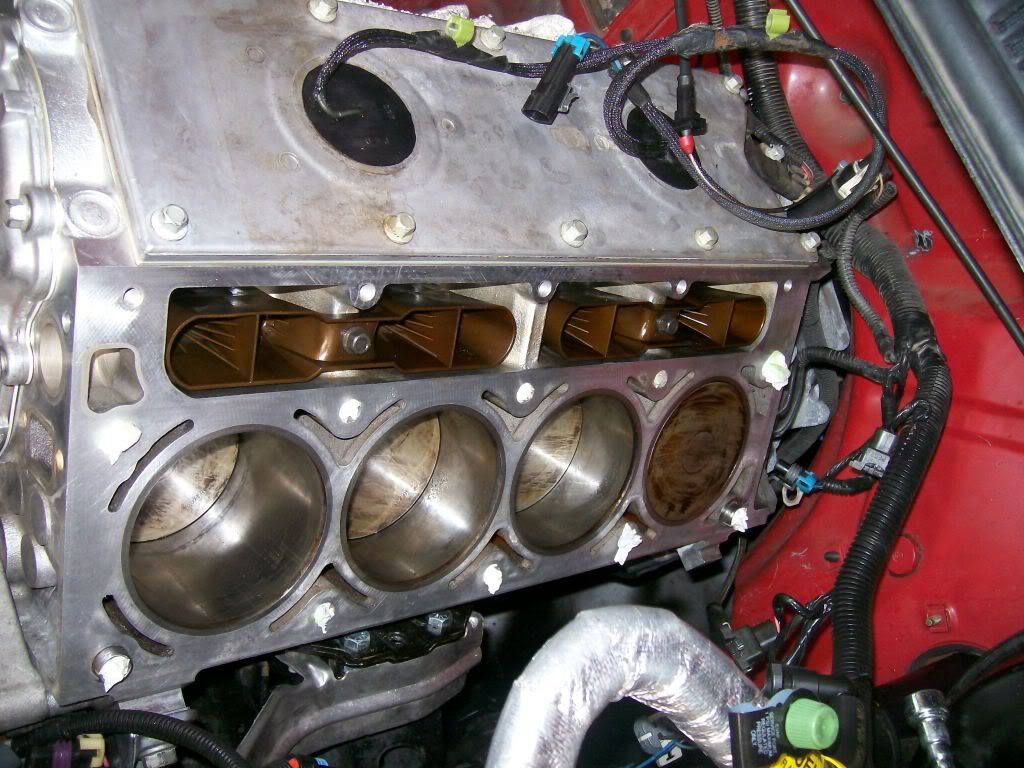
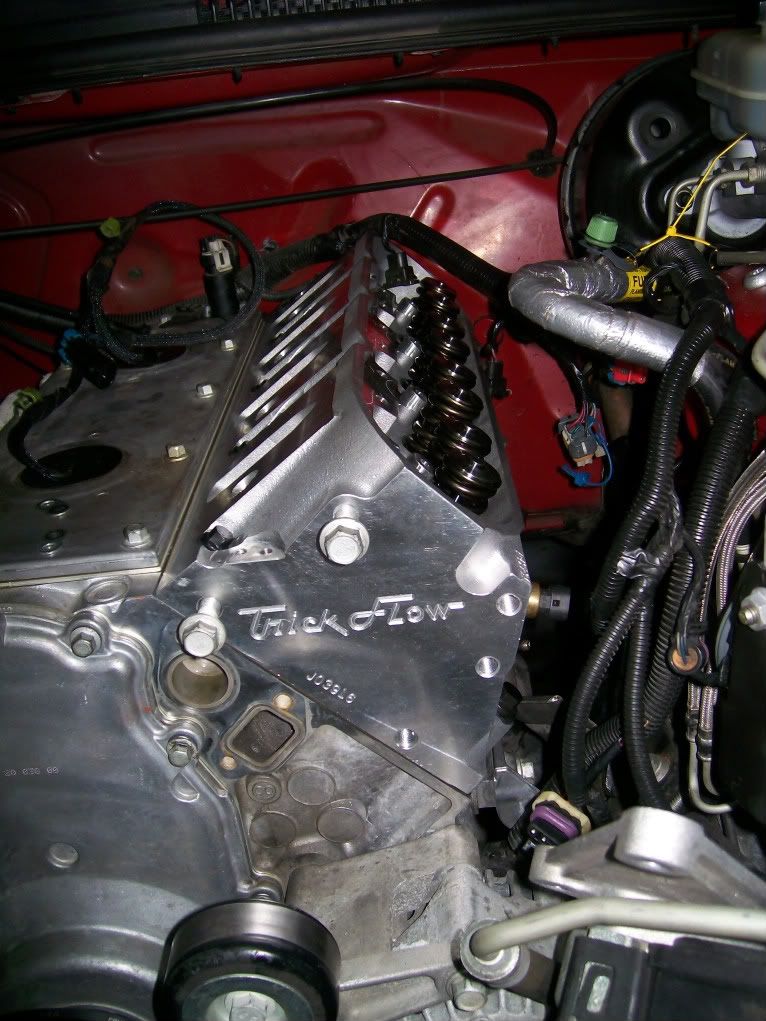
New lifters installed
Easiest spark plug change I ever did torqued to specs of course 

MLS gasket ready to go!
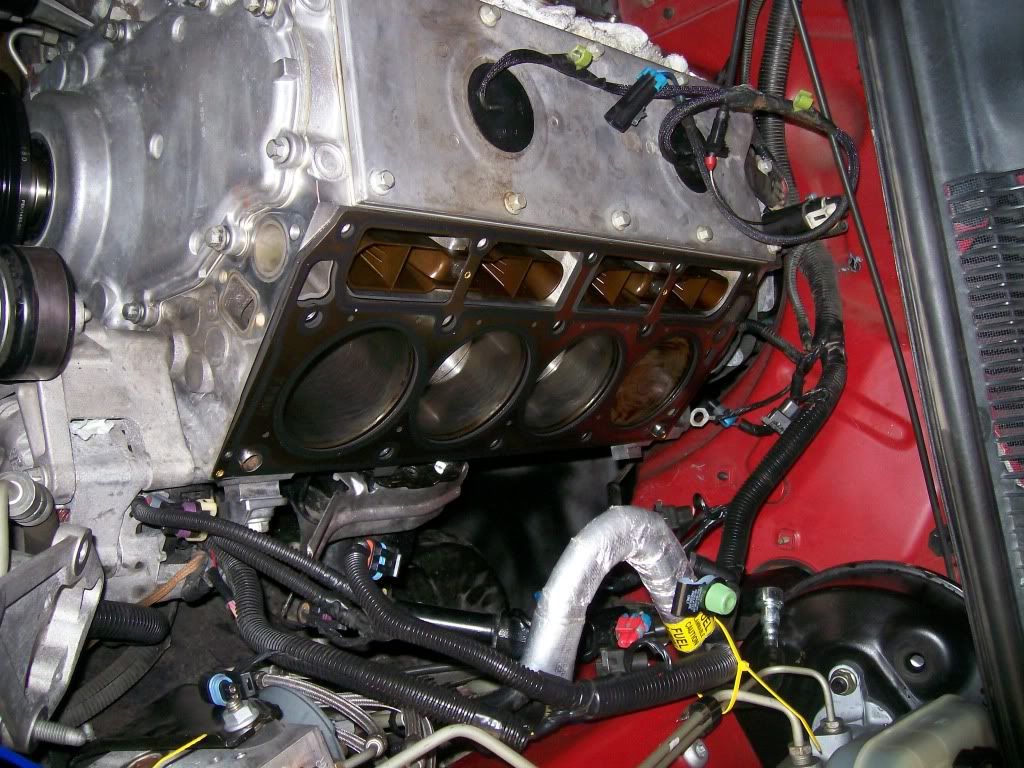
The one headed monster!!
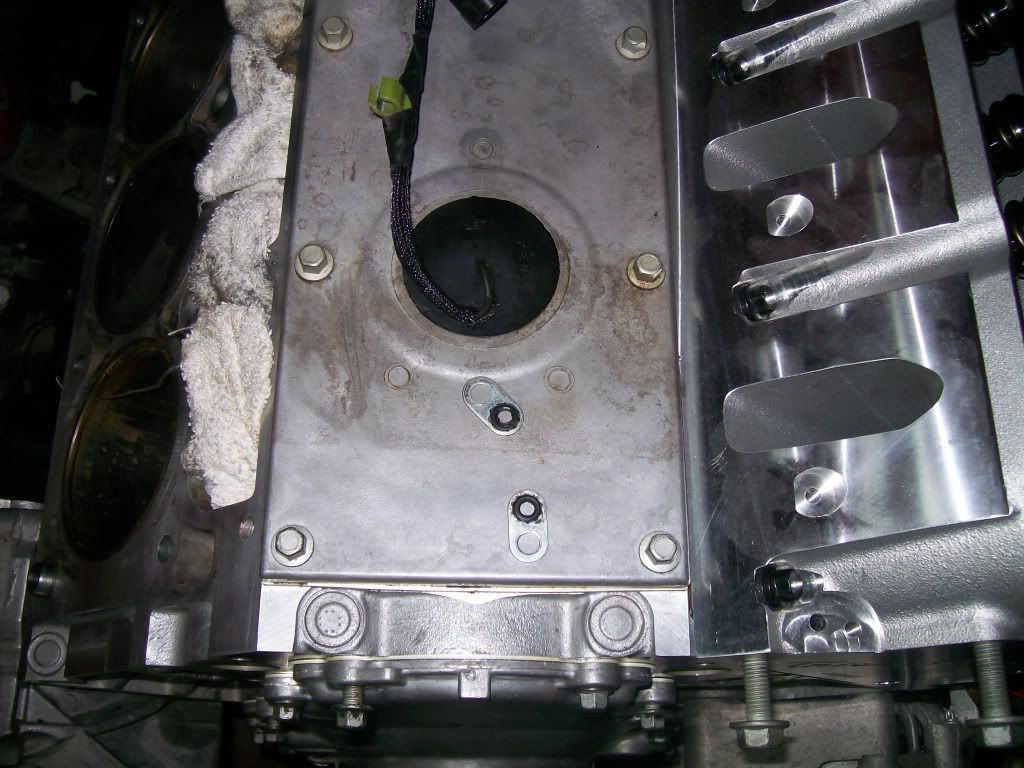
Okay now I have a question??? Theres these two little tabs that came off of the old head and the appear to be for the coolant pipes. They look just like soda pop tabs. Here is a pic of them. Do I need to get new ones?? The rubber seal on them seemed to tear when taking them off the old head.
-
11-21-2010, 04:05 PM #85Junior Member
- Join Date
- Oct 2010
- Location
- jacksonville, florida
- Posts
- 9
red- 02 camaro/ls7
LS7 Camaro
Don't know about your tabs but one of the things I do on gen IV engine
is to drill and tap water pump 1/4" pipe thread and duct steam line to water pump and not throttle body, cooler air intake.Just install barb fitting in w/pmp
and use 1/4" hose w/gear clamps unless you live in very cold aera.Looks like
your doing a great job.Good luck
-
11-21-2010, 04:09 PM #86King 0f n00bz

- Join Date
- Jan 2006
- Location
- Shepherd, Michigan
- Age
- 36
- Posts
- 11,770
blacker than wesleysnipes- 98' trans am


those tabs are used for the rear coolant pipe..it is the gasket that goes between the pipe and the head.
-
11-21-2010, 05:00 PM #87Senior Member
- Join Date
- May 2007
- Location
- Bartlesville, Oklahoma, United
- Age
- 36
- Posts
- 1,264
Bright Rally Red- 2000 Camaro SS #5075 M6
The throttle body bypass mod. I have done this mod already. Thank you for your input! I appreciate the words of encouragment. Originally Posted by lloyd
Ok so do I need new ones or are the stock ones reusable? I did notice them tear a little as I took them off. Originally Posted by shady milkman
-
11-21-2010, 05:51 PM #88King 0f n00bz
- Join Date
- Jan 2006
- Location
- Shepherd, Michigan
- Age
- 36
- Posts
- 11,770
blacker than wesleysnipes- 98' trans am
replace them..i dont think they are that expensive Originally Posted by splitfinger09
-
11-21-2010, 08:08 PM #89Senior Member
- Join Date
- May 2007
- Location
- Bartlesville, Oklahoma, United
- Age
- 36
- Posts
- 1,264
Bright Rally Red- 2000 Camaro SS #5075 M6
Part number?? Originally Posted by shady milkman
-
11-21-2010, 09:20 PM #90King 0f n00bz
- Join Date
- Jan 2006
- Location
- Shepherd, Michigan
- Age
- 36
- Posts
- 11,770
blacker than wesleysnipes- 98' trans am
look for the ls6 coolant pipes Originally Posted by splitfinger09
-
11-22-2010, 04:42 AM #91Junior Member
- Join Date
- Oct 2010
- Location
- jacksonville, florida
- Posts
- 9
red- 02 camaro/ls7
LS7 Camaro
The engines I build these parts are new,I do sometimes use low miles take off
block,heads or intake I do have a LS7 for sale 427ci in +.020 bore 6.125 rods
fordged pistons 24 relcutor 2x cam sig wet sump.
this is set up for F body and I can supply all the connectors to adapt to your
wiring harness has knock sen already installed in side of block res style.
-
11-22-2010, 07:11 AM #92Senior Member
- Join Date
- May 2007
- Location
- Bartlesville, Oklahoma, United
- Age
- 36
- Posts
- 1,264
Bright Rally Red- 2000 Camaro SS #5075 M6
Ok I need to know the torque specs on the oil pan. There are three diff areas that I took bolts off. 1. all the perimeter bolts. 2. the two very long bolts on the bottom of the pan. 3. The two much bigger bolts that go through the tranny into the oil pan. If someone could tell me the specs on 1, 2, and 3 that would be great. I looked up the spec sheet but I can tell which is which. Thanks
-
11-22-2010, 08:40 AM #93King 0f n00bz
- Join Date
- Jan 2006
- Location
- Shepherd, Michigan
- Age
- 36
- Posts
- 11,770
blacker than wesleysnipes- 98' trans am
omgzz i want ..but cant afford Originally Posted by lloyd

-
11-22-2010, 11:49 AM #94Senior Member
- Join Date
- May 2007
- Location
- Bartlesville, Oklahoma, United
- Age
- 36
- Posts
- 1,264
Bright Rally Red- 2000 Camaro SS #5075 M6
ok this is really the most tricky part of the install. I need help meauring the pushrods. I have the pushrod checker tool, but am pretty lost when it comes to using it. Is there a write up that explains the lifter preload, lash, base circle, pushrod length, etc...... Im so lost here its not even funny
-
11-24-2010, 11:32 AM #95Senior Member
- Join Date
- May 2007
- Location
- Bartlesville, Oklahoma, United
- Age
- 36
- Posts
- 1,264
Bright Rally Red- 2000 Camaro SS #5075 M6
anyone??? Originally Posted by splitfinger09
-
11-24-2010, 06:54 PM #96Member

- Join Date
- Nov 2010
- Location
- St Marys GA
- Posts
- 238
Black- '05 GTO
Okay, here we go, so first I'm going to make some assumptions, please correct me if I'm wrong 1. you have a hydraulic cam 2. you still have non-adjustable rocker arms 3.the long block is bolted together. So there are a million and one different ways to set valves,adjust rockers, measure pushrods. and this is how I do it.
-some quick definitions.
preload- the amount the valve spring is compressed when lifter is on base circle
lash- the amount of space between valve and rocker when lifter is on base circle, (you will need a pre-load not a lash because a lash would indicate there is "slop" mainly use on solid type valvetrains)
base circle- lowest part of camshaft (so the round part thats not the lobe, where the lifter rides when valve is seated but cam is still turning)
Alright theres plenty of write ups on those definitions, but as far as the pushrod measurement for LS... I found nothing. Not even any of the LS books lol. So this is considered a big downfall of LS engines, they don't have mechanic friendly valve adjustment(yes the big rollers can buy adjustable rockers). So what the goal is, is to get the valve preload in the .040 to .010, window (that is your factory spec, some might go with less preload, but it won't last as long) - but you would need a dial caliber and either a test valve spring or solid lifters of the same height as your hyd. ones, to determine that though (hydaulic lifters would "compress" before moving the spring). Let's say you don't have that stuff. 1.)Pick up the lifter end of your rocker and see where the valve end tip of the rocker contacts your valve tip. that needs to be as close to middle of the valve, through the whole valve opening/closing cycle as possable. You probably won't be able to do that though, because you need a solid lifter. So make sure it is close when the valve is fully shut, as long as it is close in your application you will be fine. To adjust that you would have to shim the rockers. 2.) For your intake valve turn the engine until the exaust valve of the same cylinder begins to open, that is how you will know your on the intake base circle, when you switch to measuring exaust turn the engine until the intake valve of the same cylinder becomes fully shut, just as it finishes shutting, your will be on your exausts base circle3.) now that we know were on the base circle for that individual valve, install your pushrod checker tool, shortest possition as possible. be sure the valve your workings lifter is FULLY extended, and rocker torqued to spec. 4.) lengthen the tool while rolling it in your fingers. As soon as it is tight enouph it won't roll in your fingers you are at 0 lash or 0 preload.STOP (if you go any farther you will just start compressing the lifter) 5.) remove the tool, (loosen rocker)measure the tool, add .020(for your preload) woolah!!! Pushrod length!!
EDIT. What tool do you have? It might be a little different for getting the length.Last edited by Jay37; 11-26-2010 at 05:44 AM.
-
11-24-2010, 07:50 PM #97Member

- Join Date
- Mar 2010
- Location
- EAST bay area Cali
- Posts
- 634
black- 1999 camaro SS
this is why I'm taking the easy road when I do head and cam (unmilled heads and off the shelf cam). most cam manufactures know what size rods go with their cams so tards like me don't have to go through this lol

-
11-26-2010, 05:32 AM #98Member
- Join Date
- Nov 2010
- Location
- St Marys GA
- Posts
- 238
Black- '05 GTO
Just ask if you have any questions, when you get it done it will make perfect sense, and you are in a fairly rare situation, most V-8s have adjustable rockers where the pushrod length isn't as critical.
-
11-28-2010, 11:57 AM #99Junior Member
- Join Date
- Jul 2010
- Location
- Canberra, Australia
- Posts
- 3
red- wh stato
How to build and modify GM LS series engines
Great tip, top book. I was a bit worried about rebuilding my LS1 as only have experience with older engines, but this book looks like it will give me very detailed help - found a good video showing book here that convinced me to buy - [ame="http://www.youtube.com/watch?v=XPxV49abPbs"]http://www.youtube.com/watch?v=XPxV49abPbs[/ame] Originally Posted by xmarkx
Cost me $25 delivered to Australia from Amazon, so I grabbed 'How to Rebuild GM LS-Series Engines by Chris Werner' while I was at it! Thanks for the tip, and this is a great build, convinced me to do it myself!
I'm fitting an LS1 to a 1964 Eh Holden - http://edzholden.com
This is a top site, even helps us Aussies! Cheers Eddy(and this is my first post).Last edited by EdzEh; 11-29-2010 at 12:26 PM.
-
11-28-2010, 07:51 PM #100Senior Member
- Join Date
- May 2007
- Location
- Bartlesville, Oklahoma, United
- Age
- 36
- Posts
- 1,264
Bright Rally Red- 2000 Camaro SS #5075 M6
ok well I finally got around to getting it started today. Everything turned over fine but the car will not stay running. Obviously this could be a number of different things, but just looking for any advice. Here are the symptoms. Car will start and get good oil pressure and when it starts to die I will give it gas and it will jump back up. But then it seems like it doesnt get anymore fuel when I try to give it more gas. It just dies. Also my tach isnt working. Thanks for the help.

 Reply With Quote
Thread Information
Users Browsing this Thread
There are currently 1 users browsing this thread. (0 members and 1 guests)
Similar Threads
-
Question: Cam and Head Install
By 1slowbusa in forum Internal EngineReplies: 4Last Post: 01-20-2011, 12:30 PM -
Stock Head Unit System or install custom head unit?
By ibh182 in forum Stereo and ElectronicsReplies: 3Last Post: 06-16-2007, 09:43 AM -
need some help after Head and Cam install
By cm2papa in forum General HelpReplies: 17Last Post: 05-11-2007, 10:59 AM -
head and cam install
By waldo31031 in forum Internal EngineReplies: 1Last Post: 02-17-2006, 02:03 PM -
head and cam install
By waldo31031 in forum Internal EngineReplies: 1Last Post: 02-16-2006, 05:58 PM

Bookmarks