

Results 1 to 20 of 23
-
02-04-2011, 02:20 PM #1Junior Member


- Join Date
- Feb 2011
- Location
- Fleetwood, PA
- Posts
- 59
2010 Tahoe Z71- 2012 Cadillac CTS-V
Carbon Fiber'd Interior Courtesy of Di-NOC
Well originally I had posted this thread just to show off my interior work. But everyone seems alot more interested in the process I used to turn the ugly wood trim into beautiful carbon fiber. Plus, the thread has been made a sticky, so it should be more "how-to" than "look-at-this".
Thus, I present to you tips and processes used to turn ugly interior trim into awesome carbon fiber trim using 3M's Di-NOC vinyl film.
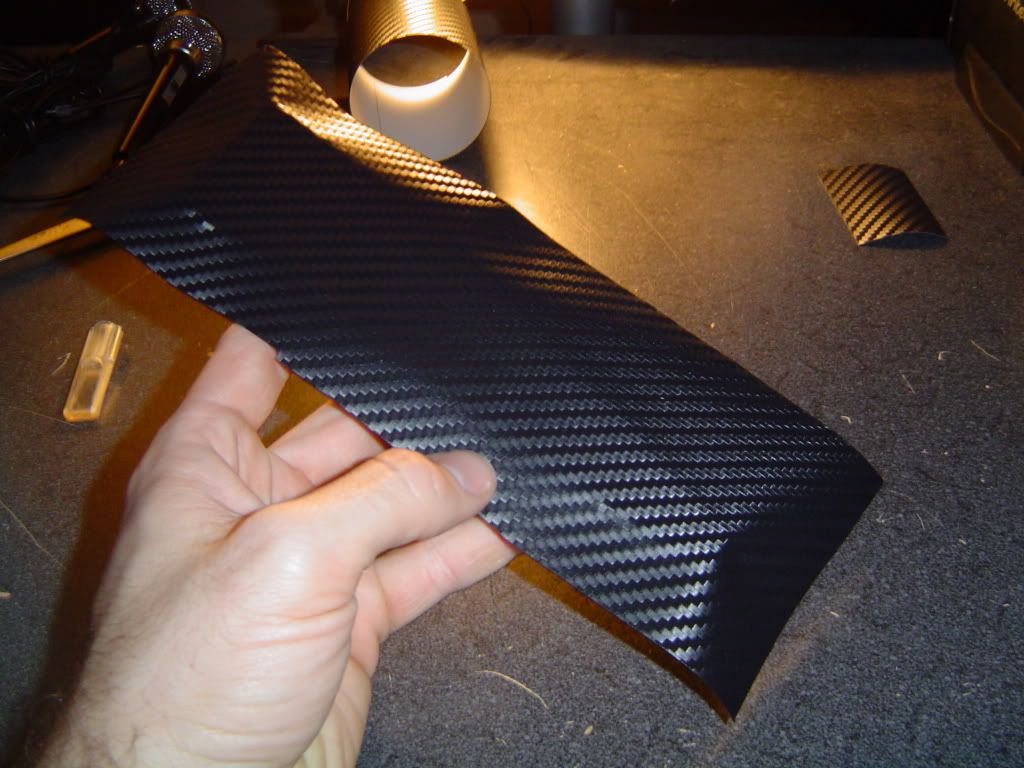
The exact product I used was 3M's Di-NOC vinyl in black carbon fiber. If you go looking for the stuff, you'll find that it's available in nearly 100 different patterns and textures. Everything from solid color, to brushed aluminum, metallic, and of course woodgrain, is available. From what I understand, the process is pretty much the same no matter what color/pattern you choose.
You will also want a heat gun, SHARP X-acto knife, and a SHARP pair of scissors for this project.
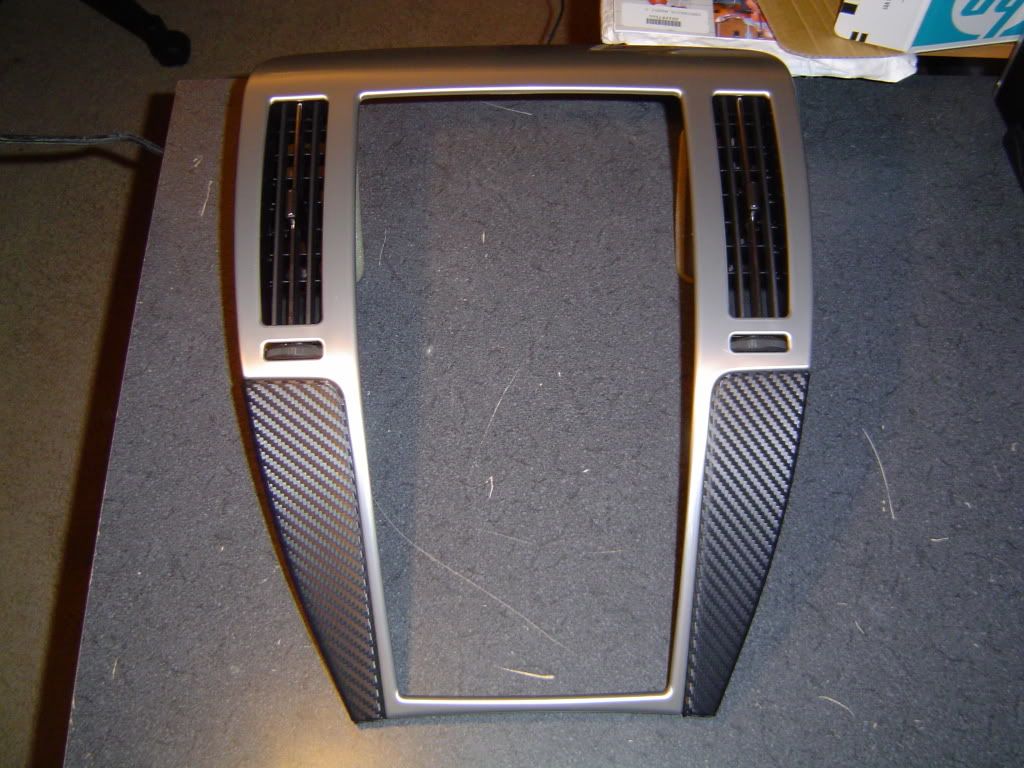
For my project, I purchased a 2008 standard STS center bezel, because I love the added brushed aluminum (the 2006 bezel is all wood). Got a crappy one on ebay for dirt cheap since I was going to be taking it apart anyway.
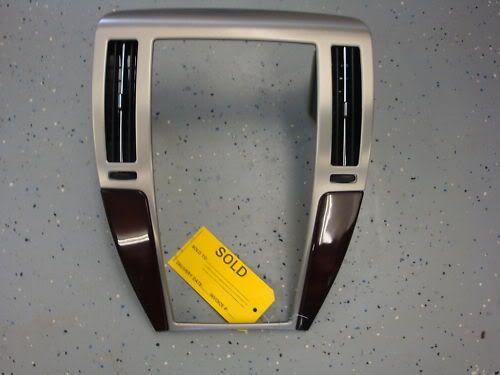
Next, I disassembled and thoroughly cleaned it, and also wetsanded and polished the clearcoat on the aluminum (it was somewhat scratched to begin with) to give it a flawless shine.
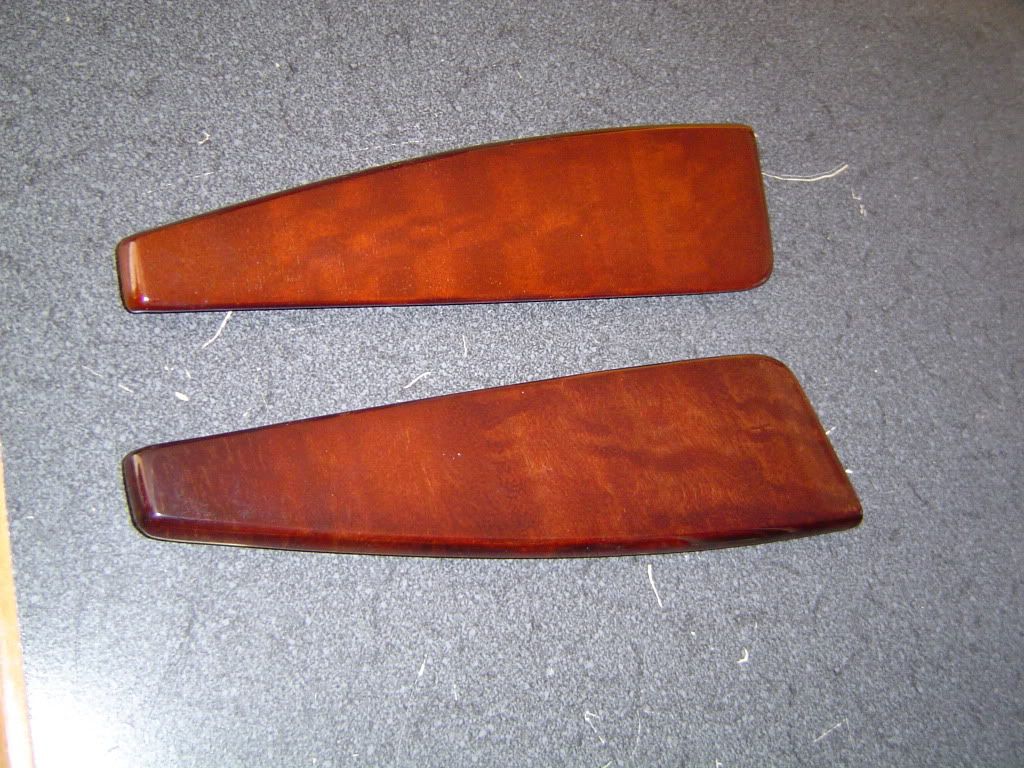
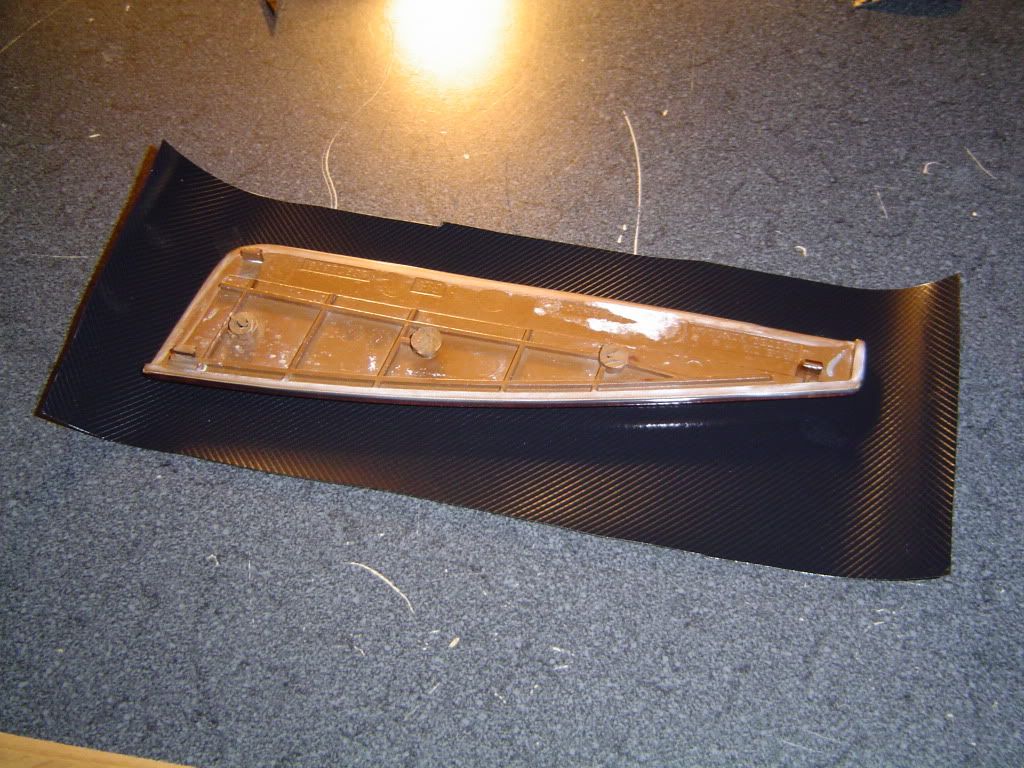
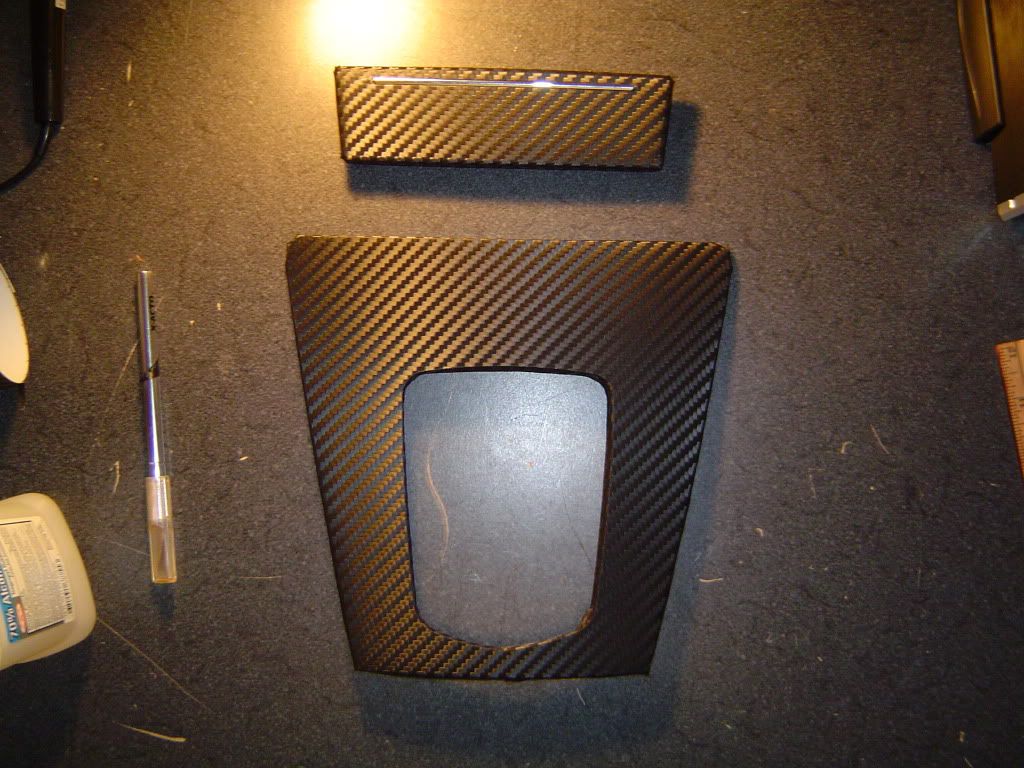
I then took the two wood pieces that I had removed from the frame, and cleaned them using Isopropyl alcohol.
Next, I took one of the wood pieces and measured out a square of Di-NOC leaving at least 1" overhang on all sides. You will notice that the film is very stiff at first, and wants to roll up making it a pain to work with. At this point I pull out the heat gun, and hit the film with some hot air. As it warms up, the film begins to fall flat. I then removed the backing, laid the film on the work surface (which should be CLEAN) face down, and laid the wood piece, centered, on top of the film.
Then I picked up the piece with film attached, and smoothed the film onto the flat front of the wood with my thumb. The film has air channels cut into its underside, so you don't have to worry about air bubbles unless you are trying to stretch the film around a curve or something.
Next I trimmed the film so that there was only about 3/4" of extra material around the edges...I could probably have gotten away with about 1/2" instead, but you really have to watch out depending on the piece you are doing...you want to make sure you have enough extra for curves and rolled edges and such. It's always better to overestimate since you can always cut away the extra later with the knife.
At this point I cranked up the heat gun and soaked the film in heat...once it gets good and hot, it becomes soft and rubbery, and conforms really well. The heat also causes the adhesive to flow, which makes the film stick with a vengeance. As long as it's hot, you can remove stuck film, with some force. But once it's cool, IT'S ON THERE. Anyway, once it's good and hot, I worked the film around the edges and stuck the "tabs" on the back side. It's best to "stretch" the tabs around the edges, with the film hot, it will force it to conform to the surface without wrinkling.
(unfortunately I don't have any good pics of this stage of the process.)
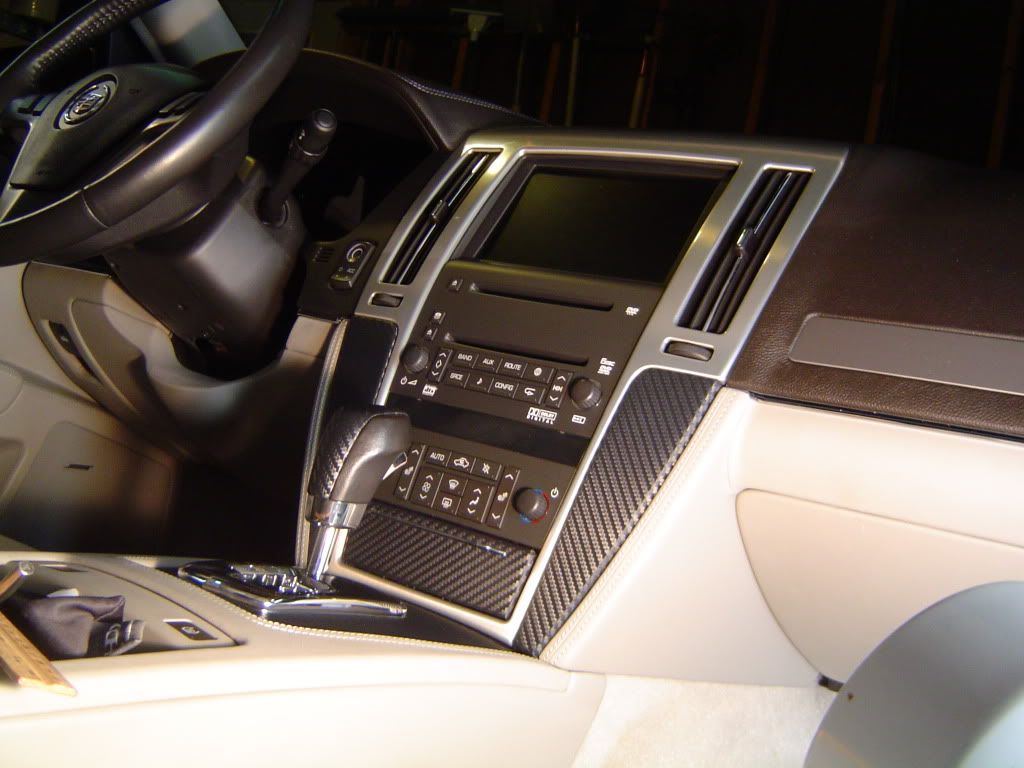
With all the tabs stretched around the edge and over to the bottom, this piece was done. I repeated this process for the other bezel piece and reassembled the bezel.
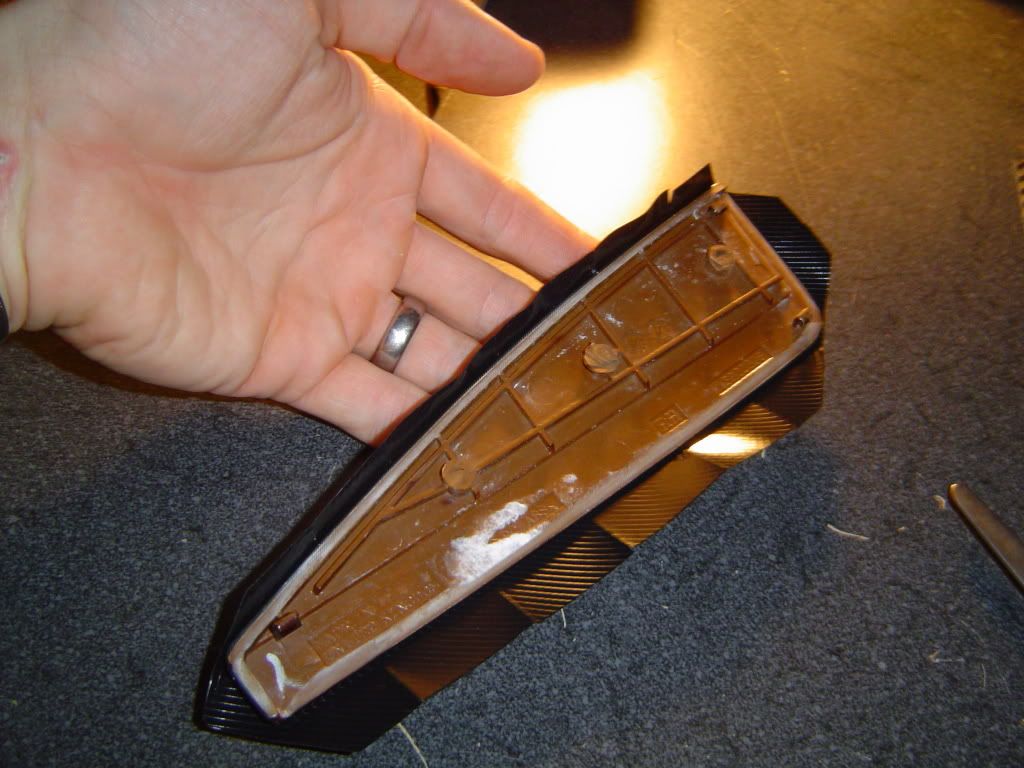
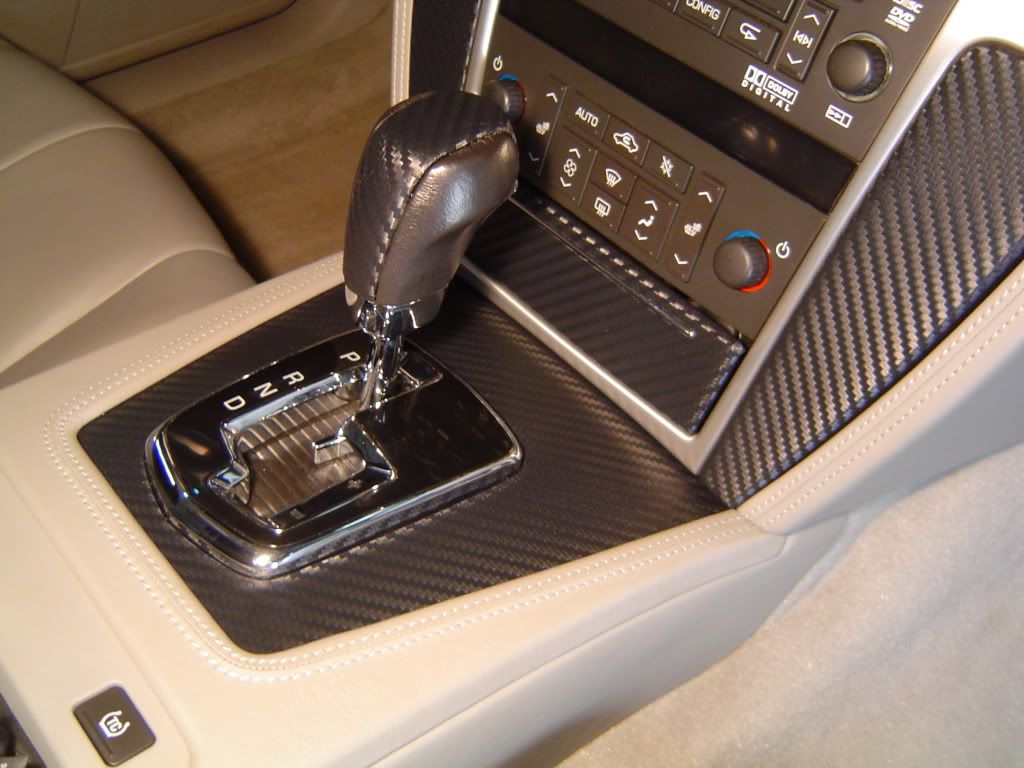
While I was at it, I also did the shift knob, shifter bezel, and ashtray door to get rid of all that wood. The process was the same for each, I just disassembled each piece as much as possible to remove any obstacles. The only one that was kinda tricky was the ashtray door...that chrome strip cannot be removed...at least not temporarily. So I simply superheated the film and forced it to conform perfectly to the strip, then "cut out" the strip with the X-acto knife and removed the affecting film.
I then reassembled everything and snapped some quick pics. They are not the greatest of pics since this was in the dark, in my garage, lit with fluorescent fixtures.
Last edited by Blakbird24; 02-05-2011 at 04:48 PM.
-
02-05-2011, 10:01 AM #2Senior Member


- Join Date
- Apr 2008
- Location
- Madison, WI
- Posts
- 7,006
1999 Formula WS6 M6-sold- 2001 Silverado Z71
That looks great!! And gives me a few ideas. Thanks for the write-up.
Its now the 1st CTS-V section's Sticky!!
-
02-05-2011, 10:16 AM #3Junior Member
- Join Date
- Feb 2011
- Location
- Fleetwood, PA
- Posts
- 59
2010 Tahoe Z71- 2012 Cadillac CTS-V
Yay me!

My first sticky on LS1.com. And it's only my second thread! I'm off to a hell of a start here.
BTW - I do have more details and pics of the process of actually wrapping the parts with the film if anybody wants to see it.Last edited by Blakbird24; 02-05-2011 at 10:20 AM.
-
02-05-2011, 10:41 AM #4Senior Member
- Join Date
- Apr 2008
- Location
- Madison, WI
- Posts
- 7,006
1999 Formula WS6 M6-sold- 2001 Silverado Z71
Yes. post them up!! I'd like to see them
-
02-05-2011, 10:48 AM #5PCM Designer

- Join Date
- Feb 2011
- Location
- Clutier, IA
- Posts
- 99
Silver- 1999 Camaro SS
That is really cool...I wouldn't mind doing that on a few parts myself.
I wonder what the temperature limits are of this stuff?
-
02-05-2011, 11:44 AM #6PCM Designer
- Join Date
- Feb 2011
- Location
- Clutier, IA
- Posts
- 99
Silver- 1999 Camaro SS
Is that the black or graphite color? I see there are 7 color variations although graphite, brown and black are the only dark colors.
-
02-05-2011, 04:22 PM #7Junior Member
- Join Date
- Feb 2011
- Location
- Fleetwood, PA
- Posts
- 59
2010 Tahoe Z71- 2012 Cadillac CTS-V
It is the black color. Originally Posted by 99WickedSS

-
02-05-2011, 04:43 PM #8PCM Designer
- Join Date
- Feb 2011
- Location
- Clutier, IA
- Posts
- 99
Silver- 1999 Camaro SS
The black looks pretty sweet...How difficult is it do work with? I think I'm going to look into getting a few sheets of it.
-
02-05-2011, 04:49 PM #9Junior Member
- Join Date
- Feb 2011
- Location
- Fleetwood, PA
- Posts
- 59
2010 Tahoe Z71- 2012 Cadillac CTS-V
I just updated my original post to make it more like a how-to. Read through it and see what you think. If you have any other questions, post up or email me at Shadow24@juno.com. Originally Posted by 99WickedSS
-
02-05-2011, 05:11 PM #10PCM Designer
- Join Date
- Feb 2011
- Location
- Clutier, IA
- Posts
- 99
Silver- 1999 Camaro SS
Ok so it looks like the key is to have clean surfaces, sharp knife, and a good heat gun Originally Posted by Blakbird24

How big of a sheet did you get? I found a place online that sells about every size you can think of and of course the larger the sheet the cheaper per square inch.
-
02-05-2011, 06:42 PM #11Junior Member
- Join Date
- Feb 2011
- Location
- Fleetwood, PA
- Posts
- 59
2010 Tahoe Z71- 2012 Cadillac CTS-V
For this project the 12x48 size was EXACTLY enough. I ordered another batch and went with 24x48 this time so I have extra to play with. I've gotten alot of requests from other forums to offer this as a service for others who are afraid to try it themselves. I'm good at this stuff so I decided to give it a try. Originally Posted by 99WickedSS
-
02-05-2011, 06:59 PM #12PCM Designer
- Join Date
- Feb 2011
- Location
- Clutier, IA
- Posts
- 99
Silver- 1999 Camaro SS
carbonfiberfilm.com is where I had been pricing various sizes. Where have you been ordering your sheets?
-
02-05-2011, 07:27 PM #13Junior Member
- Join Date
- Feb 2011
- Location
- Fleetwood, PA
- Posts
- 59
2010 Tahoe Z71- 2012 Cadillac CTS-V
Ebay. Just found the best price from a vendor that's not on the other side of the country (for reasonable shipping times). Originally Posted by 99WickedSS
-
02-06-2011, 04:40 AM #14PCM Designer
- Join Date
- Feb 2011
- Location
- Clutier, IA
- Posts
- 99
Silver- 1999 Camaro SS
Good idea, never thought of checking Ebay... Originally Posted by Blakbird24
-
02-08-2011, 03:33 PM #15Military Muscle :usa:

- Join Date
- Aug 2005
- Location
- Columbia,SC
- Age
- 51
- Posts
- 511
Millienum Yellow- 2003 Corvette Z06

Man that is some seriously good work...gives me some ideas for the Vette...
-
02-16-2011, 05:38 AM #16Junior Member
- Join Date
- Feb 2011
- Location
- Fleetwood, PA
- Posts
- 59
2010 Tahoe Z71- 2012 Cadillac CTS-V
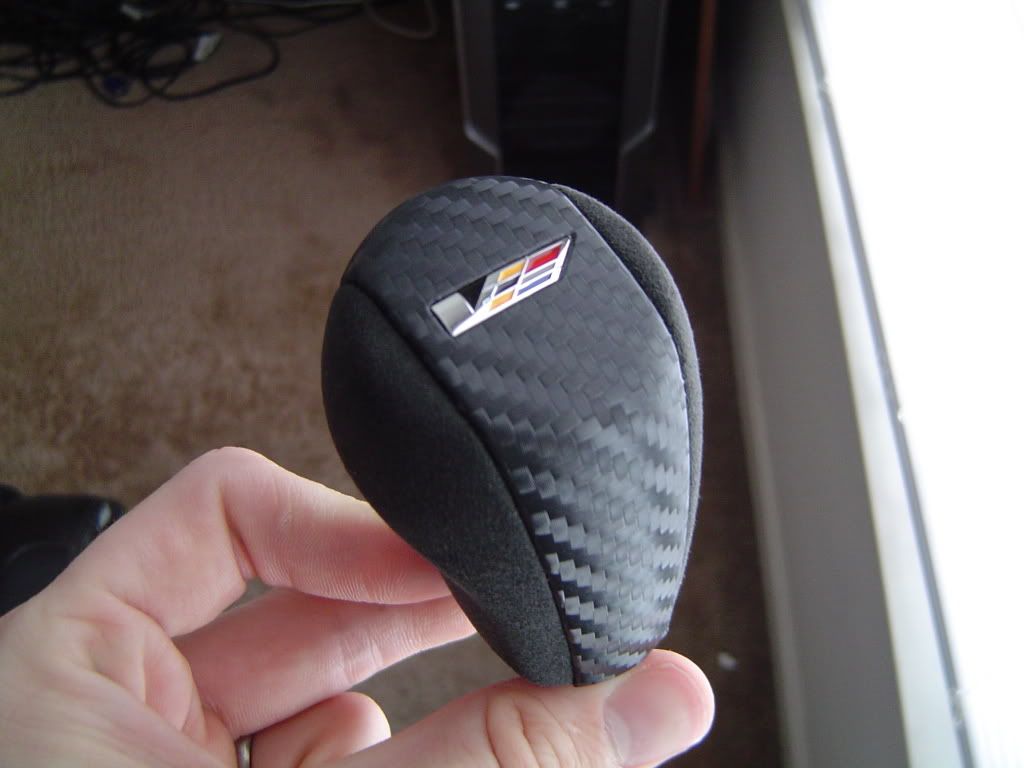
New shift knob is complete...
-
02-16-2011, 09:58 AM #17Junior Member
- Join Date
- Feb 2011
- Location
- San Jose
- Posts
- 11
- 2006
that looks great!
Last edited by Cutlass; 02-16-2011 at 04:09 PM.
-
02-16-2011, 11:15 AM #18Junior Member
- Join Date
- Feb 2011
- Location
- Fleetwood, PA
- Posts
- 59
2010 Tahoe Z71- 2012 Cadillac CTS-V
It has texture. You can feel the weave. One thing i've found that I really really like now that I have it installed - it's immune to fingerprints. You can touch it all day long without it looking like crap. Wish I could say the same for my suede and brushed aluminum though. Originally Posted by fxgs
Last edited by Cutlass; 02-16-2011 at 04:11 PM.
-
02-16-2011, 11:18 AM #19Member

- Join Date
- Mar 2007
- Location
- Camp Hill, Pa
- Posts
- 719
Onyx Black- 2002 SLP Camaro SS

How do you think it would hold up on the exterior? I was thinking that I could use it to cover my front splitter.............
 2002 SLP Camaro SS
Onyx Black
http://www.gmhightechperformance.com/features/0901gmhtp_2002_chevy_camaro_ss/index.html
-
02-16-2011, 11:52 AM #20Junior Member
- Join Date
- Feb 2011
- Location
- San Jose
- Posts
- 11
- 2006
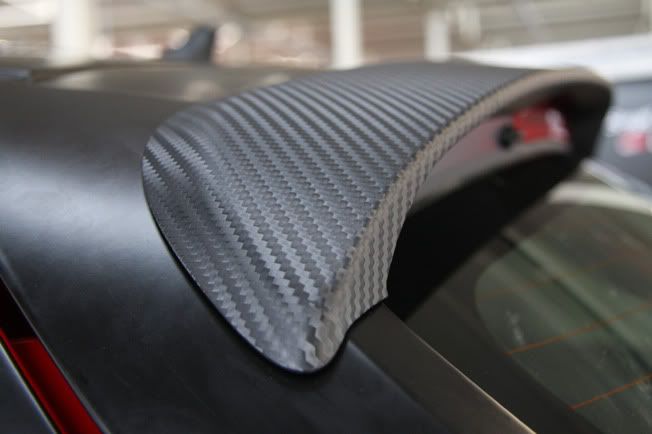
it's textured so you do feel the weave. Some of the cars in my car team had did their roofs and trunks with this material. Originally Posted by fxgs
here are example applications on the exteriors
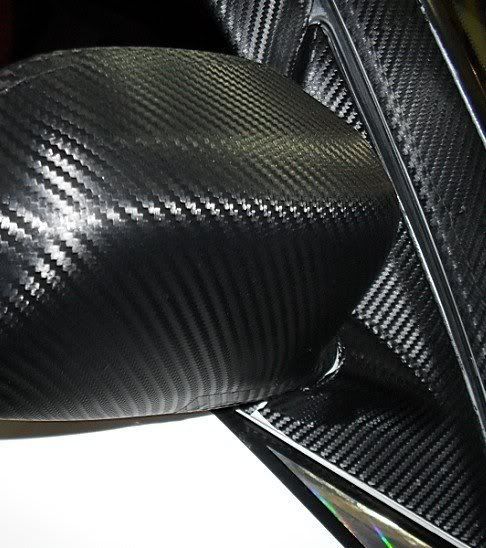
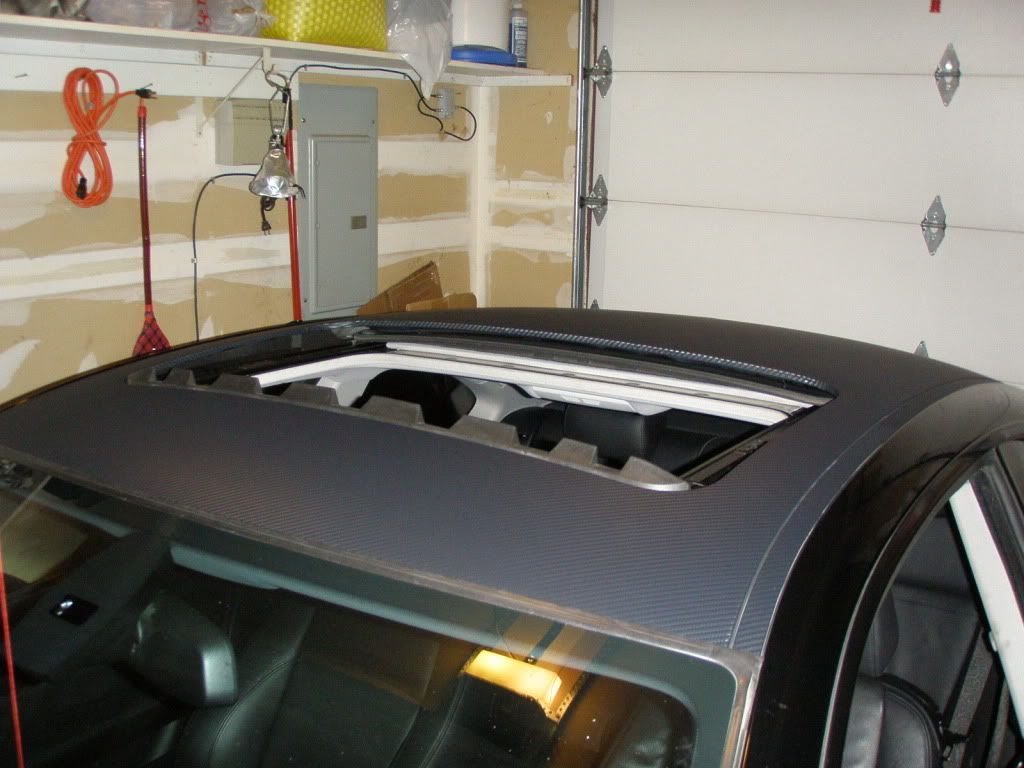
Last edited by Cutlass; 02-16-2011 at 04:12 PM.

 Reply With Quote
Thread Information
Users Browsing this Thread
There are currently 1 users browsing this thread. (0 members and 1 guests)
Similar Threads
-
Carbon Fiber Dipped Interior Parts on my G8
By AdamT in forum Appearance SectionReplies: 32Last Post: 11-13-2013, 04:23 AM -
WTB: molded carbon-fiber interior stuff for 01 SS
By Carlos01SS in forum Parts Wanted / TradeReplies: 2Last Post: 05-12-2008, 01:52 PM -
F*S*VETTE C5 Carbon Fiber Interior Pieces NEW >> PICS ****
By widget in forum Parts For Sale / TradeReplies: 1Last Post: 06-26-2007, 06:26 PM -
***98-02 Carbon Fiber FRC's***
By 94 Formula in forum Parts For Sale / TradeReplies: 1Last Post: 01-20-2007, 10:08 AM -
Carbon Fiber Interior
By Maro99 in forum Appearance SectionReplies: 8Last Post: 06-03-2006, 06:25 PM

Bookmarks