

Results 21 to 40 of 97
-
03-10-2007, 07:30 AM #21lmpounded


- Join Date
- Jan 2006
- Location
- Dallas, Texas
- Posts
- 8,030
Silver- 2007 CTS-V
How many LEDs do you have per resistor? And what ohm is that resistor? Originally Posted by Runn_WS7

-
03-13-2007, 05:37 PM #22Senior Member

- Join Date
- Aug 2005
- Location
- So Cal
- Age
- 38
- Posts
- 1,153
99FRC,00TA,98Formula- 91Firebird,88FieroGT
 Originally Posted by sandman22
How come your selling yours?
-
03-13-2007, 06:44 PM #23lmpounded
- Join Date
- Jan 2006
- Location
- Dallas, Texas
- Posts
- 8,030
Silver- 2007 CTS-V
POPO warned me with the original. Do not want to call attention to that part of the car any more. Especially with a lite up one now. I got two tickets earlier so I am under probation (thanks to lawyer) and cannot get any tickets or the other two will go on my record. Originally Posted by nhra-trans-am
-
03-14-2007, 12:53 PM #24Detailing + Design

- Join Date
- Aug 2005
- Location
- Pittsburgh, PA
- Age
- 44
- Posts
- 21,720
My life is a- Ben Stiller movie.
that's lame, man.
-
07-02-2007, 06:26 AM #25Detailing + Design
- Join Date
- Aug 2005
- Location
- Pittsburgh, PA
- Age
- 44
- Posts
- 21,720
My life is a- Ben Stiller movie.
heeeeeeeeeerrrrrrrrrre's JOHNNY!
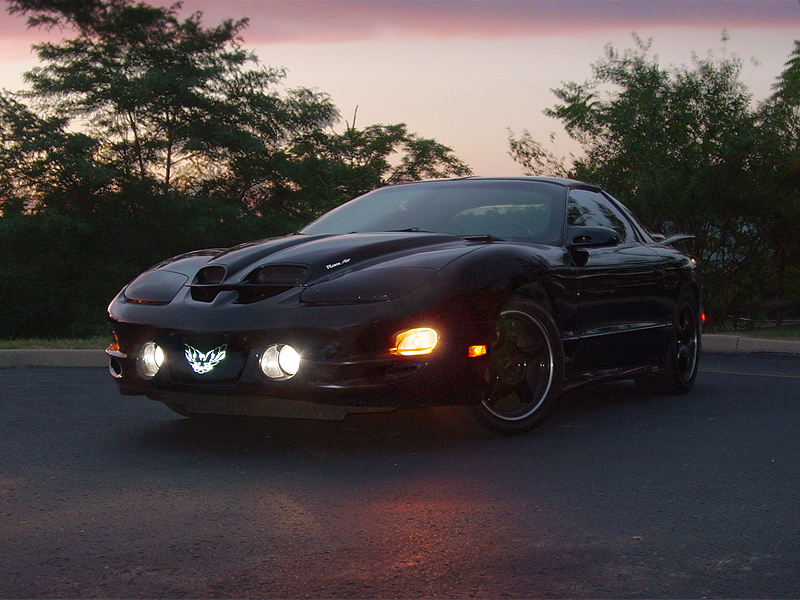
I have some more detailed pix of the way I wired it...those will come later on, i gotta shrink them down, but it should help clear things up for people
Custom Car Emblems from third_shift|studios
Pittsburgh Car Detailing & Paint Protection from ts|s detailing
jaison tortorea
-
07-02-2007, 07:05 AM #26lmpounded
- Join Date
- Jan 2006
- Location
- Dallas, Texas
- Posts
- 8,030
Silver- 2007 CTS-V
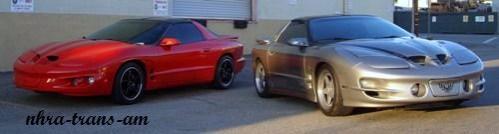
Is that the new TA?
-
07-04-2007, 08:11 AM #27Detailing + Design
- Join Date
- Aug 2005
- Location
- Pittsburgh, PA
- Age
- 44
- Posts
- 21,720
My life is a- Ben Stiller movie.
yes sir! thanks =) Originally Posted by sandman22
-
07-08-2007, 07:12 PM #28Detailing + Design
- Join Date
- Aug 2005
- Location
- Pittsburgh, PA
- Age
- 44
- Posts
- 21,720
My life is a- Ben Stiller movie.
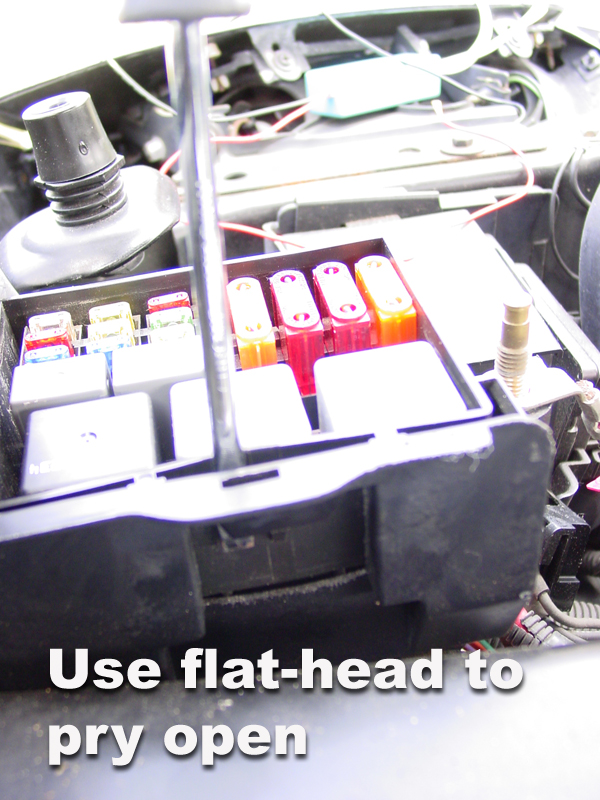
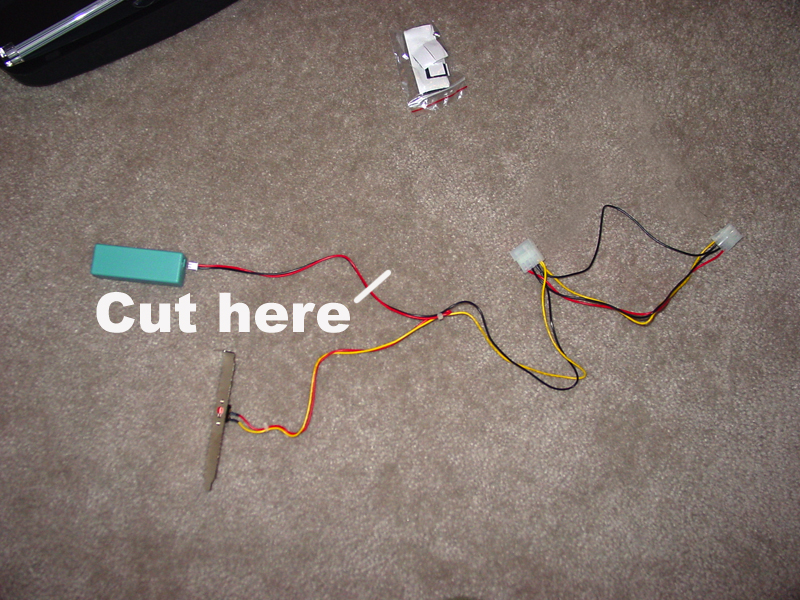
Here is some help for those of you wanting to wire the lights to your Fogs:
DISCONNECT POSITIVE BATTERY TERMINAL BEFORE CONTINUING
Start by locating the fuse box with the fog lights.

Remove the box by inserting a flat-head into the back of it and gently prying it away from the nub.
PUSH! PUUUUUSSHHH! Using speaker wire, positive to the red inverter wire and negative to the black then shove the speaker wire into the middle bird-panel anchor slot. I bent the wire just a bit so that it would follow the styrofoam bumper behind it and not get hung up. I suggest pulling out the plastic push-bolt that keeps the top of the bumper cover anchored [not shown]. It's located just infront of the hood latch. This way you can bend the bumper cover forward some to catch the wire earlier.

expose the wires of the fuse box and locate the purple one for fogs; you can cut away some purple insulation [DO NOT CUT THROUGH THE WIRE] so that you can splice in the positive cable run from the cathode's inverter.
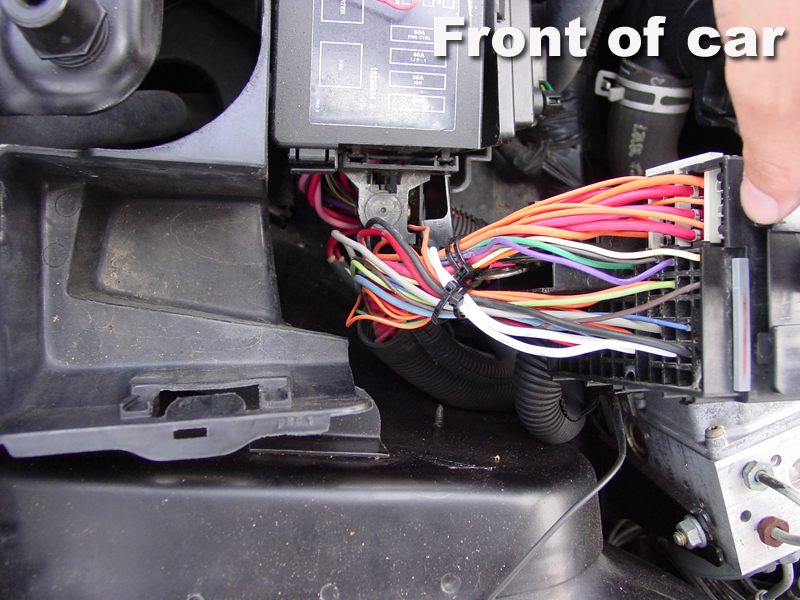
Anchor your ground and your positive as shown-use electrical tape to seal the splice in the purple wire.
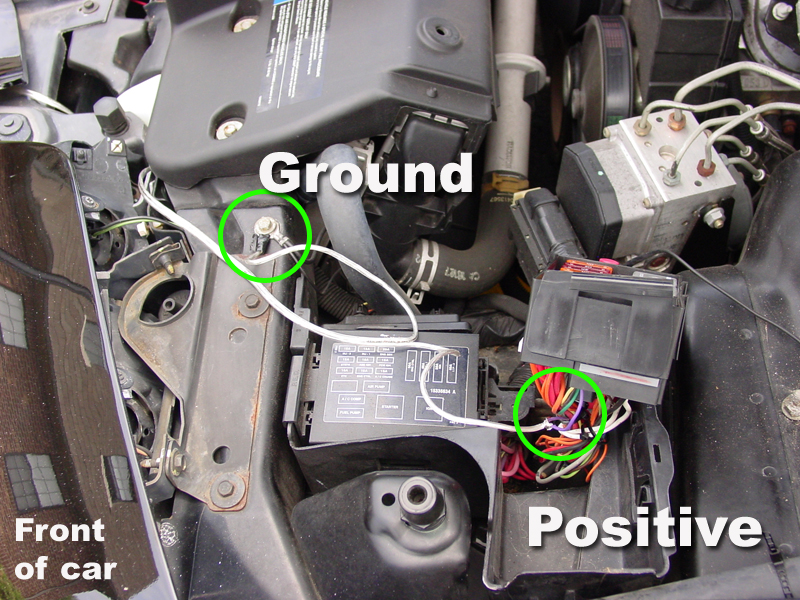
Bolt it all back up and your good. I sticky-taped my cathodes and the inverter to the back of the clear plate.
-
07-12-2007, 05:51 AM #29Junior Member

- Join Date
- Aug 2005
- Location
- Lees Summit, MO
- Posts
- 76
- 2002 Trans Am
Here's mine. I believe it was probably Runn_WS7 who made the board for mine.


-
07-12-2007, 10:58 AM #30Detailing + Design
- Join Date
- Aug 2005
- Location
- Pittsburgh, PA
- Age
- 44
- Posts
- 21,720
My life is a- Ben Stiller movie.
is that blue or super white? That's my biggest pet peave is how the color are all incongruent;i'm having the same issue.
-
07-12-2007, 11:37 AM #31Junior Member
- Join Date
- Aug 2005
- Location
- Lees Summit, MO
- Posts
- 76
- 2002 Trans Am
Mine? Mine is blue.
-
07-12-2007, 02:27 PM #32Member
- Join Date
- Jan 2007
- Location
- EL PASO TX.
- Posts
- 163
NAVY BLUE METALLIC- 02' WS6 TRANS AM
Is it better to have blue or white cathodes?
I'm gonna be getting my hands on this mod soon and before it gets here i wanna know what you guys suggest!
-
07-12-2007, 05:55 PM #33Member

- Join Date
- Jan 2006
- Location
- Statesville NC
- Age
- 44
- Posts
- 108
white/Viper blue- 01 WS6
Here is what it would looki like if you upped the cathode count to 6, I will get pics tomorrow of 8 tubes.
3 feet out

5 feet out at angle

This is the view less than a foot

Its brighter than my turn signals with 8
-
07-13-2007, 08:44 AM #34Member
- Join Date
- Jan 2007
- Location
- EL PASO TX.
- Posts
- 163
NAVY BLUE METALLIC- 02' WS6 TRANS AM
So instead of 2 lights you installed 6? Originally Posted by BURNEM
Are those the super white or the blue?
-
07-13-2007, 10:47 AM #35Detailing + Design
- Join Date
- Aug 2005
- Location
- Pittsburgh, PA
- Age
- 44
- Posts
- 21,720
My life is a- Ben Stiller movie.
did you just cut and splice the other 4 cathodes in there? I don't like how uneven 2 makes it and would like to do this.
also, where does one find super-white fogs, b/c even SilverStar bulbs look yellow next to 2 tubes
-
07-13-2007, 11:35 AM #36Member
- Join Date
- Jan 2007
- Location
- EL PASO TX.
- Posts
- 163
NAVY BLUE METALLIC- 02' WS6 TRANS AM
Hey man, does the bird that you showed me light up like burnem's or does yours only light up the outline? Originally Posted by third_shift|studios
-
07-13-2007, 11:36 AM #37insert witty title here

- Join Date
- Apr 2006
- Location
- Georgetown, Oh
- Age
- 43
- Posts
- 325
Black- 2000 WS6
I want info on those foglights! Originally Posted by Runn_WS7

I wish I could do that plate mod. I already have the clear plate cover because OH state law. My friend was pulled over twice for having the original on over the fron plate.
-
07-13-2007, 11:47 AM #38Member
- Join Date
- Jan 2007
- Location
- EL PASO TX.
- Posts
- 163
NAVY BLUE METALLIC- 02' WS6 TRANS AM
Same here those fog lights are freaking sweet..... Originally Posted by Blk00ws6
 does anyone know where to get them?
-
07-13-2007, 12:33 PM #39Member
- Join Date
- Jan 2006
- Location
- Statesville NC
- Age
- 44
- Posts
- 108
white/Viper blue- 01 WS6
No I bought 4 sets i drilled a 1/4" hole on the right side of the bumper on the flat spot behind the plate. I placed 4 in one hole and 4 in the lower hole. i'll get a pic of it posted. Those was 6 now I have all 8 in it. With 8 the space is about 1/4" between tubes. its bright. Originally Posted by third_shift|studios
-
07-13-2007, 12:41 PM #40Detailing + Design
- Join Date
- Aug 2005
- Location
- Pittsburgh, PA
- Age
- 44
- Posts
- 21,720
My life is a- Ben Stiller movie.
outline Originally Posted by SMOKIN WS6


 Reply With Quote


Thread Information
Users Browsing this Thread
There are currently 1 users browsing this thread. (0 members and 1 guests)
Similar Threads
-
light up middle tail light bird
By trans_am7935 in forum Firebird / WS6Replies: 16Last Post: 05-28-2009, 08:59 AM -
light up bird mod
By SHovV in forum Firebird / WS6Replies: 3Last Post: 05-03-2009, 01:53 PM -
Front Bird
By Al Hazz in forum Firebird / WS6Replies: 4Last Post: 05-15-2008, 08:15 PM -
acrylic bird or light up bird outline....or both?
By third_shift|studios in forum Appearance SectionReplies: 8Last Post: 06-12-2006, 09:16 AM -
Front bird plate
By Scorch in forum Appearance SectionReplies: 2Last Post: 04-19-2006, 04:28 PM

Bookmarks