

Results 201 to 220 of 292
-
10-12-2011, 06:00 PM #201Veteran


- Join Date
- Feb 2009
- Location
- Mansfield, PA
- Posts
- 22,146
Black & Blue- '02 WS.6 / '07 Suburban
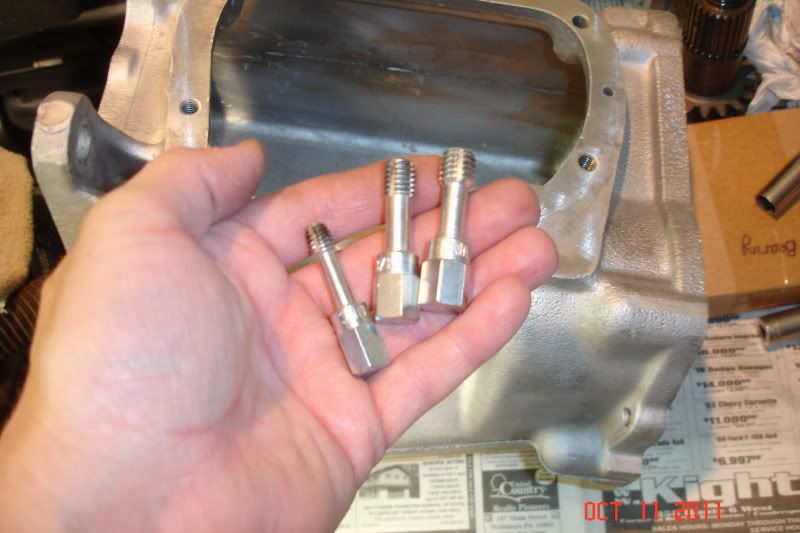
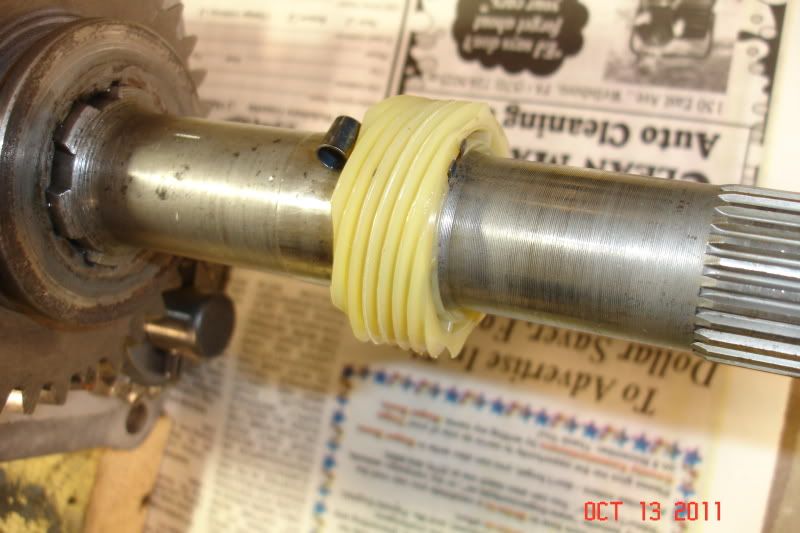
Last night I installed the mainshaft and reverse gears and then cleaned the next batch of parts. I started by running thread chasers through all the holes in the case. These are rethreading taps and are quite different when compared to a regular tap. They are designed not to remove any material from the threads, but will repair any damaged areas while also cleaning the threads. The mainshaft slides into the case from the rear and the front bearing is then placed over the input shaft.
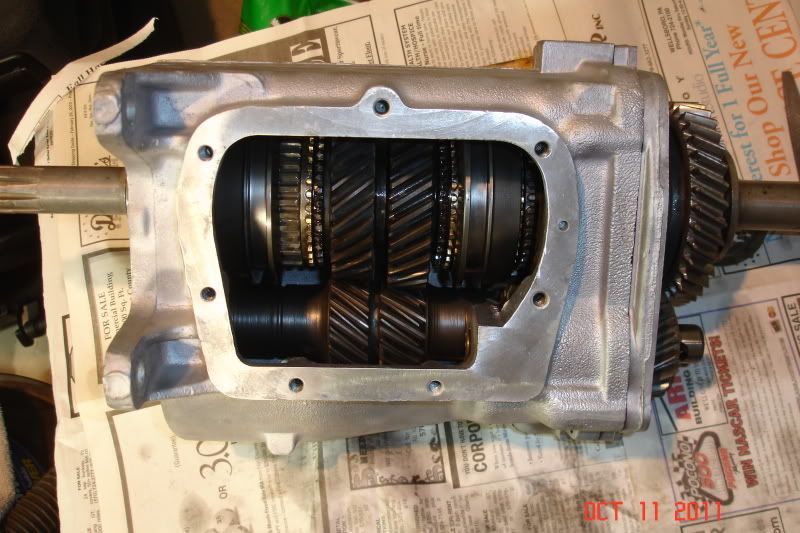
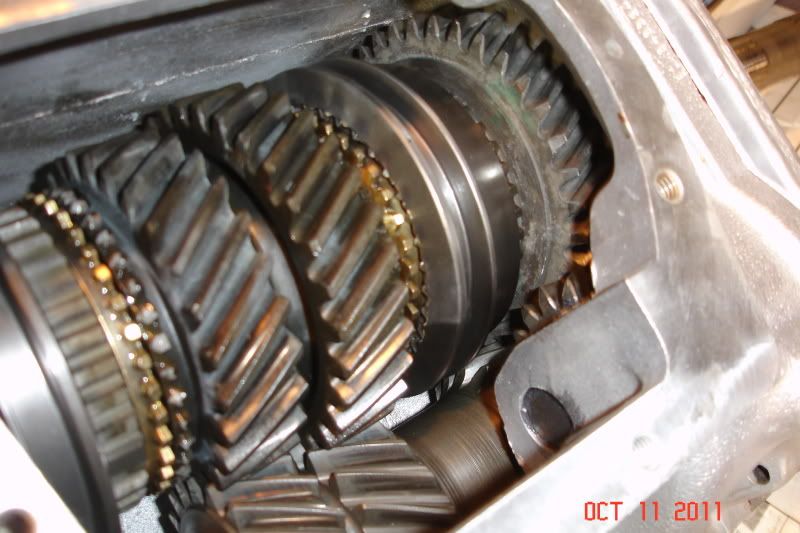
This is a good shot of the new synchros and slides with everything inside nice and clean:
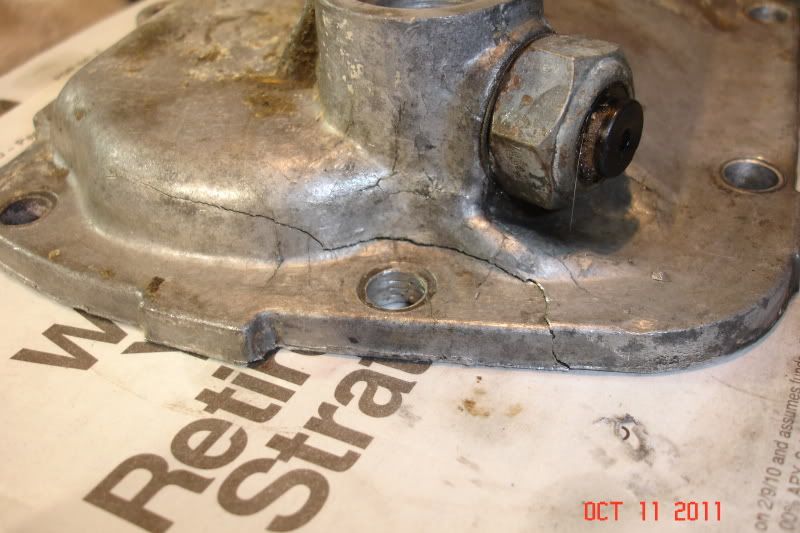
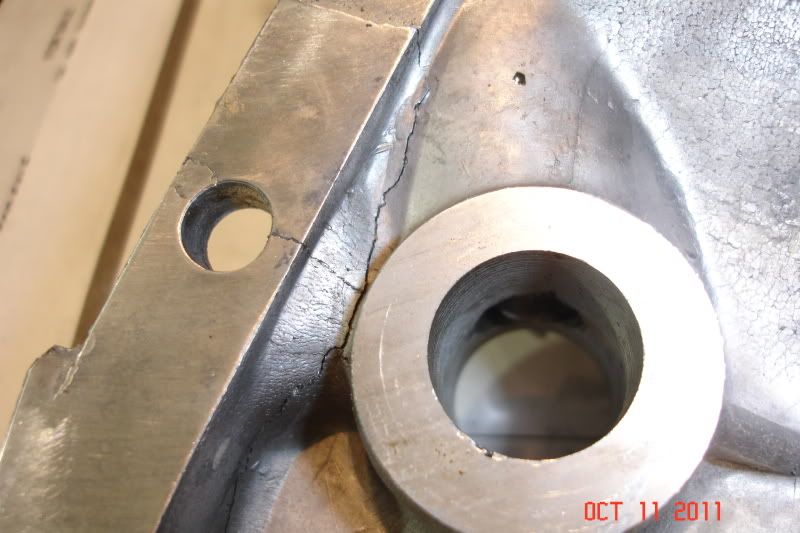
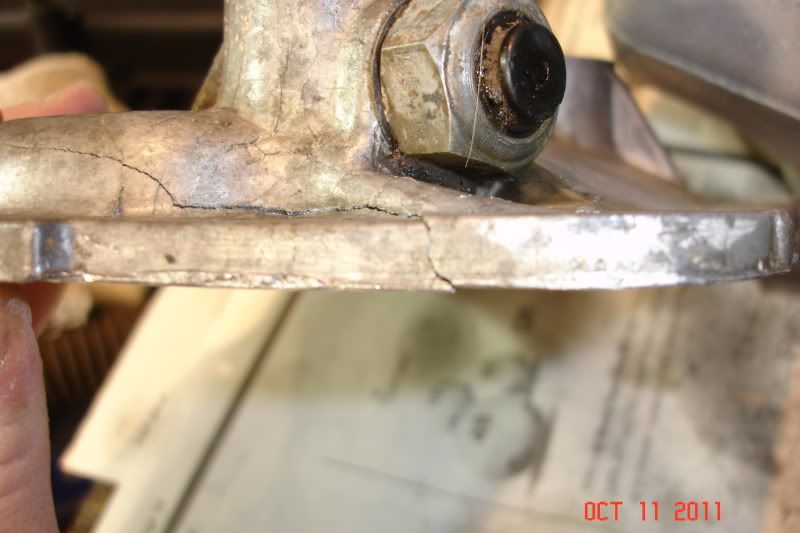
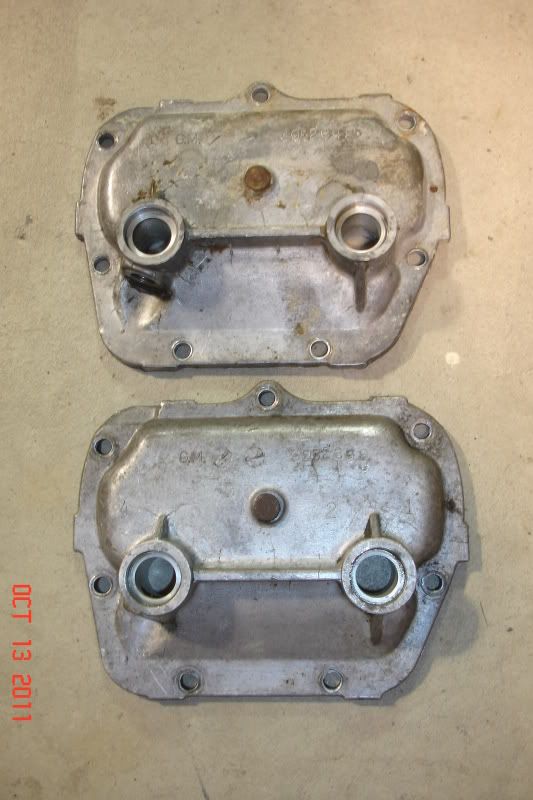
I knew this rebuild was going too well... finally found an issue. Cleaning up the side cover I found a 2-3" crack directly in front of the 3-4 shift lever. The cover's mating surface is actually displaced. Fortunately, a friend likes to rebuild Muncies and has one on hand that I can use.
-
10-12-2011, 06:03 PM #202Senior Member

- Join Date
- May 2010
- Location
- Wilkes-Barre, PA
- Posts
- 1,547
Black/Black- 98 WS6/04 Sierra Dmax
Those thread chasers work great! I have a whole set of them that I bought from snap-on.
-
10-12-2011, 06:08 PM #203Veteran
- Join Date
- Feb 2009
- Location
- Mansfield, PA
- Posts
- 22,146
Black & Blue- '02 WS.6 / '07 Suburban
I bought the Craftsman set -- was not all that expensive and they do seem to work great. It is one tool set that I really wish I had when I did the restoration on the Corvette.
-
10-12-2011, 06:12 PM #204Senior Member
- Join Date
- May 2010
- Location
- Wilkes-Barre, PA
- Posts
- 1,547
Black/Black- 98 WS6/04 Sierra Dmax
The craftsman set and snap on set are almost identical, and surprisingly very close in price.
-
10-12-2011, 06:32 PM #205Veteran

- Join Date
- Oct 2008
- Location
- Wherever life takes me
- Posts
- 12,526
Red- 02 35th LE Camaro SS
Looking good Jeff. It's good to know people!!
-
10-13-2011, 03:34 PM #206Veteran
- Join Date
- Feb 2009
- Location
- Mansfield, PA
- Posts
- 22,146
Black & Blue- '02 WS.6 / '07 Suburban
Thanks! Picked up the replacement side cover this afternoon on my way back from Court. He even took the time to root around his stash to find one with the same part number. Trying to get up some ambition now to head out into the garage.
-
10-13-2011, 06:35 PM #207Veteran
- Join Date
- Feb 2009
- Location
- Mansfield, PA
- Posts
- 22,146
Black & Blue- '02 WS.6 / '07 Suburban
Started the evening affixing the gasket to the tailstock and then running thread chasers through all the holes. I then installed the shaft seal for the reverse linkage and then inserted the spring, detent ball and shaft through the tailstock. The new bushing was installed at my friend's house this afternoon as he has the appropriate sized driver. I also installed the rear seal and then set the tailstock aside as it is ready to be attached to the case. The speedometer drive gear slides over the output shaft and is held in place by a small spring clip.
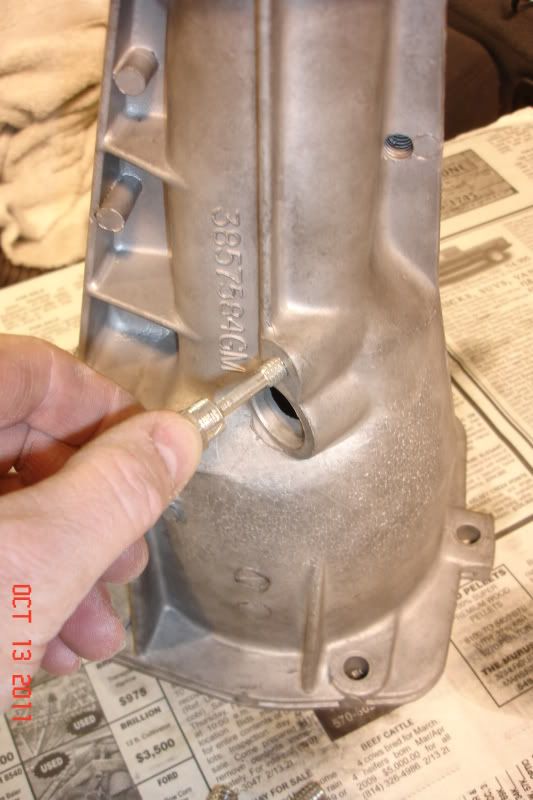
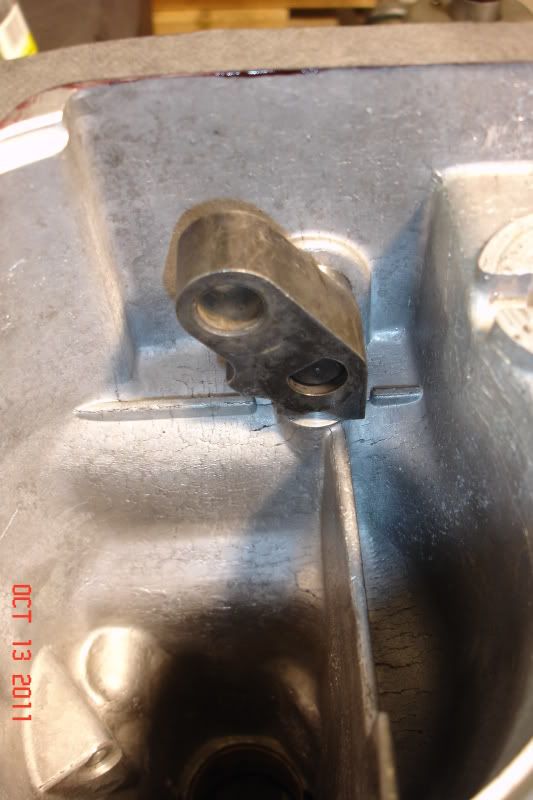
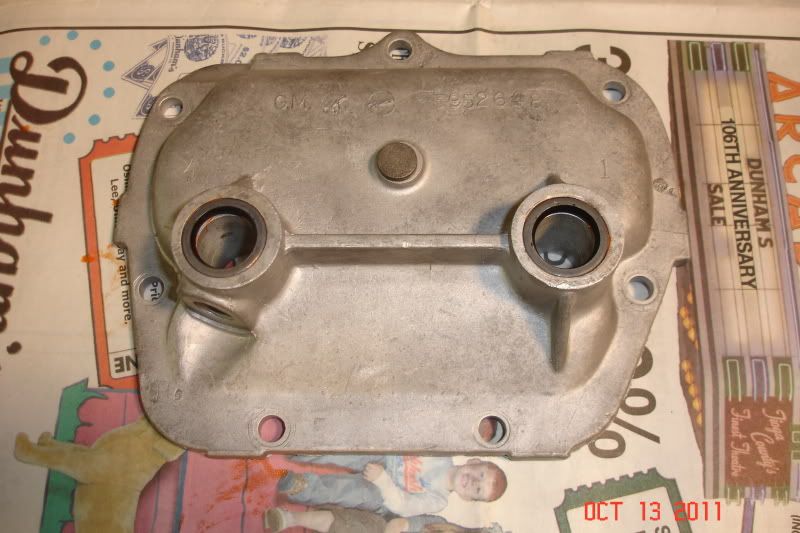
Broken cover is the top, new one is the bottom in the first pic. I pried out the old seals, removed the TCS switch and then it went through the parts washer and bead blaster. It is all cleaned up and ready to go in the second picture. The new seals are tapped into place with a little Permatex smeared into the bores first to assure a good seal. Starting on the back, the detent levers, spring and c-clip are installed before the shift rods are inserted through the cover. The forks are then dropped into the levers and the detents are lifted up for engagement.
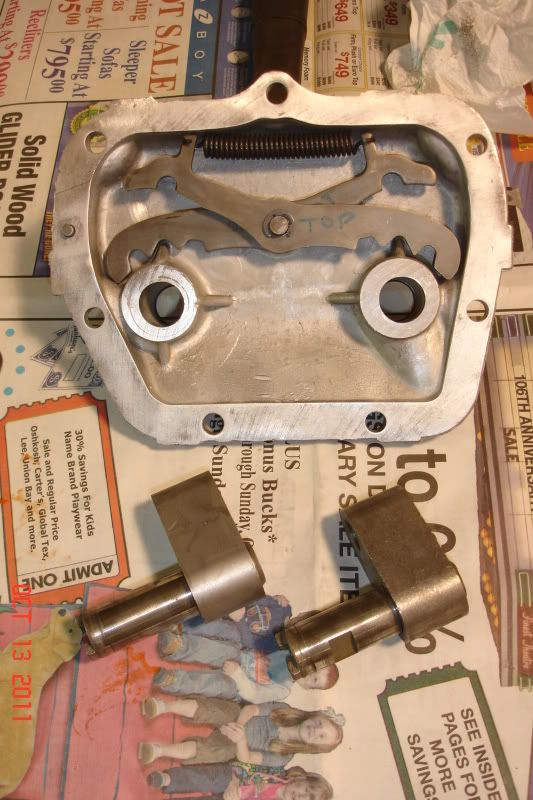

All the subassemblies are now ready to go. I simply need to clean up the bolts and other hardware before finishing up. I will then finish cleaning up the bellhousing and give it the threadchaser treatment as well.
-
10-25-2011, 06:06 PM #208Veteran
- Join Date
- Feb 2009
- Location
- Mansfield, PA
- Posts
- 22,146
Black & Blue- '02 WS.6 / '07 Suburban
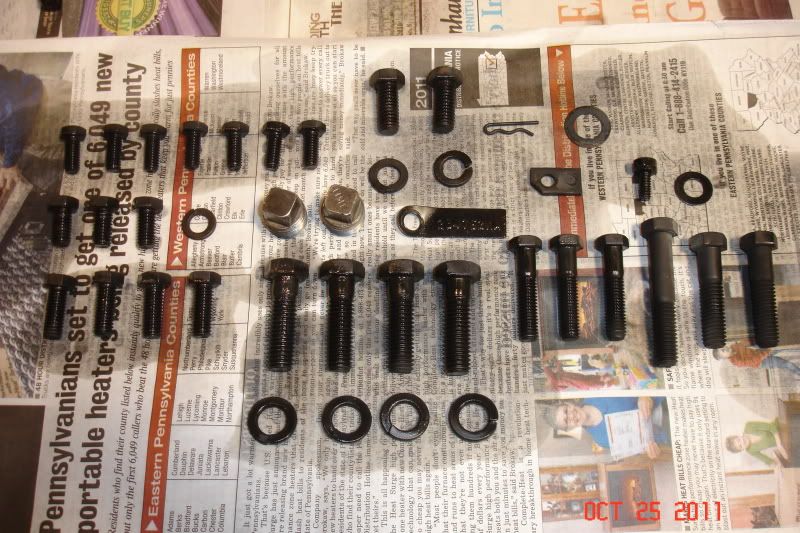
Got sidetracked for a bit on other projects. Tonight, I cleaned up all the bolts for the reassembly and gave them a fresh coat of black oxide. They look wet in the pic due to the sealer coat that goes on after being dipped in the black oxide solution. I'll need to order a new clutch fork pivot and bellows along with a new pilot bearing. I see they have a new composite bushing out and may also consider that in place of the roller bearing.
-
10-26-2011, 06:53 PM #209Veteran
- Join Date
- Feb 2009
- Location
- Mansfield, PA
- Posts
- 22,146
Black & Blue- '02 WS.6 / '07 Suburban
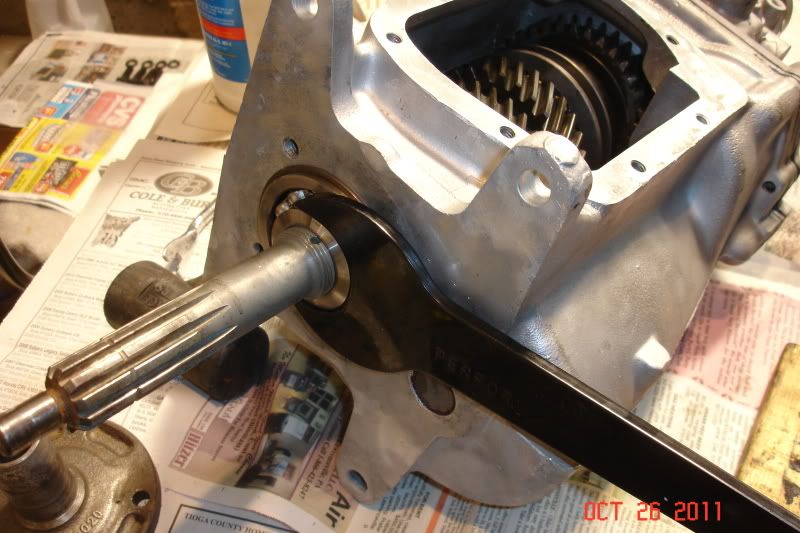
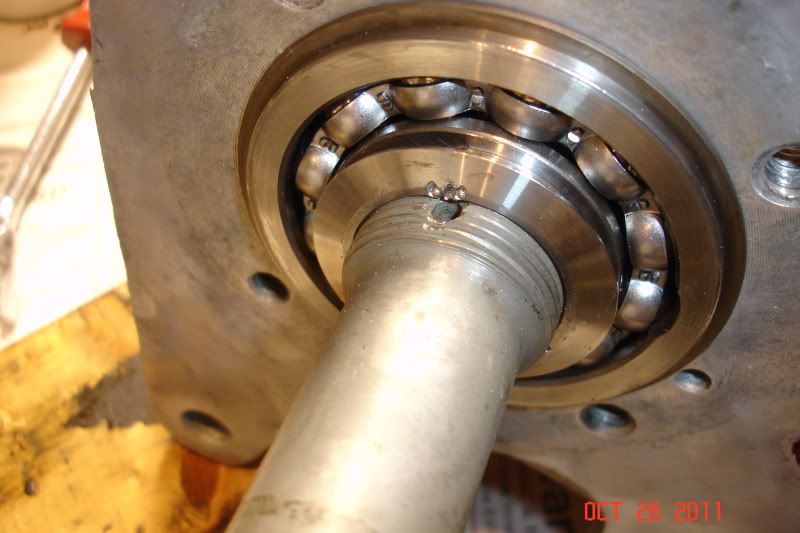
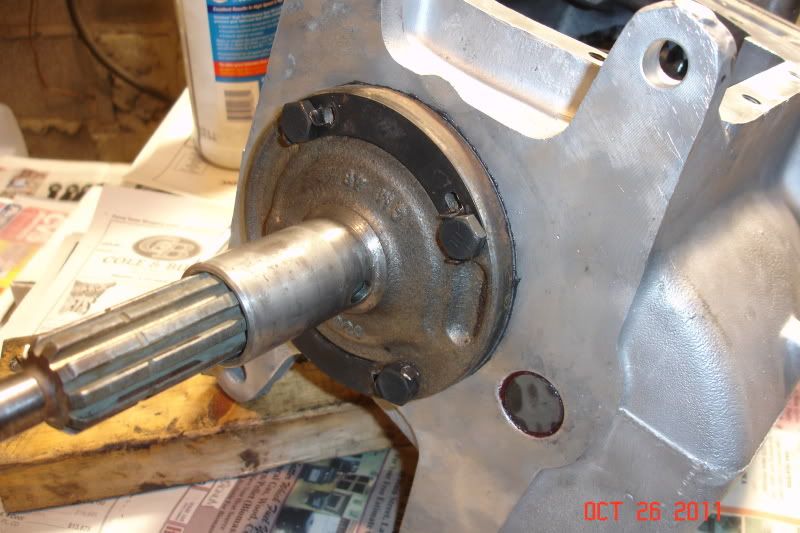
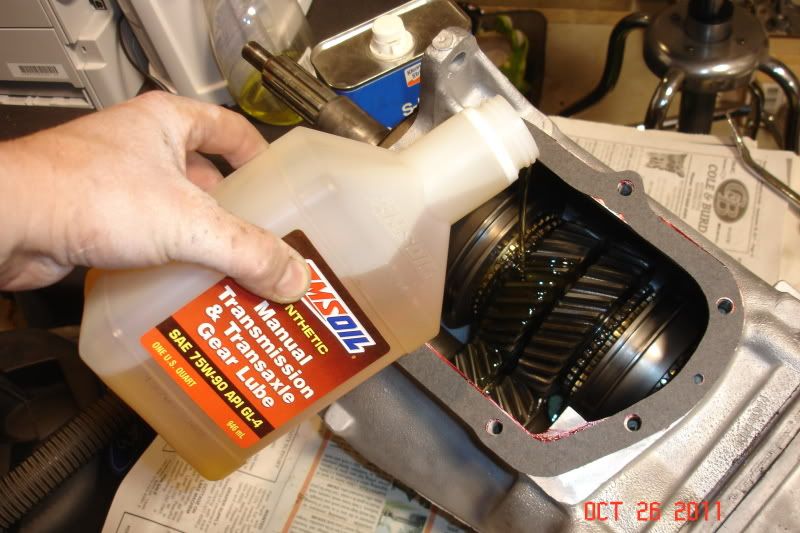
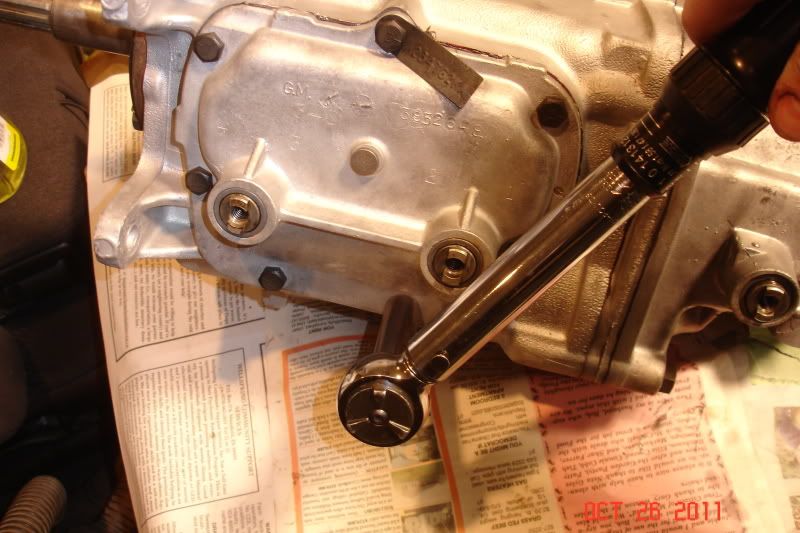
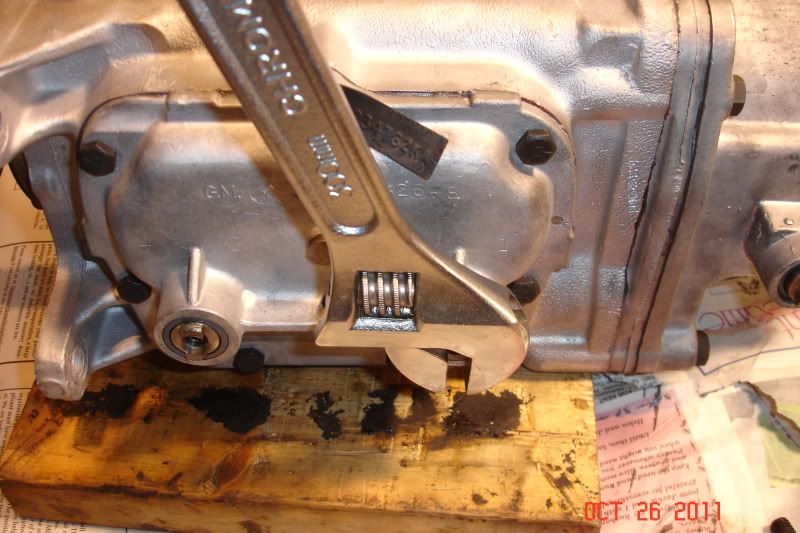
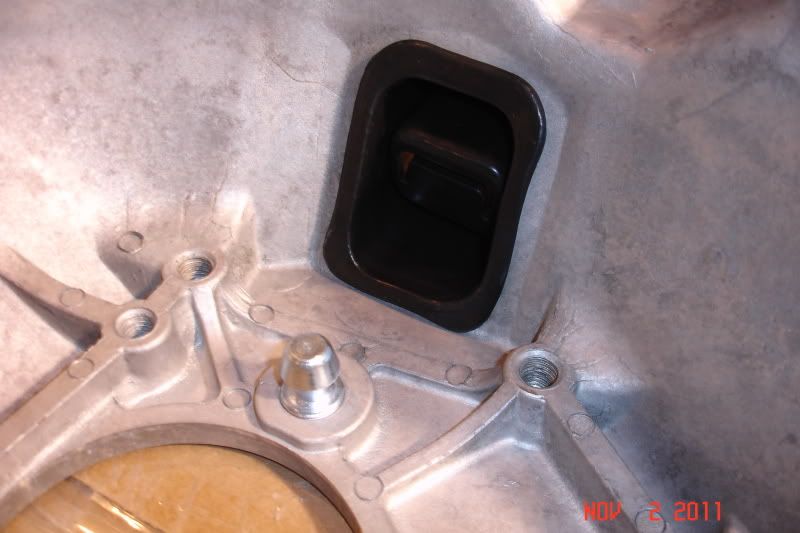
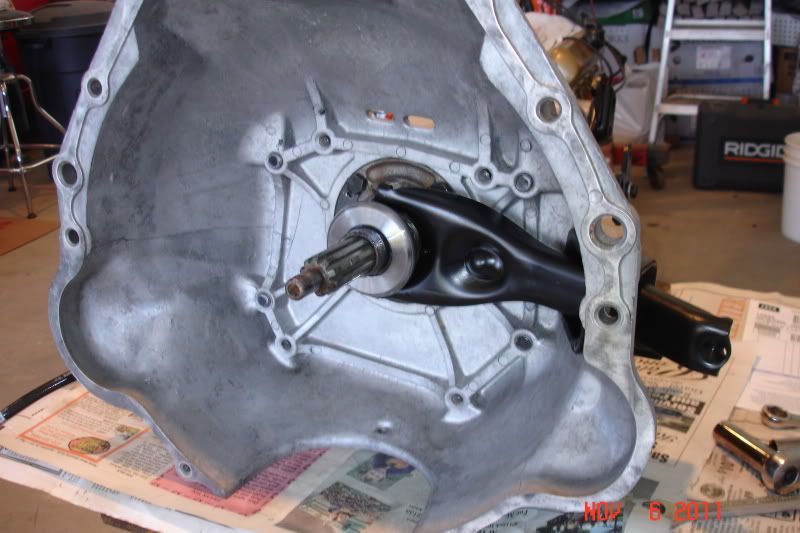
Started the evening by installing the tailstock onto the transmission. As it is slid over the output shaft, you have to carefully line up the reverse linkage with the flange on the gear. Once it is seated on the main case and torqued to spec, a steel pin is installed in the reverse linkage shaft to secure it in place. The nut on the input shaft can then be tightened and staked in place to ensure that it cannot back off. The nut is left hand thread just to keep things interesting and over top of this the bearing retainer is installed. This has to be positioned correctly as there is a dimple in the casting that allows fluid to drain back into the case. There is no seal around the input shaft.
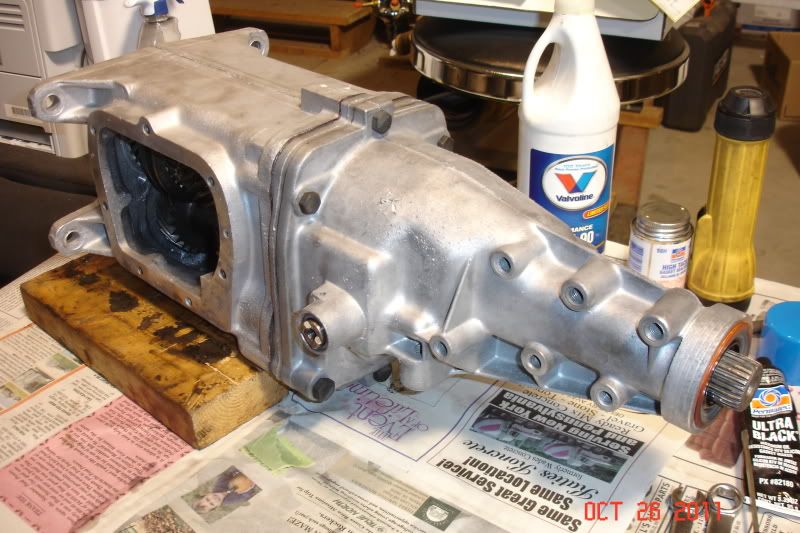
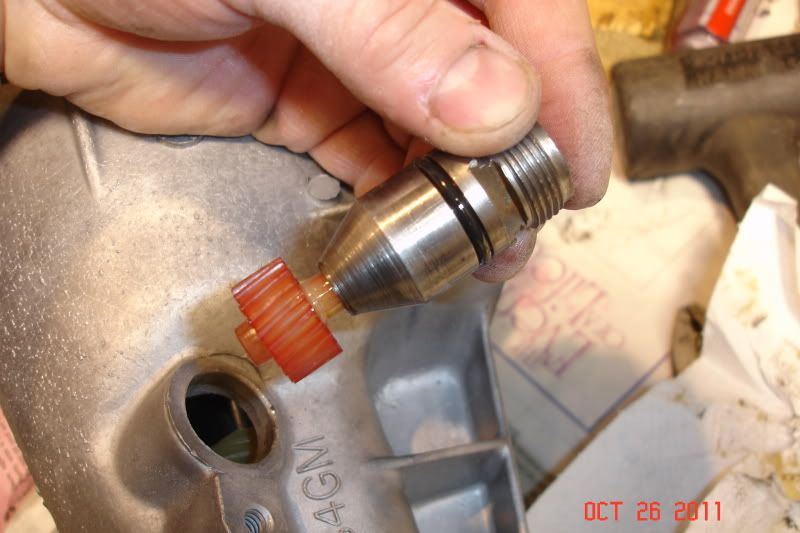
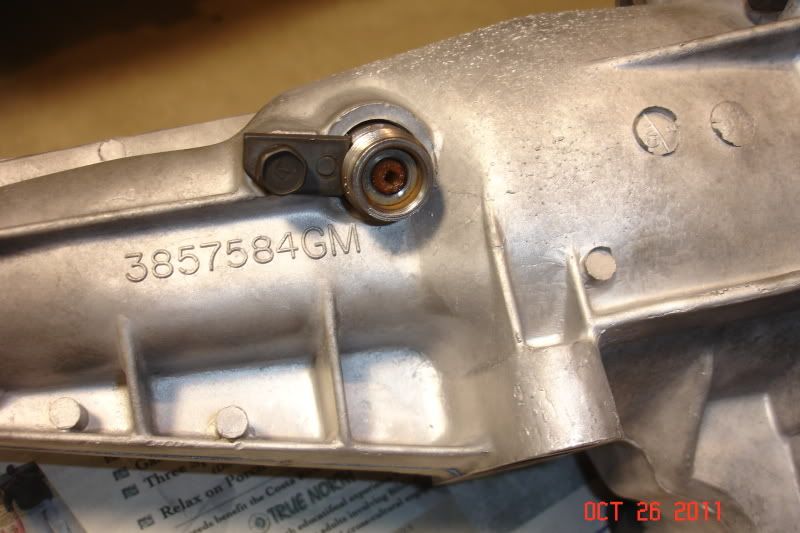
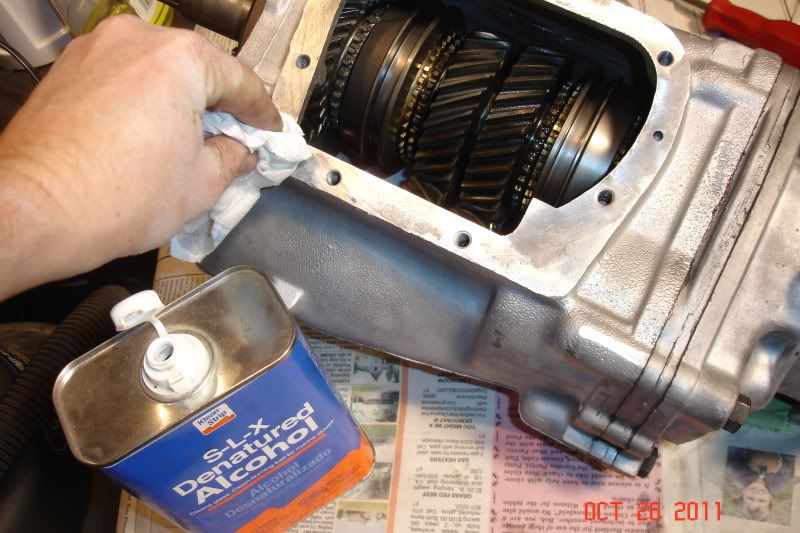
Back on the tailstock, the speedometer driven gear is installed through the hole in the passenger side and is retained by a small metal tab. After threading the fill and drain plugs into the case, the side cover mounting surface was cleaned with denatured alcohol. All gaskets were initially installed with High Tack and the opposite surface was skim coated with Permatex Black Silicone. Before installing the side cover and shift forks, approximately one-half quart of transmission fluid was poured over the gearsets and synchros. The side cover was then installed while ensuring that the shift forks fully engaged the clutch sliders. After it was torqued to spec, the input shaft is spun by hand while each gear is engaged in turn to ensure proper operation. Tomorrow, after the Permatex has cured, I will go over the mating surfaces with a stainless steel wire brush to remove any excess material that squeezed out as the bolts were tightened.
-
11-02-2011, 05:16 PM #210Veteran
- Join Date
- Feb 2009
- Location
- Mansfield, PA
- Posts
- 22,146
Black & Blue- '02 WS.6 / '07 Suburban
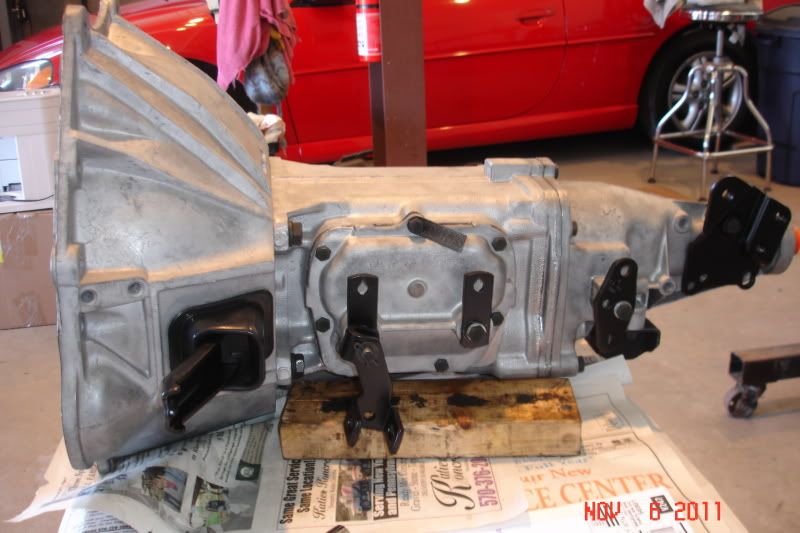
Parts arrived at the office today so I was able to get the bell mounted to the transmission. I was waiting for a new clutch fork pivot ball and clutch fork seal.
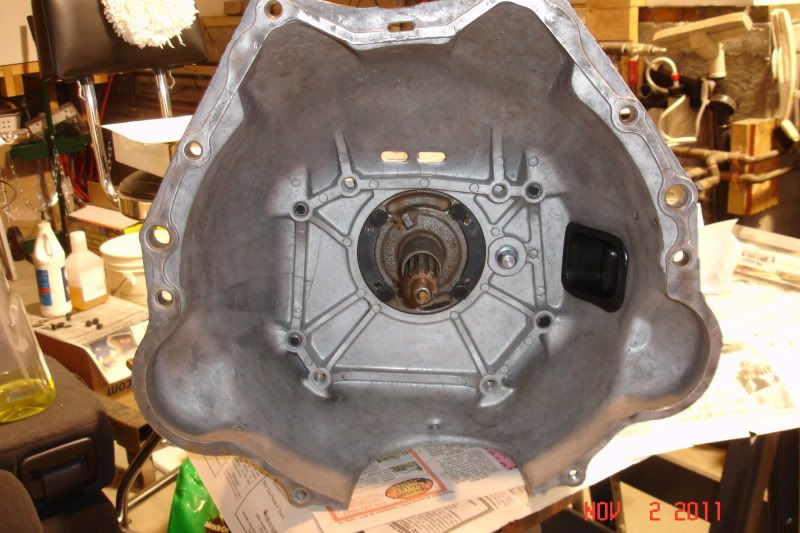
I still have a few miscellaneous parts to clean up and install, but for now it is essentially complete and ready to install onto the engine. I always like to end with a before and after shot to really show the difference once the restoration is completed.
BEFORE:
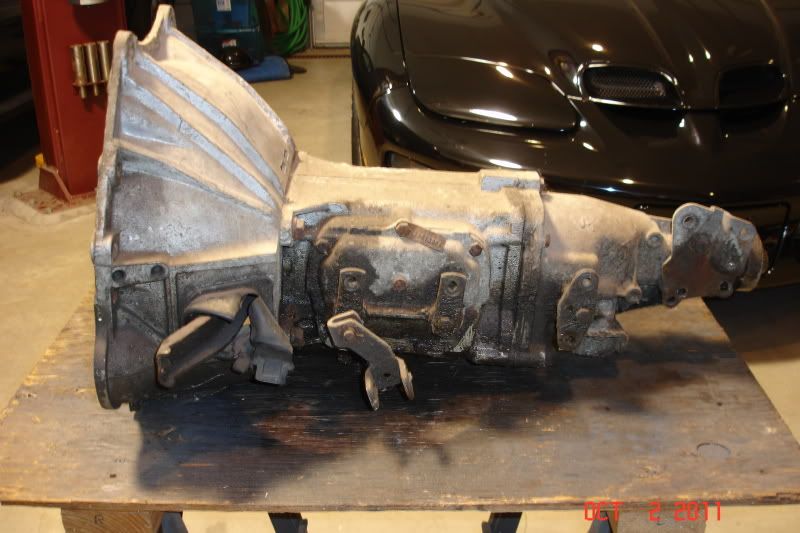
AFTER:
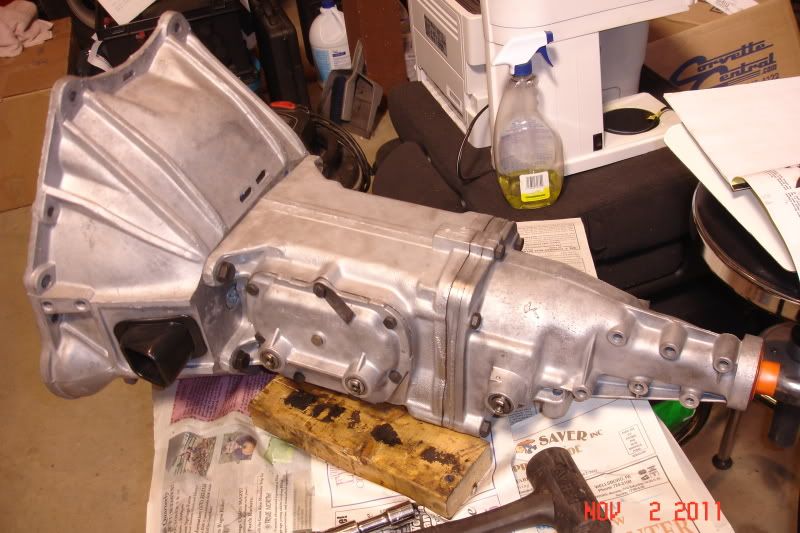
It took a little longer than anticipated, but that is the norm for most all of my projects.
-
11-02-2011, 06:47 PM #211Giant Dicks Car Club

- Join Date
- Nov 2006
- Location
- Millerton, PA
- Posts
- 5,191
2005 Ram- 1978 Firebird

dang Jeff. Almost hear that engine running again..
-
11-03-2011, 03:17 AM #212Veteran
- Join Date
- Feb 2009
- Location
- Mansfield, PA
- Posts
- 22,146
Black & Blue- '02 WS.6 / '07 Suburban
I would like to fire it up this Fall sometime. If I get it to that point I'll give you and Steve a call.
-
11-04-2011, 04:15 PM #213Veteran
- Join Date
- Feb 2009
- Location
- Mansfield, PA
- Posts
- 22,146
Black & Blue- '02 WS.6 / '07 Suburban
I rooted around the basement and lower garage this evening and managed to find all the bolts for the motor mounts, trans mount, flywheel, clutch, and trans-to-engine. I have new mounts ready to go also, so dropping the engine and trans into the chassis should be a go this weekend.

-
11-05-2011, 05:56 PM #21411 years of bangin gears

- Join Date
- Jan 2009
- Location
- North Jersey
- Posts
- 11,496
Phantom Black Metallic- 2004 GTO M6
Awesome thread!!

That Cutlass looks like the 442 from "Demolition Man".
-
11-05-2011, 06:08 PM #215Veteran
- Join Date
- Feb 2009
- Location
- Mansfield, PA
- Posts
- 22,146
Black & Blue- '02 WS.6 / '07 Suburban
Thanks! Being a 350 c.i. engine, it's the 442's "little brother".
-
11-06-2011, 05:16 PM #216Veteran
- Join Date
- Feb 2009
- Location
- Mansfield, PA
- Posts
- 22,146
Black & Blue- '02 WS.6 / '07 Suburban
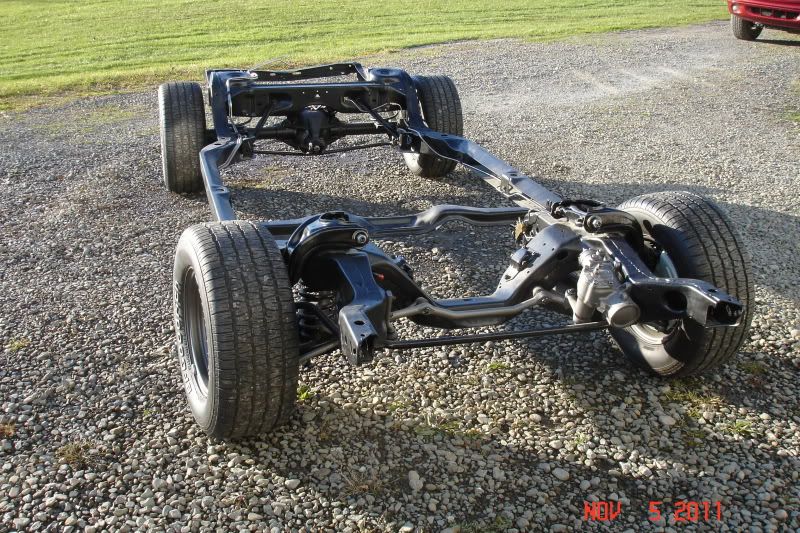
Had some great weather this weekend after last week's snowstorm. With a tow strap and our newly permitted driver behind the wheel of the Durango, I moved the chassis into the upper garage yesterday afternoon.
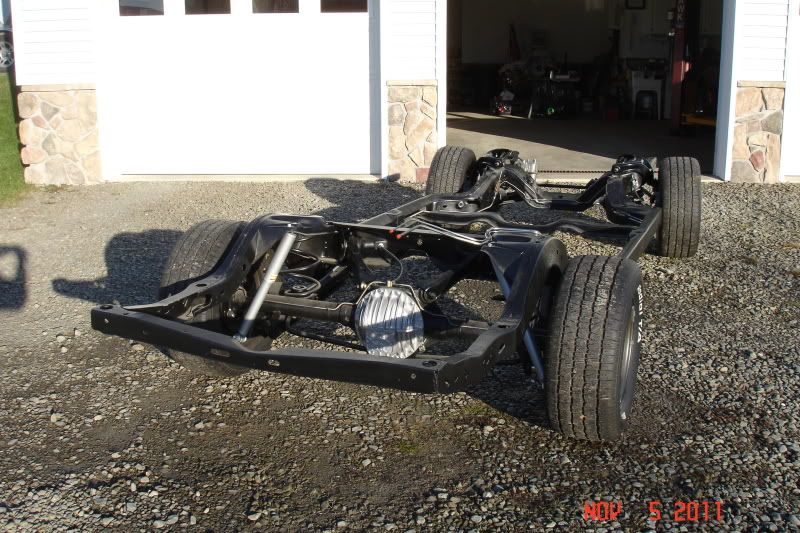
Last night, I cleaned and painted the shift levers, brackets, clutch fork and a few other odds and ends in preparation for the install. This morning, I mounted everything to the completed transmission and then read up on the new Hays clutch instructions before heading off to my brother-in-law's 45th birthday party.
Dan (TLS_Addict) came over this evening and we dropped the engine into the frame after installing the motor mounts. Once it was in, we then bolted up the new SFI-approved flywheel and a Hays Street/Strip clutch assembly. The transmission slid home on the second attempt and everything fell into place right where it should.
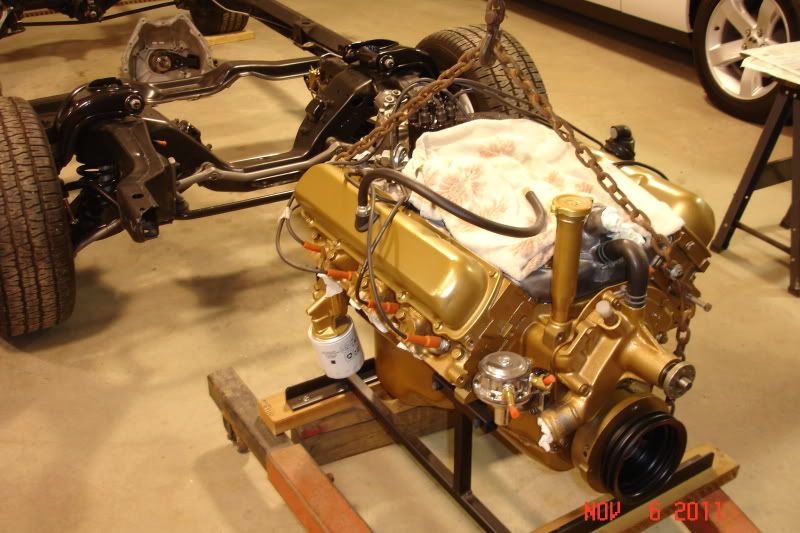
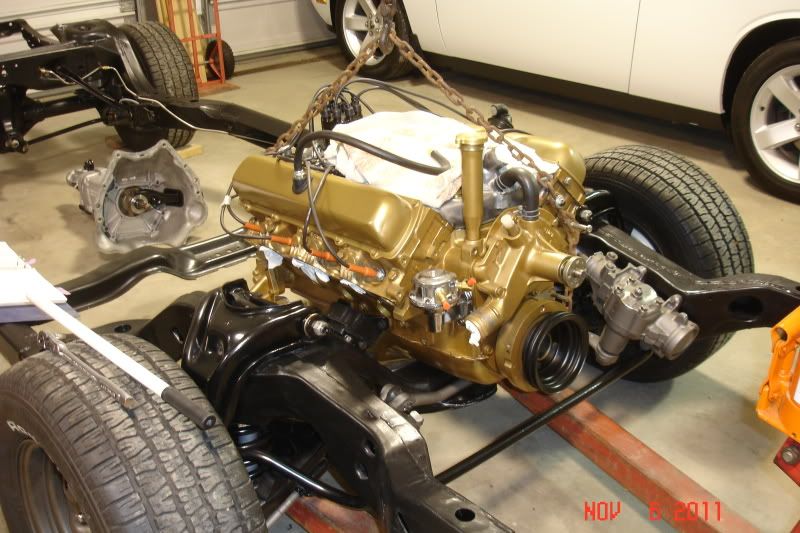
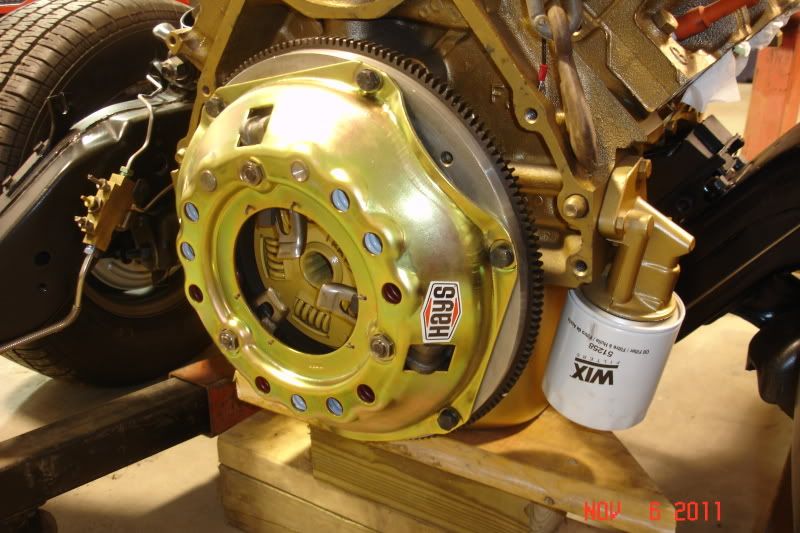
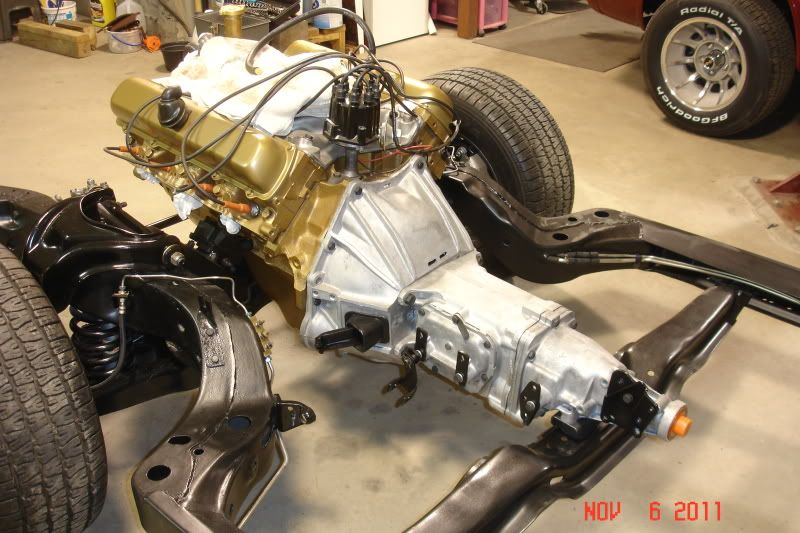
Have a long way to go yet, but have certainly made some good progress in the last few weeks. Thanks for the help, Dan!
-
11-06-2011, 05:46 PM #217Member

- Join Date
- Nov 2011
- Location
- QuarterMile, KY
- Posts
- 308
Red w/ silver Stripes- 2000 WS6 6 Speed

Subscribed.. that is a killer project that looks as it is coming together nicely. I didn't take time to read all the post but i will be reading what i can when i get a chance. Good luck on the build.
-
11-07-2011, 03:43 AM #218Veteran
- Join Date
- Feb 2009
- Location
- Mansfield, PA
- Posts
- 22,146
Black & Blue- '02 WS.6 / '07 Suburban
Thanks! Going to try to be diligent about things now that the chassis and drivetrain are about completed.
-
11-07-2011, 04:47 AM #219None Shall Pass


- Join Date
- Jan 2010
- Location
- East of Cleveland, Ohio
- Posts
- 3,827
Black- 99 WS.6 - Modified
Bring it to my picnic next year? Hint hint......
-
11-07-2011, 09:04 AM #220Veteran
- Join Date
- Feb 2009
- Location
- Mansfield, PA
- Posts
- 22,146
Black & Blue- '02 WS.6 / '07 Suburban
 Originally Posted by Knight

Long ways off and I still have quite a bit to do. We'll see how things go.

 Reply With Quote
Thread Information
Users Browsing this Thread
There are currently 1 users browsing this thread. (0 members and 1 guests)
Similar Threads
-
Question: anybody familiar with the oldsmobile aurora.
By dav-02ws6-m6 in forum General HelpReplies: 25Last Post: 07-03-2012, 02:44 AM -
I need some '69 Oldsmobile Cutlass parts! (help!)
By FasstChevys in forum Classic MuscleReplies: 5Last Post: 10-27-2011, 12:06 PM -
F/S or Trade 1970 SS396 El Camino Project
By H8tulooze in forum Vehicles For Sale / TradeReplies: 0Last Post: 09-01-2008, 06:42 AM -
Any oldsmobile forums?
By TARZAN in forum Almost Anything GoesReplies: 5Last Post: 05-31-2007, 02:59 AM -
1970 oldsmobile cutlass convertible forsale
By z-28lover in forum Vehicles For Sale / TradeReplies: 0Last Post: 10-25-2006, 10:32 AM

Bookmarks