

Results 41 to 60 of 146
Thread: 1987 Buick Regal Turbo
-
03-24-2013, 06:13 PM #41Veteran


- Join Date
- Feb 2009
- Location
- Mansfield, PA
- Posts
- 22,146
Black & Blue- '02 WS.6 / '07 Suburban
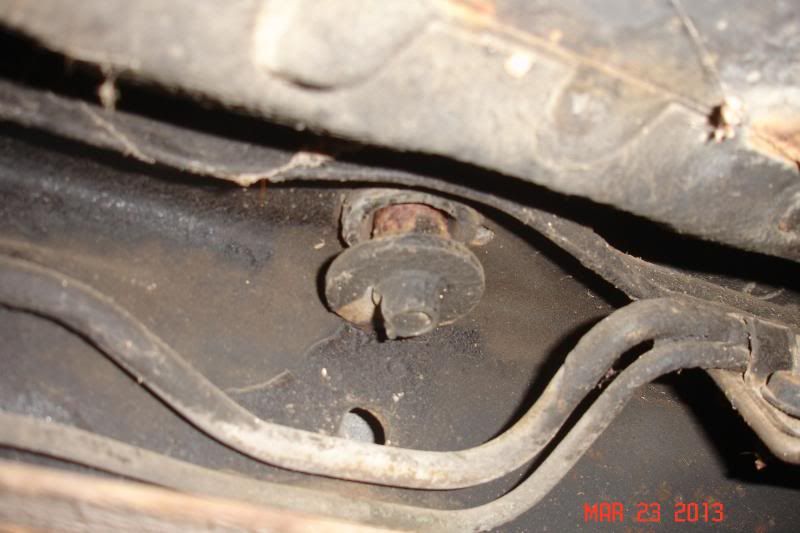
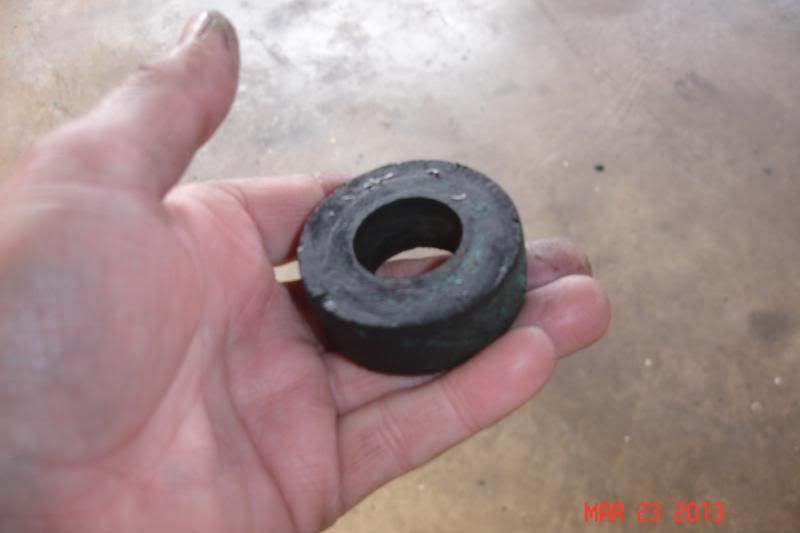
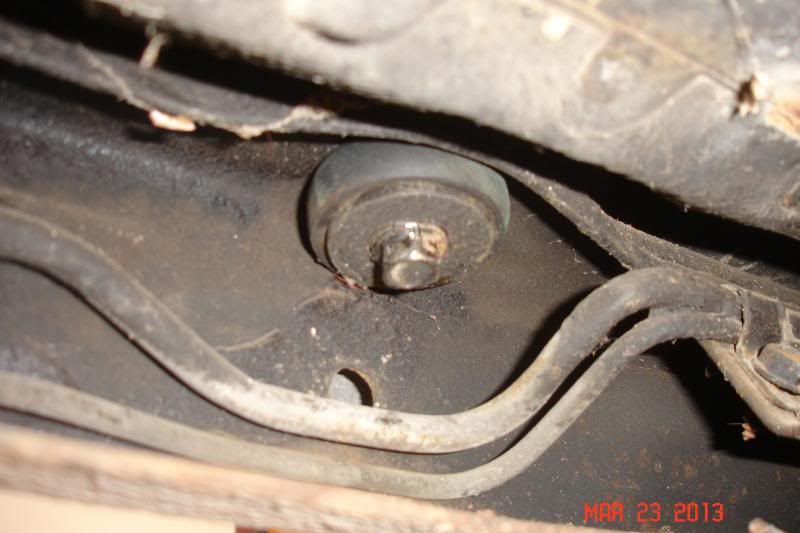
Was able to get quite a bit done this weekend. The car is finally going back together and the pile of parts on the work bench has shrunk considerably. Yesterday, I finally addressed an issue from the factory. The gentleman we purchased the car from mentioned that for whatever reason, General Motors did not install the lower bushings on four (4) body mounts. These are the two mounts on each side of the car in front of the rear wheel well. After getting the car up in the air for the first time, I quickly found that it was indeed missing four bushings. Kirbans, and other G-body suppliers, offer kits with just these four bushings, new bolts and washers. However, I have at least two sets of used bushings from prior restorations and found the ones I removed from our '70 Cutlass several years ago. I cleaned the bushings up and using a 15 mm socket removed the body bolts and installed the bushings. Luckily, all four bolts were in great shape and I had no issues removing them.
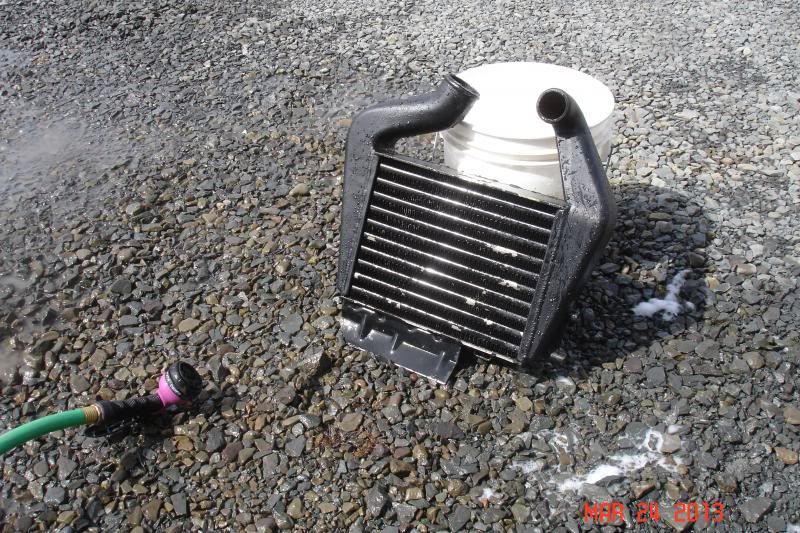
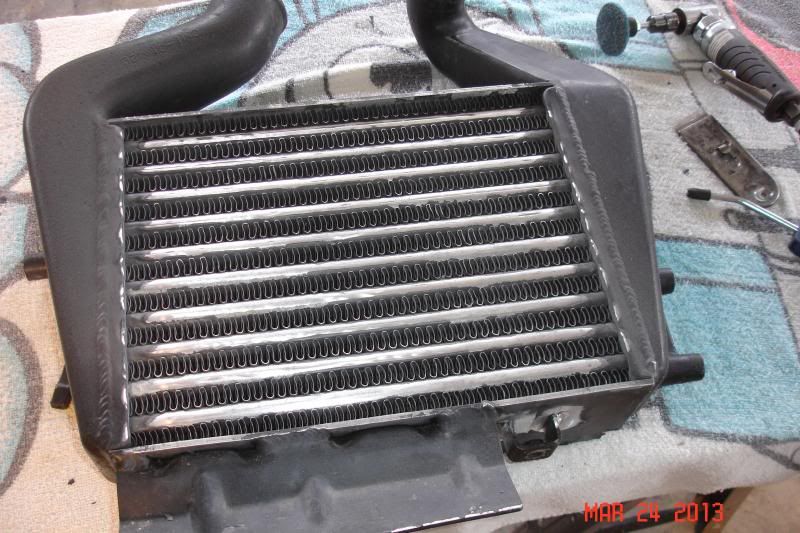
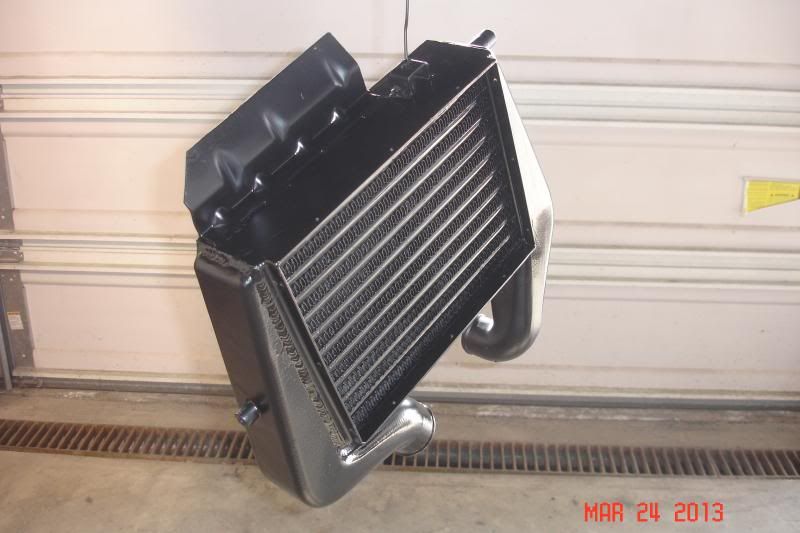
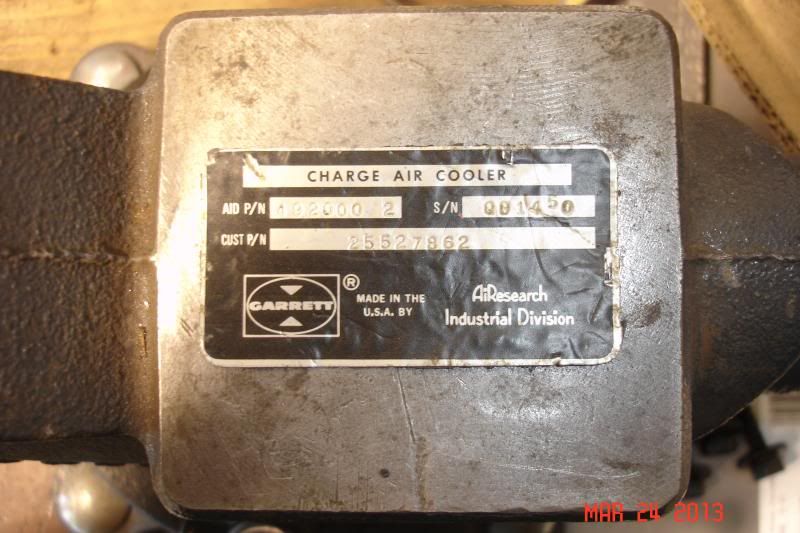
Today, I started by cleaning up the intercooler. Per the instructions on a Turbo Regal website, I first poured a solvent into the intercooler and sloshed it around. After doing this several times, the fluid became progressively less black in color when I dumped it each time. After the solvent, I then flushed it with soapy water and also scrubbed the exterior. I had already blown a lot of road debris out of the fins with my air gun, but I was still able to get more out with the "jet setting" on my hose. The paint was coming off the tubes and also in a few places on the flat surfaces. I was able to carefully remove the foil decal affixed to the top of the intercooler with a razor blade and will glue it back in place later this week.
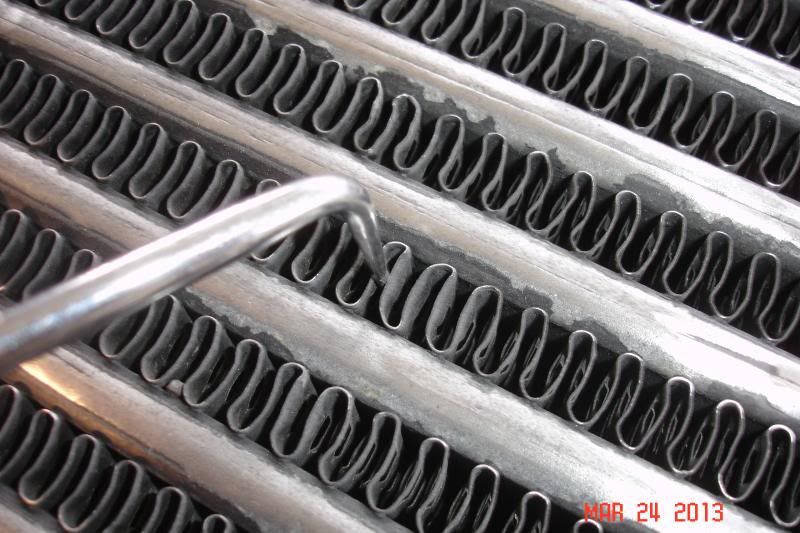
After blowing the intercooler dry, I used my angle grinder with a Roloc fiber disc to clean each tube. Most of the paint, or whatever was on there from the factory, flaked right off. It almost appeared to have the same consistency as powder coating although I am not sure how prevalant that was back in 1987. I then dry sanded the rest of the intercooler before flushing it all out again with clean tap water. I used a small hose pick to straighten a couple of bent fins and also pried a couple of small stones out that were lodged in them. After that, I baked it in the oven at 200 degrees for a little over a half hour to ensure that all the water was evaporated from the inside and also from the fins so as not to cause issues with the new paint. A couple of light coats of semi-gloss black made it look like new.
-
03-24-2013, 06:29 PM #42Veteran
- Join Date
- Feb 2009
- Location
- Mansfield, PA
- Posts
- 22,146
Black & Blue- '02 WS.6 / '07 Suburban
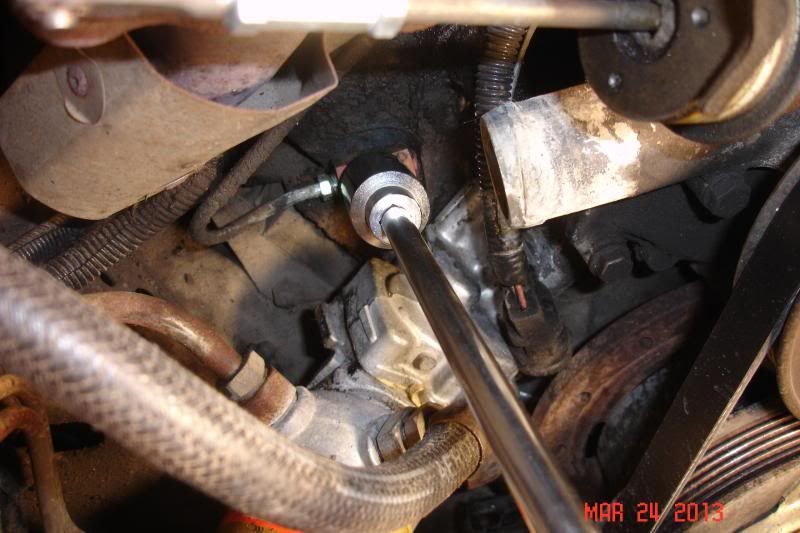
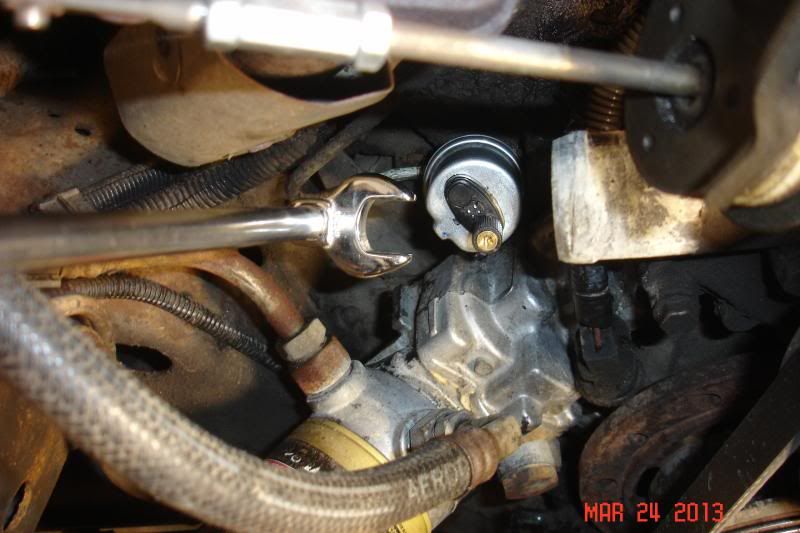
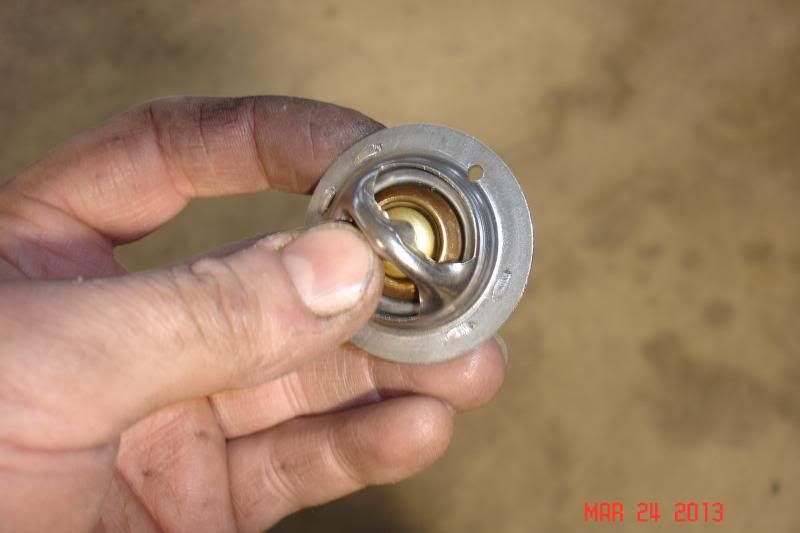
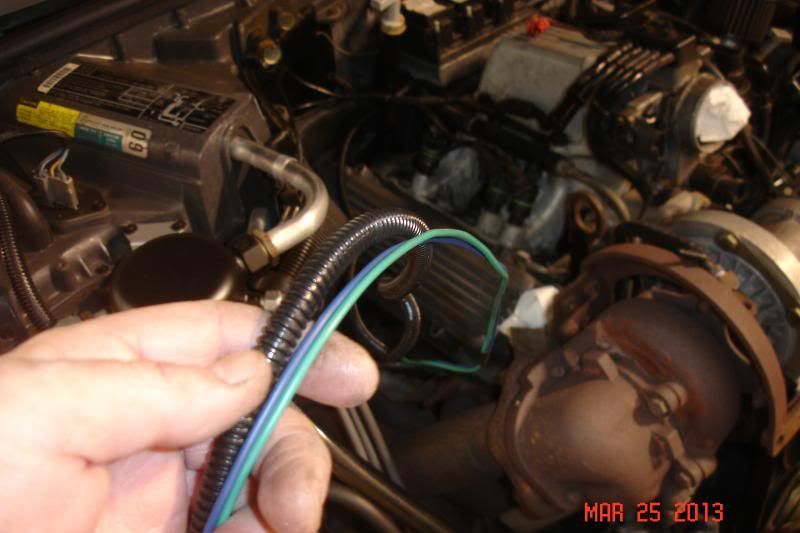
After painting the intercooler, I re-installed the air dam to the bottom of the core support. I checked out the pictures Chris sent me of his father's Grand National, and drilled a new mounting hole for the center portion of the air dam. Not sure why, but the holes were not on the same plane and things were somewhat skewed from where I thought they should be. The new gauges arrived last week and I removed the factory idiot light senders and installed the new ones. Kirbans makes a nice package that includes the gauge and correct sender with instructions specfic to these cars. I had to use a sensor socket to remove the stock oil pressure sender and then a crows foot to install the new one. After the sensors were in place, I installed the new thermostat and water pump bypass hose. I always drill a small hole in any thermostat that does not come equipped with an air bleed. This is cheap insurance against an air locked thermostat.
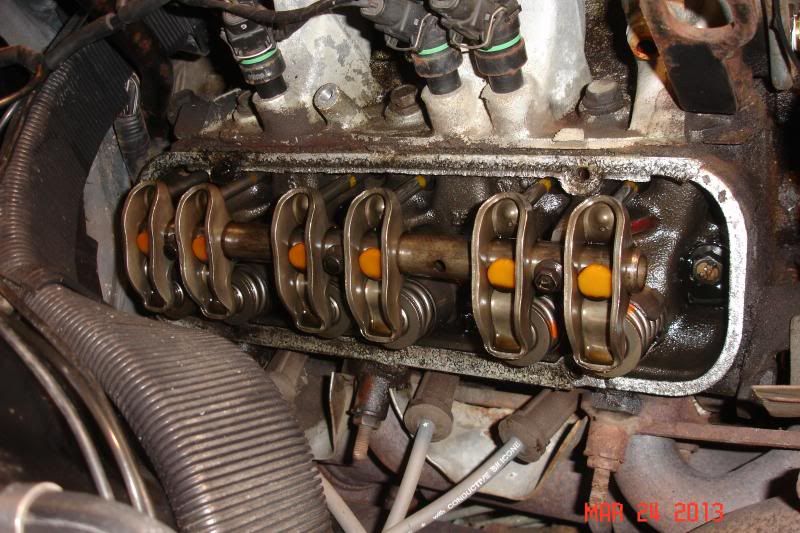
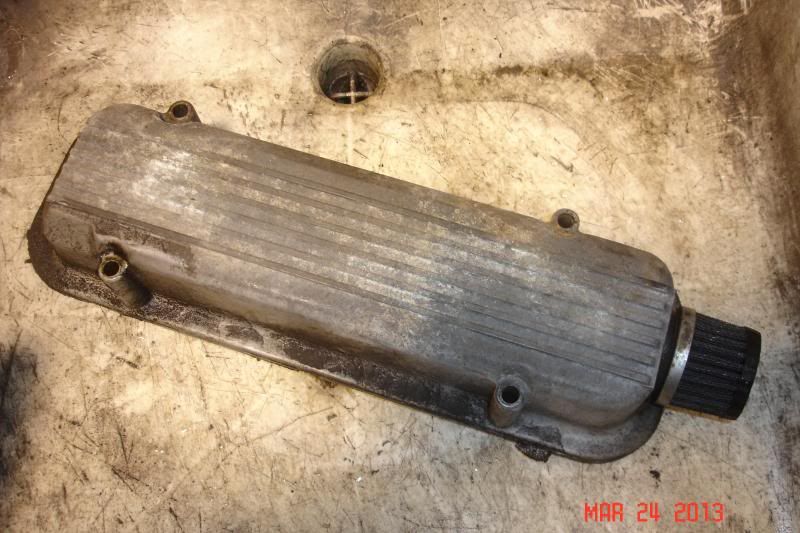
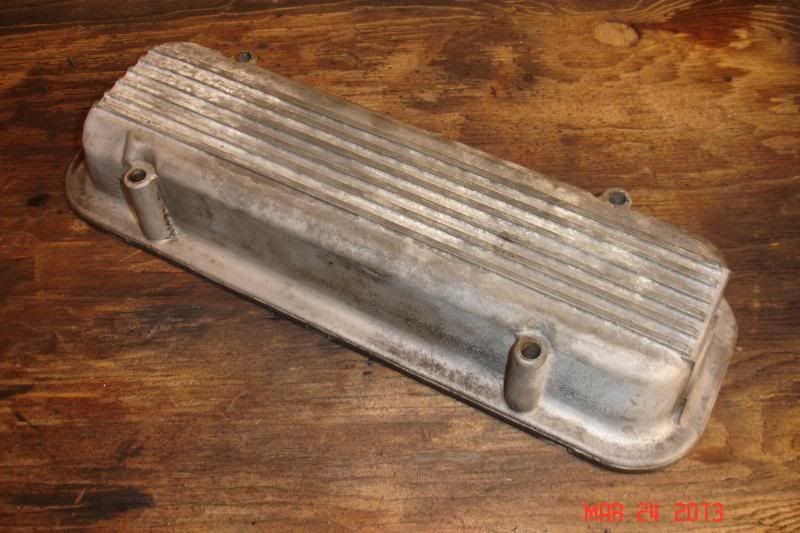
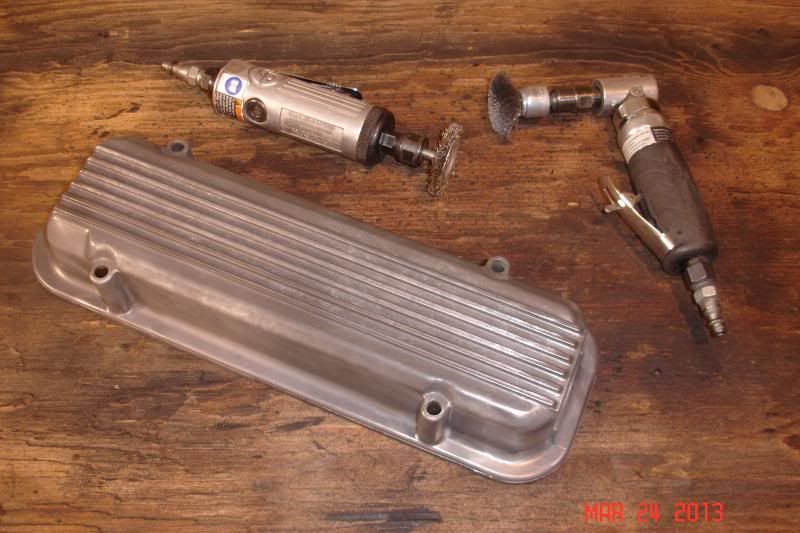
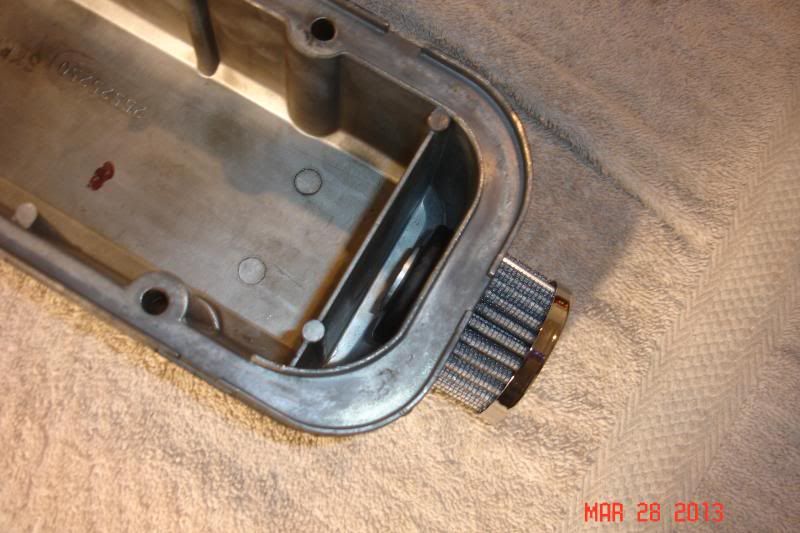
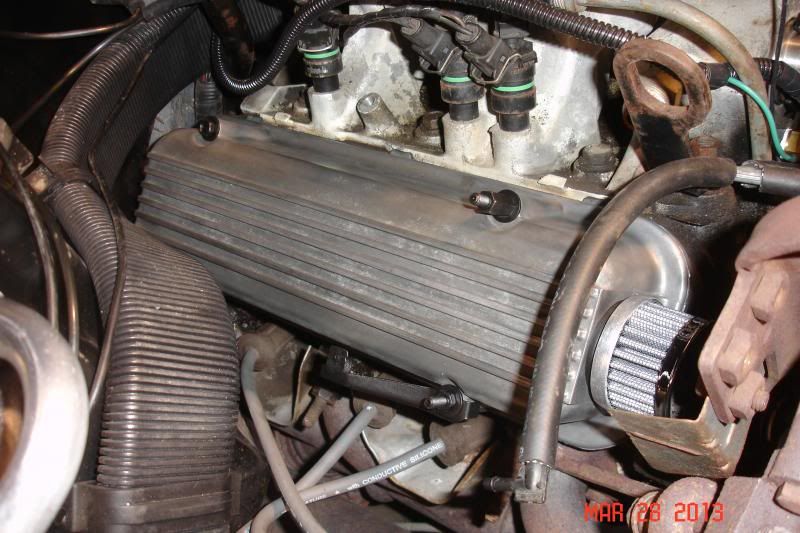
I had planned on shutting down after that, but decided to go ahead and pull the passenger side valve cover. The plan is to simply clean the covers up and install new neoprene gaskets. The cover was simple to remove and there are no real clearance issues. It appeared that the covers were both leaking a bit and there was a cork gasket lurking underneath. I washed the cover in hot, soapy water and then blew it dry. There is a breather installed in place of the factory air tube on the passenger side and I will maintain this as the factory setup can pull oil into the intake. A new grommet and breather have been ordered and should be here this week. Using a soft wire cone attachment on my angle grinder I cleaned up the cover. A small brass wheel was used on the gasket mating surface and between the fins. The cleaned up cover looks much better and is ready to go back on the car.
-
03-27-2013, 06:24 PM #43Veteran
- Join Date
- Feb 2009
- Location
- Mansfield, PA
- Posts
- 22,146
Black & Blue- '02 WS.6 / '07 Suburban
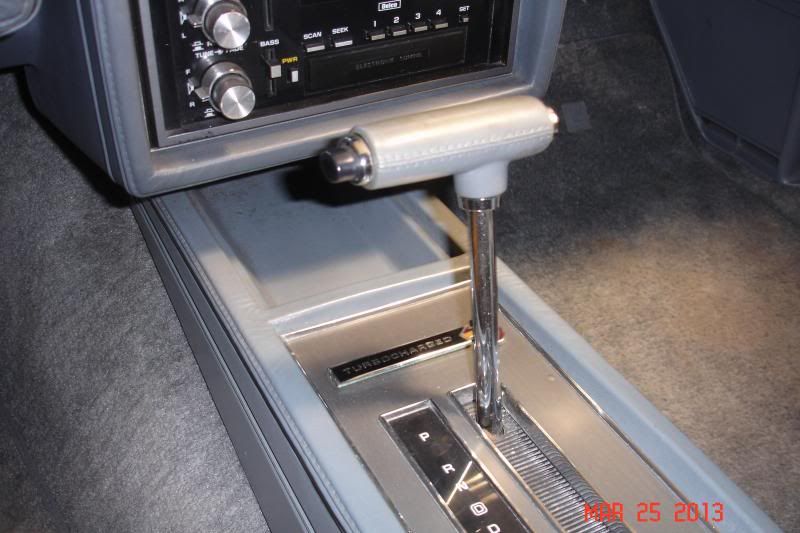
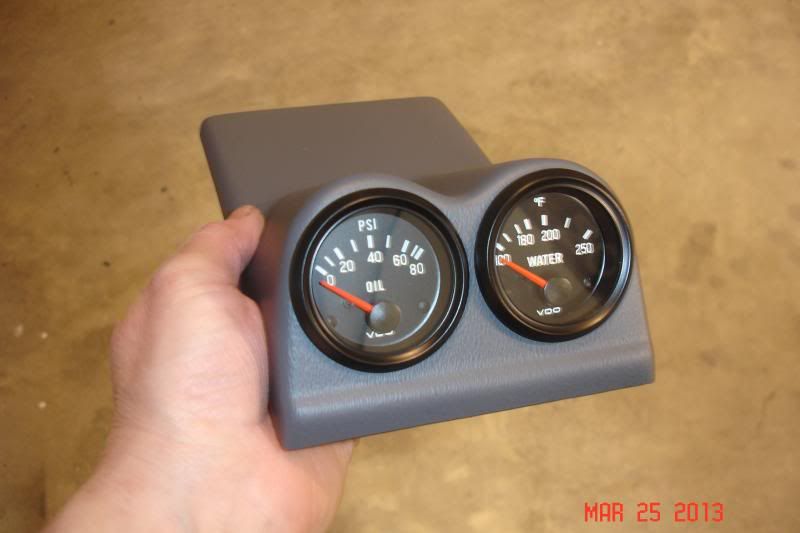
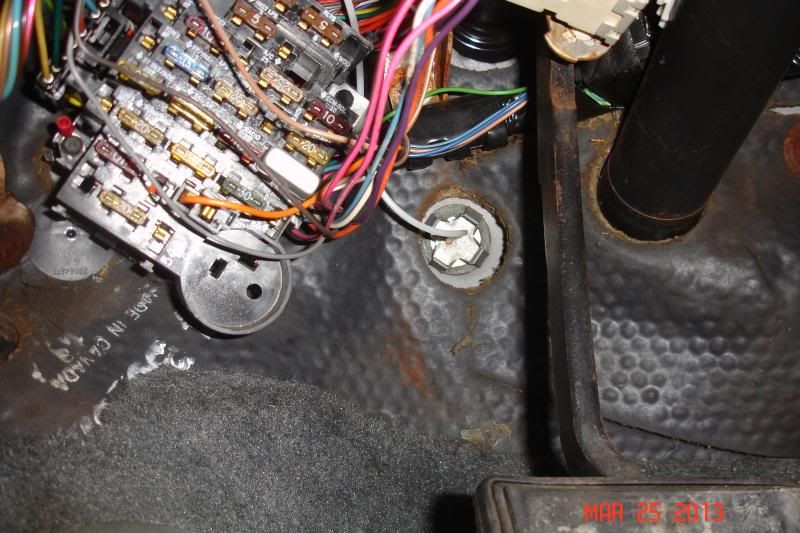
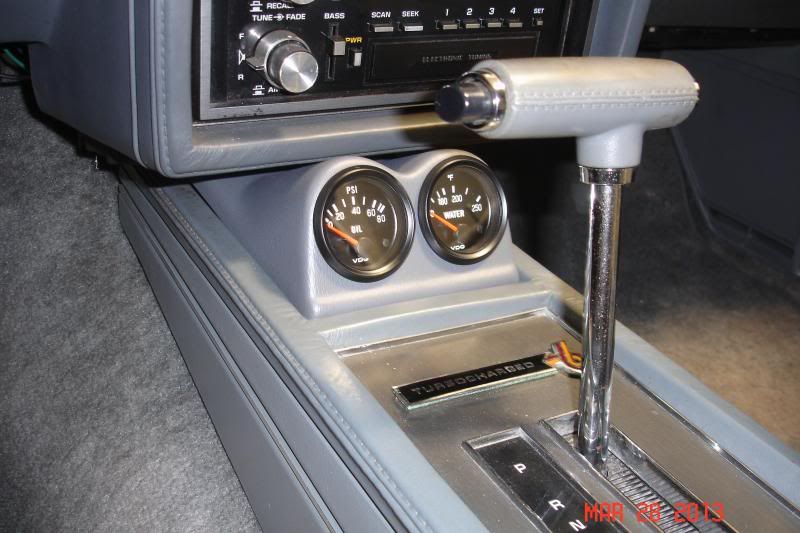
Worked on completing the gauge installation last night. Kirban's sells a gauge pod that fits into the tray in the console -- no holes have to be cut and no screws have to be run into anything. I went with their VDO gauge package for the oil pressure and water temperature as they come with the correct senders and match the boost gauge that was installed by the previous owner. I have everything installed, but forgot to take a pic of the finished product... will get one later and add it to the thread. I did enlarge the hole in the firewall and installed a rubber grommet to keep everything safe before shooting the wires through. I disconnected the tube for the boost gauge and need to get that back in place through the grommet as well.
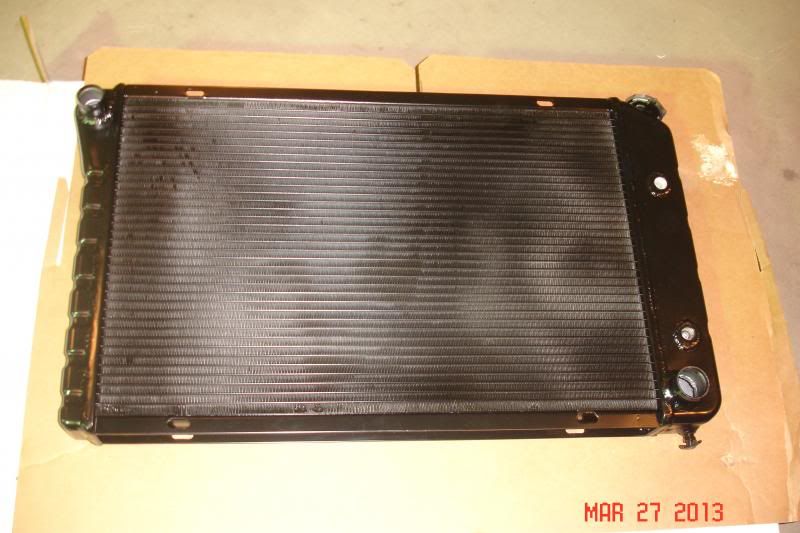
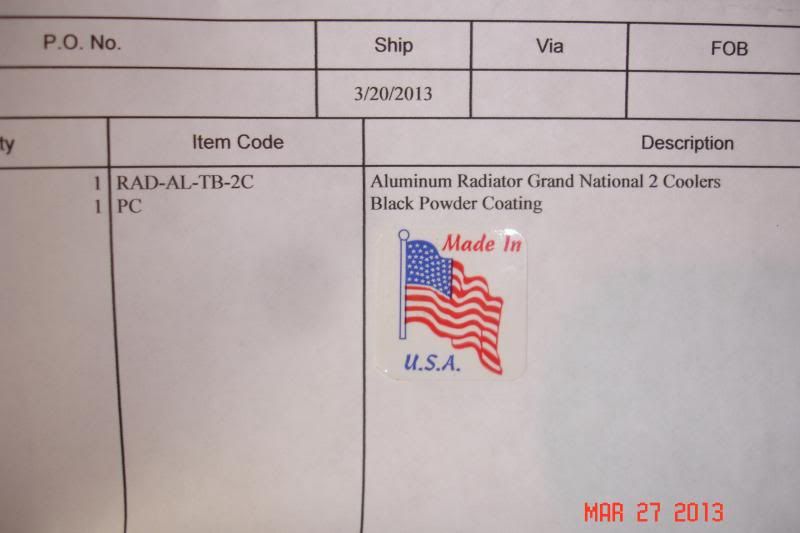
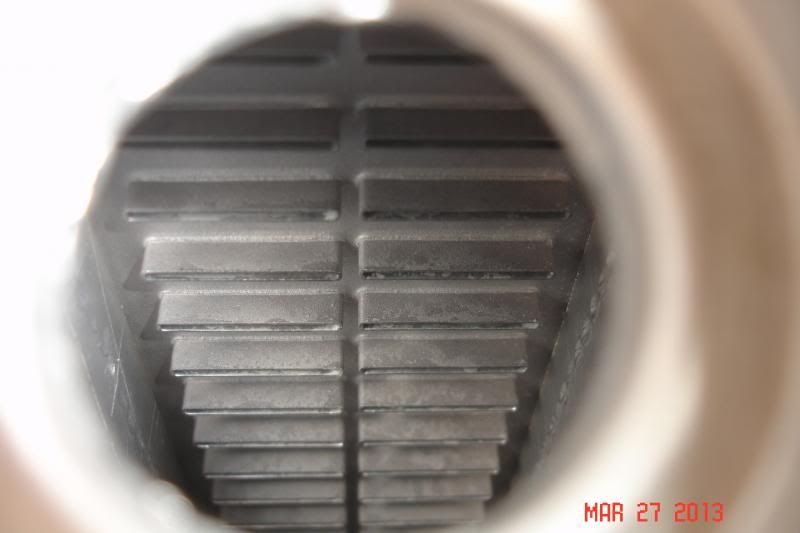
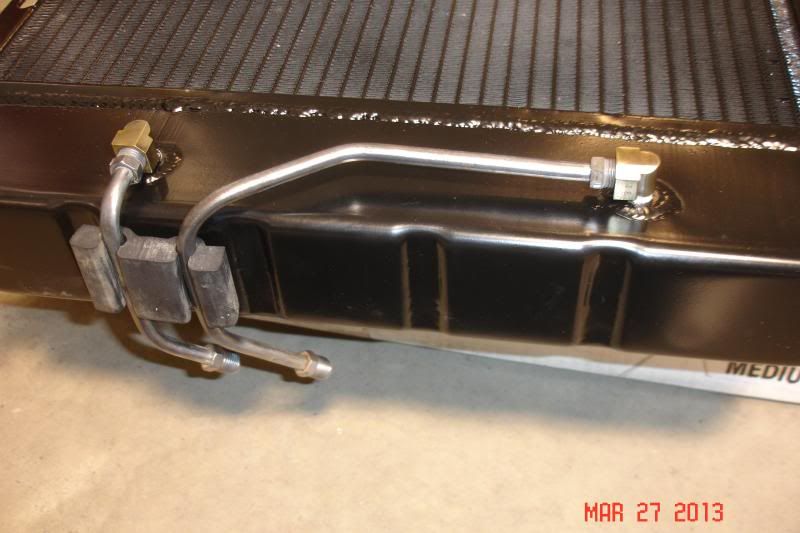
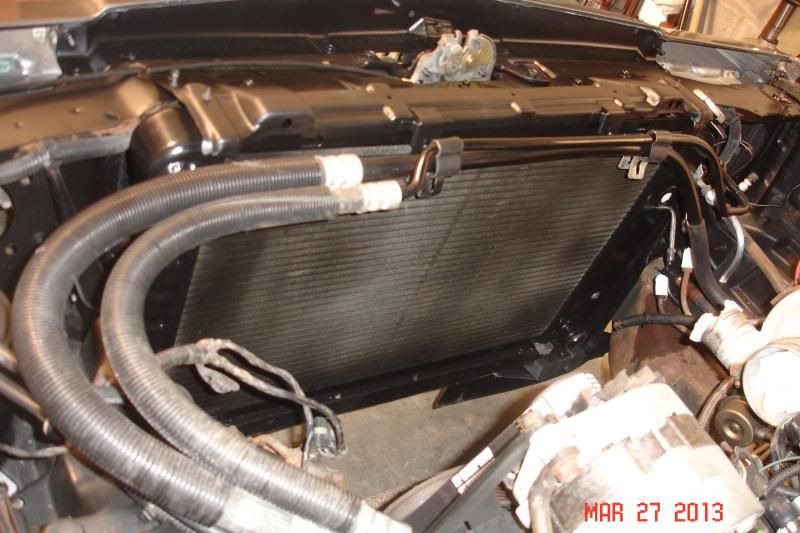
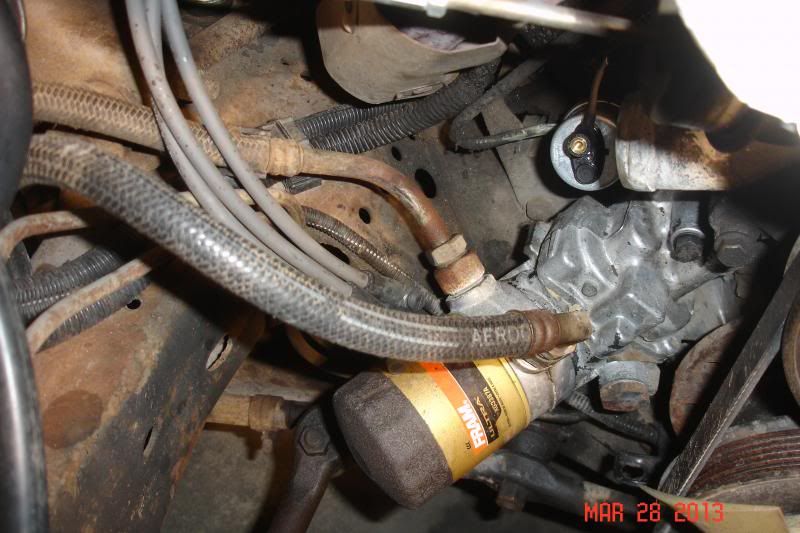
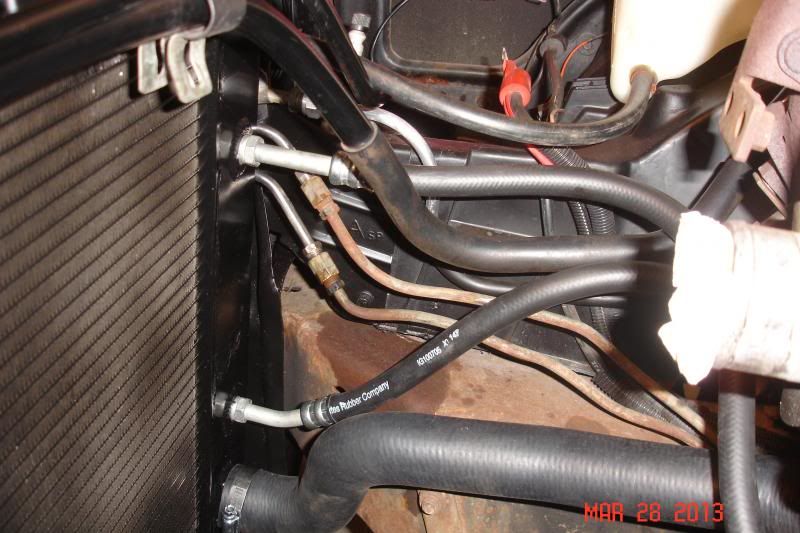
The radiator finally arrived today. It was actually worth the wait -- turns out it is a USA made dual core aluminum radiator. For whatever reason, when I ordered it from Kirbans, I assumed I was getting a copper/brass replacement with a larger core. The only modification I had to do was to clearance an aluminum bracket that holds the AC lines and slightly bend one of the AC lines. I cleaned up and swapped over the transmission cooler lines as they attach to the front of the passenger side tank and have to be in place before you drop it into the core support. With the radiator in place, I used a flashlight and my bore scope to check for clearance all the way around the bottom and sides. Tomorrow, I'll connect the transmission cooler lines and install the new oil cooler lines.
-
03-27-2013, 06:26 PM #44Sold: LS1 '85 El Camino

- Join Date
- Dec 2005
- Location
- Laurel, Maryland
- Posts
- 4,975
2000 Grand Prix GTP- 2000 Trans Am WS6 M6
Sweet!!!
-
03-28-2013, 12:11 PM #45Member

- Join Date
- Apr 2012
- Location
- Iowa
- Posts
- 207
2002 Trans Am WS6 - Red- 2013 Chevy Traverse LTZ
Nice car. Good luck with the project.
-
03-28-2013, 07:01 PM #46Veteran
- Join Date
- Feb 2009
- Location
- Mansfield, PA
- Posts
- 22,146
Black & Blue- '02 WS.6 / '07 Suburban
Thanks! Getting close to being done.
Here's a shot of the gauge pod. I just have to tuck the wires together and hit them with a few zip ties under the dash to keep them out of harms way.
I was out in the garage before 6:00 this morning and buttoned up the passenger side valve cover. I was waiting for a new breather element and grommet from Kirbans. This replaces the factory breather that is plumbed into the turbo inlet bell. I cut about 3/8" off the neck so that the breather can't bottom out against the baffle. The instructions recommend taking 1/2" off as the breather is an off the shelf piece rather than custom for this application. The fit on the new grommet is quite tight and it looks like it should work without any leakage. The cap is chrome and I am not at all into engine bay bling. Fortunately, it is tucked in behind the turbo and once the heat shield is installed not too much is visible.
Tonight, I attached the transmission cooler lines after massaging the lines to mate up with the ones installed onto the new radiator. Being a bit thicker than the stock radiator, I had to pull some of the bend out of the lines to reach. I then had a pretty good fight with the oil cooler lines. They were both stuck fast and I was afraid of breaking the fan on the crank pulley if things suddenly let go. I was finally able to break the top fitting free from underneath the car and once it was out of the way the other one wasn't quite as bad. The new hoses look much nicer and even though they do not have the fabric covering like the stock pieces, the ends are closer to being correct than other sets that I looked at on line. These hoses came from Highway Stars, Ltd. and the fit was perfect. Once they were in place, I installed the lower radiator hose and then called it a night. I trimmed the hose just a bit on each end for added clearance after test fitting it the first time.
-
04-03-2013, 06:52 AM #47Member

- Join Date
- Jun 2011
- Location
- N.C.
- Age
- 54
- Posts
- 266
Blue- 2002-WS6
nice car man, i had a 83 black one like that but some one had replaced the turbo 3.8 with a mildly built 305, it was fun and smooth ride tho, congrats!!!!
-
04-03-2013, 06:40 PM #48Veteran
- Join Date
- Feb 2009
- Location
- Mansfield, PA
- Posts
- 22,146
Black & Blue- '02 WS.6 / '07 Suburban
Thanks, Mr. T. Hoping to get it all back together this weekend. Still waiting for the intercooler hoses to make an appearance.
-
04-04-2013, 02:39 AM #49I like turtles

- Join Date
- Aug 2007
- Location
- Corn and Soybean fields
- Posts
- 5,483
Gray/ White- 09Ram 1500 83 Thunderturd

 Everyone loves the brick
 Originally Posted by cpop98ws6

Well the trick I remember besides open cone and no high beam is cut the end off an office trash can to make a ram air if you will scoop to the intercooler. Supposed to be good for a tenth or two
-
04-04-2013, 06:00 PM #50Veteran
- Join Date
- Feb 2009
- Location
- Mansfield, PA
- Posts
- 22,146
Black & Blue- '02 WS.6 / '07 Suburban
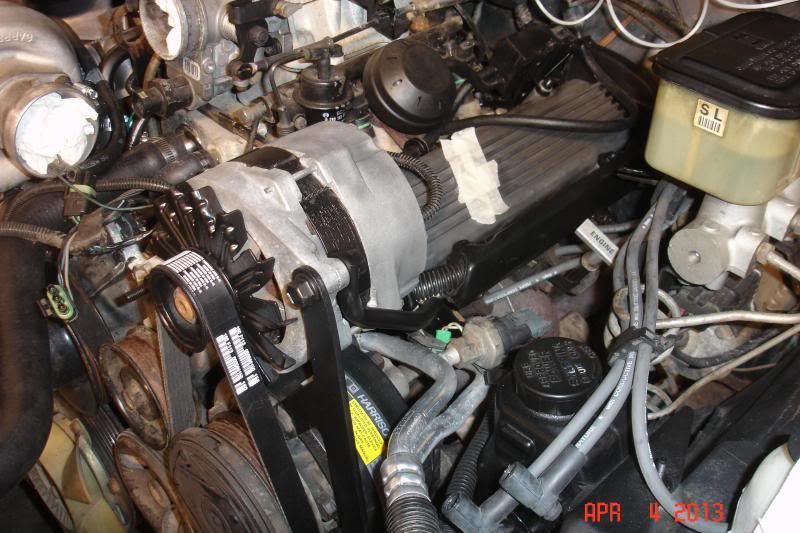
Rehab on the driver side valve cover and alternator, plus a few miscellaneous brackets in that area, was finished up this evening. Still working on a replacement breather. To be safe, I may order one from Kirbans, but I think I am going to attempt to modify the one I purchased to fit the Buick valve cover. Found that the overflow bottle is weeping just a bit. Looks like someone applied an epoxy to the hose fitting at some point in time and it finally gave up. Part of the thread is also missing from the filler neck, so I'll just have to order a new one and be done with it.
-
04-06-2013, 05:46 AM #51Member

- Join Date
- Jan 2009
- Location
- MARYLAND
- Age
- 51
- Posts
- 807
BLACK- 1998 PONTIAC TA
I have always LOVED the buick gn's. Something about them always got my heart pumping. Awesome find. What a clean looking car.
-
04-06-2013, 07:52 AM #52Veteran
- Join Date
- Feb 2009
- Location
- Mansfield, PA
- Posts
- 22,146
Black & Blue- '02 WS.6 / '07 Suburban
Same here. We never really had any in our area and when I would see them in our travels or at car shows, they always got my attention.
I think I came up with a driver side valve cover breather that I can live with. Will know more in about 15 hours...
-
04-07-2013, 02:26 PM #53Veteran
- Join Date
- Feb 2009
- Location
- Mansfield, PA
- Posts
- 22,146
Black & Blue- '02 WS.6 / '07 Suburban
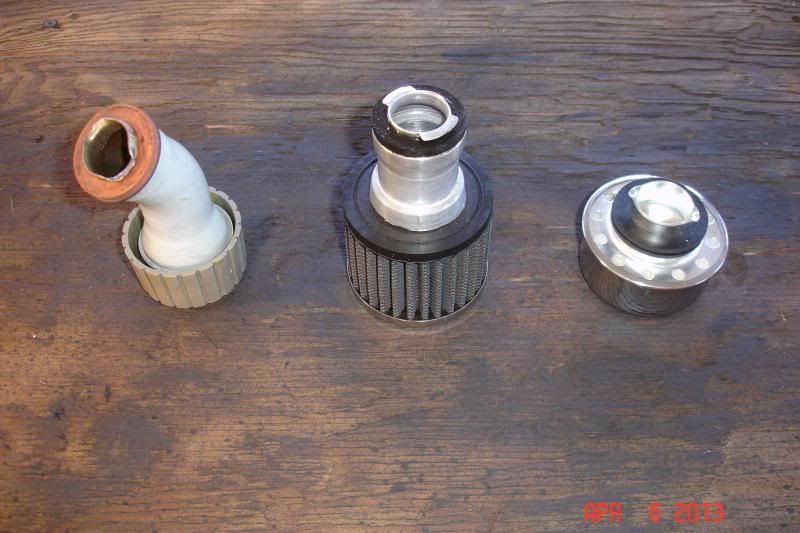
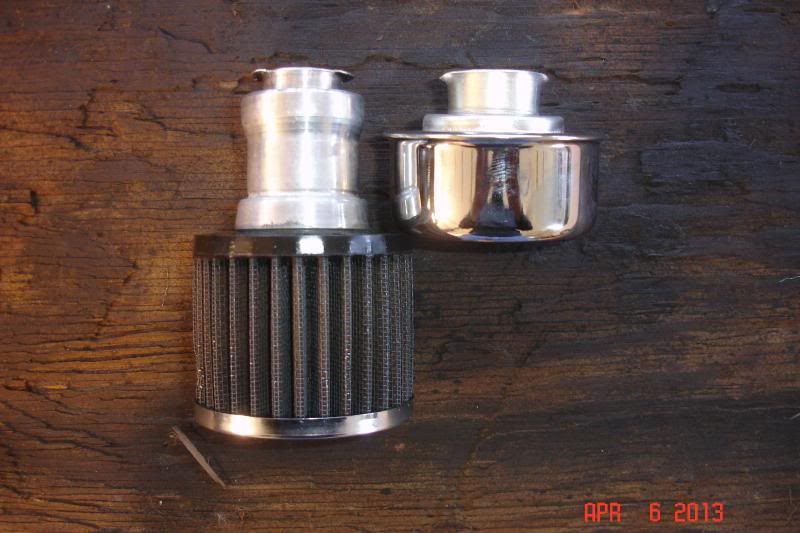
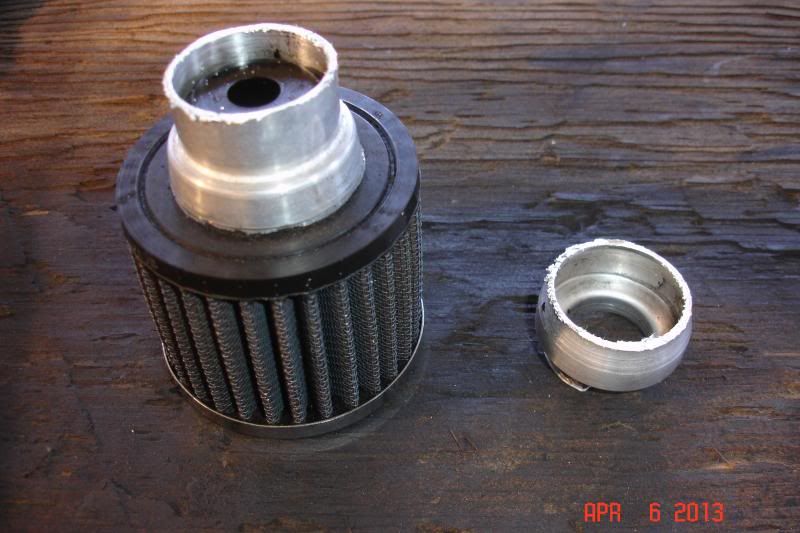
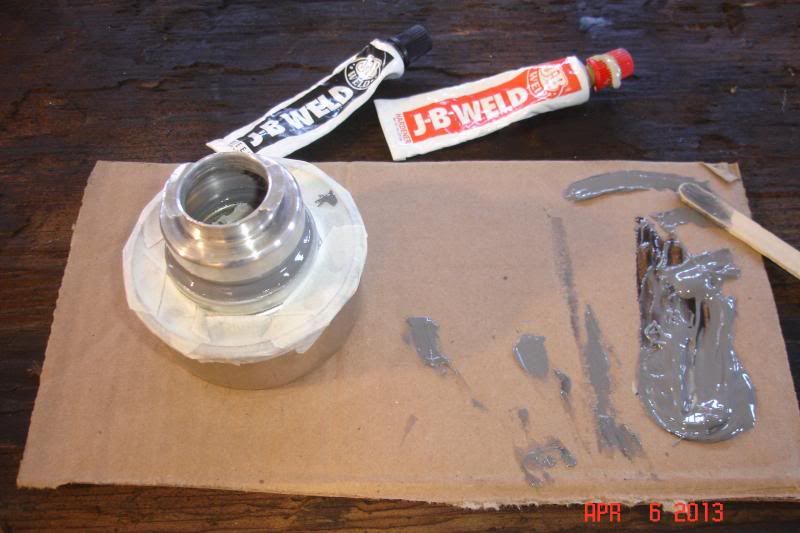
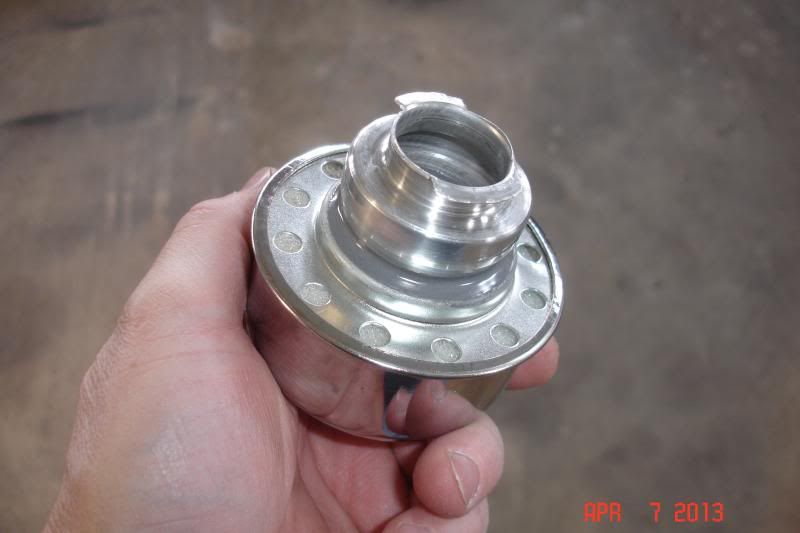
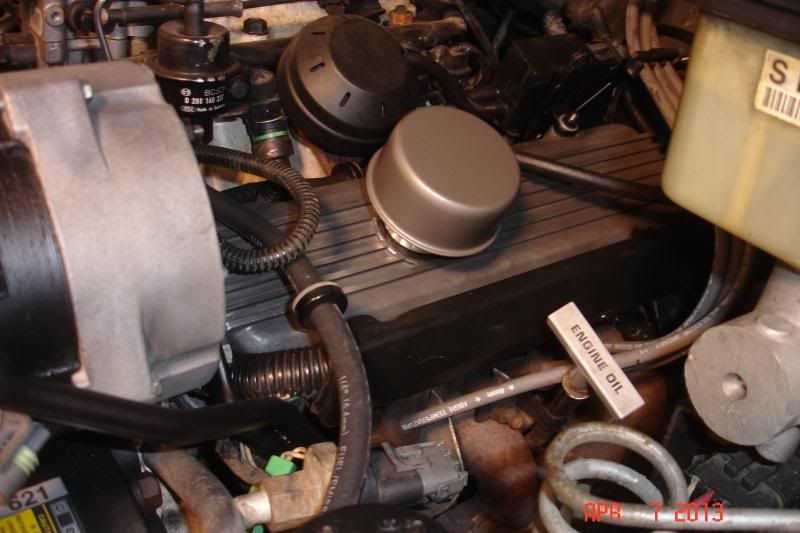
I successfully cross bred an aftermarket Chevy breather with an aftermarket Buick breather. First pic shows the stock Buick breather on the left, the aftermarket Buick breather in the center, and a Chevy style breather from our local parts store.

-
04-07-2013, 02:58 PM #54Giant Dicks Car Club

- Join Date
- Nov 2006
- Location
- Millerton, PA
- Posts
- 5,191
2005 Ram- 1978 Firebird
subscribed..
-
04-07-2013, 05:23 PM #55Veteran
- Join Date
- Feb 2009
- Location
- Mansfield, PA
- Posts
- 22,146
Black & Blue- '02 WS.6 / '07 Suburban
Getting so close...
-
04-07-2013, 05:33 PM #56Yeah baby! Yeah!

- Join Date
- May 2009
- Location
- okc
- Posts
- 2,567
Silver 2002 WS.6- Red 1989 Formula
Looking great! Don't you hate how the JB Weld caps always crack?
-
04-07-2013, 05:42 PM #57Veteran
- Join Date
- Feb 2009
- Location
- Mansfield, PA
- Posts
- 22,146
Black & Blue- '02 WS.6 / '07 Suburban
I rarely use it, but yes... I did find that annoying.
-
04-11-2013, 07:06 PM #58Veteran
- Join Date
- Feb 2009
- Location
- Mansfield, PA
- Posts
- 22,146
Black & Blue- '02 WS.6 / '07 Suburban
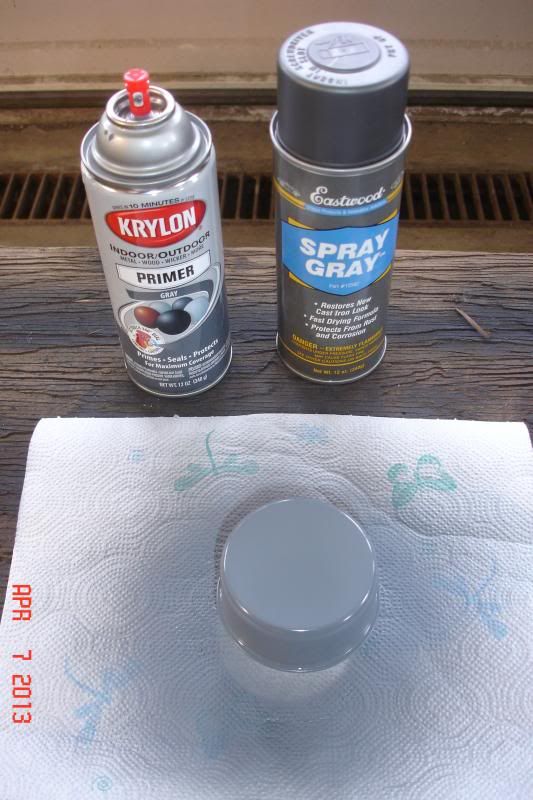
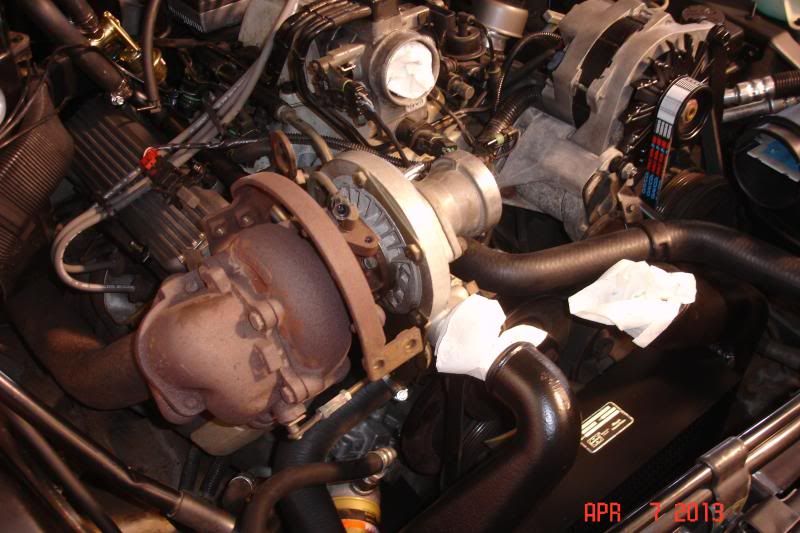
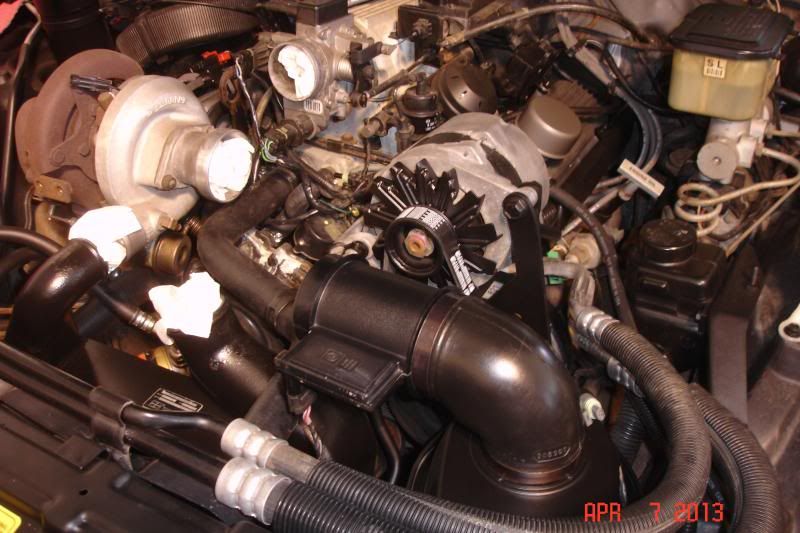
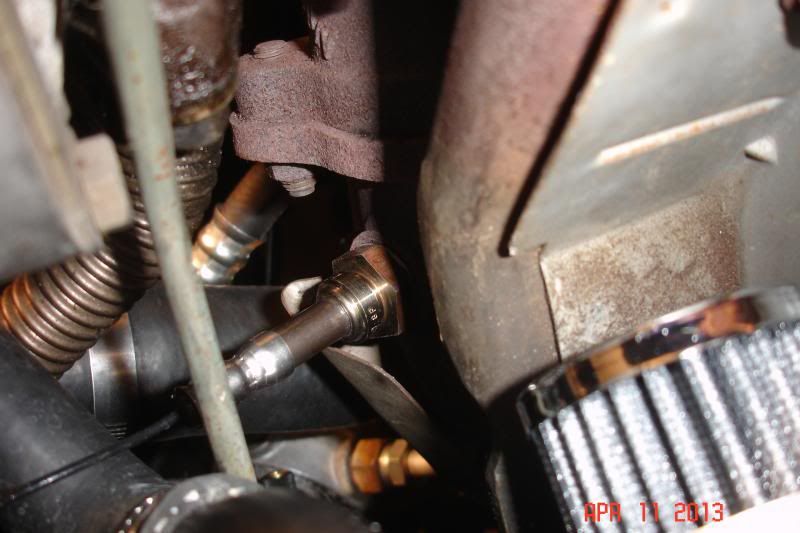
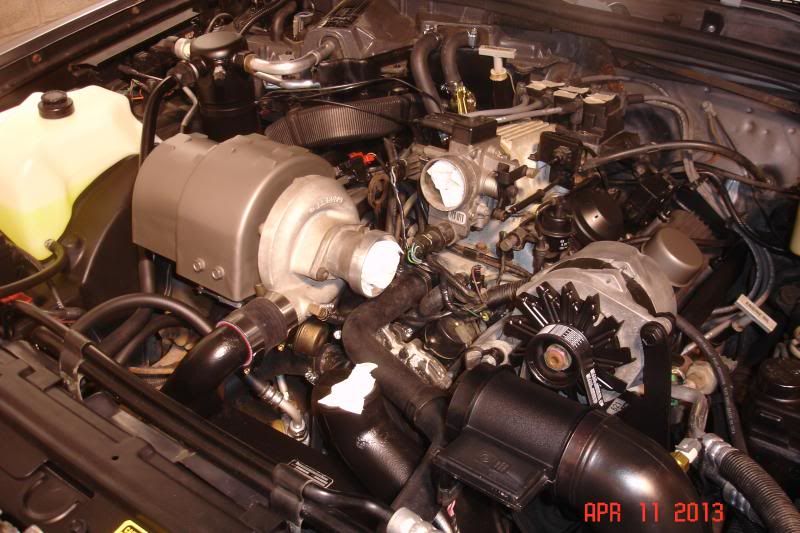
The new overflow tank showed up yesterday and has been installed. I cleaned up the metal tube that connects the intercooler to the throttle body. There were a few rust spots and marks (someone had it in a vice at one point in time) so I wet sanded and buffed it just enough to clean it up. Replaced the IAT and the O2 sensor just for the sake of changing them out. O2 sender is tucked in under the turbo and points up towads the intake manifold. Not real easy to get at, but changed it out without any real issues. Managed to get one of the hoses installed this evening and then bolted the turbo heat shield back on. The shield in stock condition is probably topped with a tin/zinc electroplating... mine was rusted quite a bit but cleaned up great in the blast cabinet. I am not one for the look of silver paint, so I elected to hit it with some Eastwood Spray Gray for now. Just waiting for the air hose that runs from the air cleaner to the turbo inlet and the underhood work will just about be done.
-
04-15-2013, 05:33 PM #59Veteran
- Join Date
- Feb 2009
- Location
- Mansfield, PA
- Posts
- 22,146
Black & Blue- '02 WS.6 / '07 Suburban
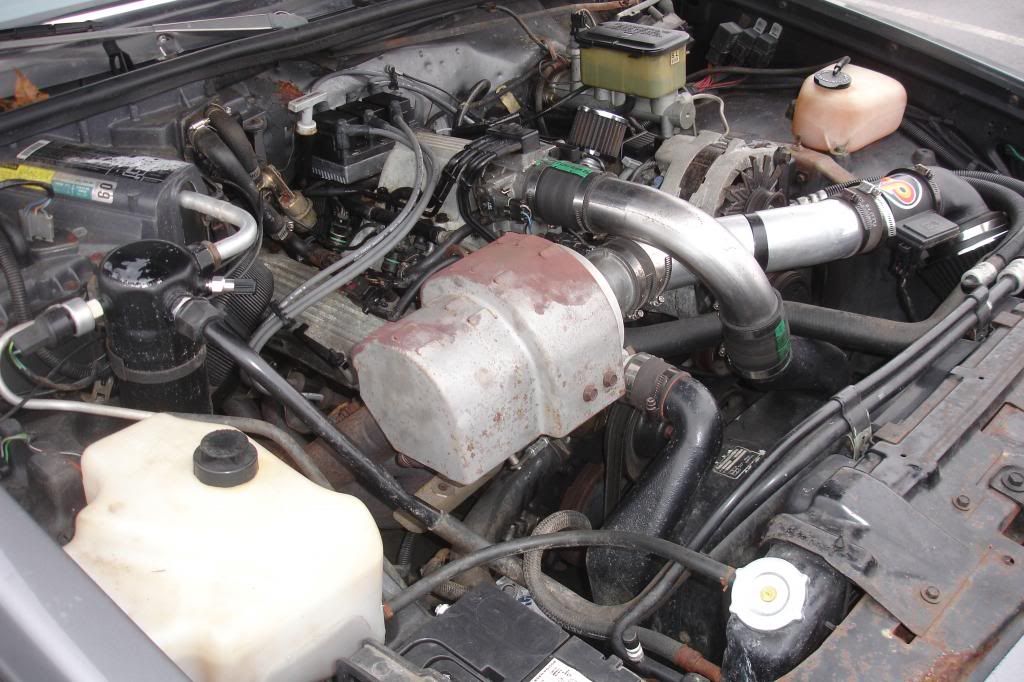
Finally drove it for the first time tonight since we brought her home. It is amazing how hard this thing pulls.

For comparison sake:
BEFORE:
AFTER:
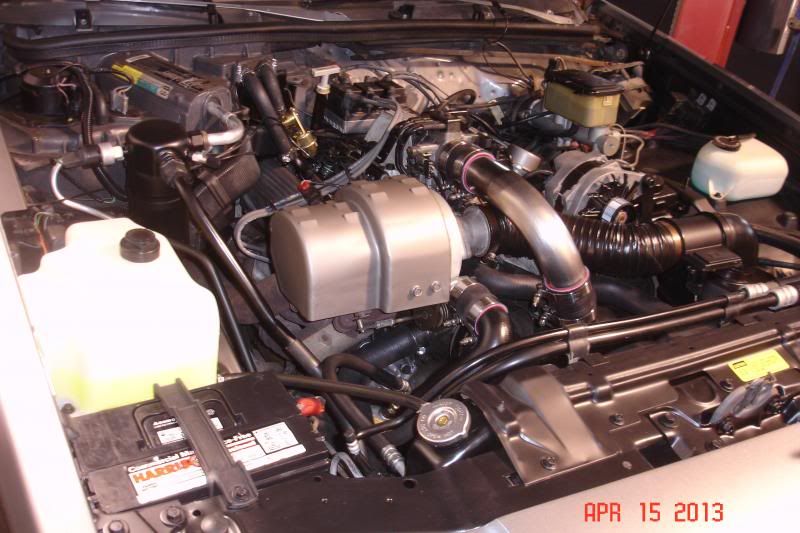
Still have a few minor things to address, but she is all back together and can be driven now.
-
04-15-2013, 05:53 PM #60Sold: LS1 '85 El Camino
- Join Date
- Dec 2005
- Location
- Laurel, Maryland
- Posts
- 4,975
2000 Grand Prix GTP- 2000 Trans Am WS6 M6
Very nice!!!

 Reply With Quote


Thread Information
Users Browsing this Thread
There are currently 2 users browsing this thread. (0 members and 2 guests)
Similar Threads
-
1987 Turbo Regal
By Redegal in forum Vehicles For Sale / TradeReplies: 23Last Post: 03-11-2010, 08:34 PM -
1998 Buick Regal GS Turbo
By casper the ghost in forum Vehicles For Sale / TradeReplies: 8Last Post: 03-03-2009, 03:17 PM

Bookmarks