

Results 261 to 280 of 292
-
01-28-2013, 06:16 PM #261Senior Member


- Join Date
- May 2010
- Location
- Wilkes-Barre, PA
- Posts
- 1,547
Black/Black- 98 WS6/04 Sierra Dmax
Did you make those jigs or but them? They are pretty nifty.
-
01-29-2013, 03:19 AM #262Veteran

- Join Date
- Feb 2009
- Location
- Mansfield, PA
- Posts
- 22,146
Black & Blue- '02 WS.6 / '07 Suburban
Picked them up at Carlisle. I believe either Harbor Freight or Grizzly has them.
-
01-31-2013, 06:30 PM #263Veteran
- Join Date
- Feb 2009
- Location
- Mansfield, PA
- Posts
- 22,146
Black & Blue- '02 WS.6 / '07 Suburban
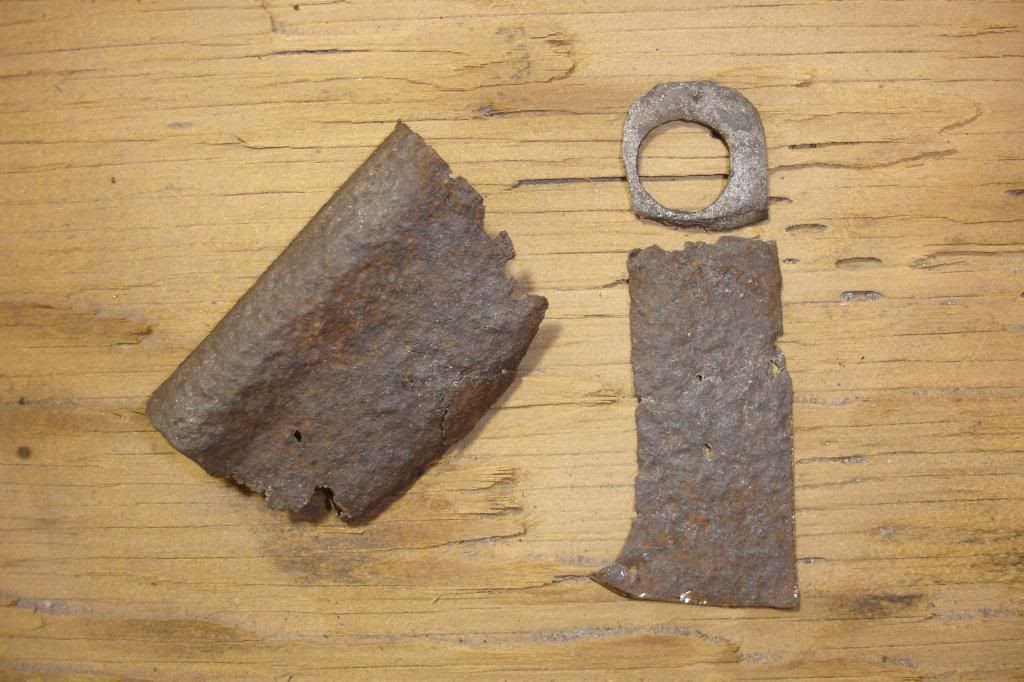
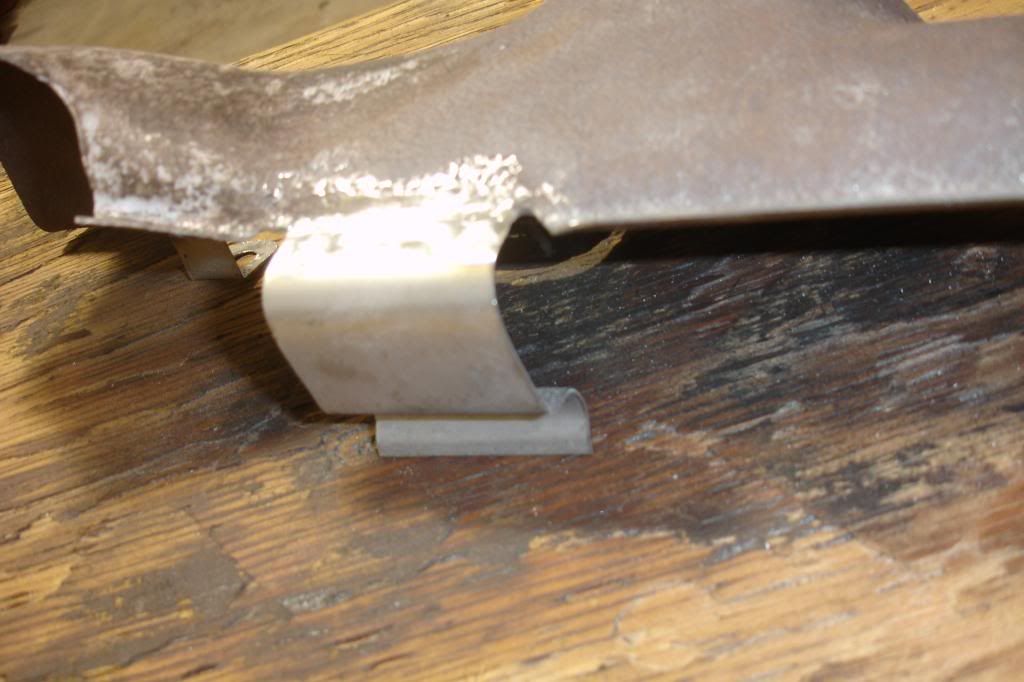
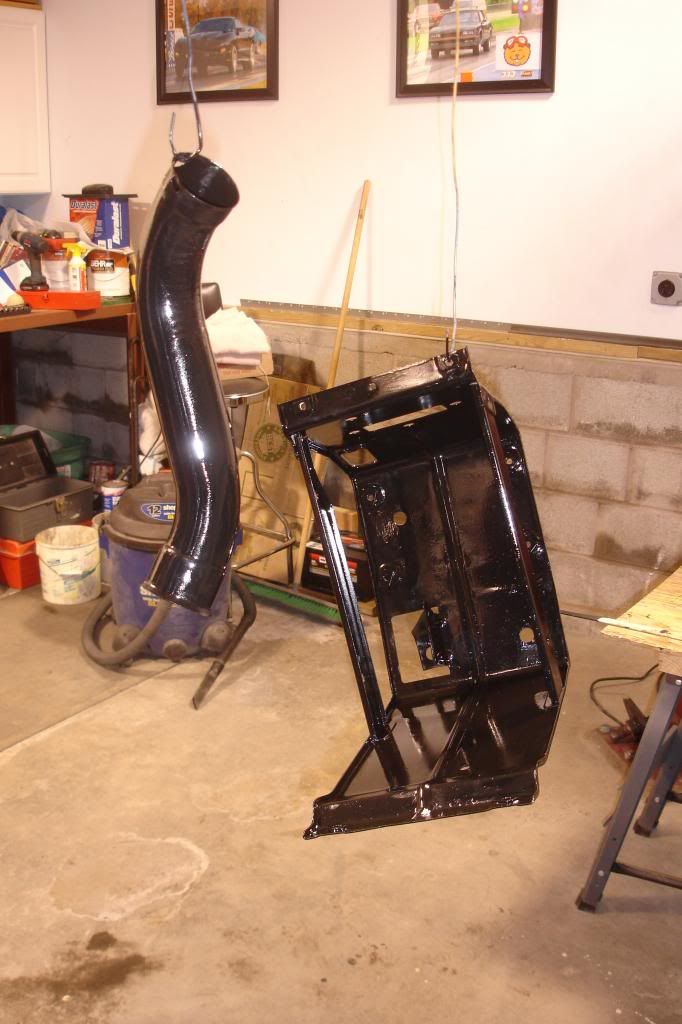
The car was missing the passenger side exhaust manifold shroud and hot air tube that runs from the shroud to the air cleaner. A friend happened to have both, but the shroud was in pretty rough shape. Unfortunately, no one is re-popping the small block shrouds so I had to take what I could get. The top rear mounting tab and bottom clip were essentially gone. I searched Google Images Tuesday night to see what the bottom clip was supposed to look like before I could fab a replacement.

I didn't think I would get to it this evening, but was actually able to start painting everything I have been working on lately. I applied a first coat of POR-15 Chassis Coat Black using a foam brush. Both the bottom and top radiator supports have to be flipped and the other side painted before the first coat will be finished. They will then get a light second coat and a final top coat of semi-gloss black spray paint.
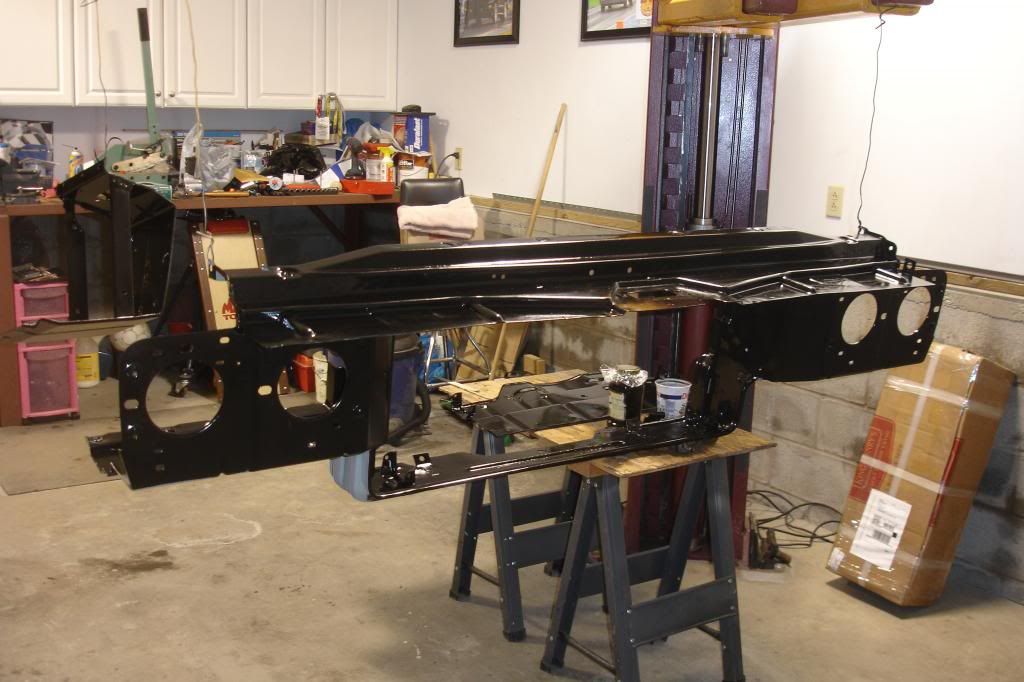
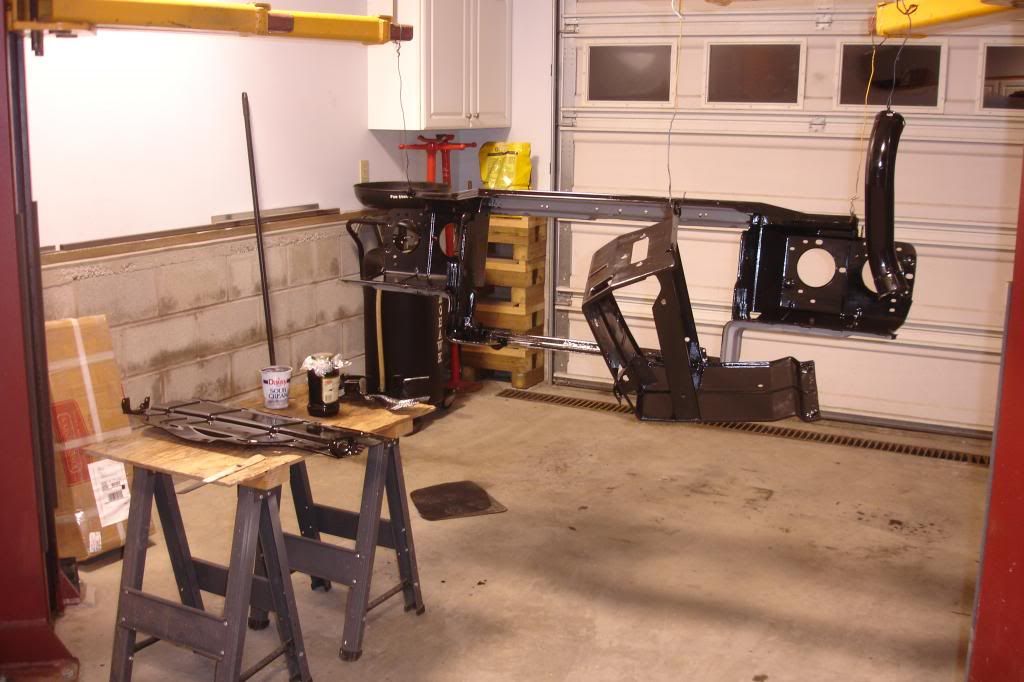
If all goes well, painting will be finished by Sunday night and I'll be working on refurbishing the hardware to assemble all of this onto the front of the frame and engine. I have a Be-Cool restoration style radiator sitting in the basement ready to go. They make aluminum radiators now formed just like the original factory radiator. They even come already coated black to blend in and look original to the car. No way I was going to throw a boxy, shiny aluminum radiator in this thing.
-
02-03-2013, 06:29 PM #264Veteran
- Join Date
- Feb 2009
- Location
- Mansfield, PA
- Posts
- 22,146
Black & Blue- '02 WS.6 / '07 Suburban
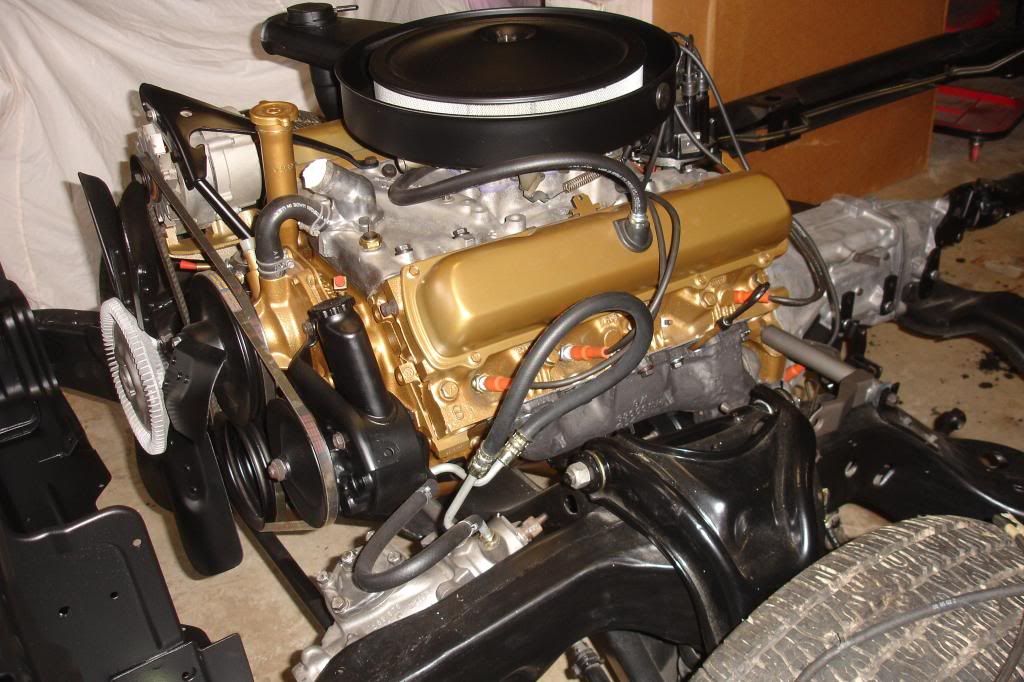
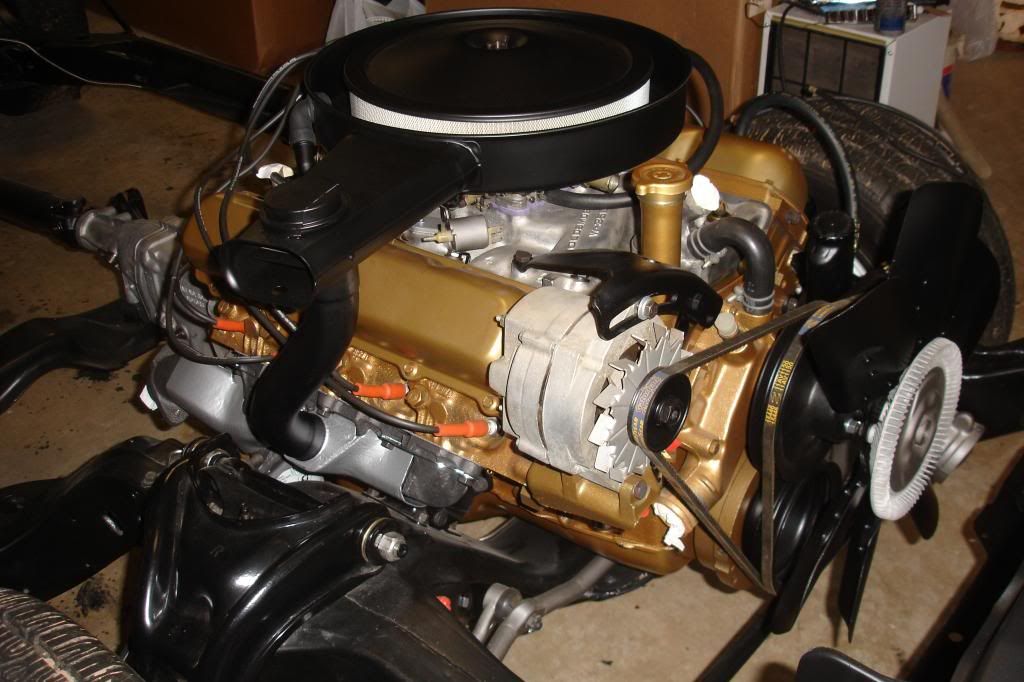
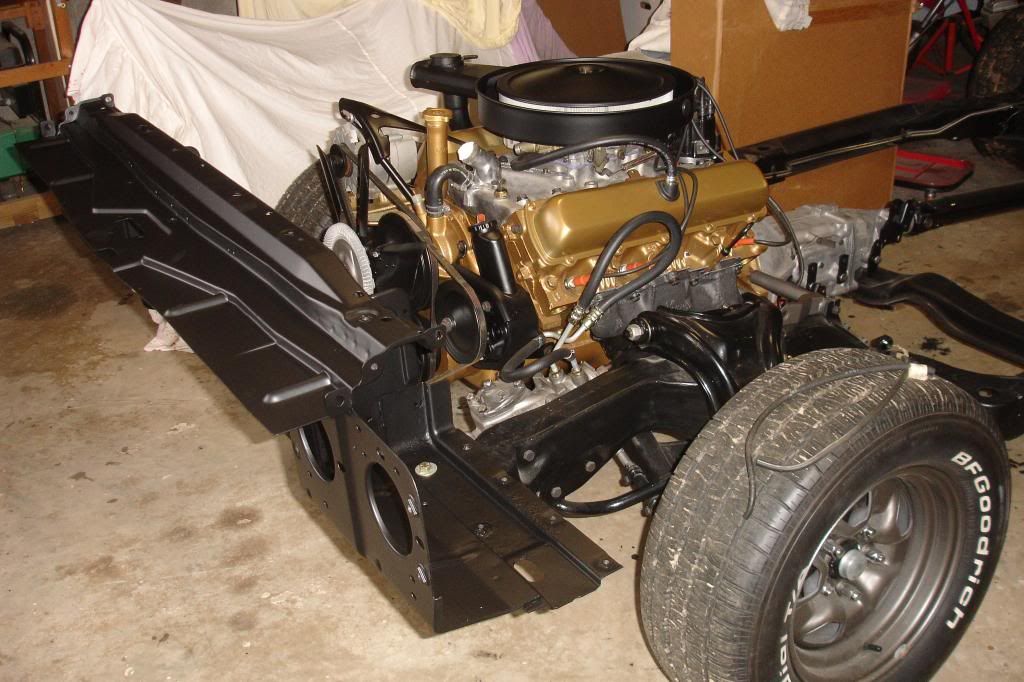
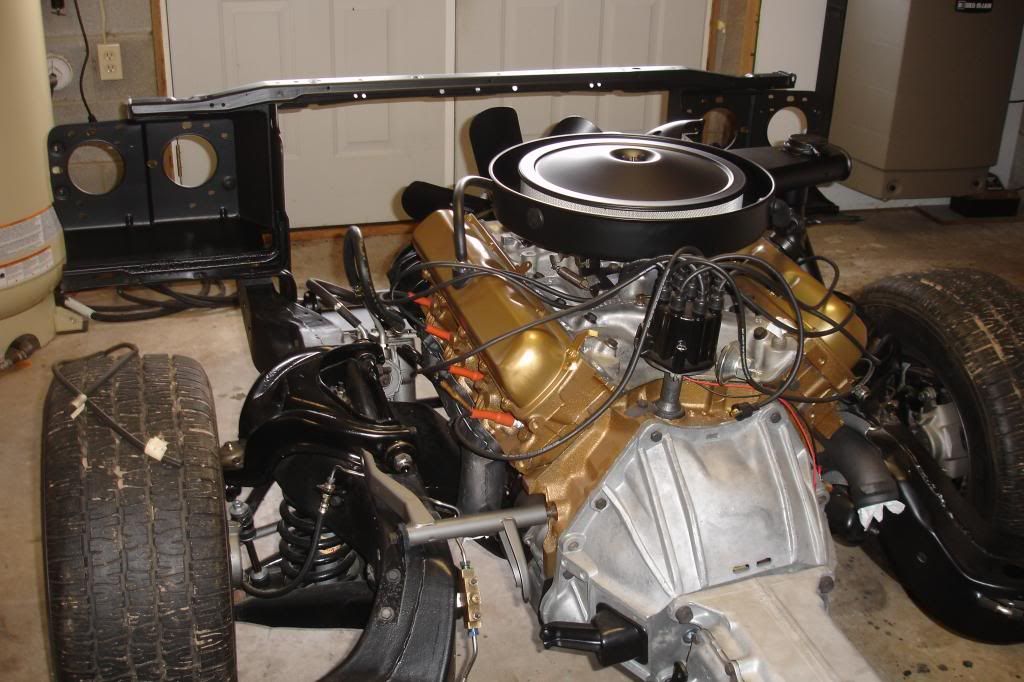
Bolted up the exhaust manifolds and installed the shroud and heat riser to the air cleaner. Everything went together pretty easy and looks good finally having the engine complete. After installing the driver side manifold, I realized that I had forgotten to add the power steering pump brace, so had to remove the front manifold bolt to slip it into place.
I ran a thread chaser through all the holes in the radiator support and cleaned out the POR and paint. I need to take another measurement, but I am fairly certain I can still get the chassis out of our basement with it bolted in place. Waiting now for an order from Fusicks and then I can get everything else attached to the core support.
-
02-04-2013, 03:54 PM #265Member

- Join Date
- Apr 2012
- Location
- Iowa
- Posts
- 207
2002 Trans Am WS6 - Red- 2013 Chevy Traverse LTZ
Awesome work. I would love to have the space to do the work on my T/A. I have a 2 car garage, but the wife insist she needs a spot. I just don't get it.

-
02-04-2013, 05:33 PM #266Veteran
- Join Date
- Feb 2009
- Location
- Mansfield, PA
- Posts
- 22,146
Black & Blue- '02 WS.6 / '07 Suburban
Thanks! I know what you mean -- our house originally had an attached one car garage and you can guess who's car was in that.

-
02-15-2013, 06:24 PM #267Veteran
- Join Date
- Feb 2009
- Location
- Mansfield, PA
- Posts
- 22,146
Black & Blue- '02 WS.6 / '07 Suburban
Sometimes you have to take a step backwards in a restoration...
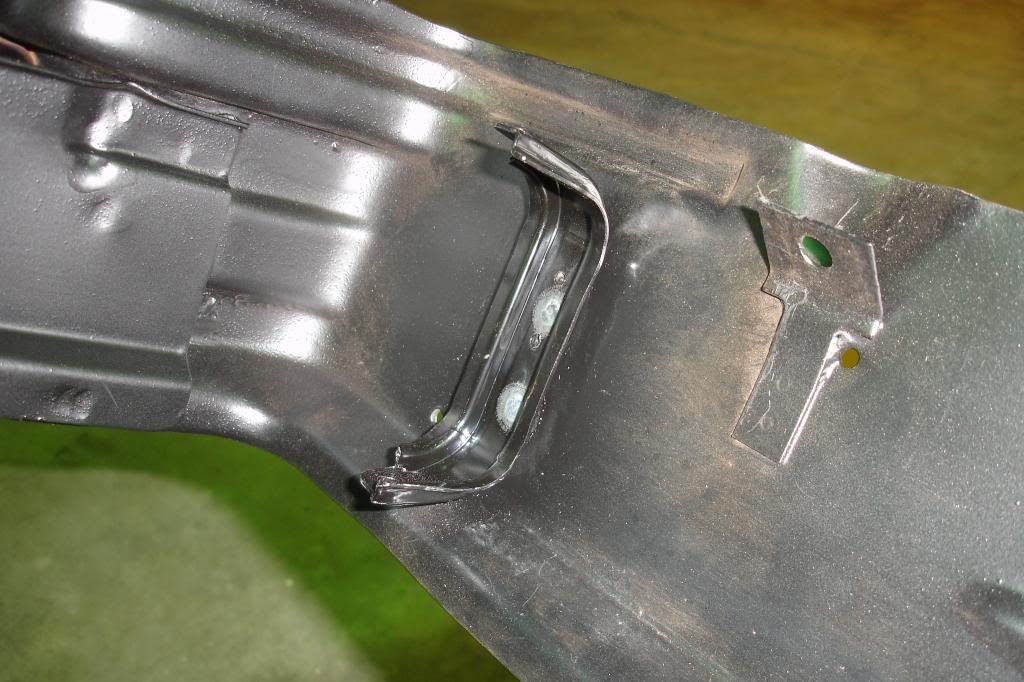
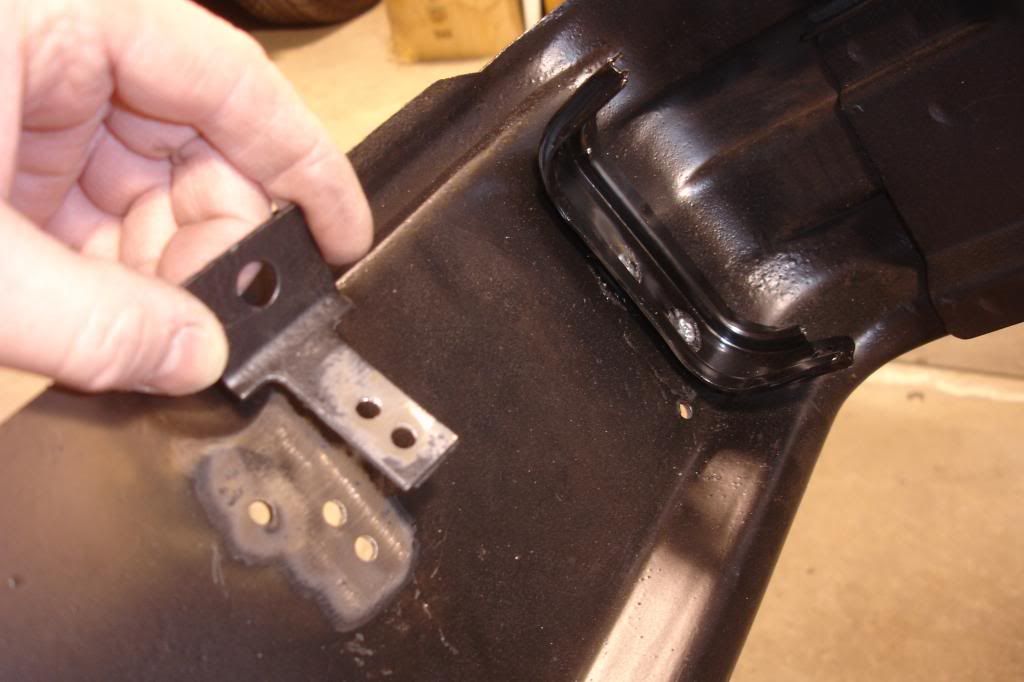
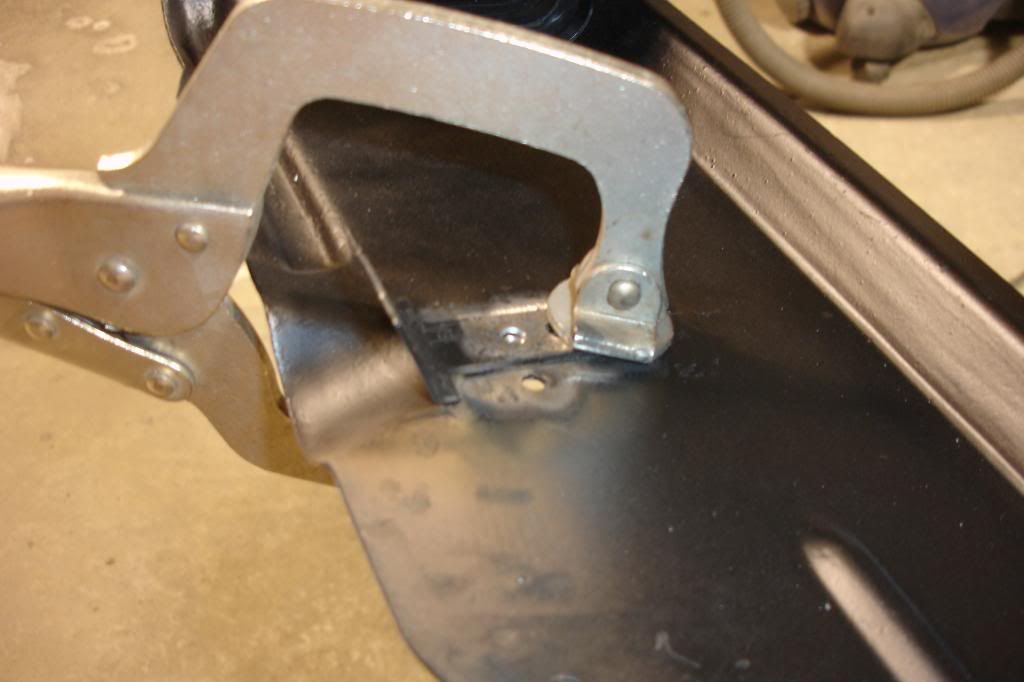
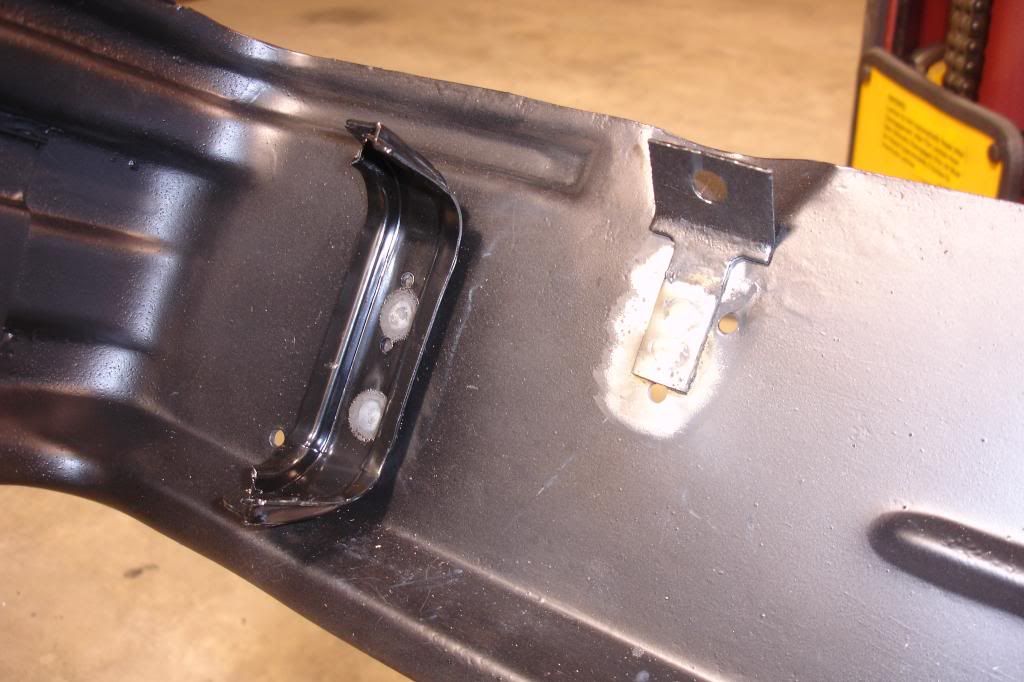
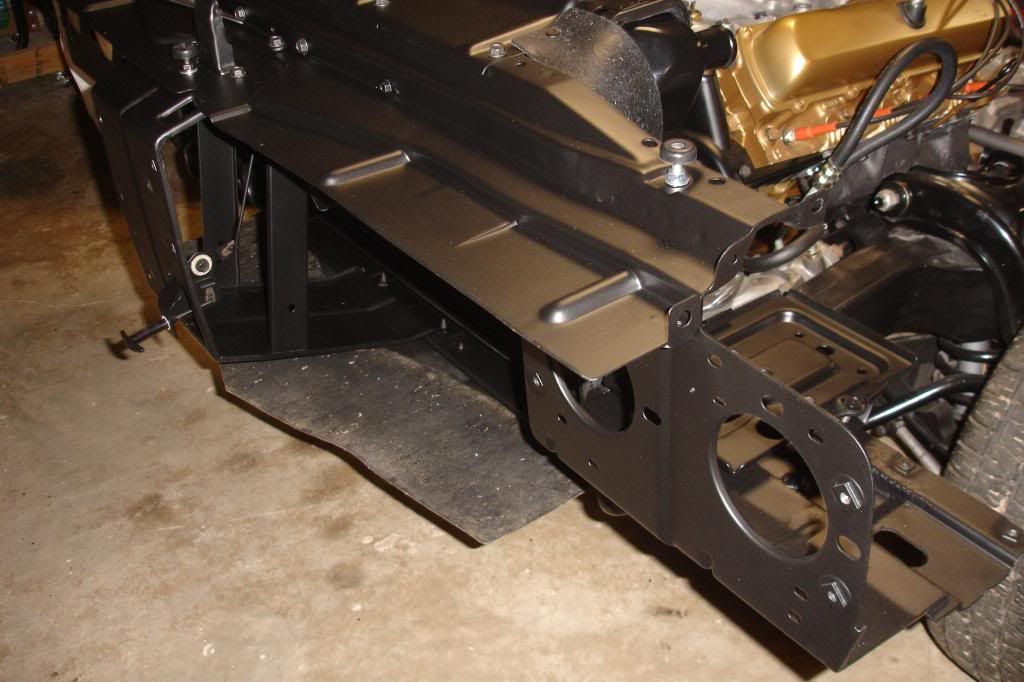
After bolting the radiator core support onto the chassis, I started on some of the assemblies that attach to it. I pulled the new radiator out of the box and quickly found that it didn't fit into either the upper or lower brackets. Jumping on the computer, I learned that Oldsmobile utilized different top plates and core supports for the regular and HD cooling. As I am using a restoration style radiator from Be Cool, it is sized to replace a stock HD radiator that has a thicker core and tanks. Live and learn.
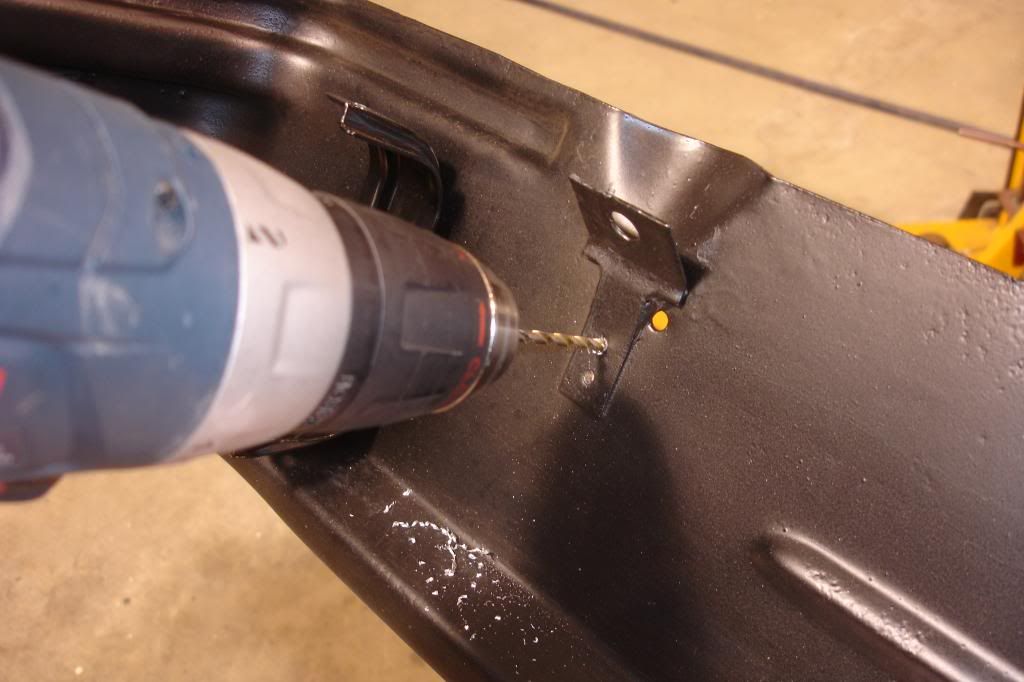
Fortunately, Fusick (an Olds supplier) stocks the HD style top plates and replacement brackets that can be welded to the core support. I ordered it all late last week and the new parts showed up at my office on Tuesday. Tonight, I measured everything very carefully and then drilled out the spotwelds on the lower brackets to remove them. I also ended up moving the lower tabs for the fan shroud back around 3/4" so that the shroud clears the radiator. I had to set the radiator in place to ensure that the tabs were located properly and the trial fit looked good. I'll know for sure this weekend when I go to put it all together.
-
02-16-2013, 05:53 AM #268Veteran
- Join Date
- Feb 2009
- Location
- Mansfield, PA
- Posts
- 22,146
Black & Blue- '02 WS.6 / '07 Suburban
Got an early start this morning and was able to get everything cleaned up and painted... again. Probably going to take a ride up to my brother-in-law's body shop this morning to see the progress on my father-in-law's '31 Chevy project. He retired around 2 years ago and has been plinking away at it on and off ever since.
-
02-16-2013, 05:45 PM #269Veteran
- Join Date
- Feb 2009
- Location
- Mansfield, PA
- Posts
- 22,146
Black & Blue- '02 WS.6 / '07 Suburban
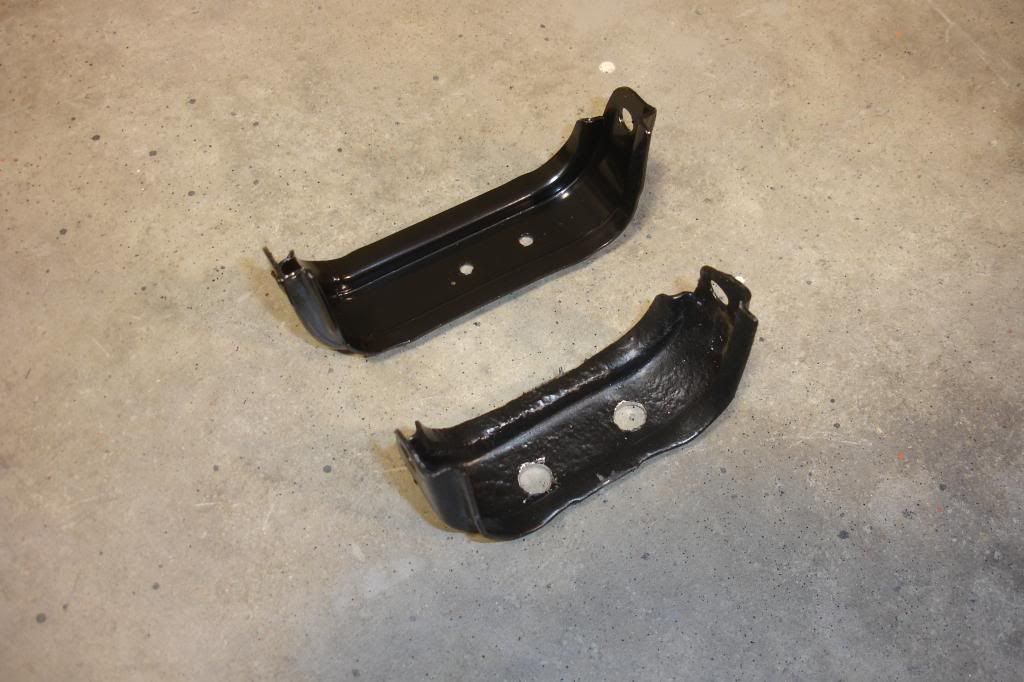
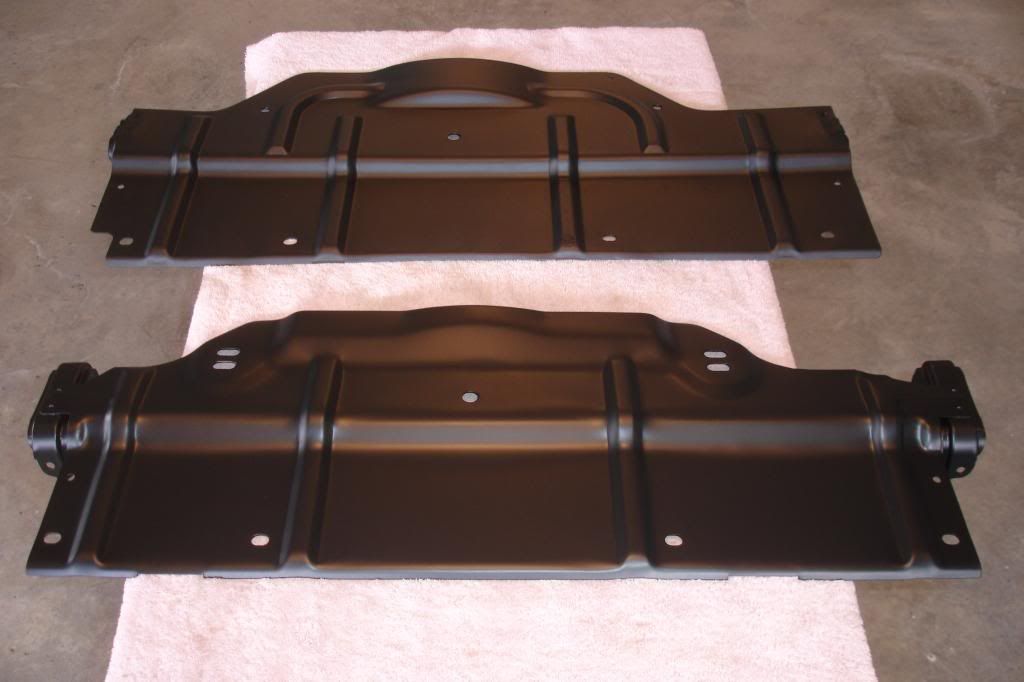
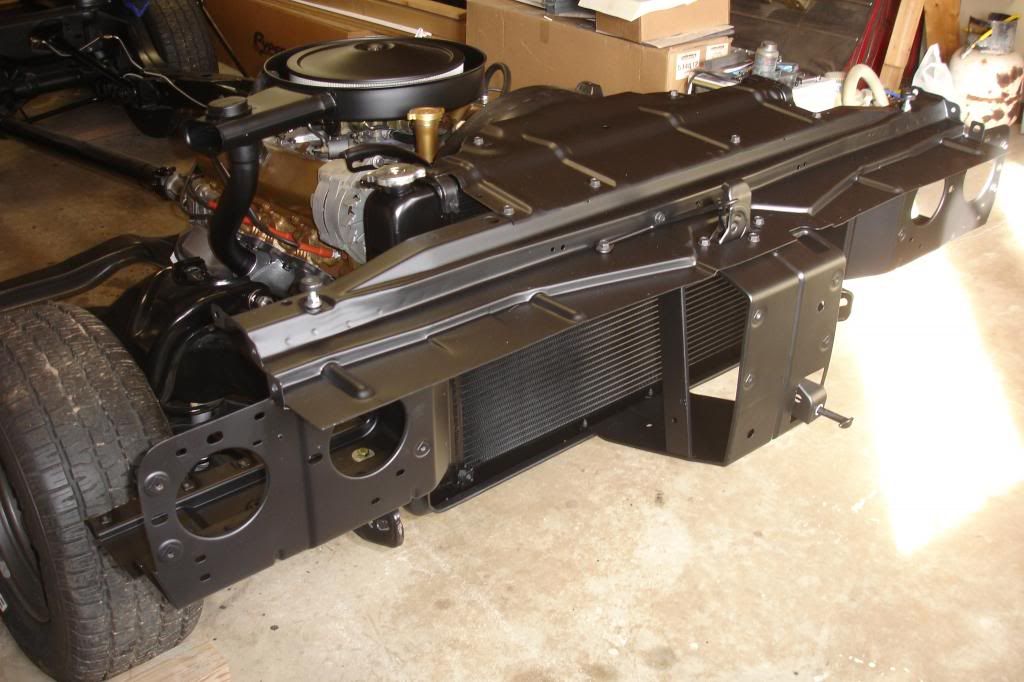
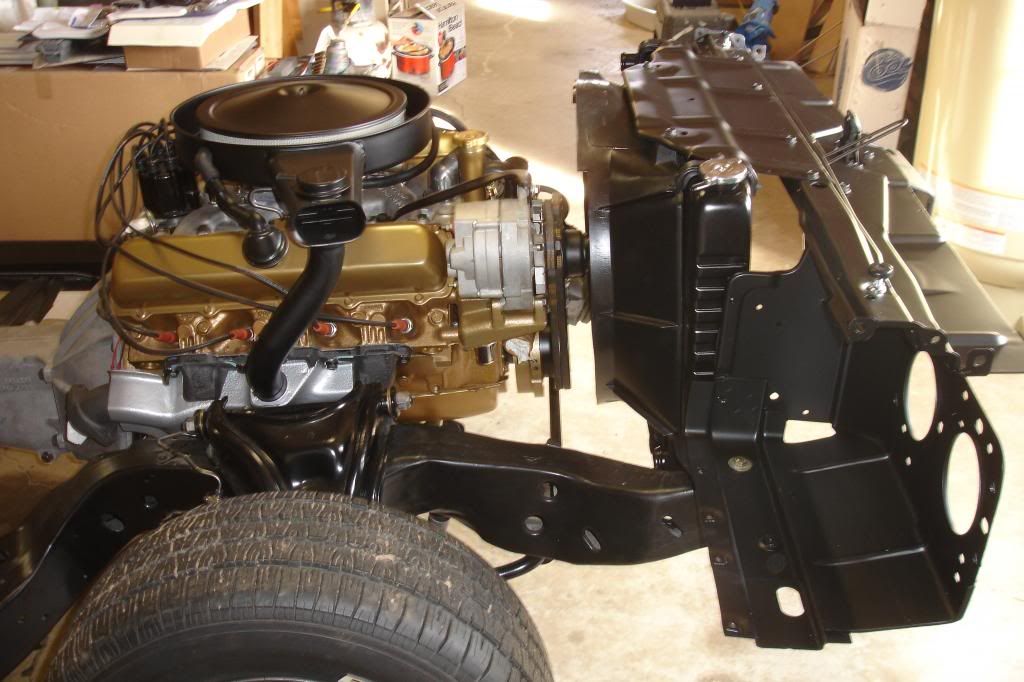
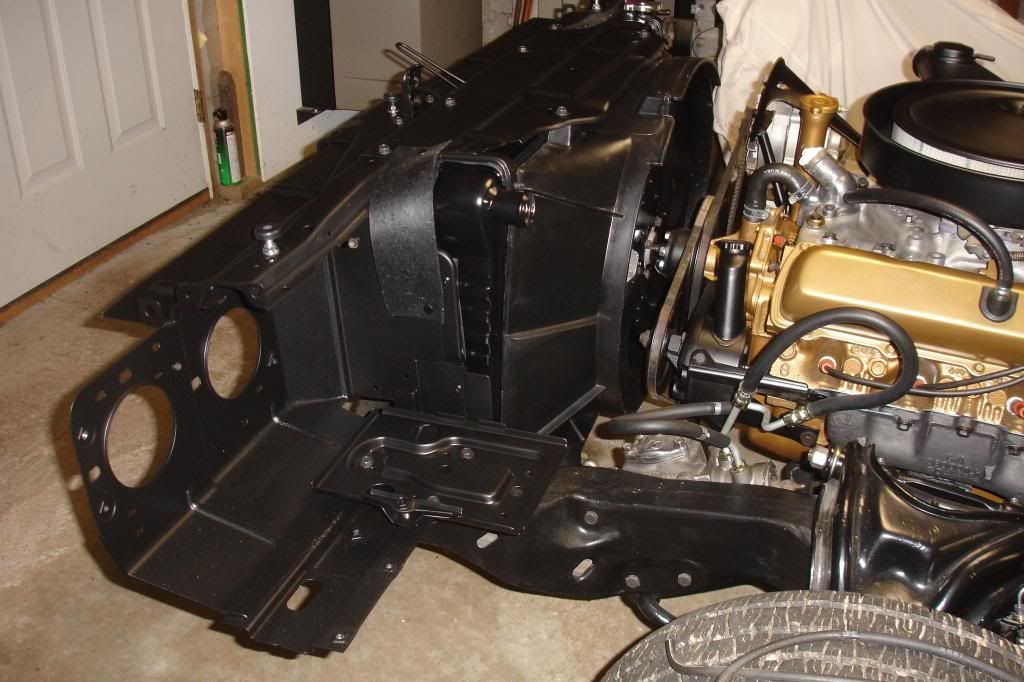
This shows the difference between the two top plates -- the new heavy duty cooling plate is in the foreground:
The radiator fits great and the spacing for the fan shroud worked out well with the relocated brackets. I have hoses and clamps to install and then need to go dig around the upper garage to find the next batch of parts to work on. I'll probably start on the headlight assemblies tomorrow.
-
02-16-2013, 06:58 PM #270None Shall Pass


- Join Date
- Jan 2010
- Location
- East of Cleveland, Ohio
- Posts
- 3,827
Black- 99 WS.6 - Modified
Progress!
-
02-17-2013, 02:19 PM #271She Moderator

- Join Date
- Jul 2008
- Location
- So Cal
- Age
- 61
- Posts
- 15,660
Arctic White- 2000 Camaro Z28
And coming along very nicely too

-
02-17-2013, 04:53 PM #272Veteran
- Join Date
- Feb 2009
- Location
- Mansfield, PA
- Posts
- 22,146
Black & Blue- '02 WS.6 / '07 Suburban
I picked through some parts today and looked things over to decide where to go next. I am going to strip the bumpers down and get them ready for chrome. I simply removed them from the car as an assembly and they still have the lights, brackets and such attached. I started the day working on the horns, only to find that the high note horn is not working. The diaphram is intact, but there is no continuity so it can't be saved. The low note horn was stuffed with a paper towel before making a trip through the blast cabinet and then paint. While the first coat was drying, I started taking the headlight assemblies apart. Seven of the twelve retainer ring screws were seized up, so I used the Henrob torch and a very tiny flame to break them free. I was able to get everything stripped off with bo breakage. The buckets and mounting plates also went through the blast cabinet and were then painted. I also cleaned up the air dam and bolted that to the radiator support and then installed the rubber flaps that close off the top of the radiator. It is so good to see progress...
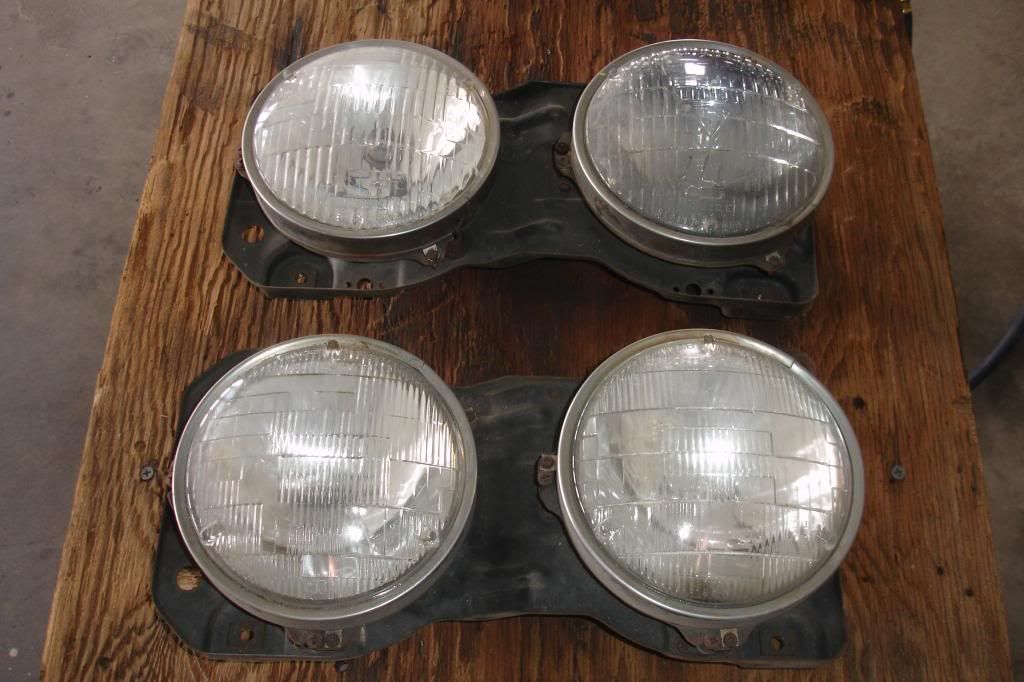
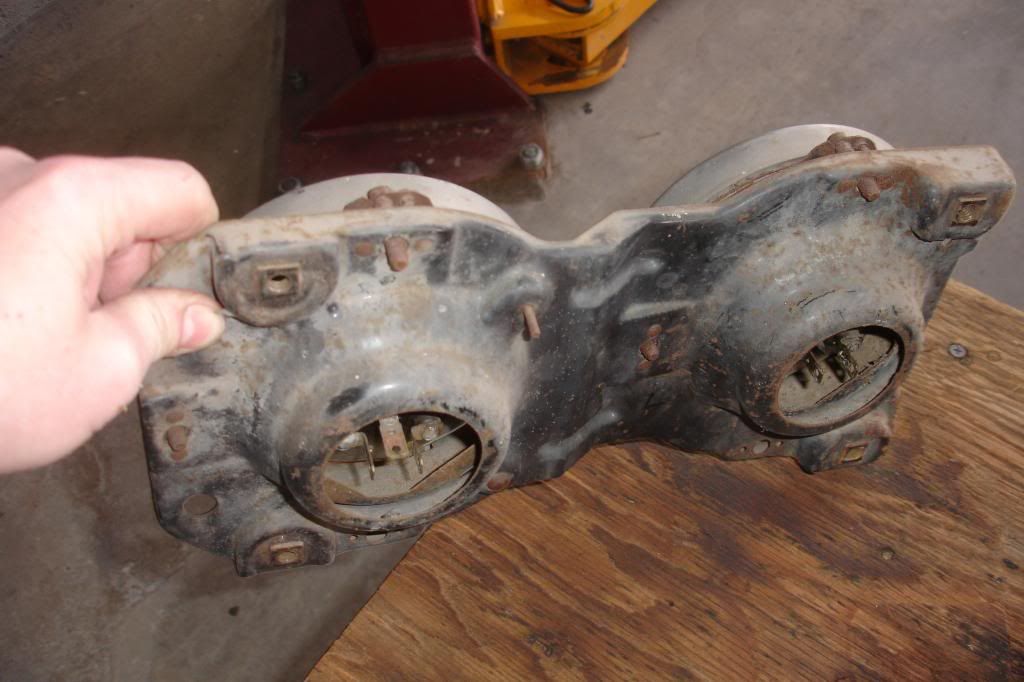
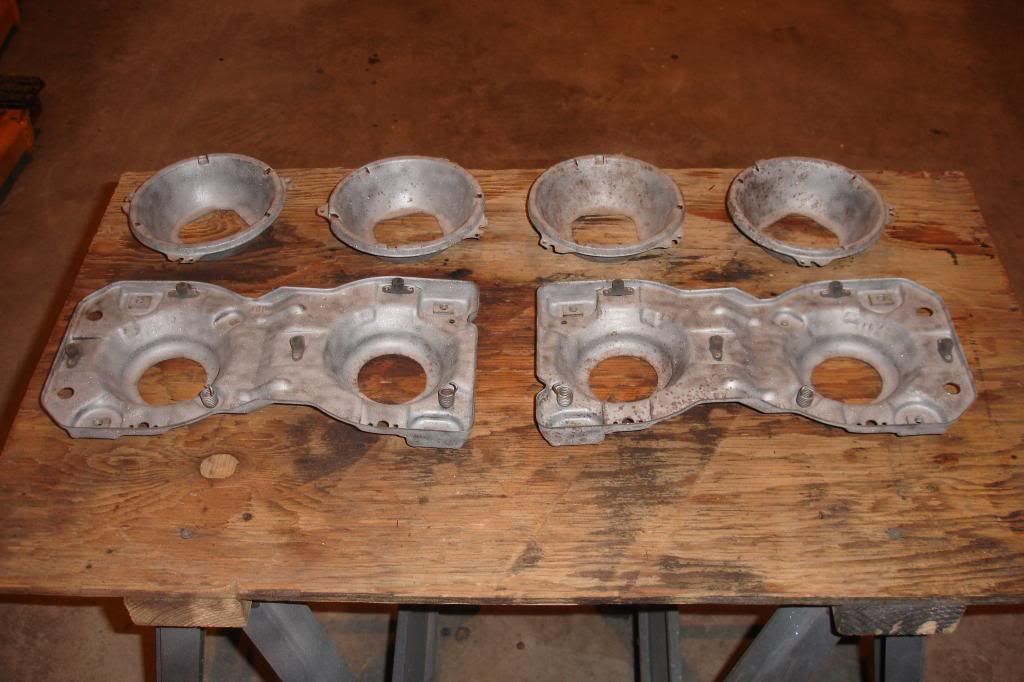
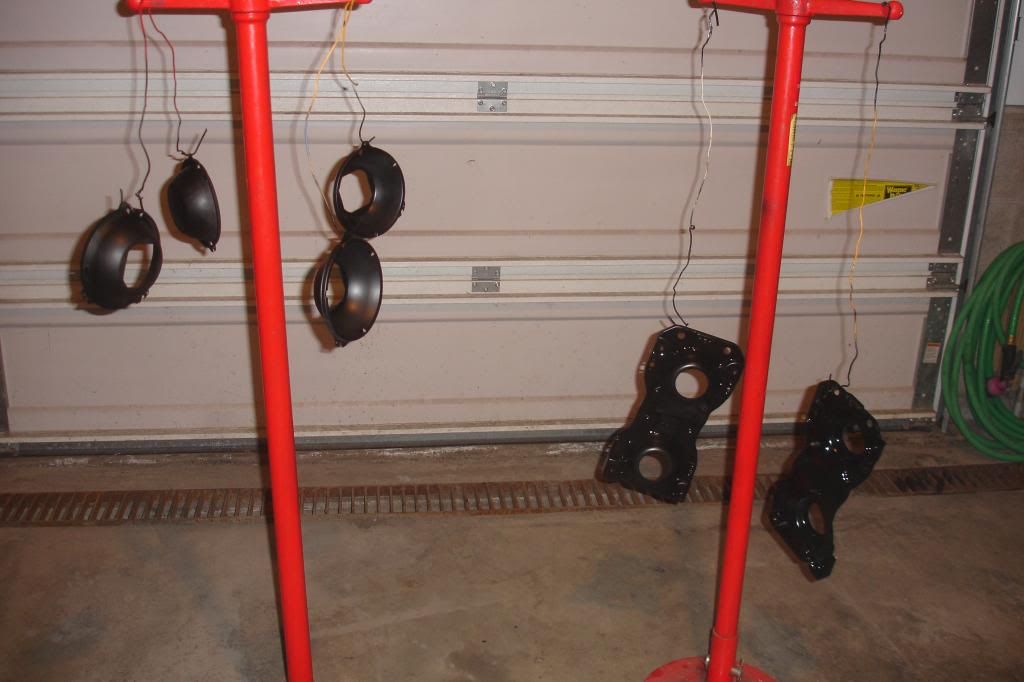
I'll have to go hunting for some new hardware for the retainer rings and adjuster screws. They are simply too rusted to save. I should be able to find very similar adjuster screws at the parts store and I hope that Lowe's has some stainless screws that will work for the retainers. I'll also pick up some new headlights as the car had 2 GE's, a Sylvania I installed after we bought the car, and one original T-3.
-
02-18-2013, 05:26 PM #273Veteran
- Join Date
- Feb 2009
- Location
- Mansfield, PA
- Posts
- 22,146
Black & Blue- '02 WS.6 / '07 Suburban
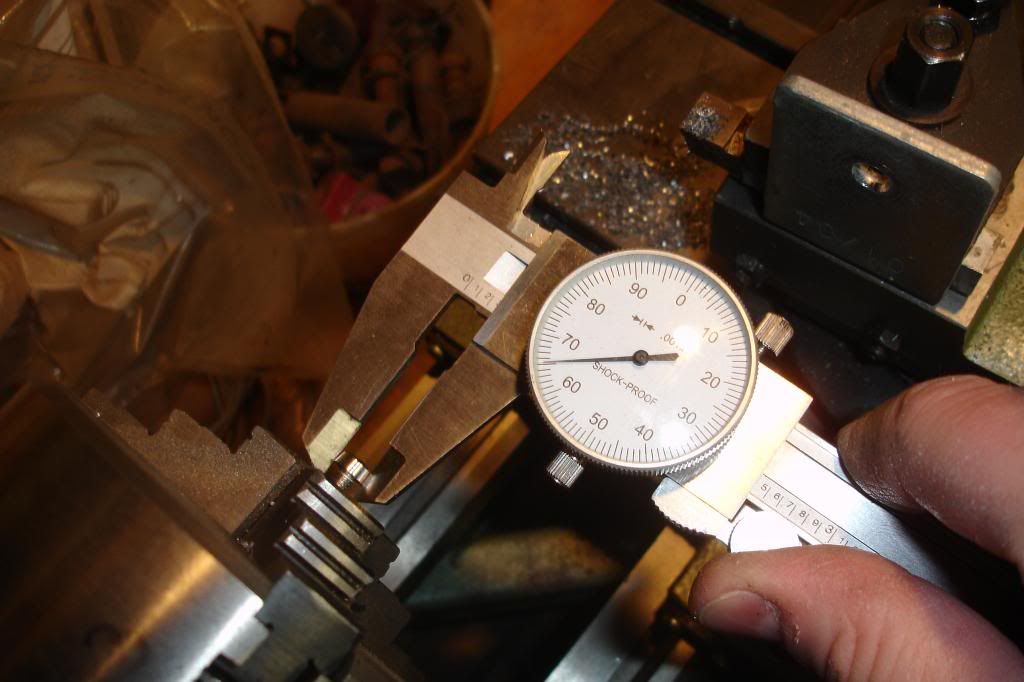
Went shopping after work and found headlight adjuster screws at Autozone that will work. They only had two packs in stock, so I have two more on order. I had to cut off around 5/8" from each one and then bevel the edge a bit. I wasn't so lucky on the trim ring retaining screws. The actual screws are self-tapping with an 8-32 thread and a very small head. The stainless 8-32 screws I found have a larger head on them. I thought that a number 6 stainless sheet metal screw might work, but it is just too small. Back on the hunt tomorrow for something else I guess.
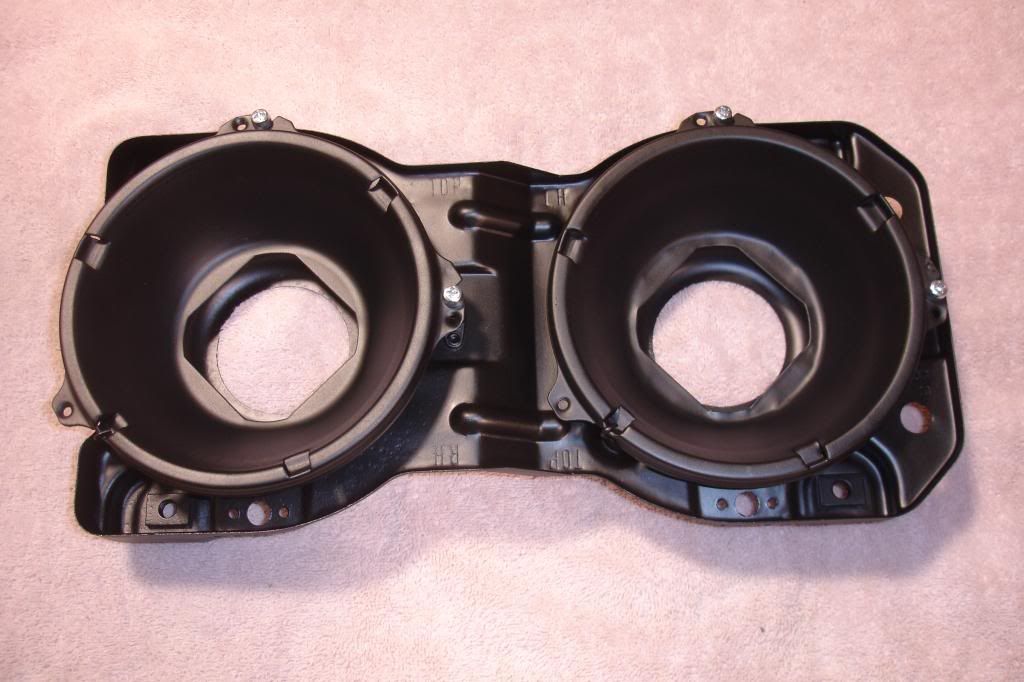
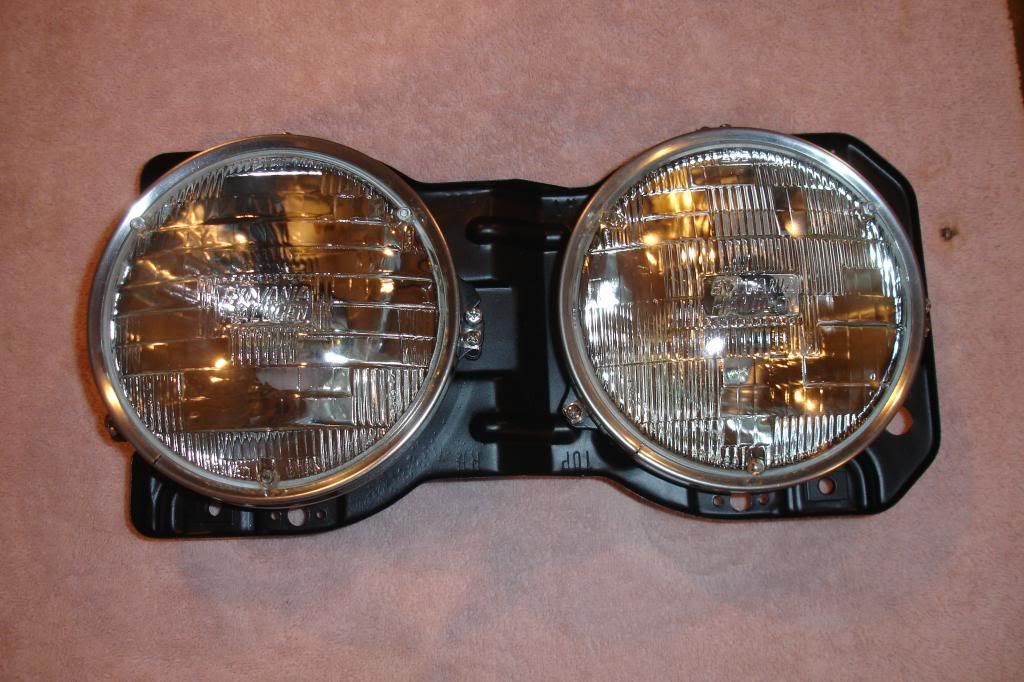
I assembled the buckets onto one of the backing plates and cleaned up all the trim rings with some fine steel wool. In the pic, the ring in the rear is all polished up while the one in the foreground is about what I started with.

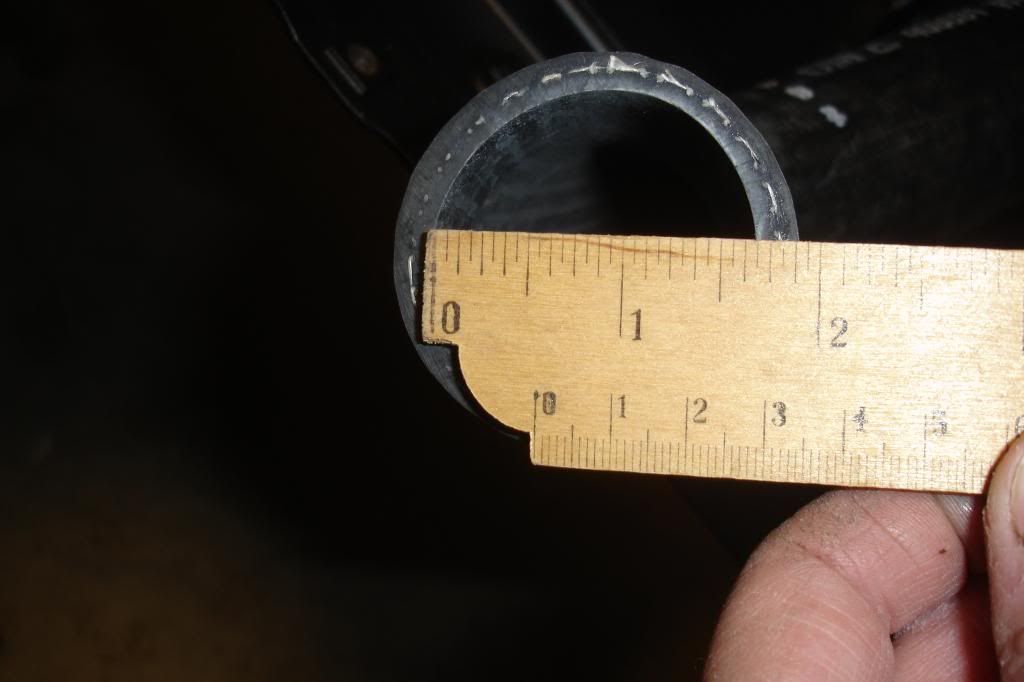
Yesterday, I installed the rubber flaps on the sides of the radiator support, bolted the battery tray in place and also the bumper seal that goes underneath the front end. Then... taking a step backwards again... I discovered that the new radiator has the wrong size outlet. I picked this one up at Summit last year, a Be Cool OE style radiator, P/N 15008. The specs all say that it should have a 1-3/4" outlet, which is correct for our car, however, this one is definitely 1-1/2". I called Summit today and they will process a warranty return on it. Just have to wait until next month to exchange it when we trip out there.
-
02-18-2013, 07:40 PM #274Member

- Join Date
- Mar 2011
- Location
- Waynesboro, Pa
- Posts
- 256
Mystic Teal Metallic:320c- 1998 Camaro Z/28
very nice job on everything so far jeff looking forward to it being done. Probably not as much as you but im pretty stoked. Maybe Leif and I will have to make a trip up to check it out in person!
-
02-19-2013, 03:47 AM #275Veteran
- Join Date
- Feb 2009
- Location
- Mansfield, PA
- Posts
- 22,146
Black & Blue- '02 WS.6 / '07 Suburban
Thanks Rob. Just meet us halfway in Beaver Springs. This thing will definitely by making passes at the track.
-
02-19-2013, 05:44 PM #276Veteran
- Join Date
- Feb 2009
- Location
- Mansfield, PA
- Posts
- 22,146
Black & Blue- '02 WS.6 / '07 Suburban
Talked to Be Cool today and they said just to return the radiator through Summit and pick up another one. I still have to yank it back out and am going to see if there is a part number stamped on the radiator. The box was sealed when I bought it and did not appear to have ever been opened.
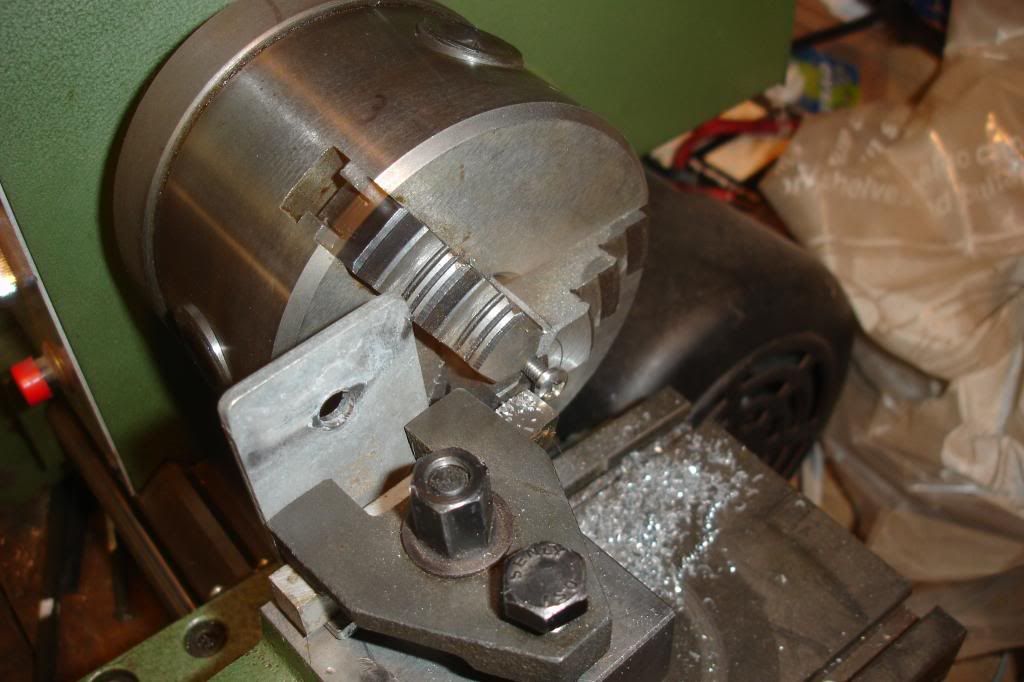
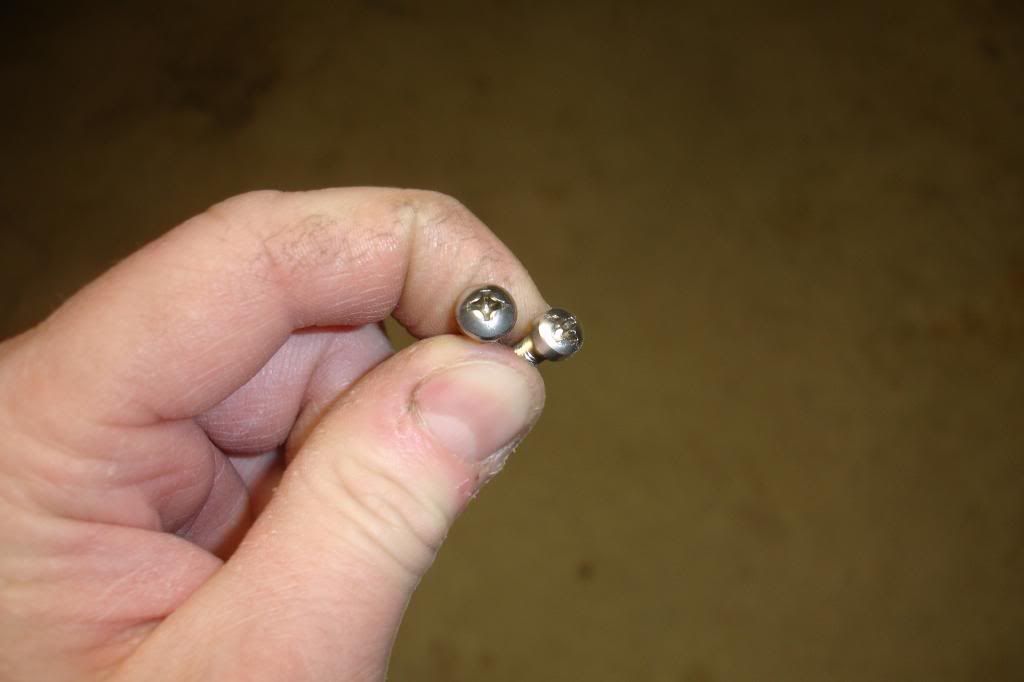
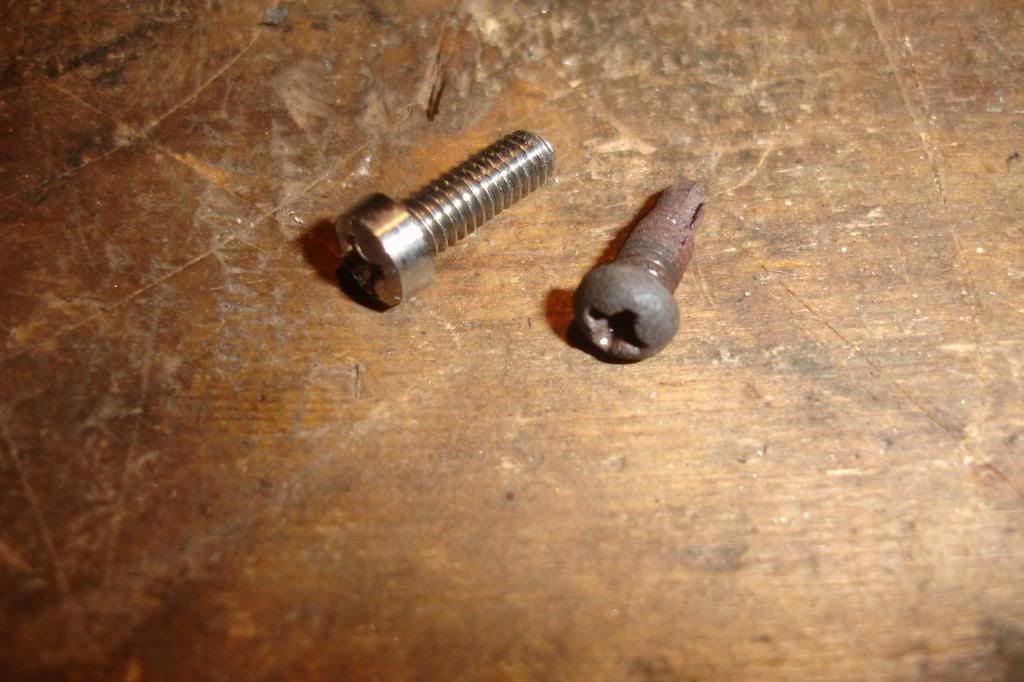
The sheet metal screws didn't quite work for the headlight trim rings. They were just a bit too small to grab. Since I had to step up to a No. 8, I went with a machine screw as that matches the stock thread. Unfortunately, the stock pieces are just an odd style screw and have a very small diameter head (rusty screw in the pic below). For the sake of appearance, and a chronic case of obsessive-compulsive disorder, I chucked the screws up in the lathe and turned the heads down. The new screws are stainless so rust isn't a concern. Turns out that the headlight buckets are one side only for left and right. I didn't notice this when I took everything apart and of course had them backwards. The buckets have notches that index with tabs on the back of each headlight. After swapping them over, everything went together just fine.
-
02-21-2013, 04:58 PM #277Veteran
- Join Date
- Feb 2009
- Location
- Mansfield, PA
- Posts
- 22,146
Black & Blue- '02 WS.6 / '07 Suburban
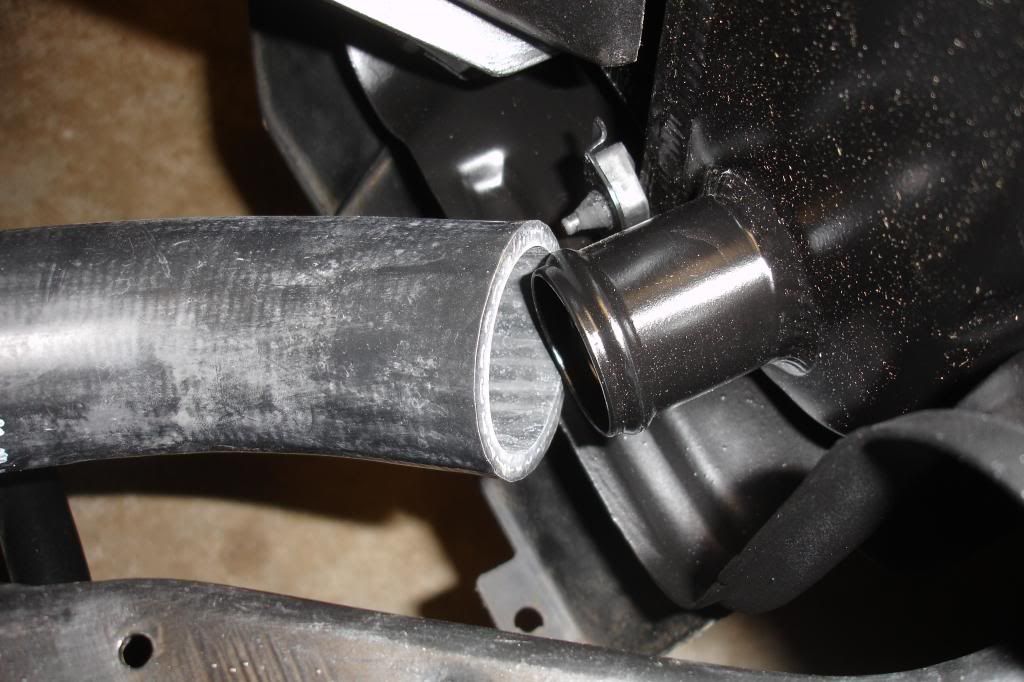
I pulled the radiator back out of the chassis this evening. Looking it over, I found engraved on the bottom the correct part number - 15008, a set of initials and a build date. I measured the outlet again with it out and there is no question that it is 1-1/2". The good news is that a friend wants to trip out to Summit tomorrow and I was able to clear my calendar. I called Summit and they have two in stock with one being held by my warranty exchange order. So I should be coming home with another radiator tomorrow night. We go wheels up at 6:00 tomorrow morning.
-
02-24-2013, 09:04 AM #278Veteran
- Join Date
- Feb 2009
- Location
- Mansfield, PA
- Posts
- 22,146
Black & Blue- '02 WS.6 / '07 Suburban
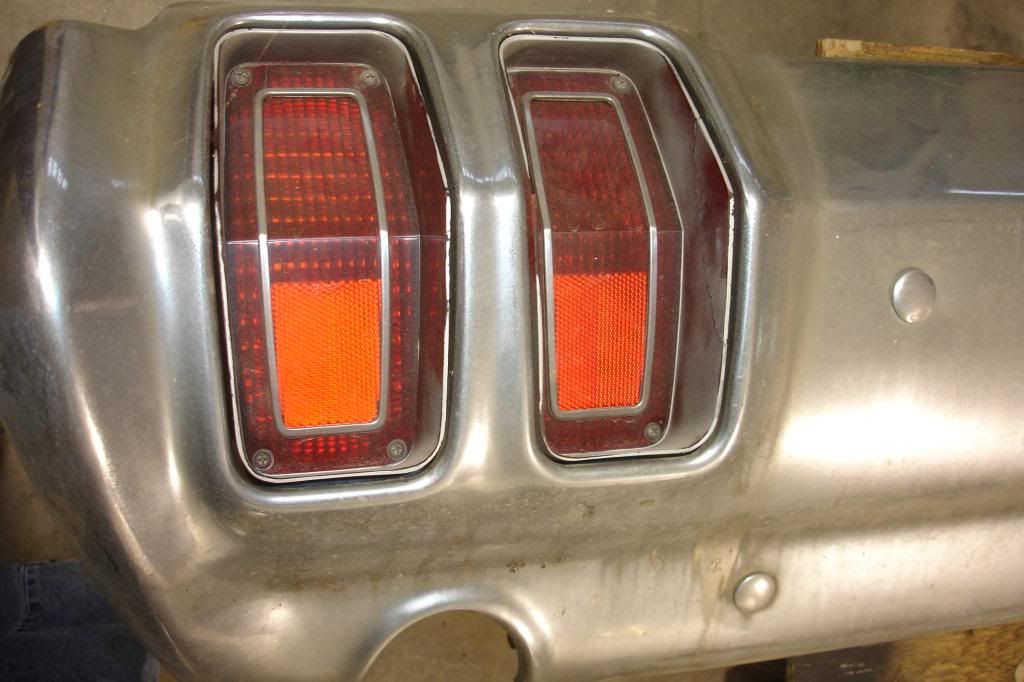
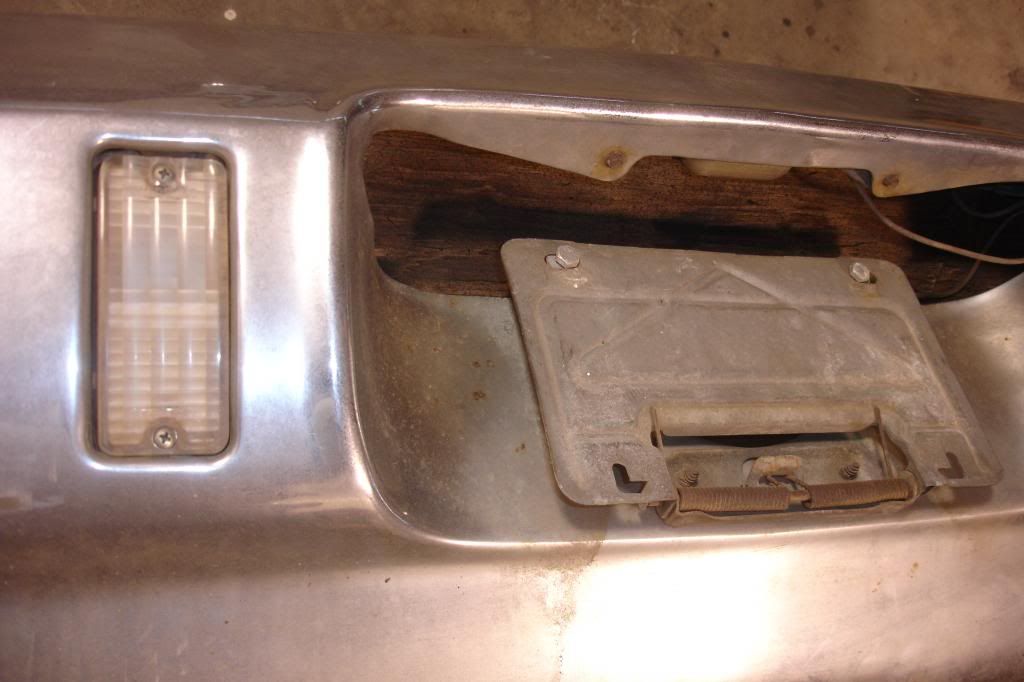
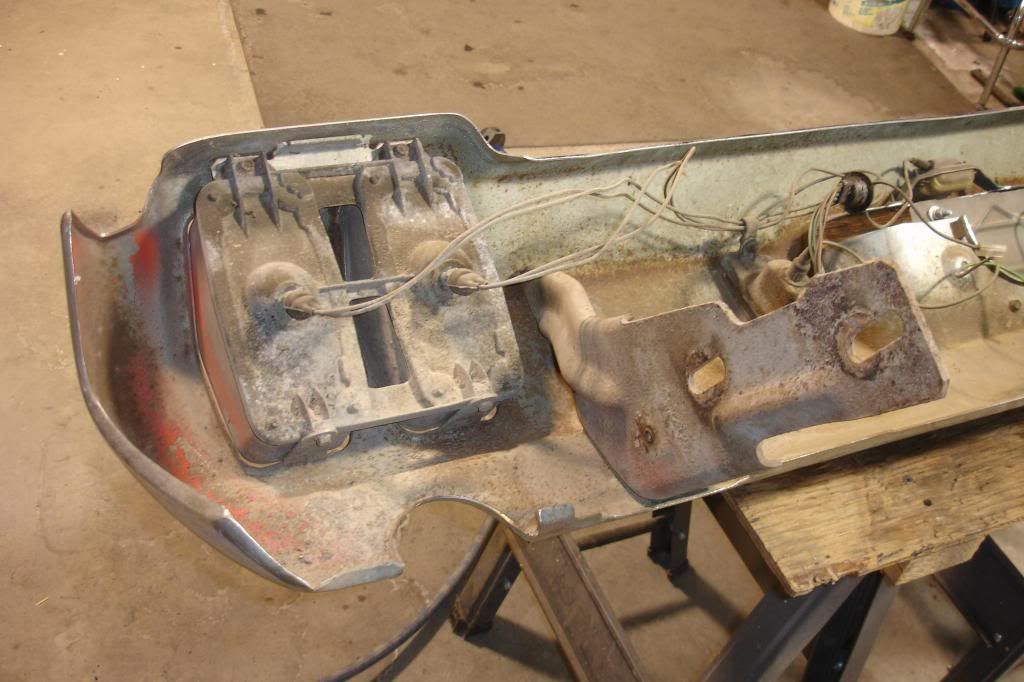
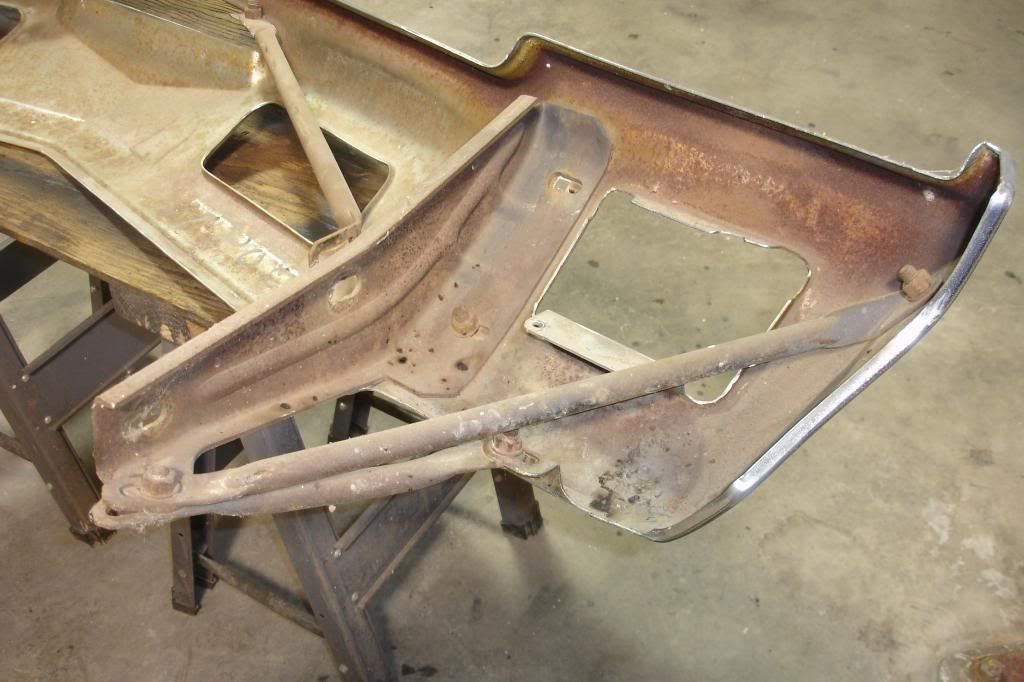
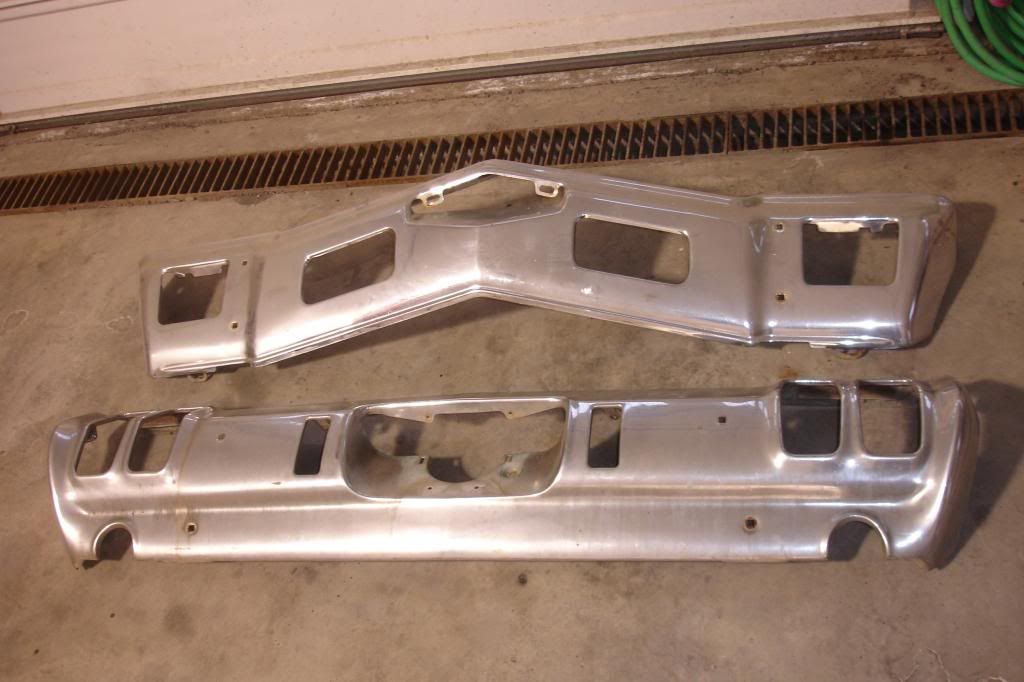
Last night, I dropped the new radiator into the car and buttoned everything back up. The headlight assemblies are bolted to the core support (no pics yet) and I installed the lower radiator hose. I dragged the bumpers out of storage and stripped off all the lights and brackets. I am hoping to head to Librandi Plating below Harrisburg sometime in the next several weeks to drop them off. Overall, both bumpers are in pretty decent shape with only minor issues. Fortunately, there are no dents and they have not been bent out of shape.
-
02-24-2013, 07:53 PM #279Member
- Join Date
- Mar 2011
- Location
- Waynesboro, Pa
- Posts
- 256
Mystic Teal Metallic:320c- 1998 Camaro Z/28
hell, thats only 2 hours away! ive never been there either
-
06-24-2013, 11:43 AM #280Junior Member
- Join Date
- Dec 2008
- Location
- Southern California
- Posts
- 65
silver- 1998 S-10 Truck
Wow Jeff, that is some great work. What a great job! Your making me stop and look over what i am doing and forcing me to try and get better. I am a "HACK" compared to you!!!!
Since you started this car and to today, I have gotten mine home, put the car on stands and worked on the starter system.
I do not have your knowledge as well, but I hope I can do some of the things I see you doing! I am printing all the neat things you do so I can copy them; hope you do not mind!

 Reply With Quote
Thread Information
Users Browsing this Thread
There are currently 1 users browsing this thread. (0 members and 1 guests)
Similar Threads
-
Question: anybody familiar with the oldsmobile aurora.
By dav-02ws6-m6 in forum General HelpReplies: 25Last Post: 07-03-2012, 02:44 AM -
I need some '69 Oldsmobile Cutlass parts! (help!)
By FasstChevys in forum Classic MuscleReplies: 5Last Post: 10-27-2011, 12:06 PM -
F/S or Trade 1970 SS396 El Camino Project
By H8tulooze in forum Vehicles For Sale / TradeReplies: 0Last Post: 09-01-2008, 06:42 AM -
Any oldsmobile forums?
By TARZAN in forum Almost Anything GoesReplies: 5Last Post: 05-31-2007, 02:59 AM -
1970 oldsmobile cutlass convertible forsale
By z-28lover in forum Vehicles For Sale / TradeReplies: 0Last Post: 10-25-2006, 10:32 AM

Bookmarks