

Results 1 to 6 of 6
Thread: Turned a rotor today
-
05-17-2010, 06:20 PM #1Member


- Join Date
- Apr 2008
- Location
- Bay Area
- Posts
- 8,114
On your ass flashing- my highbeams
Turned a rotor today
2 Reasons for making this thread
#1. Today I turned a rotor. I put on a dial indicator and measured where the highest point was and the lowest point and of coarse the total difference. What I had failed to do was mark one of the slots for the lug and the part of the rotor that goes over it. Since the spindle it sits on isn't perfect if you don't put it on in the same spot you still end up with run-out, in my case it was a mere .001" but after all that hassle I'm going back in to get it perfect . You also need to adjust it on the brake lathe so it reads the same run-out in the same spot because the clamp it sits on has some play for adjustment. So for anyone who might do it in the future don't forget to put it on the way you got it off because putting that rotor on 5 times to see which slot it belonged to and torquing them on and off each time is a real bitch.
#2. Is there any interest in a wright up on doing a full brake change? There is install university already and I am unsure if there is a wright up here or not.
-
05-17-2010, 06:48 PM #2Veteran

- Join Date
- Feb 2009
- Location
- Mansfield, PA
- Posts
- 22,146
Black & Blue- '02 WS.6 / '07 Suburban
I have never messed with a brake lathe. Good to know if I ever do. Another member just asked a question about changing pads and rotors... probably not a bad idea to have a write up.
-
05-17-2010, 08:20 PM #3Member

- Join Date
- May 2009
- Location
- U.S.A
- Posts
- 117
Black- 2003 Z06 Corvette
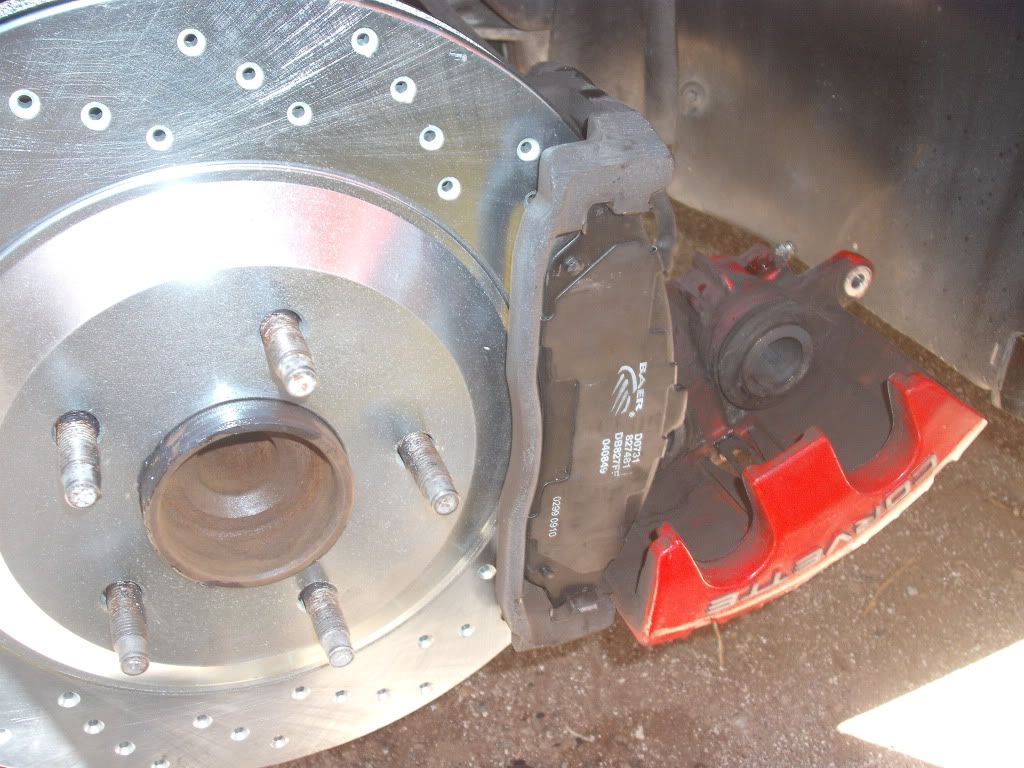
I recieved my Brembo Sport Cross Drilled Rotors
Unfortunetly only for the rear axel
So I had another set made up to hold me over till my Brembo's arrive
I only did the Front for now because I want make sure they operate at full capacity before I do the rear set
I like to do one axel at a time
That way I can narrow down problems
and should there be a Malfonction
I still have my rear brakes in order to stop the car
Tools you need:
1) C-Clamp
1/2" Drive Râchet
3/8" Drive Râchet
21mm Socket
15mm Socket
18mm open End Wrench
1" piece of Cheater pipe 18" long
(This pipe is for Leverage and you will slip it over the end of your 1/2" Rachet in order to gain more leverage)
Supplies & Parts:
Brake pads
Brake cleaner
Rags
CRC Brake & Rotor grease
Begin By Drivng the car up a good set of Race Ramps
After the car is on the Ramps
Break Loose all 10 Lug nuts on either side of the car (Both Rims)
Loosen but do not remove the cap to the brake fluid reservoir
If the fluid level is between fill and full remove no fluid
If not remove Fluid as needed with a syringe
Also place a rag around the reservoir in case of a overflow or spill
Next Jack car up by using a 2X6X26 piece of wood
and then lower on to Jack stands as follows
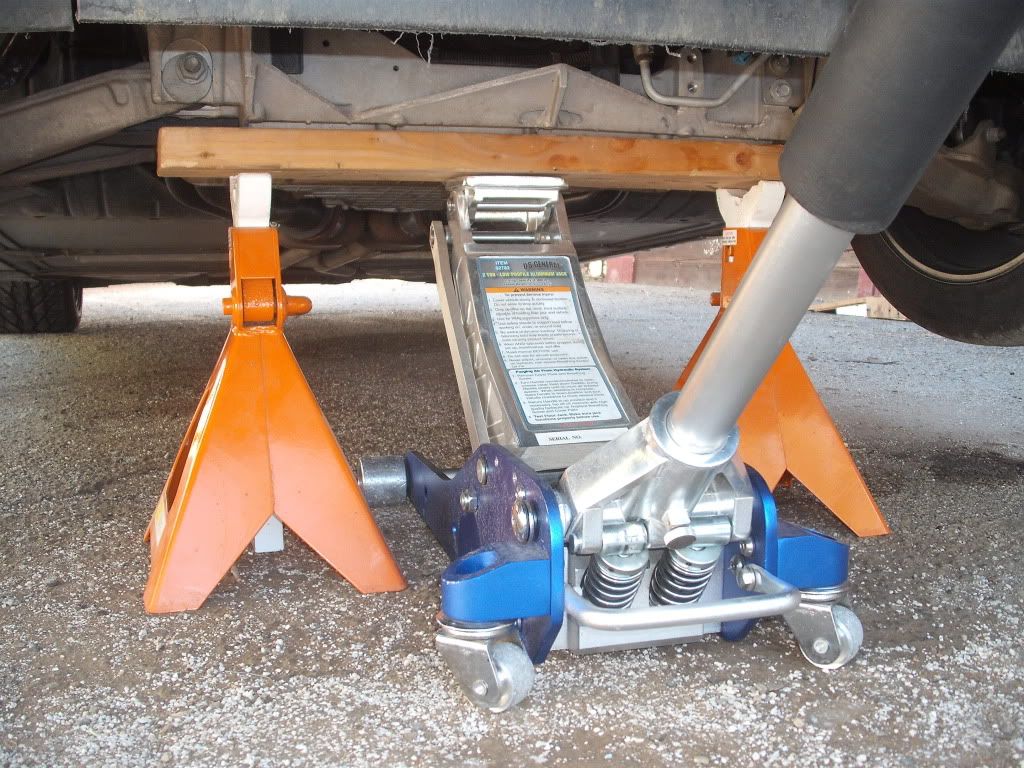
Next finish removing the wheels
Spray the 21mm Bolts that retain the calipers and the area around the wheel studs and the back of Both rotors with Liquid wrench in order to make your this job easier
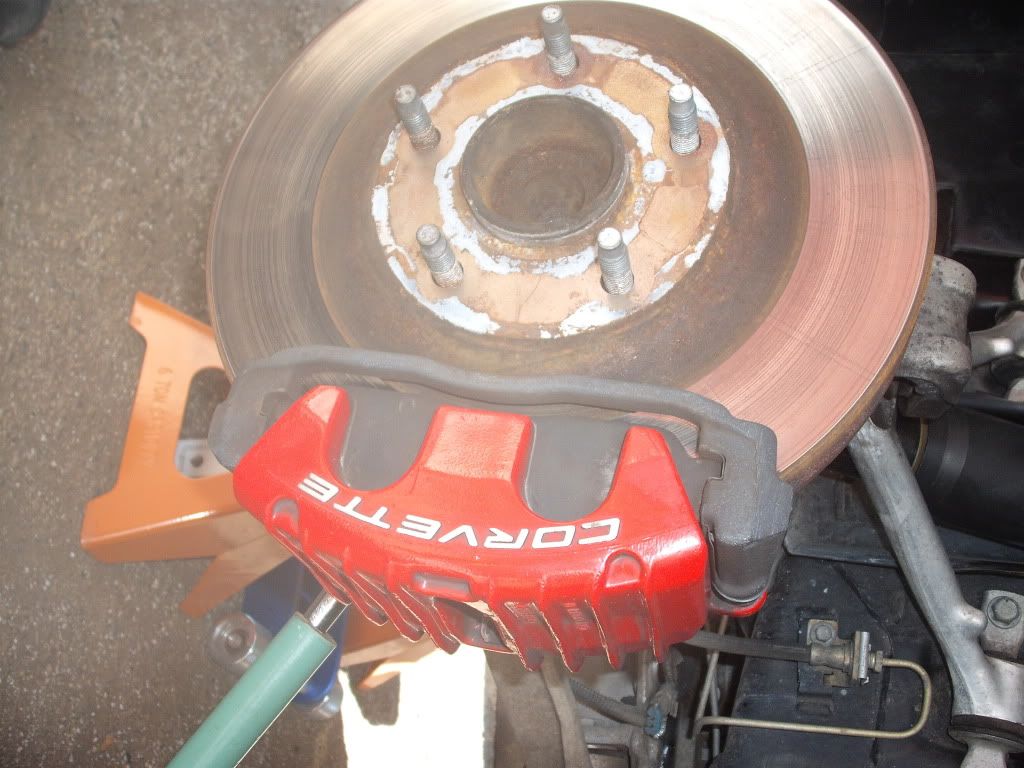
Get your cheater pipe 1/2" Rachet and 21mm Socket and remove the caliper mount bolts on the back side of the Calipers ( The Big Ones lol)
Do not Yank or pull hard on the barr but rather just apply gradual but progressive force to the end of the bar till each bolt ease's itself free
Do not remove the bolts completely yet
Just break them free
Cheater Barr on the end of the 1/2" Rachet
Next get your 18mm open end wrench and your 15mm socket and break the bolts holding the 2 guide pins
There is one top & Bottom on the Caliper
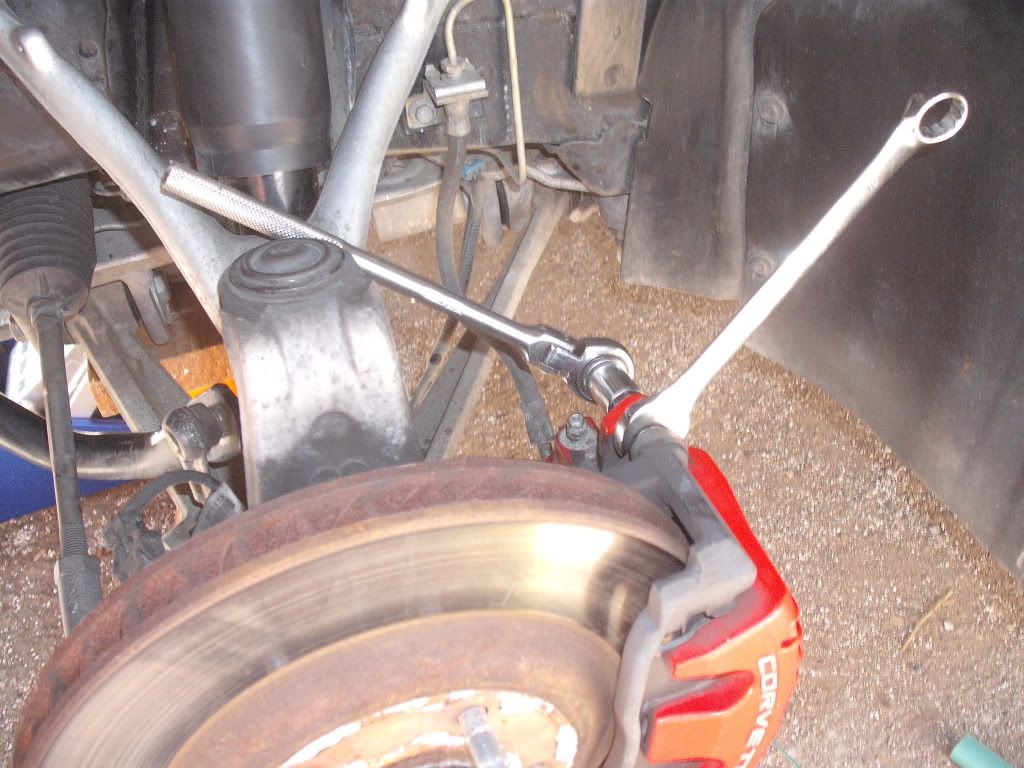
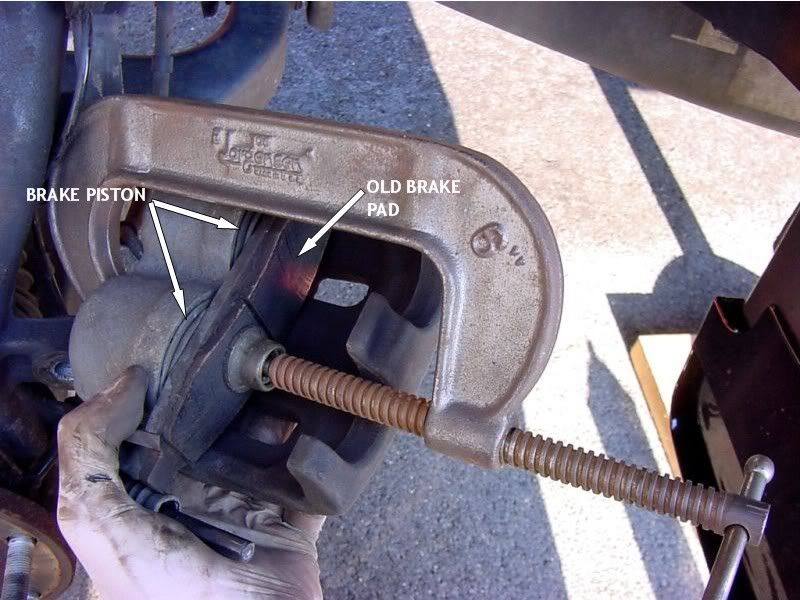
Now take your C-clamp and compress the Caliper pistons back out of the way
Now go ahead and finish removing the 2 (21mm) Bolts that retain the caliper
And tye the caliper off at the A-arm with a piece of wire
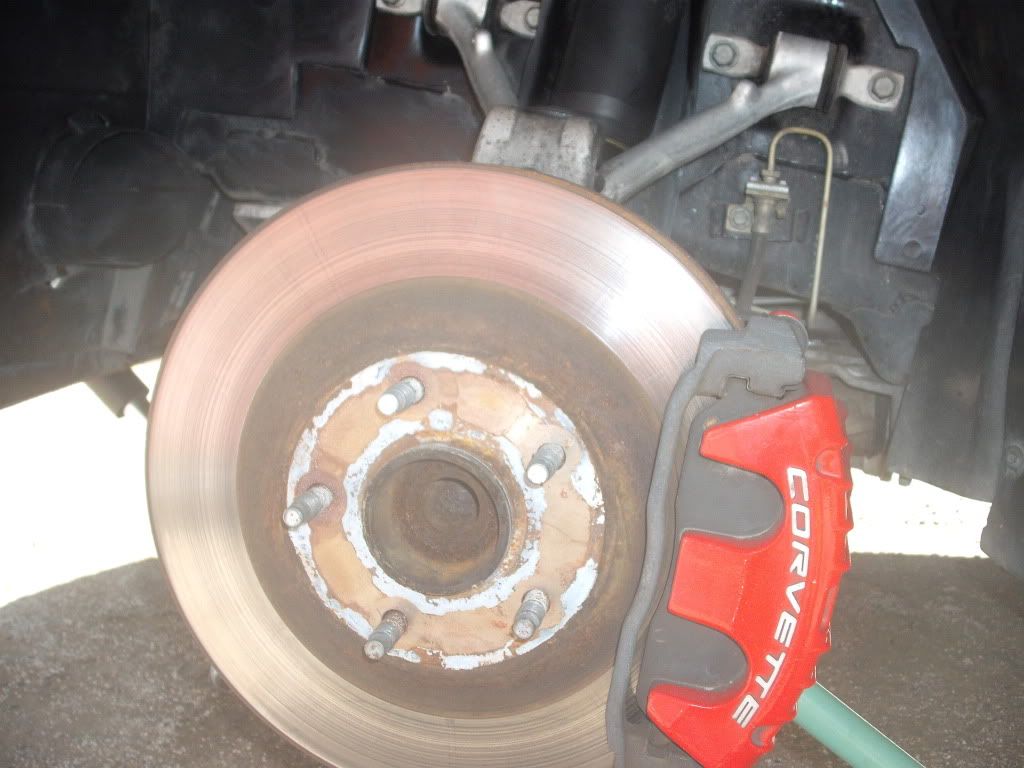
Next Remove the rotor
Clean the Area of old grease with carb cleaner
Also Clean all the bolts off
Stay away from the front axel bearings with the Carb cleaner ( It needs Grease)
Just use a rag and lightly wire brush the area
Wire brush the Wheel studs and rotor mount surface and then apply
After you are done cleaning the area
Apply some CRC Brake & Caliper grease to the face plate of the Axel like So
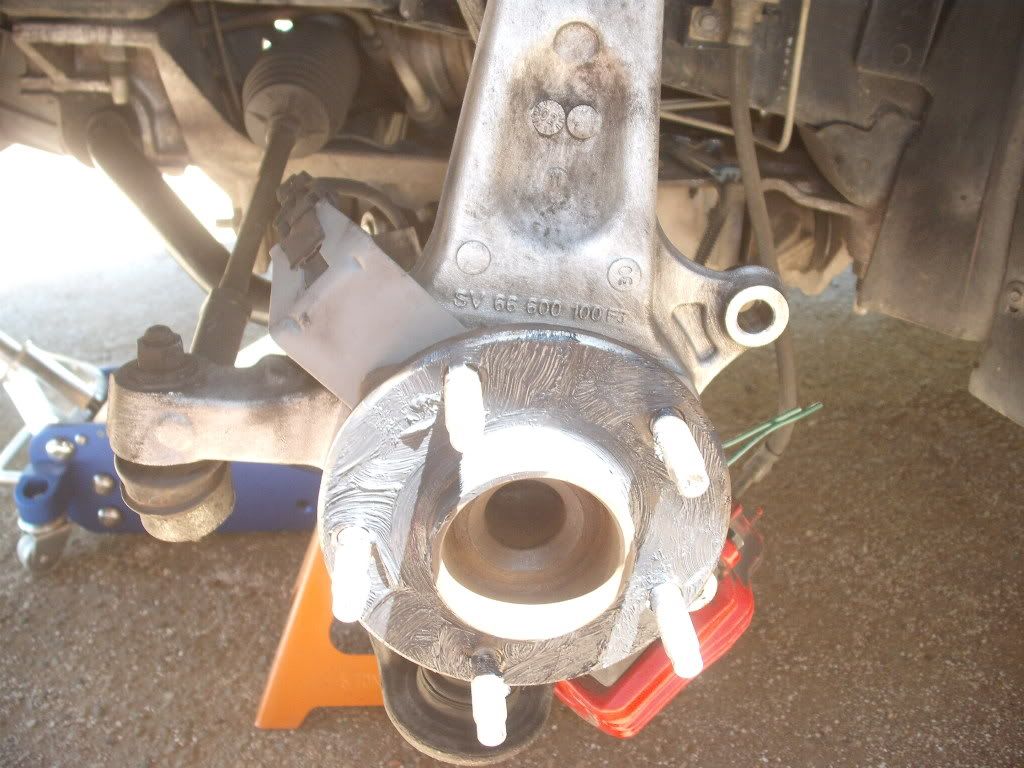
Install new rotor and make sure it is seated well
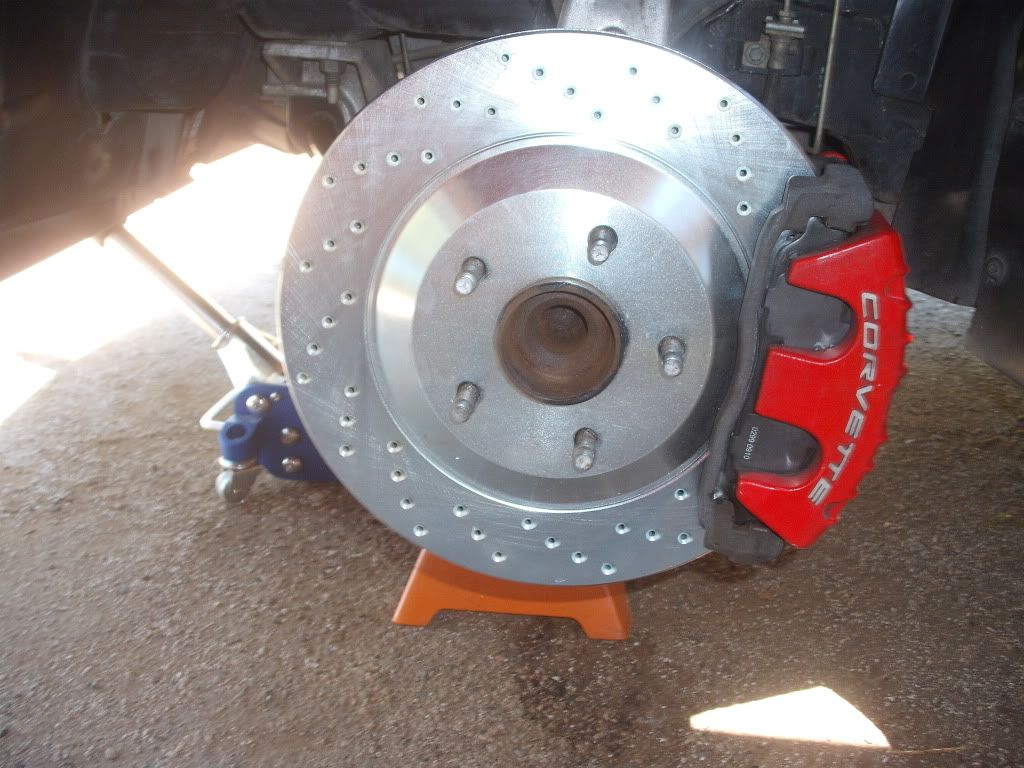
Pull old pads out of the caliper and install new clips and hardware also remove and clean guide pin bolts and then re- grease them thoroughly
Install 21mm caliper Bolts and guide pin bolts
"Use a Torque wrench"
Go From the Bottom of the caliper torque the 21mm Bolts to 125ft lbs and then torque the guide pin bolts to 23ft lbs
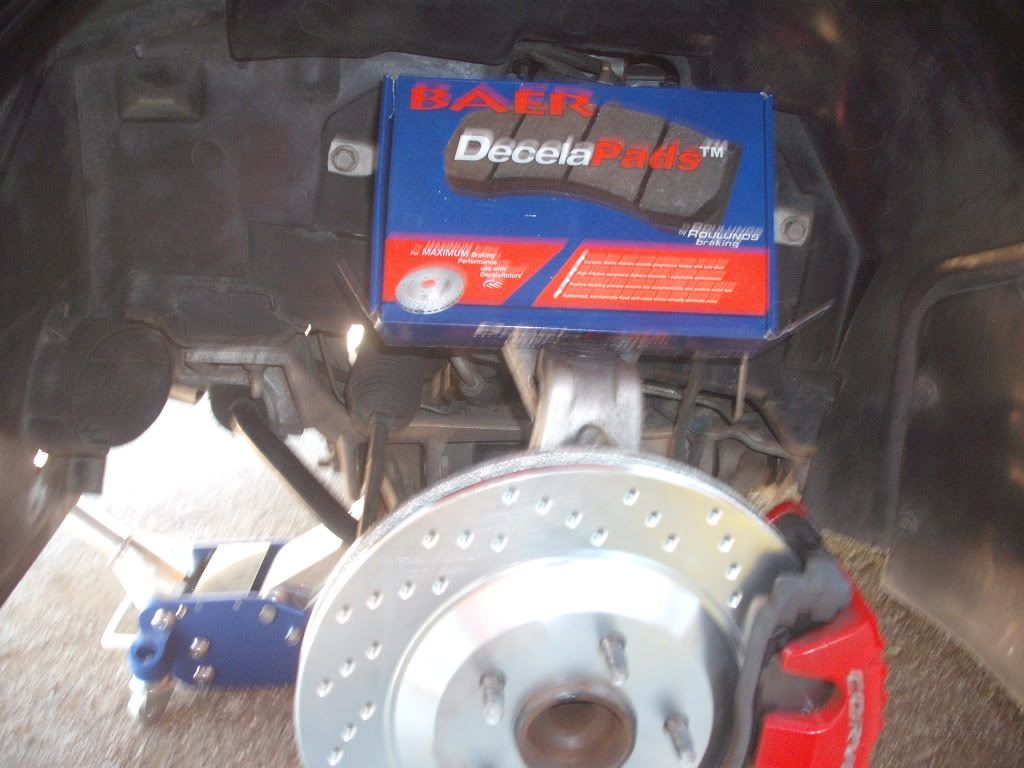
Photo #2 Baer Decela Pads
Re-mount wheels and tighten snug till you lower the car back onto the Ramps
Now make sure the area is 100% clear of all tools and old parts
Jack the front of the car up
and remove the jack stands
Then lower the car back onto the ramps (Leave on Ramps)
Top off Brake Fluid in the reservoir if needed
*** Note: Next Get your torque wrench and in Starr Fashion tighten all the wheel lug nuts to 70ft lbs then re-torque them again in Starr fashion to 100ft lbs
Go inside the car and pump the brake pedal
several times in order to " Pump the Caliper Pistons back up "
Start the Car up and then back it slowly back down the ramps
Always inspect under and around the car before you lower it or back it off the ramps
Proceed to Clean-up
Voila !
NOTE: Seek Manufacture's protocol on "Bedding Of Rotors & Brake Pads"
Bon
-
05-17-2010, 10:47 PM #4Member
- Join Date
- Apr 2008
- Location
- Bay Area
- Posts
- 8,114
On your ass flashing- my highbeams
Good stuff^
The sockets used on the guide pins and the caliper seem to be a different size for the corvette brackets than the f-body brackets.
-
05-18-2010, 02:42 AM #5Veteran
- Join Date
- Feb 2009
- Location
- Mansfield, PA
- Posts
- 22,146
Black & Blue- '02 WS.6 / '07 Suburban
I would definitely start by painting the hats on the new rotors -- once they start to rust the ugliness begins. Nice write up!

-
05-18-2010, 03:48 AM #6Member
- Join Date
- May 2009
- Location
- U.S.A
- Posts
- 117
Black- 2003 Z06 Corvette
Turned a rotor today
Yeah your right Originally Posted by pajeff02

I put the (Gold) Brembo cross drilled rotors on the back
The ones you see in the photo are made by R1 Concepts and are temporary till my Back ordered Brembo's come in
I plan to Anodize the Hats "Red"
Did you know 1 piece brembo's weigh less than the High $$$ 2 piece rotors
Here have a look
RB 2 piece rotors Chaaa Ching $$$$$

My rear Brembo Cross Drilled

Save yourself some money and buy 1 piece rotors then have the hats anodized to look like 2 piece


 Reply With Quote
Thread Information
Users Browsing this Thread
There are currently 1 users browsing this thread. (0 members and 1 guests)
Similar Threads
-
Who turned you on
By Sarge in forum Almost Anything GoesReplies: 69Last Post: 03-02-2011, 03:15 AM -
I turned 21 today
By Toyota h8r in forum Almost Anything GoesReplies: 21Last Post: 08-24-2008, 12:39 PM -
Turned 21 today, yay!
By Warbird in forum Almost Anything GoesReplies: 15Last Post: 11-23-2006, 06:41 AM -
My world was turned upside down today.. my WS6 was totaled
By Corona-Extra in forum Almost Anything GoesReplies: 30Last Post: 08-20-2006, 06:52 PM -
My son turned 2 today. Looks like he's enjoying that cupcake!
By nitrox28 in forum Almost Anything GoesReplies: 12Last Post: 06-02-2006, 09:24 PM

Bookmarks