On to the swaybar bushings and the end link bushings.
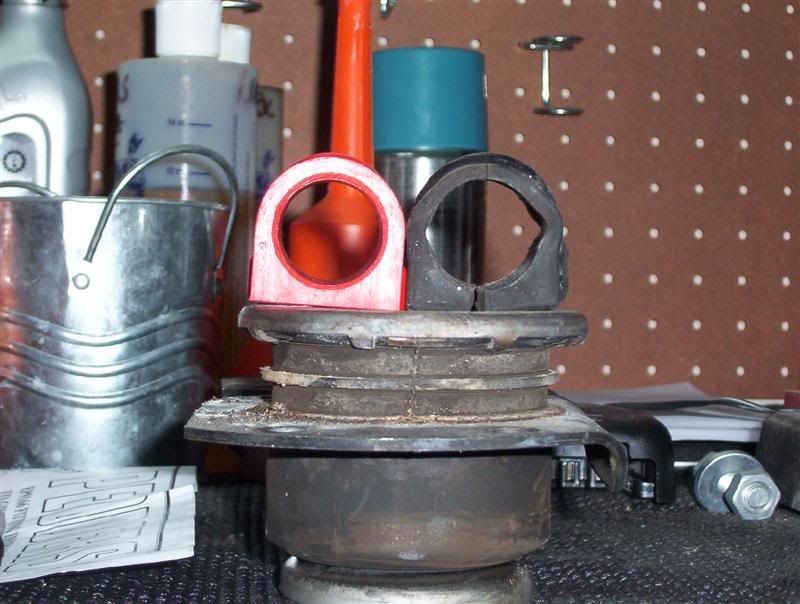
Pic of OEM swaybar bushings and the new pedders.....you can see the black factory bushing is a joke. Flimsy POS. The new Pedders is solid. By the way they are sitting on top of the POS factory Radius Rod bushing.
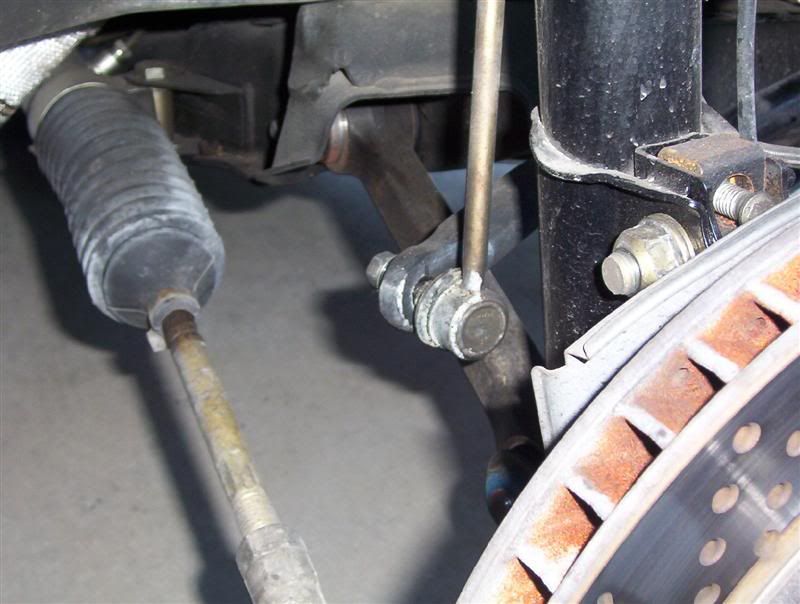
Here is what we are after....these pics are from the passenger side by the way....
Here is the swaybar bushing....see the copper bracket holding it in....
Now I started to take it off using a open end wrench....but that got old...so I opened the hood and you can get right to both of the nuts ...look down and there they are. I used a couple of extension and got after them. Came right off. Once you get the bushing bracket off...you need to break the swaybar loose.....break the end link from the swaybar here....You may need to jack up the control arm about an inch or two to let the swaybar come loose.....
Go ahead and pull the old swaybar bushing out...clean it up good....grease the inside of your new bushing and set it in there....retighten the bracket and nuts. I torqued them to 35lbs. Here is the new one installed....

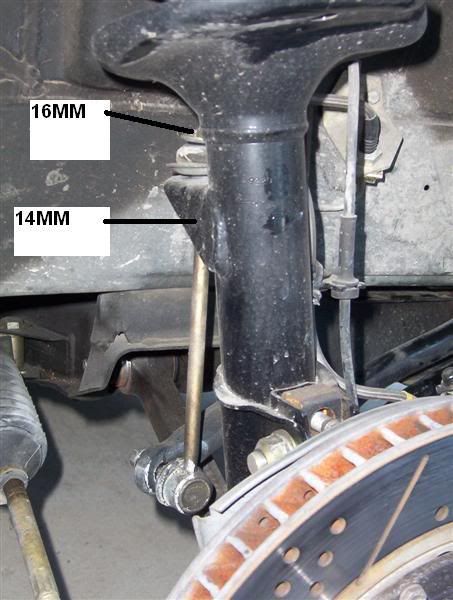
Now remove the end link for its new bushings. You need a 16mm wrench for the top nut and a 14mm wrench to hold it while your taking the nut off. I measured the distance between the first washer and the end of the bolt so I could put it back the same distance.