Mine are the 2" primaries, just like his.

Printable View
Mine are the 2" primaries, just like his.
Not sure, maybe it's a newer design?Quote:
Originally Posted by ls1camino
Thanks! Kooks True Duals to go with them are on their way as well.Quote:
Originally Posted by pajeff02
I got my driveshaft off and after doing so I realized I did not have the plug for the transmission next to me...which resulted in a mess until I grabbed it and stuck it on the tail shaft. All that is left is to drop the engine/trans out of the bottom now.
Quote:
Originally Posted by fbodyNATION
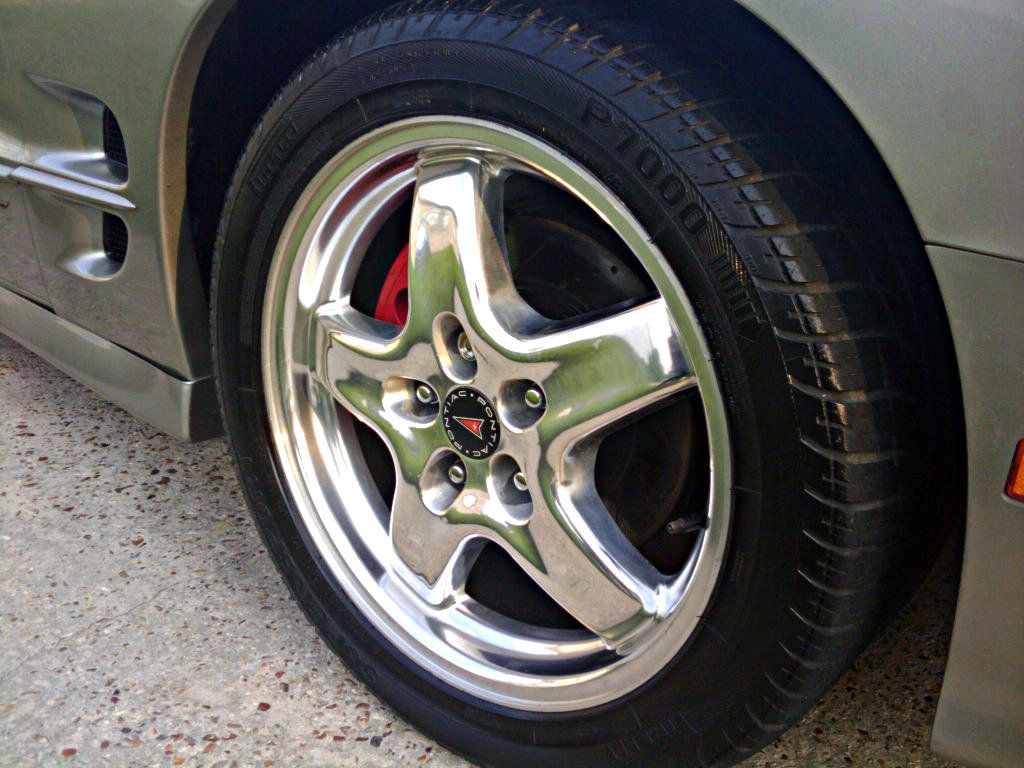
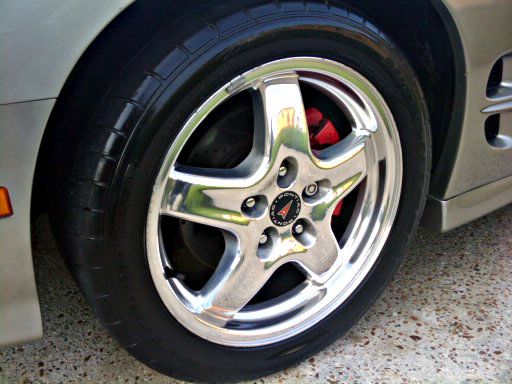
so my wheels look different than yours???? they are ws6 wheel caps but the wheels are more caved inwards as yours are more bowed out..wierd
Attachment 25669
You have the 98-00 WS6 wheels, he has the 01-02 WS6 wheels.Quote:
Originally Posted by Questioner
I think those are the years.
that's a QT bell housing correct? I have one also for my T56. Great bell housing.Quote:
Originally Posted by ls1camino
Yup.Quote:
Originally Posted by SMWS6TA
Box 1 of 2 for my TDs. The other needed a signature for some reason.....
http://i737.photobucket.com/albums/x...ps0d3d28ff.jpg
http://i737.photobucket.com/albums/x...ps98f86ae3.jpg
95# Deatschwerks injectors
http://i737.photobucket.com/albums/x...psdbd20f63.jpg
http://i737.photobucket.com/albums/x...pse9bc02e8.jpg
Mast Motorsports 4th gen stroker windage tray
http://i737.photobucket.com/albums/x...pse4d13bc6.jpg
http://i737.photobucket.com/albums/x...psb7971355.jpg
Got my UMI Torq Arm, sold my factory air box on eBay, also set of Heads, Parts in parts out. Money out and money in then MORE PARTS IN. I love this time of year.
Assembled my Kooks TDs in my basement lol.
http://i737.photobucket.com/albums/x...ps01fa9b54.jpg
http://i737.photobucket.com/albums/x...psaa1a9194.jpg
http://i737.photobucket.com/albums/x...psffab7f18.jpg
http://i737.photobucket.com/albums/x...ps3aec0ac0.jpg
http://i737.photobucket.com/albums/x...ps130b97b1.jpg
Just realized I think I put the tips on the wrong side.
Looks awesome! You'll need to post some pics of the install.
I will after I get my engine done or at a minimum the fuel pump switched out since I am going to drop the rear end to replace the fuel pump.Quote:
Originally Posted by pajeff02
Ugh I love that exhaust set up, Will, very nice. I'm thinking of going with bassani true dual but I'm staying legal with the emissions ....unfortunately. But I refuse to stay quiet :)
I wrapped her in some new BFG sport comp 2 shoes yesterday. So far I'm happy with them, but she is already put up again due to impending winter weather :(
Thanks the quality is astonishing.Quote:
Originally Posted by Questioner
anyone else notice installing a block is much cleaner than tearing it down?
http://i584.photobucket.com/albums/s...psogie8wqa.jpg
Replaced the stamped steel lower control arms on my hawk with tubulars in black (of course). What a pain in the ass the passenger side was. Couldn't get either bolt out of the stock piece. Had to punch the front one out & back out with a ratchet the rear. Turns out, the rear was bound up by the sub frame connector. So, off came the passenger side sfc to bore out the mounting hole to make room for the lca bolt. After busting the back of my hand 5 times on the chassis trying to torque the bottom bolt to specs, I said f this & finished with a combination wrench. Sure is fun laying on the garage floor doing suspension work.
Took her out and ran like 60miles of the Natchez Trace...lots of turns, lots of hills. For a 14 year old car she still can blow by some of the stuff that was out there with me...WITH THAT SAID...I got the suspension mod bug big time...
https://fbcdn-sphotos-c-a.akamaihd.n...13134133_n.jpg
These came in today, stock rockers with the trunion upgrade installed but they are also cryogenically treated as well as micropolished for increased strength.
http://i737.photobucket.com/albums/x...psaf80314b.jpg
http://i737.photobucket.com/albums/x...ps5b7c3cd4.jpg
http://i737.photobucket.com/albums/x...ps620cc198.jpg
http://i737.photobucket.com/albums/x...pscdc536a1.jpg
Nice! Where did you get those at?
Ebay from RPM transmissions. They can cryogenically treat and micropolish pretty much anything.Quote:
Originally Posted by pajeff02
Crappy cell phone pics but I got my HID kit that I got for Christmas installed.
http://i78.photobucket.com/albums/j1...ps769ea644.jpg
http://i78.photobucket.com/albums/j1...psab2cce3e.jpg
Pulled the LS1 out, through the top and with the 4l60e still attached, it was actually quite easy.
http://i737.photobucket.com/albums/x...ps46091fbf.jpg
http://i737.photobucket.com/albums/x...psf724053d.jpg
http://i737.photobucket.com/albums/x...ps23e268c5.jpg
It's kinda funny you posted the picts of the ls1 coming out from the top. The chiltons book has a pict of the same thing on the front cover. Although "they" always say to drop the sub frame and suspension.
Lol, kind of confusing when it seems to contradict itself then. I found it way easier from the top despite what others said about removing it from the top with the Transmission still attached.Quote:
Originally Posted by RONS98TA
I also pulled mine from the top. It is so much easier to do the k member way. Less to take off . Going through the top means pulling the top end off. I dropped my transmission too to make it easier.Quote:
Originally Posted by RONS98TA
How I removed mine I could have done it without removing the top end at all (except the FAST 102 that is) it was already off so it did make it easier but I could have done it either way. If I had a lift I would have done it out the bottom like Scott said.
I will always recommend removing the intake off at a minimum. It's plastic and can get cracked if pinched by the cowl if you aren't careful. Getting it back in I installed the heads outside the car (so much easier :D )
Well the passenger window didn't roll up even so by the mirror there was a .5 inch gap so I took the door panel off and the two holes in the fiberglass that hold the window motor had been elongated!! So I will reinforce the glass later but for now I used panel washers and just winched the hell outta it so it's in it proper place! Window seals again
interesting...my driver side window does that as well. I was thinking it was the regulator that the window actually sits in/on...I might take a look at this before I order the regulator. Do you know what size washers you used...?Quote:
Originally Posted by Sadie2
it could also be the horrible posts that the guide wheels are attached to. The rivets on mine popped out. There is a quick fix on the tech stickies.
She's finally in, leaving the ac belt off till I can get it purged and filled. Hate to see the compressor destroyed because of lack of oil/no freon.
http://i584.photobucket.com/albums/s...ps1pq5wxro.jpg
You can see how the new belt will be re-routed. So much room now to service the R&P.
i used two inch fender washers with a 1/4" hole... also switched the phillips head screw for a 1/2" bolt.
cool. thanks for the info.Quote:
Originally Posted by Sadie2
Spent all day removing and re-installing the tranny to replace the slave quick connect fitting. :brick:
Harrowing Hydraulics | 2000 Trans Am Blog
I also like the fact the the alt is now up away from the possibility of getting wet by a puddle, a power steering leak, or if you need the change it out. I just installed a D1SC Procharger and it sure would be nice to NOT have the alt in the way of changing out the pulley!Quote:
Originally Posted by SMWS6TA
Scott - how about a better pic of your alternator set up?
I plan on doing a sticky once it's all done on how to do this.
http://i584.photobucket.com/albums/s...ps9wyg0ru2.jpg
http://i584.photobucket.com/albums/s...ps0jnwnohy.jpg
http://i584.photobucket.com/albums/s...psx7shfife.jpg
- - - Updated - - -
http://i584.photobucket.com/albums/s...psqcom7ije.jpg
http://i584.photobucket.com/albums/s...psj9w7yjme.jpg
that sucker is up in the air lol is your hood going to close...? I do like that location WAY better...Quote:
Originally Posted by SMWS6TA
yes it does, and I have a flat non ws6 hood. At least till this summer when I plan on getting a WSQ hood.
It doesn't look like it but it's no higher then the intake and slightly lower than my TSB (tower strut brace)
Did you figure out what to do with your catch can with this setup?Quote:
Originally Posted by SMWS6TA
not yet, I'm going to wait till I get everything installed to see what options I have.
Nice -- cool setup on the mounts.
My best guess is probably going to be the wheel well on the other side of the evap canister.Quote:
Originally Posted by SMWS6TA
Pulled her into the garage for the first time. Also snapped some pics.
http://img.tapatalk.com/d/14/03/15/egatu9ab.jpg
http://img.tapatalk.com/d/14/03/15/6unupa7u.jpg
http://img.tapatalk.com/d/14/03/15/bahe9ute.jpg
http://img.tapatalk.com/d/14/03/15/naqa7uza.jpg
http://img.tapatalk.com/d/14/03/15/yna9apeq.jpg
http://img.tapatalk.com/d/14/03/15/edaja6e5.jpg
http://img.tapatalk.com/d/14/03/15/e7anega2.jpg
Is that a pro charger with the stock dual fans? How did that fit? I just installed a procharger D1SC on my 98 TA and I had to use the single fan. Even then it was a tight fit with the blower hitting the sheet metal plate for the single fan.Quote:
Originally Posted by Dzel
I looks like you have relocated the radiator forward some. I see the aftermarket fan in front of the blower and what looks like the stocker on the other side. Nice set up.
Yes the radiator was moved up have us about 1.5 inches of clearance in between the D1 and the fan.
You really can't see it but I have the intercooler in front of those as well about 5 inches of space in between. Custom intercooler so the fog lights are still there.
Do you have the Burkhart Chassis front bumper support?
Negative. I have to double check if I even still have the crash beam
I dont have a crash bumper at all on mine. Just the large FMIC. I made up some custom brackets so I could still have my fog lights also.
Did some detail work...got a car show im heading to this weekend. Rubbing compound, polish, wax, etc...
I think the picture with the reflection was after the rubbing compound and before the polish.
http://i188.photobucket.com/albums/z...ps3d411604.jpg
http://i188.photobucket.com/albums/z...psbb8b7186.jpg
http://i188.photobucket.com/albums/z...ps0d9c449e.jpg
Fresh and clean!
I also hit all the plastic and rubber striping on the car with some of this stuff...worked really well. Made the plastic between the hood and windshield look brand new.
http://ep.yimg.com/ca/I/autopia_2267_68143116
Not oily is it?
nope. it dries in like 2-3mins and just looks black instead of oily. Its not like tire shine or anything like that...not sure how long the black color will last because i've never really used it but im sure it'll wear off eventually after washing the car 5-10times.Quote:
Originally Posted by Dzel
Has anybody tried this mod yet...? Its for the AUX stereo input on a stock headunit.
Thinking about picking up the little part tonight and splicing everything in when I get home. Must...have...IPOD...in...car...
http://www.jason-novak.com/pictures/spliced.jpg
http://jason-novak.com/pictures/diagram.jpg
ordered new ZR1 rims to replace my old ZR1 rims. Trying to figure out what 315/35/17 to put on the rears that are streetable and still has a decent amount of grip for straight line acceleration
Look what came in today even despite the snow! Vigilante 4000 stall and my ABS delete kit (comes with a Wilwood proportioning valve) with a Hurst line lock.
http://i737.photobucket.com/albums/x...ps39fdeec8.jpg
http://i737.photobucket.com/albums/x...ps338cfa7b.jpg
Yes. I did this mod a long time ago. It's fairly easy and works great if you want to keep your original head unit.Quote:
Originally Posted by theorangeguy
It was a couple days ago, BUT my brother and I picked up a new toy for him. It's a 1999 trans am. We got it from "Spaz".
got in my car this morning and it wouldnt start...looks like a dead battery "fingers crossed"...glad I didnt drive it because it started raining halfway to work anyway.
Sorry no pics, too tired and forgot but the Monster Clutch, flywheel, starter and bell housing are in. Just hope I installed the clutch disk correctly. They only go on one way correct?
Also finish running the wire harness on the bottom side.
Just need my rebuilt transmission to come home and throw it in.
took her to work today...
http://i188.photobucket.com/albums/z...psc3c273b6.jpg
Every time I see your car I say to myself. "I'm Batman" lol
haha funny you mention that...I stopped at a gas station on the way in to work this morning to get a drink and put some gas in it and a dude walked by and said it looked like the bat mobile.Quote:
Originally Posted by Dzel
My staff calls our car "The Batmobile" when I take it to the office.
Spent SEVERAL hours changing out the stock head lights and fog lights for true HID's. Not a hard job at all, just very time consuming. I also go the extra mile to wire loom all the wires, zip tie wires out of the way, hide everything for the "stock" look, and I also don't cut and splice any wires. That way, if I ever get the urge to go back to stock, everything is there and it can be done w/o a hassle.
when you say true HID's are you referring to projectors, HID's, etc etc or did you drop in an HID kit? Only reason I ask is because I havent found a really good projector solution for my car yet...I ordered some stuff online like 2 or 3 months ago but I havent installed any of it yet and they arent projectors...they are a different housing "same size as stock" but they accept a different bulb so you can run an hid kit. I got LED's for the fog lights because I kept reading that our fog lenses like to melt under the heat of an HID kit so I didnt want to fool with it but I did get a 35watt headlight kit.Quote:
Originally Posted by RONS98TA
NOTHING, been snowing here off and on all day on this the first day of spring!
Pics!!! Or it didn't happen! LolQuote:
Originally Posted by RONS98TA
Wait...Ryan sold his car?Quote:
Originally Posted by RONS98TA
:yup:Quote:
Originally Posted by ls1camino
Finally got around to re-installing the gauge pod.
Gauges Re-Installed | 2000 Trans Am Blog
What is this mod for? adding an ''aux'' for an ipod or something???Quote:
Originally Posted by OhTwo
That's it!Quote:
Originally Posted by SuperSSguy
No I did not get projectors, just an HID 6000 temp kit into the stock looking housings. I bought different housings years ago for the high and low beams. The fog lights are in the stock housings. Haven't had any melting issue yet, but it has been 20-30 degrees the past 6 month's here in Maryland. I guess winter is never gonna end!! UGGGHHH!
based one what I read it looks like it takes a while for any issues to pop up with the fog lights...you have to run them quite a bit to have any heat issues.Quote:
Originally Posted by RONS98TA
Here's a pic of one of them I found when researching the problem but I really think you'll be ok if its a 35watt kit. the 55's seem to be more of a problem.
http://i675.photobucket.com/albums/v...psb5e226fd.jpg
Looks like someone had a cold and spit a "lugey" in there!! LOL That's nasty looking. I hope that doesn't happen to me. I guess only time will tell. I will try to get pics to ya Dzel, cause I took a few. Just haven't got around to loading them onto the pc yet.
I noticed that my passenger side DRL is out when I fired up the car over the weekend. I just installed new lamp pigtails too. Hmm.
mine go out on a regular basis if I dont put a dab of di-electric grease in the socket...Quote:
Originally Posted by pajeff02
Mine were greased upon installation. I pretty much use dielectric grease on everything in the garage. :dunno:
I keep a spare set of new bulbs in my glovebox. I did just buy some new housings to see if that helps. I cleaned all the sockets and always apply dielectric grease also.
I just bought a set of Morel 5206 Link Bar Lifters since no one seems to have BTR SLR Lifters.
Quote:
Originally Posted by pajeff02
Mine was out too, took it for a short ride and it started working again.
i've had that happen as well...moisture causes 90% of the issues with the DRL's. I dont drive my car in the rain and I also dont spray water directly into the pockets on the front bumper where the DRL's are located because they are pretty notorious for letting water in. If I pop it with a hose one good time i'll have one go out...Quote:
Originally Posted by cpop98ws6
ordered all the stuff to remove the secondary air system from my car...next up will be the EGR.
This reminds me to drill some drain holes in the drls while the nose piece is off. I had great success doing this with my tail lights. No water fill ups and the chrome is still looking good inside the tail lights.
I wish I had the time to do the C6 fog light mod to the drl's but.....priorities....priorities. I think I'll do it at the same time I do the HD light conversion.
Did this on Saturday...
Trans am ws6 - YouTube
You have a cracked ring or a head gasket going or is that what happens when you do the sea foam treatment?????:lmao:
I'm totally kidding that was bad ass:drivin::drivin:
looks like sea foam to me :hmm:Quote:
Originally Posted by kingls1
That car will never see sea foam.
haha why you say that?Quote:
Originally Posted by cpop98ws6
We use a different product at work lol
gotcha...I always ask because some people like it and some people dont. Just curious if you had a bad experience with it or something.Quote:
Originally Posted by cpop98ws6
Seafoam. :no:
ok...so whats your story on it?Quote:
Originally Posted by pajeff02
Seafoam is a solvent -- no way I am dumping that crap in my gas tank or engine. I prefer the TC-W3 regimen with an occasional dose of Chevron Techron fuel system cleaner for the fuel tank and Penzoil Platinum for the oil pan.
Adding to the above, the simplest way to de-carbon the cylinders is to mist water into the intake with a spray bottle while the engine is running. No harsh chemicals and about as cheap a fix as you can get.