
Results 1 to 20 of 35
Thread: Transmission Removal - Part 1
-
05-16-2011, 06:48 PM #1Veteran


- Join Date
- Feb 2009
- Location
- Mansfield, PA
- Posts
- 22,146
Black & Blue- '02 WS.6 / '07 Suburban
Transmission Removal - Part 1
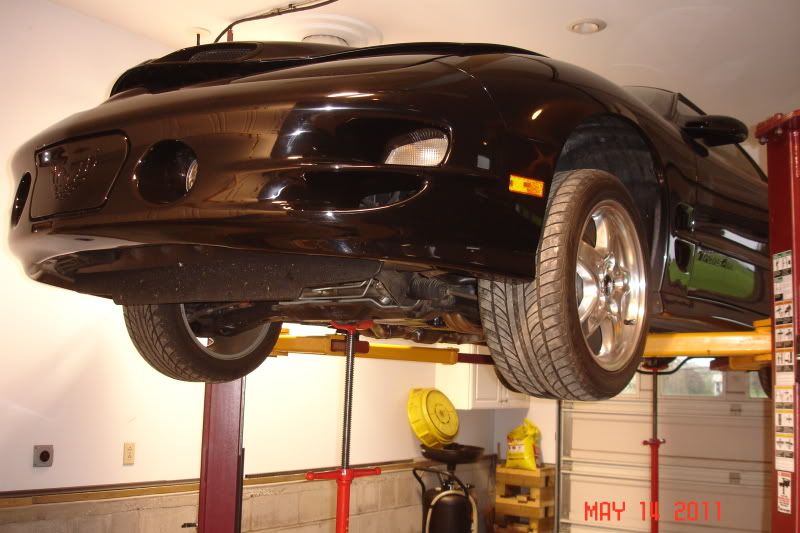
This past weekend, I pulled the transmission from our 2002 Trans Am in preparation for installing a Performabuilt Level II and a 3,200 stall torque converter. Although labor intensive, the removal is a pretty straightforward process and I have detailed a few tips and tricks to make the job simpler. I started the job by disconnecting the battery, pulling the transmission dipstick, and then unclipped and removed the air lid. This is necessary as the engine will be tipped down during the process and the air lid can be damaged from excessive strain.
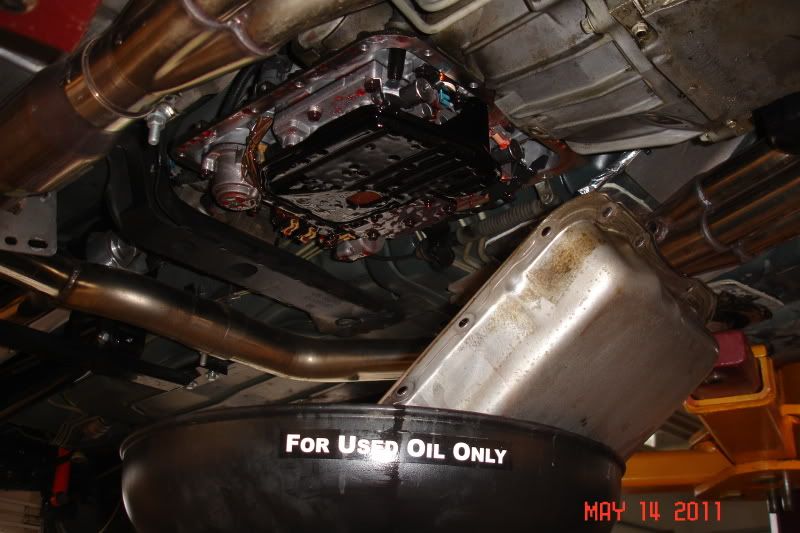
I picked up the car a few inches on my lift and then placed the transmission in neutral before raising the car to working height. This allows the driveshaft to be rotated to facilitate its removal. Once under the car, I drained the transmission fluid by dropping the pan. This is not completely necessary, but it does help avoid a mess and only takes several minutes to do.
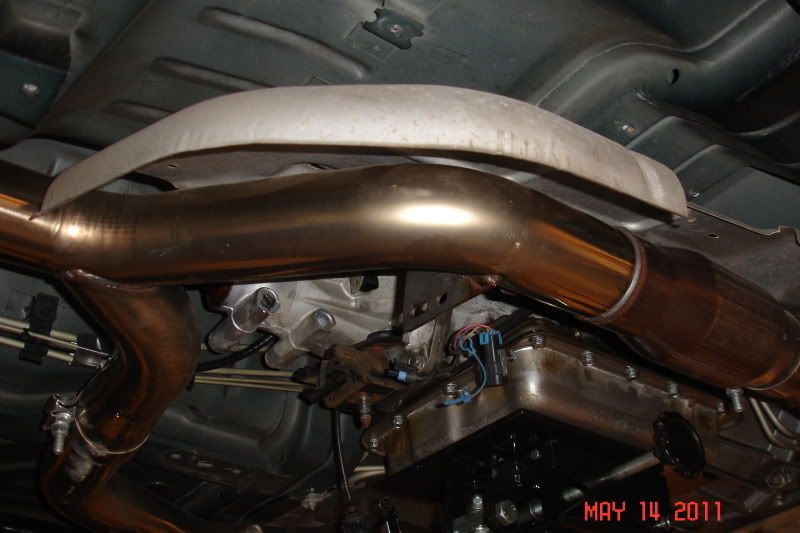
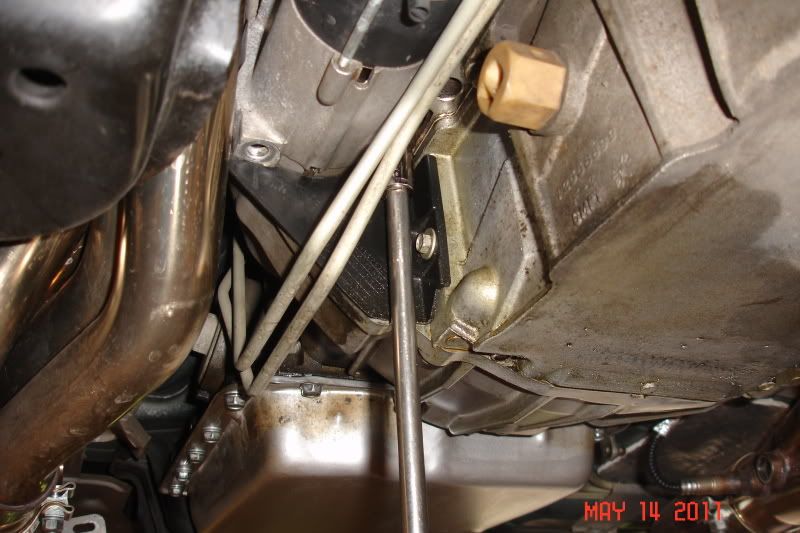
After bolting the pan back in place, I began removal of the ancillary parts to make room for dropping the transmission. This includes the driveshaft and, on our car, the tunnel mount for the torque arm. Stock cars will need to have the tunnel brace removed and the clamp on the side of the tailstock that retains the torque arm. If the transmission fluid is not drained, you need to plug the tailstock or fluid will leak out. On cars equipped with stock exhaust, the service manual indicates that the converters need to be removed. Our car has Kooks LT's and catted Y-pipe and I was able to leave these in place. I did pull the front O2 senders, but was able to leave the O2 sender for my air/fuel gauge in place. Stock cars will need to have the harness for the rear O2 senders unclipped. I also removed the heat shields from both the driver and passenger side to give me a few extra inches of working space.
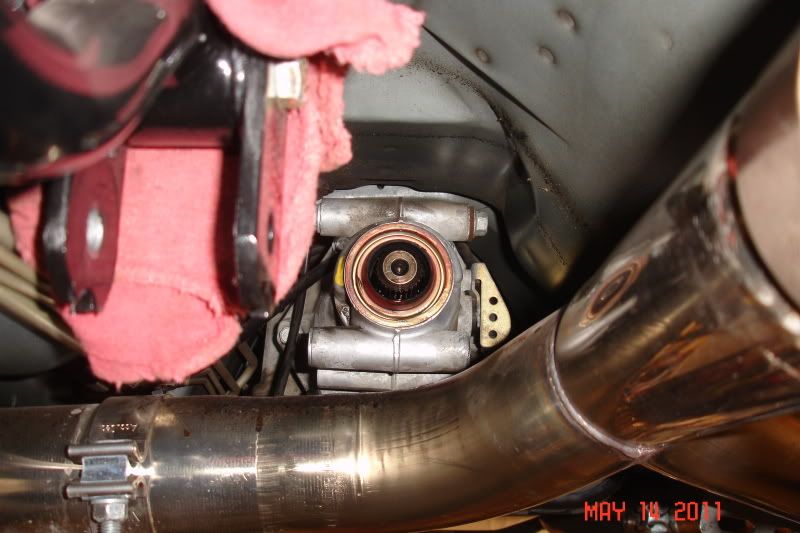
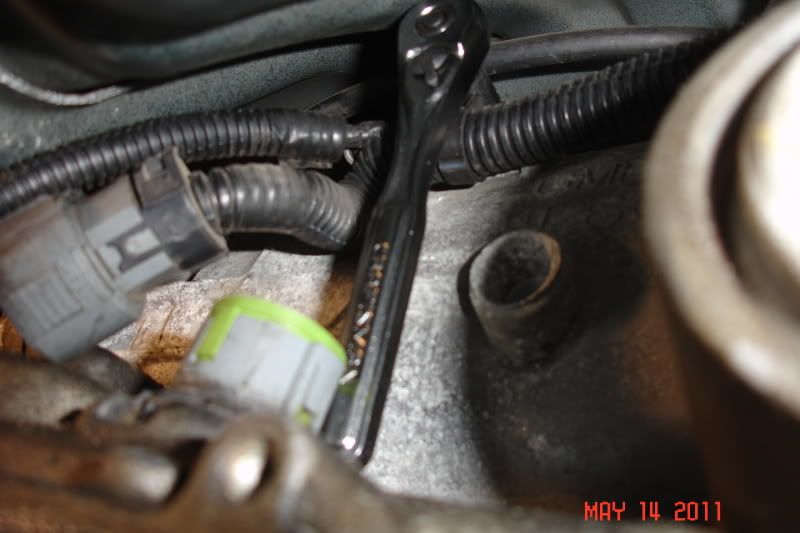
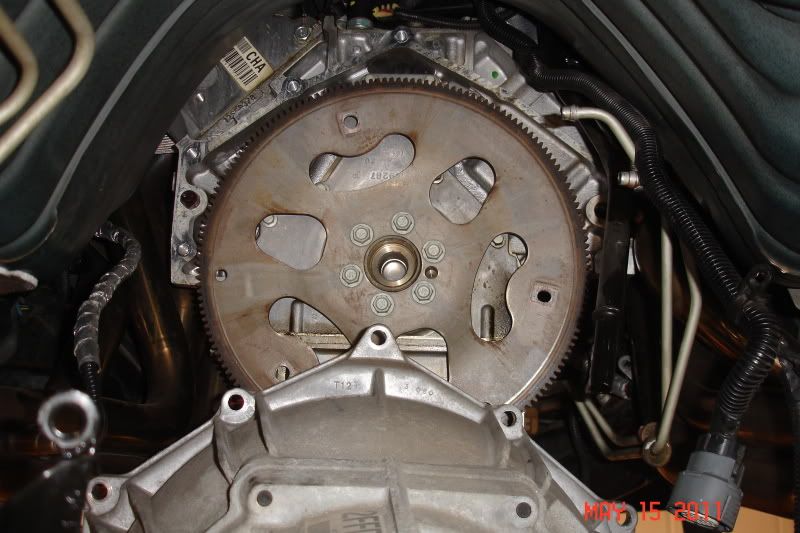
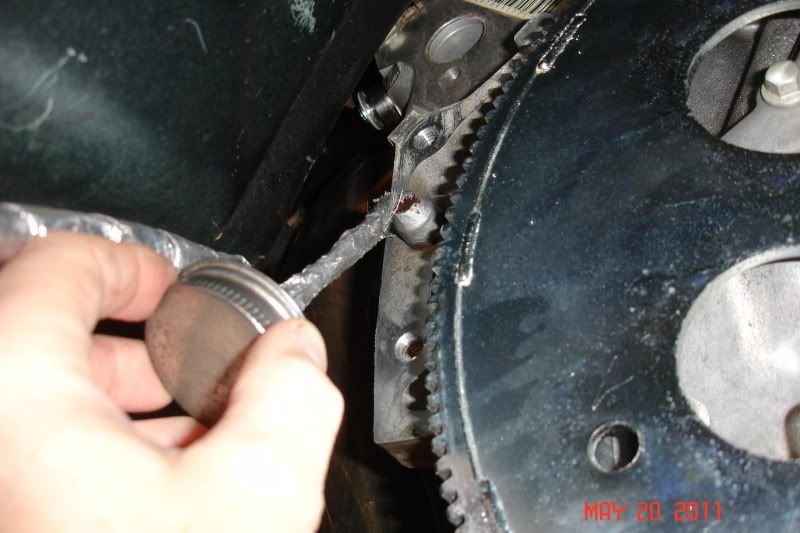
The starter has to be removed to access the torque converter bolts. Be sure to remove it completey and do not allow it to hang from the wire harness. Also, make sure the battery is disconnected before you pull the starter. Once the starter is out of the way, the plastic torque converter covers can be removed from both sides of the engine. Using a large breaker bar and socket to rotate and hold the crank via the balancer bolt, the engine can be turned until a torque converter bolt in the flex plate becomes visible. There are three bolts and I found that the easiest method for removal was to run a long 3/8" extension over the K-member along the passenger side of the engine and to break the bolts loose with my impact. Just be very careful not to slip off and round the bolt heads. Once the bolts were removed, I started unclipping the harness connectors from the transmission. There is one for the speed sensor on the tailstock and a large round plug on the passenger side of the transmission. There are also two harness retainer clips that must be unbolted from each side of the transmission.
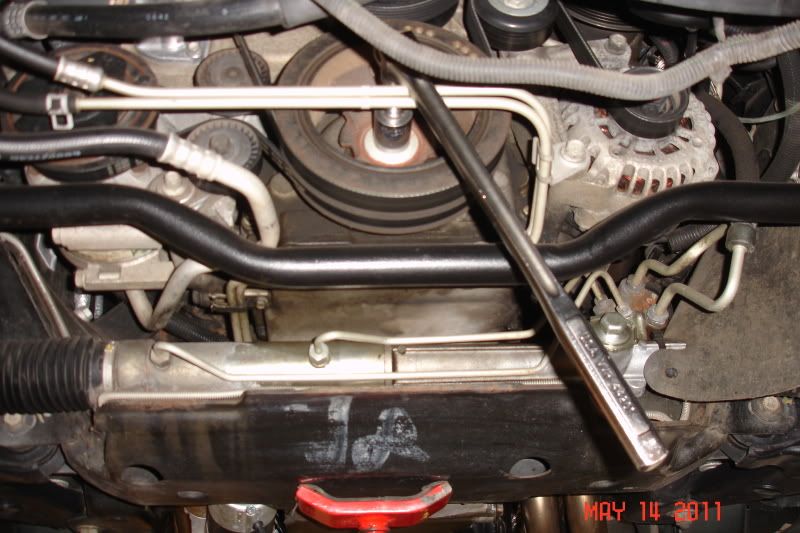
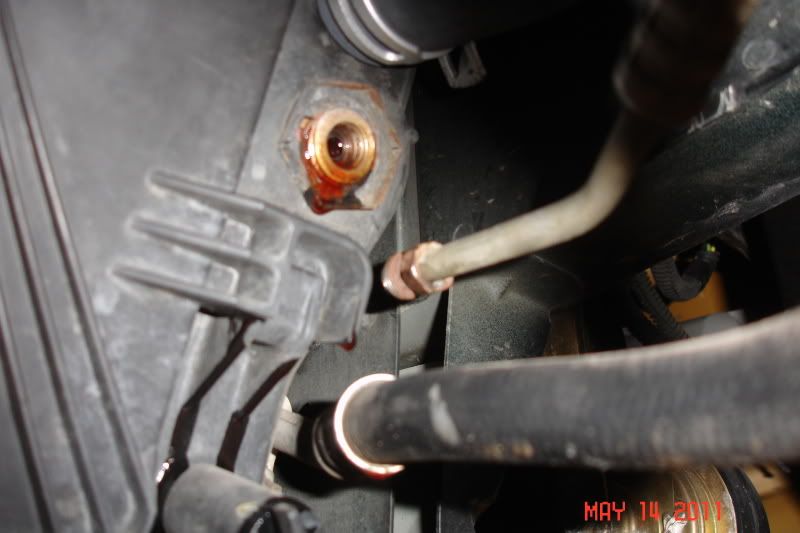
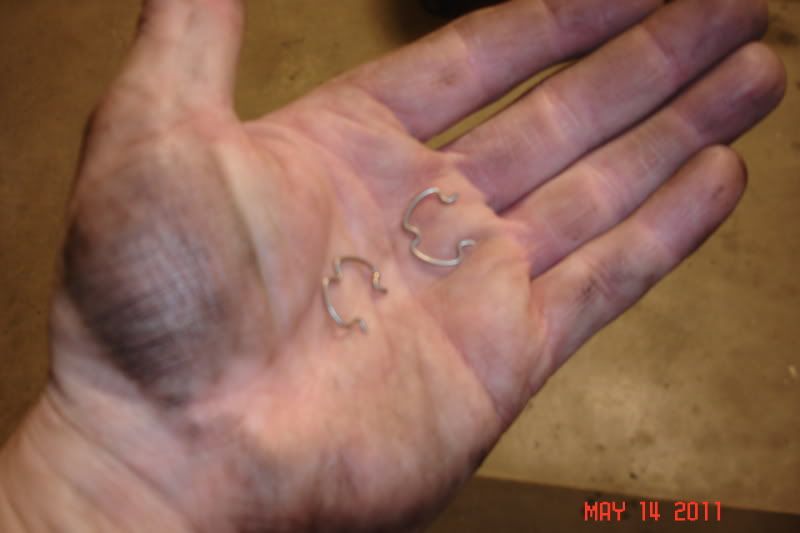
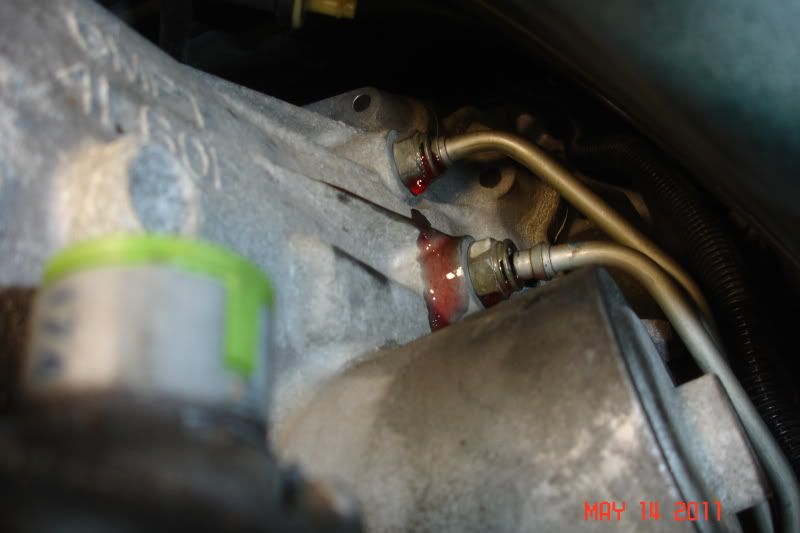
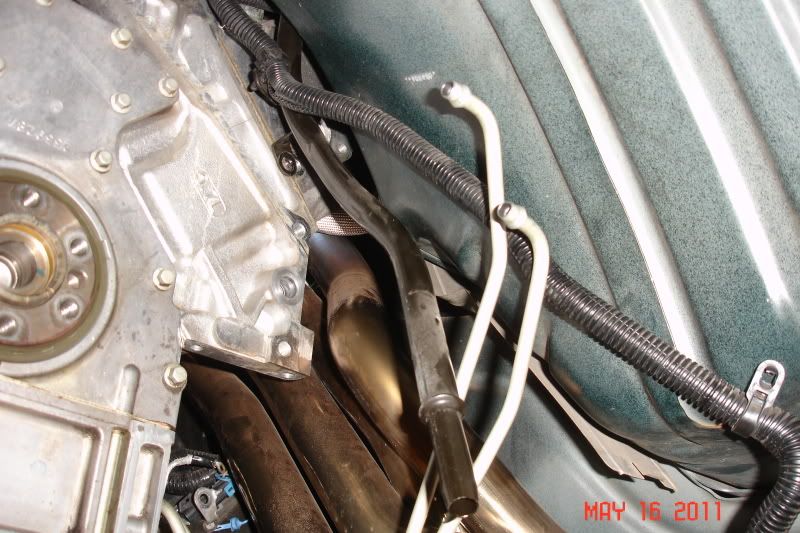
I then moved up front and unbolted the bottom cooler line from the radiator. In order to get my line wrench on the fitting, I had to pull the plastic splash shield and vacuum canister from the area adjacent to the radiator on the passenger side. Once the line was unbolted, I used gentle air pressure to push the fluid from both the cooler and bottom line back into the transmission. This will cut down on how much fluid drips out. The lines on the side of the transmission are retained by clips. A round plastic cover is gently pried back to reveal the clips. The manual recommends a bent tip screwdriver, however, I was able to use a long screwdriver to release the clips. A dental pick would have probably worked best, but I just did not think of it at the time. The clips are not supposed to be reinstalled once removed. Fortunately, Performabuilt supplies a new set of clips with their transmissions.
Last edited by pajeff02; 05-17-2011 at 03:04 AM.
-
05-16-2011, 07:11 PM #2Member

- Join Date
- May 2009
- Location
- Osawatomie KS
- Age
- 35
- Posts
- 324
white/Black- 1999 Pontiac Firebird
Helpful Im fixing do mine thanks for pics
-
05-16-2011, 07:21 PM #3Senior Member
- Join Date
- Apr 2007
- Location
- Newport, RI
- Posts
- 1,552
Navy Blue Metallic- '00 Formy A4
Great writeup! I'm looking forward to seeign the rest, and also hearing about the 3200 converter...I'm thinking about one for my car.
-
05-16-2011, 07:23 PM #4FASTER THNA SPEEDINtICKEt

- Join Date
- Apr 2008
- Location
- A, A
- Age
- 35
- Posts
- 281
White- 2002 trans-am

whooo I just did this yesterday and finished today.
-
05-16-2011, 07:33 PM #5Just a slow Camaro

- Join Date
- Oct 2007
- Location
- Fresno Ca
- Posts
- 2,228
LPM- 2002 Z28 Camaro

Nice write up and pics. I'll be doing this this summer to put the stall in and I wish I had a lift to do mine on.
-
05-16-2011, 07:56 PM #6FASTER THNA SPEEDINtICKEt
- Join Date
- Apr 2008
- Location
- A, A
- Age
- 35
- Posts
- 281
White- 2002 trans-am
dig a hole haha Like I did this is the second time I've done this. suck without a lift
-
05-17-2011, 06:06 PM #7Veteran
- Join Date
- Feb 2009
- Location
- Mansfield, PA
- Posts
- 22,146
Black & Blue- '02 WS.6 / '07 Suburban
Transmission Removal - Part II
With the transmission cooler lines disconnected, the shift cable popped from the lever, and the shift cable bracket unbolted from the pan rail, I positioned the transmission jack under the pan and applied a slight amount of pressure. I then unbolted the transmission mount and removed the crossmember. I disconnected the exhaust in front of the rear axle. This allowed the engine and transmission to be tipped downward to allow better access to the bolts. The exhaust was supported with an undercar stand and the transmission jack was then lowered. A second undercar stand was positioned under the oil pan with a block of wood between the stand and the pan to spread the weight.
There are six (6) bolts that attach the transmission bellhousing to the engine block and two (2) bolts that attach it to the oil pan. I began by removing the bolts on the bottom as they were all easily accessible. The upper bolts are best reached with a very long 3/8" extension setup with a swivel -- you need about 3' of extension to work comfortably. Interestingly, the top bolt was not the issue -- it was the bolt adjacent to the driver compartment footwell that gave me a problem. After unscrewing it a couple of turns, the socket would wedge against the tunnel. I eventually got out my 1/4" drive socket and extension to remove it.
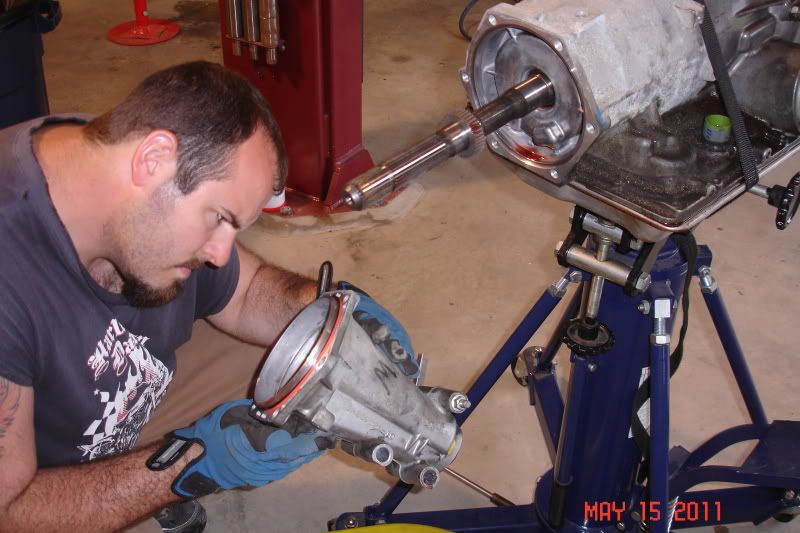
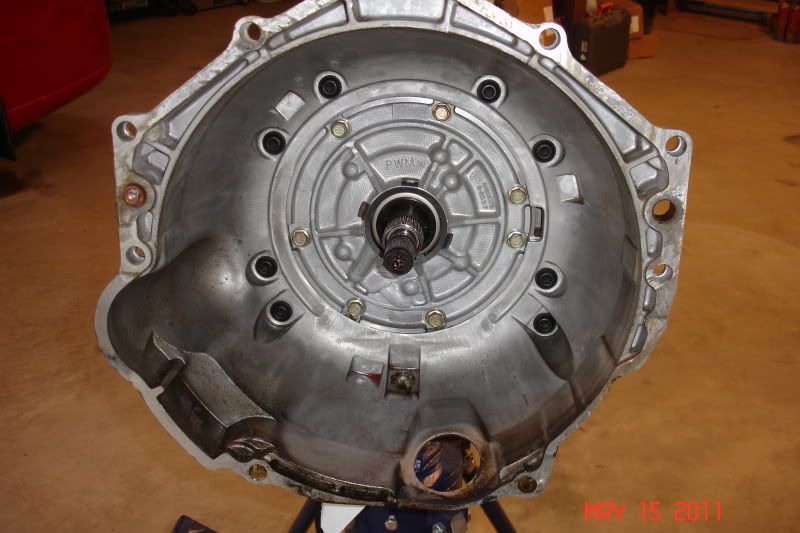
The last item to disconnect is the transmission dipstick tube which is bolted to the back of the passenger side head with a 15mm bolt. The transmission and rear O2 sender harness is clipped to the tube bracket and proved impossible to remove. I ended up popping the dipstick from the case and allowed it to hang in the car during removal. As the transmission was backed off the pins, I worked the tube up out of the case as there was not enough clearance to pull it with the transmission in place. The hardest part of the job proved to be separating the transmission from the engine. It was stuck tight on the alignment pins and no amount of up-down or side-to-side movement would break it free. I even very carefully inserted a pry bar through the holes covered by the plastic torque converter covers to attempt to break it free. What eventually worked was having Zapper move the transmission while I attacked the passenger side pin with a blunt tip in my air chisel.
The Performabuilt requires that the bellhousing and tailstock be transferred from the old transmission, together with the cooler fittings, shift lever, speed sensor, and side brackets that retain the wire harness. With Zapper's assistance, we quickly stripped down the stock transmission and looked everything over. The bellhousing bolts are torx plus and require special sockets -- a set from MAC cost $100 (ouch!) but worked perfectly. After trying to break one free by hand, we utilized the air impact with plenty of pressure against the bolt head to ensure that the socket would not jump out and strip the head.

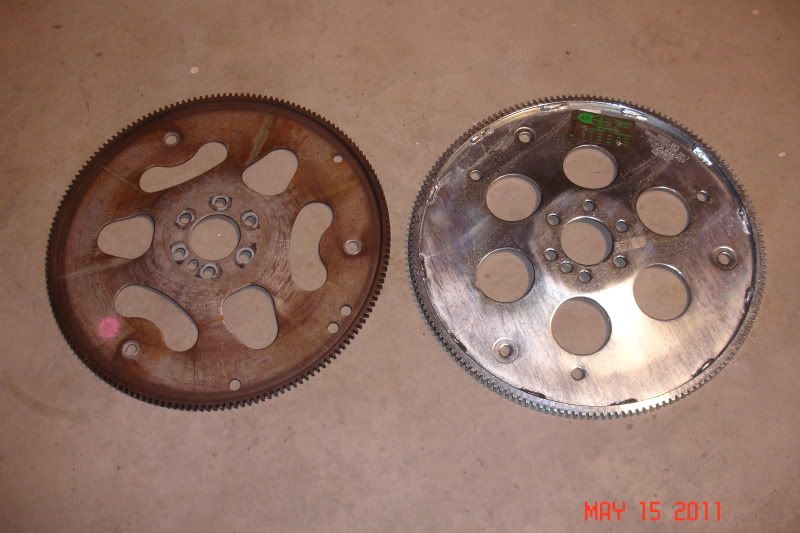
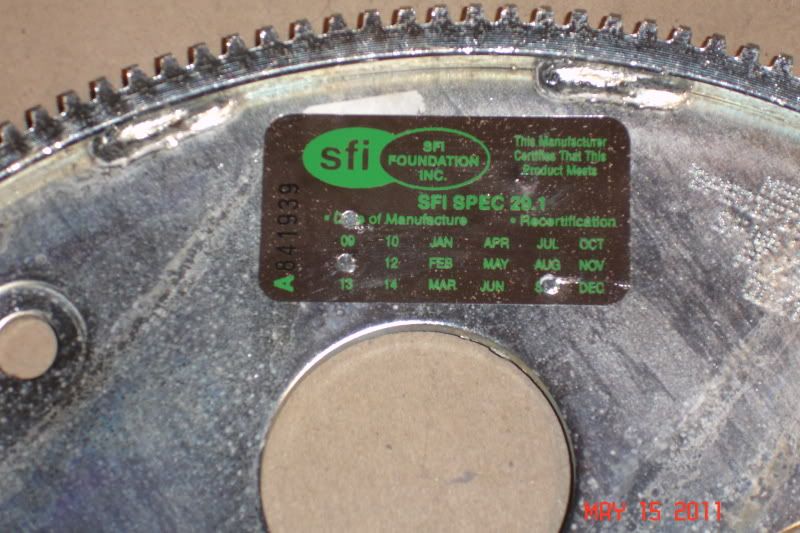
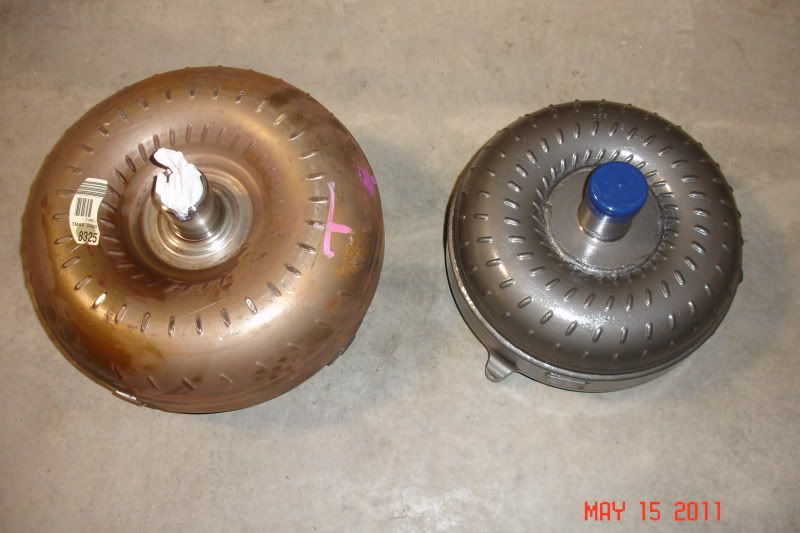
The other upgrades include switching over to a Hays SFI-approved flex plate, ARP flex plate bolts and converter bolts, and the 3,200 stall billet converter.
Thanks to both Zapper and TLS_Addict for stopping in to assist on Sunday. I would not have been able to remove the transmission myself due to the issue with the pins. I have since used emery paper to sand down the pins and holes. After a couple of test fittings onto the engine, the bellhousing now presses into place with only a small amount of force. I will apply anti-seize to the pins before final installation to avoid this issue in the future.Last edited by pajeff02; 05-17-2011 at 06:25 PM.
-
05-17-2011, 06:23 PM #8Veteran

- Join Date
- Oct 2008
- Location
- Wherever life takes me
- Posts
- 12,526
Red- 02 35th LE Camaro SS
As always Jeff, great write-up with tons of detail.
 Can't wait to see how she performs for you!
-
05-17-2011, 06:25 PM #9Veteran
- Join Date
- Feb 2009
- Location
- Mansfield, PA
- Posts
- 22,146
Black & Blue- '02 WS.6 / '07 Suburban
 Originally Posted by 35th-ANV-SS

Thanks! Hopefully will have the entire install done in the next week or so -- still have the K-member and control arms to swap out and a weeping oil pan gasket to deal with.
-
05-17-2011, 06:26 PM #10Veteran
- Join Date
- Oct 2008
- Location
- Wherever life takes me
- Posts
- 12,526
Red- 02 35th LE Camaro SS
Any idea on what the weight difference is with that K-member?
-
05-17-2011, 06:27 PM #11Veteran
- Join Date
- Feb 2009
- Location
- Mansfield, PA
- Posts
- 22,146
Black & Blue- '02 WS.6 / '07 Suburban
I think it is supposed to shave 25-35 lbs. off the car. I am going to weigh both of them to see the actual difference. Originally Posted by 35th-ANV-SS
-
05-17-2011, 07:36 PM #12Senior Member


- Join Date
- Dec 2007
- Location
- Orlando, FL
- Posts
- 3,352
Mean Black- 1998 Trans Am
great write up Jeff. this gives me a better idea on how to remove my tranny now. Very nice details.
-
05-18-2011, 11:55 AM #13Senior Member

- Join Date
- Mar 2008
- Location
- PA
- Posts
- 1,719
Ray Charles blue- 1492
The under side of the car is as clean as the pictures look too.
Zach had the "eye of the tiger" look going on in that one picture.
Cant wait for it to be all back together Jeff.
-
05-18-2011, 10:28 PM #14Member
- Join Date
- May 2009
- Location
- Osawatomie KS
- Age
- 35
- Posts
- 324
white/Black- 1999 Pontiac Firebird
Corre Im not replacing my converter Im doin new tranny but still this is lot of help ction
-
05-18-2011, 11:16 PM #15Senior Member

- Join Date
- Feb 2010
- Location
- north bay california
- Age
- 34
- Posts
- 2,973
Black- 00 camaro ss M6 #6695
nice job
wish it was for an M6, upgrade on clutch..
-
05-20-2011, 06:53 AM #16Senior Member

- Join Date
- Jun 2009
- Location
- Ohio
- Posts
- 1,017
Sunset Orange Metallic- 2002 Z28 Hardtop
Nice writeup. That looks a lot easier on a lift. Last time I did a transmission swap it was on stands.
-
05-20-2011, 12:09 PM #17Veteran
- Join Date
- Feb 2009
- Location
- Mansfield, PA
- Posts
- 22,146
Black & Blue- '02 WS.6 / '07 Suburban
Thanks, guys. A lift does make the job quite a bit easier.
-
05-21-2011, 08:48 PM #18Just me

- Join Date
- Nov 2006
- Location
- Broken Arrow, OK
- Age
- 49
- Posts
- 23,345
Pewter metallic- 2000 Camaro SS
Sticky worthy
-
05-22-2011, 06:42 PM #19Veteran
- Join Date
- Feb 2009
- Location
- Mansfield, PA
- Posts
- 22,146
Black & Blue- '02 WS.6 / '07 Suburban
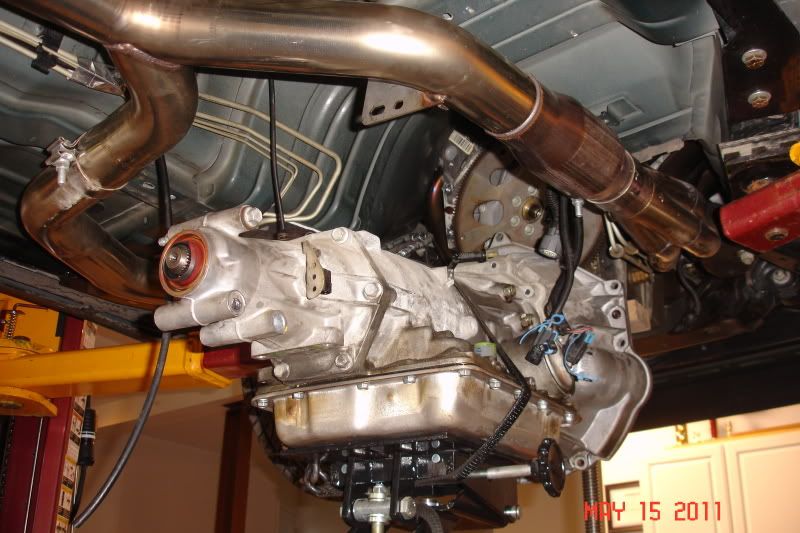
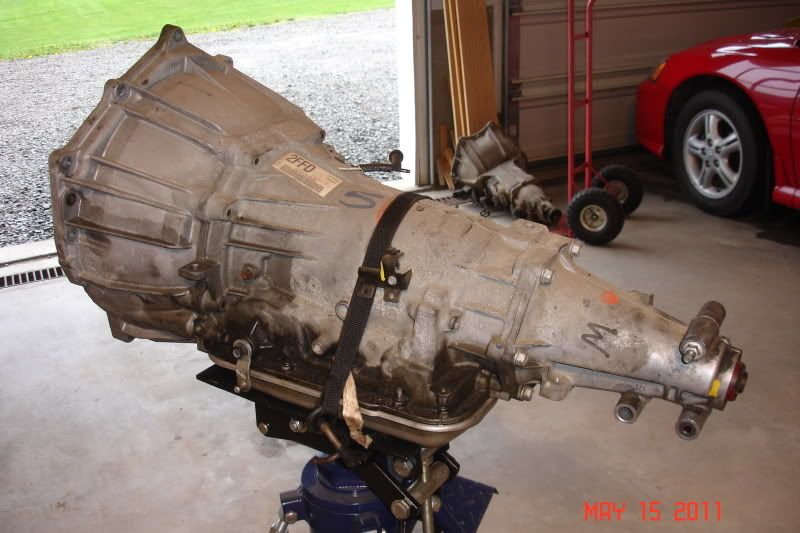
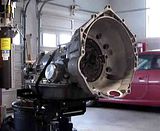
Transmission Installation - Part I
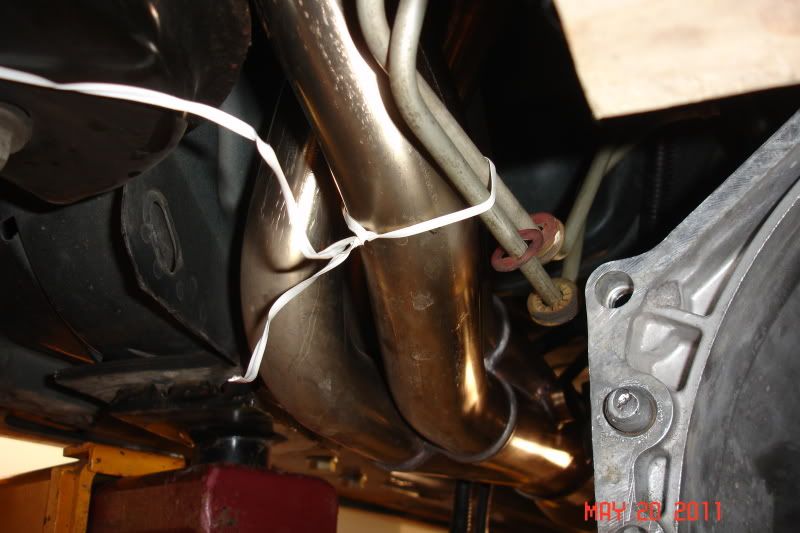
Here is the new Performabuilt going back in the car. As noted during the removal process, both the transmission cooler lines and fill tube remained in the car. I do not think there is any way I would have been able to snake the fill tube down the firewall attached to the transmission without first removing the Y-pipe from the car. I was fortunate in that other than dropping the exhaust by the rear axle to allow the engine to pivot downward, I was able to remove and install the transmission with the complete system intact. Prior to installation, I tied off the cooler lines to the passenger side header.
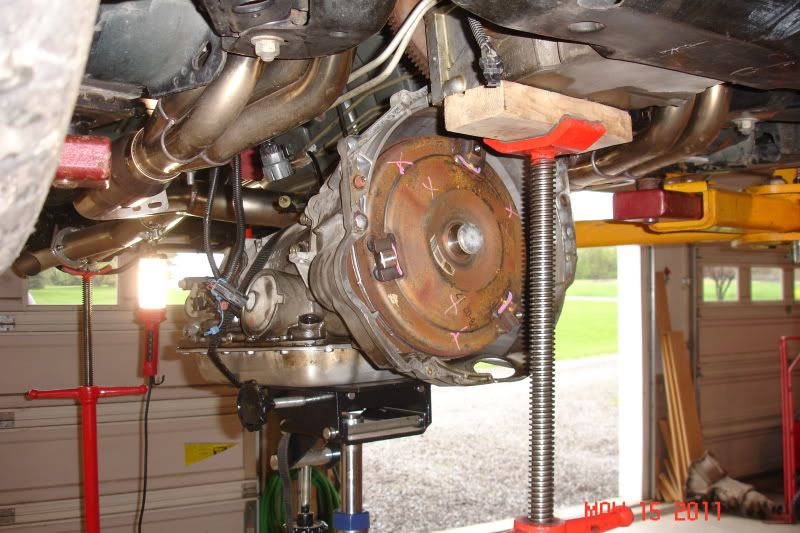
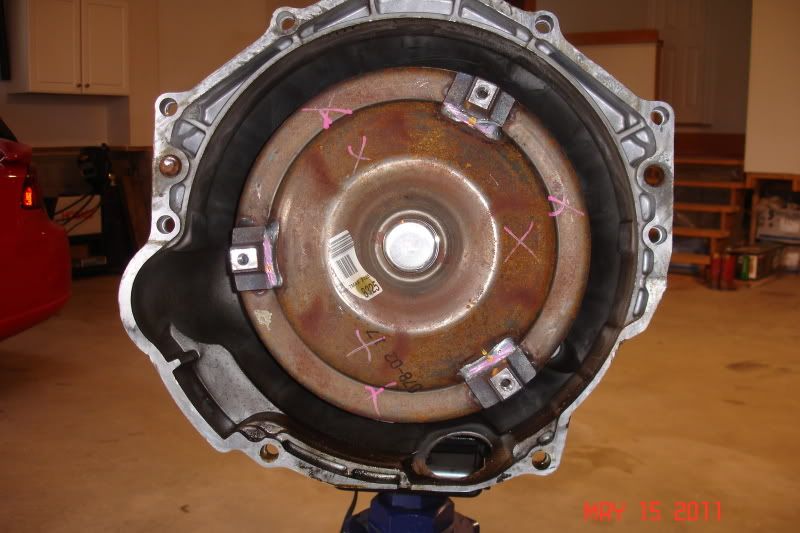
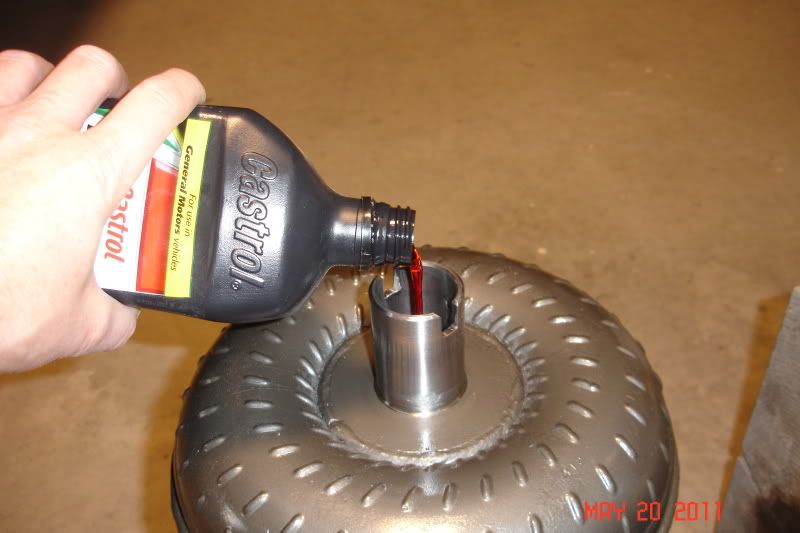
Getting the transmission ready included swapping over the bell housing and tailstock to the new unit. Performabuilt included all the necessary seals for the tailstock, dipstick, driveshaft yoke, the cooler fittings, and even a new set of cooler line clips. Before installing the torque converter, I lubed the seal lip, the splined shafts and the nose of the converter with clean transmission fluid. I also applied anti-seize to the guide pins in light of the issues I had removing the transmission. One quart of transmission fluid is then poured into the converter as new units are shipped dry. Installing the converter properly means that it has to be seated on the pump tangs or you will probably not be able to install the transmission. If you somehow manage to get it bolted up, you will certainly burn it up in a hurry as there will be no fluid pressure. The converter nose has two (2) notches in it that must index on the pump tangs. If you shine a light into the front of the transmission you can see the tangs behind the input shaft seal.
I must admit that my first attempt at installation failed and it was not until I raised the transmission into place that I realized this. Unfortunately, the instructions called for a 1/2" setback from the converter mounting tabs to the face of the bell housing. THIS IS NOT CORRECT. The actual setback should be 1-3/16". I installed the converter to the spec listed in the instructions and it measured in at just over 1/2" of setback. Unfortunately, the flex plate is 7/8" off the face of the engine block so I had negative clearance. After dropping the transmission back down, I removed the converter and measured the depth of the pump tangs and the thickness of the converter. Sure enough, I was missing almost 11/16" so I knew the instructions had to be wrong. I quickly marked the location of the cutouts in the converter's nose with tape to ensure that I would match the pump tangs which happened to be about at the 12:00 and 6:00 o'clock positions.
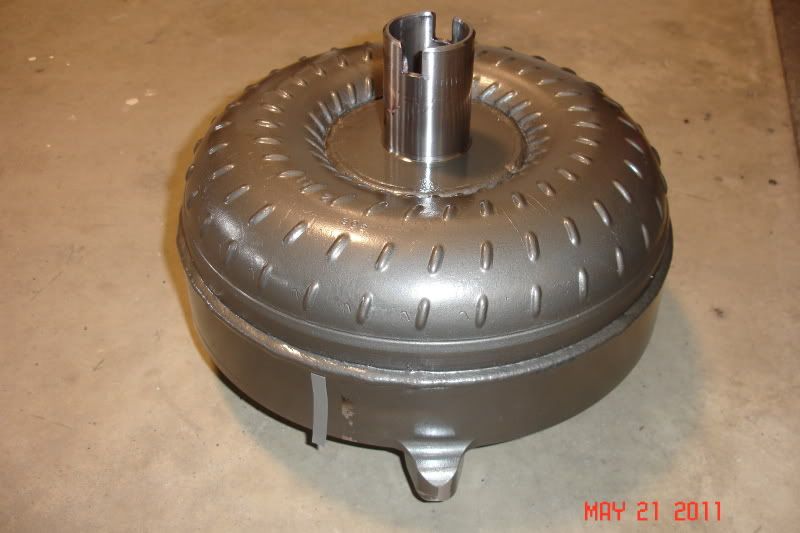
I then installed the torque converter -- keeping track of the taped marks. Most times the converter is simply spun around during installation to allow everything to line up. I was concerned about contacting the pump tangs and spinning them out of place, so I rocked the converter back and forth while it was wiggled onto the shafts and pump tangs. I then gave it a spin once I saw that the depth appeared correct. Immediately upon installation, the depth was checked with a straight edge and a steel rule -- measuring from the face of the bell housing to the mounting tabs on the converter. This time it was exactly 1-3/16", so I knew that the pump tangs were properly engaged. Here is a video of the converter being installed:
-
05-22-2011, 10:37 PM #20Junior Member
- Join Date
- Mar 2011
- Location
- Alberta
- Posts
- 30
black- 2002 TA
I just did mine this weekend too. Not as easy as yours turned out to be. My dowels were badly seized. I had to use my air hammer to push them in to the block to get the trans to break free. Other than that things went well when i only had 17" of clearance under the car.

 Reply With Quote
Thread Information
Users Browsing this Thread
There are currently 1 users browsing this thread. (0 members and 1 guests)
Similar Threads
-
Transmission Removal Tips
By rc74racer in forum GTOReplies: 9Last Post: 02-06-2012, 07:39 AM -
Help: Manual Transmission Removal (hints-etc)
By TerribleTed in forum Manual TransmissionReplies: 1Last Post: 02-22-2011, 09:19 AM -
Removing The Engine From A C5 Corvette - Removal Procedures Part: 1
By Ed Blown Vert in forum CorvetteReplies: 0Last Post: 09-29-2007, 06:50 AM -
2000 T/A, Ram Air.. T-56 Transmission Removal?
By SteelmanLS1 in forum External EngineReplies: 2Last Post: 08-11-2007, 01:04 PM -
Engine and Transmission Removal ??
By Trouble maker in forum General HelpReplies: 2Last Post: 04-18-2007, 07:27 PM

Bookmarks