
Results 1 to 20 of 28
-
05-27-2016, 05:33 AM #1Member

- Join Date
- Apr 2014
- Location
- .
- Posts
- 125
Wolfe Racecraft 6 pt Bolt in Roll Bar Convertible install
I posted the original thread at LS1tech, let me know if there's any trouble with the link and I'll redo the posts here.
Edit-Install starts below at post 6.Last edited by Inferno WS6; 05-28-2016 at 05:02 AM.
-
05-27-2016, 08:07 AM #2Member

- Join Date
- Dec 2009
- Location
- Mechanicsburg, PA
- Posts
- 541
Navy Blue- 2002 Trans Am WS6 Conv
Great info, thanks much. I've always wondered how this would work in a convertible. Are you finding any rubbing with the inside of the convertible top?
ATI Procharger, SFCs, Y-pipe, LM2, BBK Shorty Headers, Corvette N73 Magnesium Wheels, 4th Circle Designs Stripe and Overlay kit
-
05-27-2016, 06:20 PM #3Member
- Join Date
- Apr 2014
- Location
- .
- Posts
- 125
SJ, take another look at the thread-will upload pad pics momentarily.
Only 2 points make contact and it only happens when the top is fully closed at the top of the shoulder bar.
Edit-all pics uploaded now.Last edited by Inferno WS6; 05-27-2016 at 06:54 PM.
-
05-27-2016, 08:02 PM #4Blown, Stroked, & Sprayed


- Join Date
- Aug 1999
- Location
- Arizona
- Posts
- 51,364
Black- 383 Procharged & N20 Vert
Could you redo the post here? Thanks.
Black 1999 Blown Convertible A4
Forged 383 | ATI D-1SC
NX MAF Kit | 222/226 .585 115
AS Stage II 6.0L FI Heads
Moser 9" | 3.70 | Wavetrac | 35 Spline | Vigilante 3600
548.0 RWHP - 563.8 RWTQ - 10# - D1
666.0 RWHP - 734.2 RWTQ - 125 Shot - P1
Black 2009 Escalade Hybrid 4WD
-
05-27-2016, 09:27 PM #5Member
- Join Date
- Apr 2014
- Location
- .
- Posts
- 125
Sure thing. Need a little time to re-figure out photo bucket and then I'll get it done.
-
05-27-2016, 09:55 PM #6Member
- Join Date
- Apr 2014
- Location
- .
- Posts
- 125
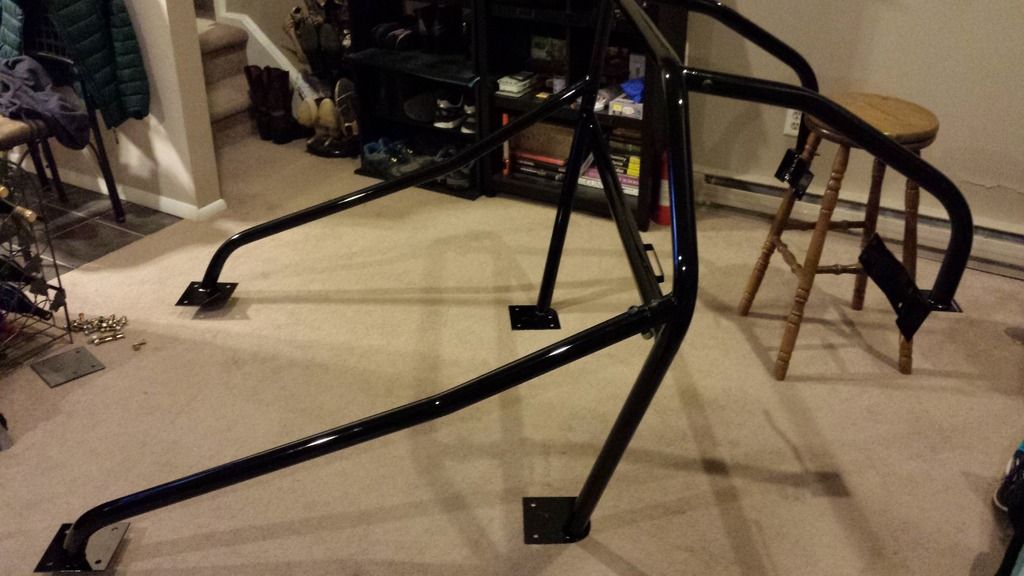
I did a lot of searching and learning before I purchased a 6 pt. roll bar. Throughout the various threads I looked at, I was never able to find a picture of the plates that go under the car for the installation so instead of just a simple review of this product, I'd like to give some feedback with pictures justifying how great this product is.
Wolfe Racecraft 6 point bolt in roll bar for 2000 Trans am convertible. I opted for chromoly which weighed 65 lbs total compared to 85 lbs for mild steel. Prices are on their website. Shipping is within 3 weeks of order date.
Options I chose:
Powdercoated black, no swingout doors for an extra stiff chasis, no removable cross bar to stay NHRA legal, and low slung door bars due to no swingouts.
One box comes via freight. A lot of plastic wrap protecting all of your pieces. 2 door bars. 1 main hoop. 2 rear bars. 2 plates for mid points. Bag of bolts and nuts that you will need to do a lot of adding to as you will see.
1st pic of roll bar set up in house.
-
05-27-2016, 10:38 PM #7Member
- Join Date
- Apr 2014
- Location
- .
- Posts
- 125
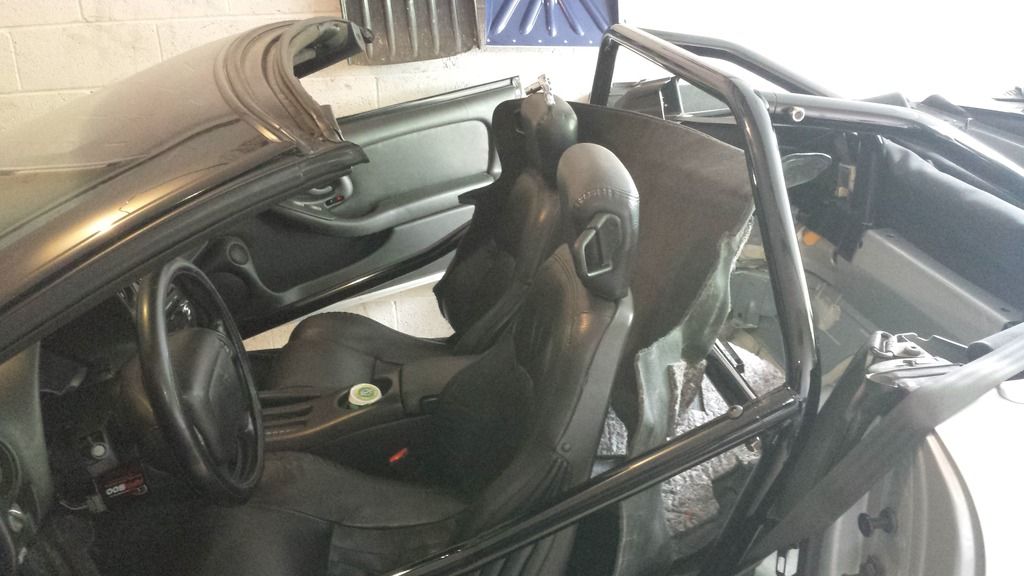
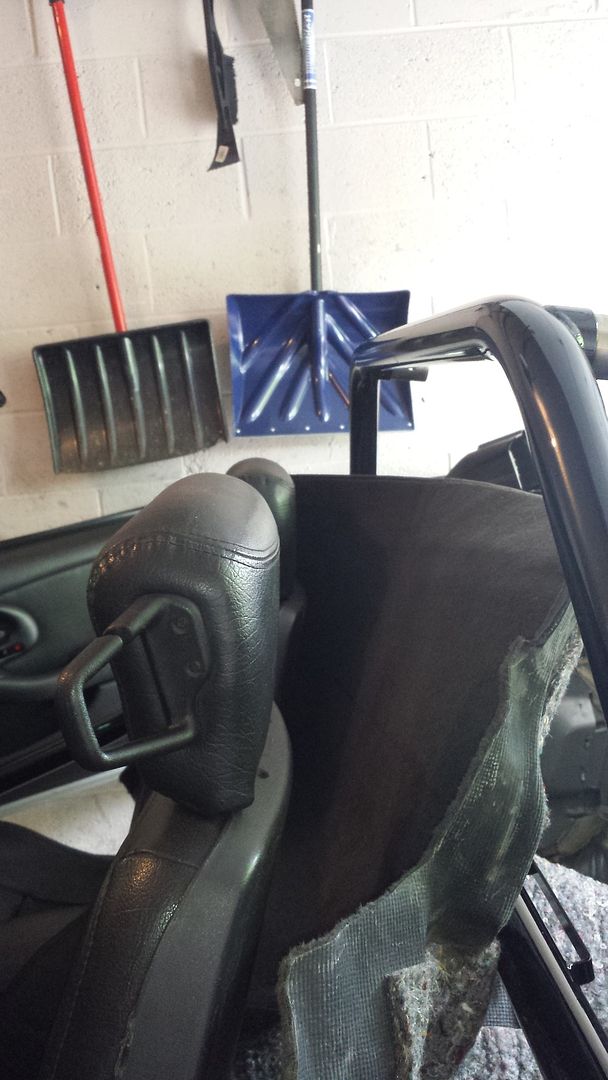
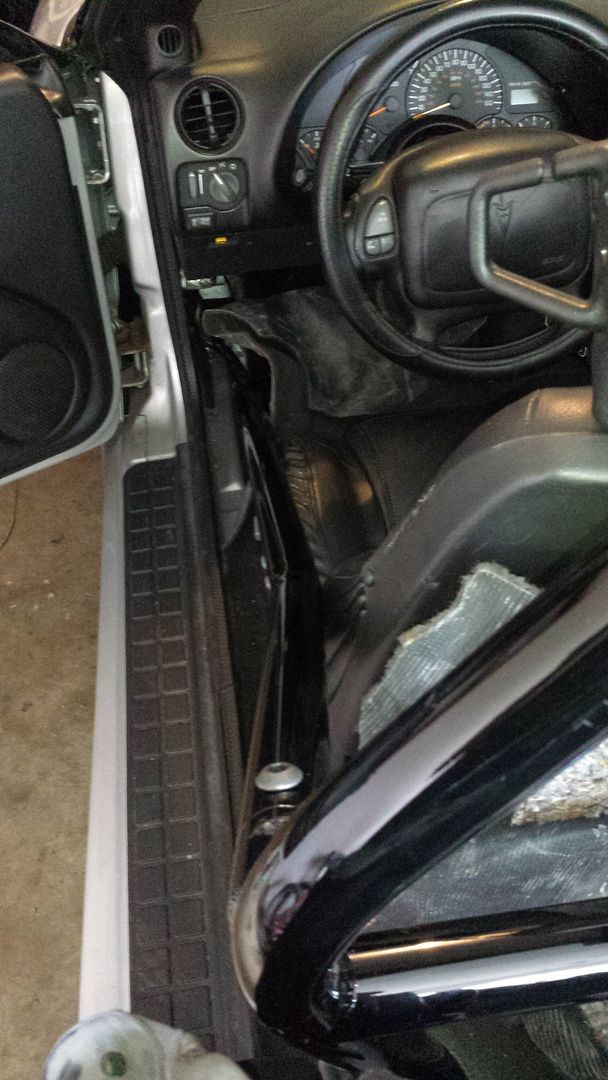
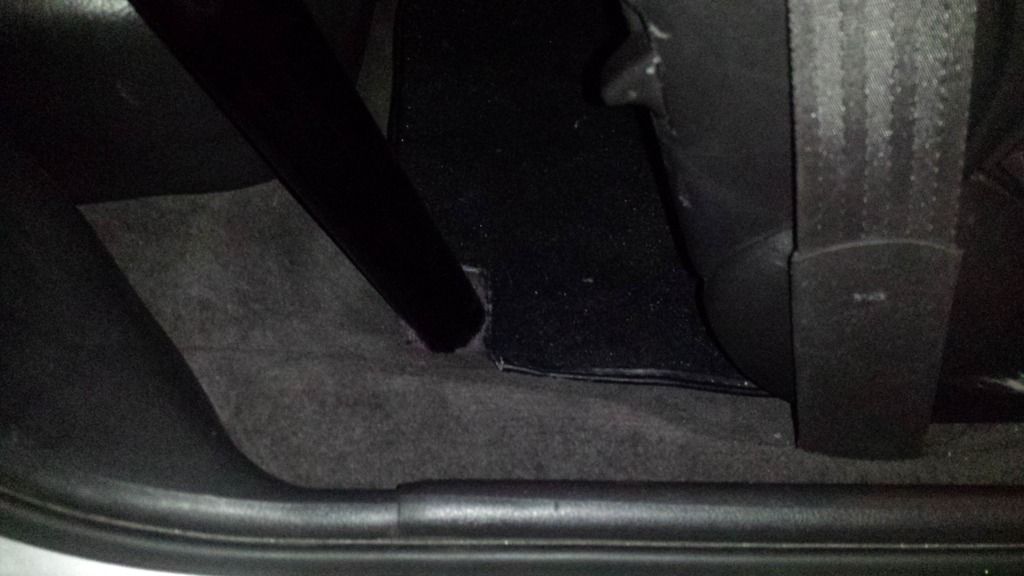
Top was put down to install main hoop.
Remove rear seat backs and seats and pull back carpet. Remove side panels and front door sills etc.
-
05-27-2016, 10:43 PM #8Member
- Join Date
- Apr 2014
- Location
- .
- Posts
- 125
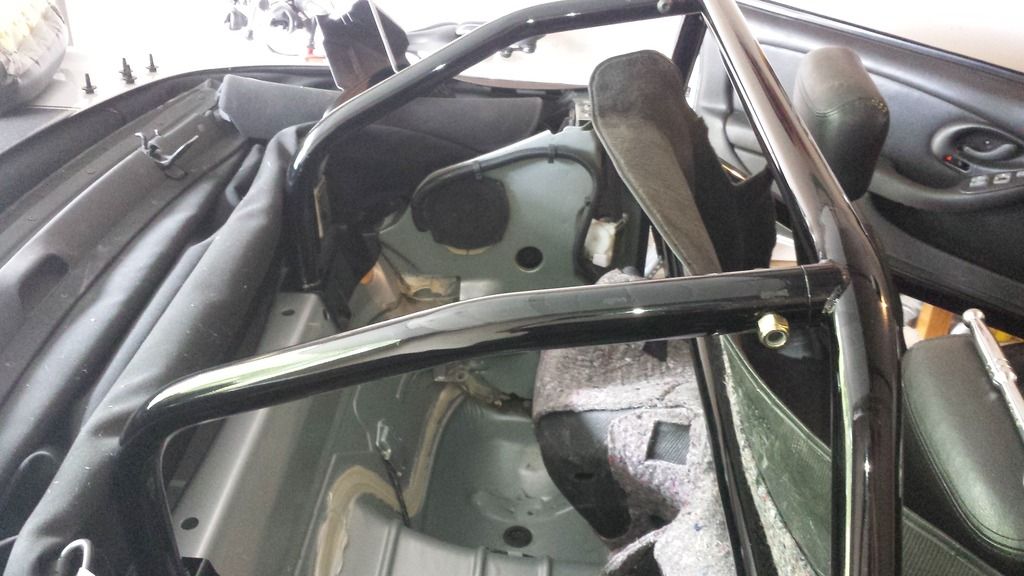
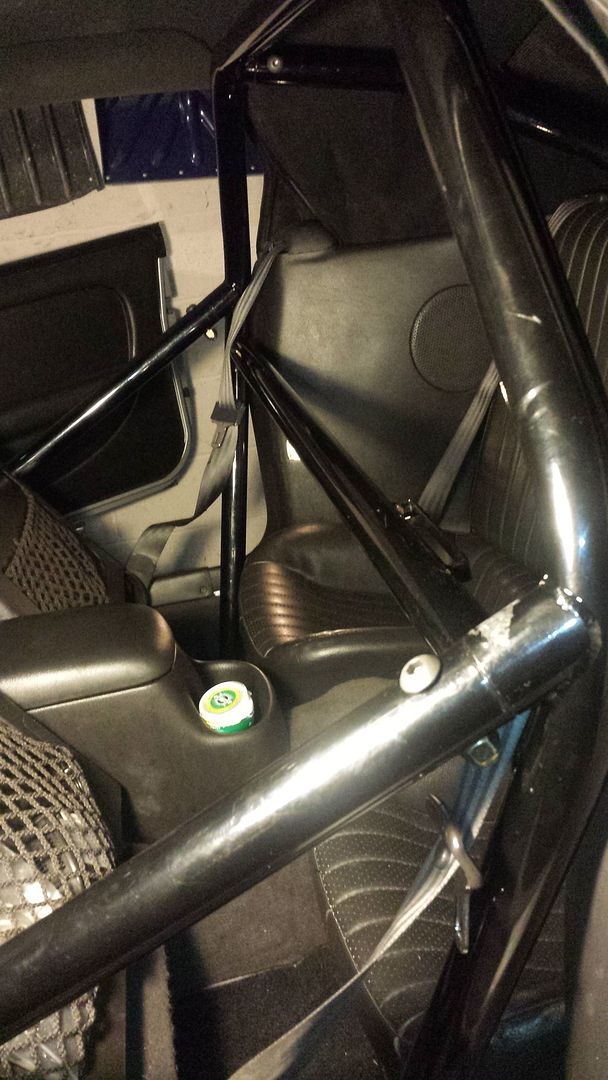
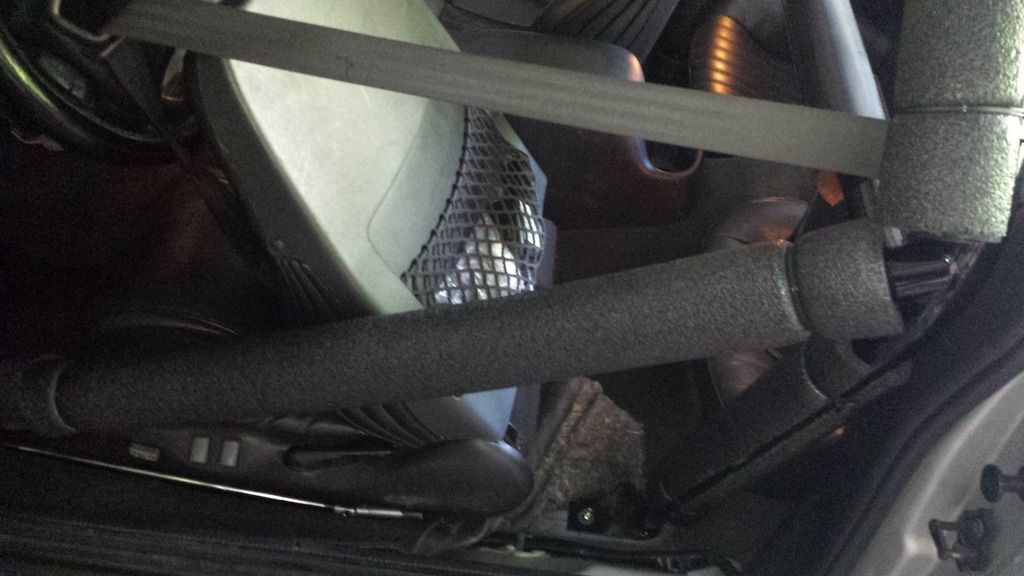
Assemble ALL pieces with allen bolts and nuts (4 nuts/4 bolts) loosely installed before tightening anything or drilling anything. After rollbar is assembled and laying on the floor/seat back, I installed the 4 stock bolts for the seat belts as shown in pictures. Install tight but do not torque. Next you measure and make marks for mid points/front points.
-
05-27-2016, 10:49 PM #9Member
- Join Date
- Apr 2014
- Location
- .
- Posts
- 125
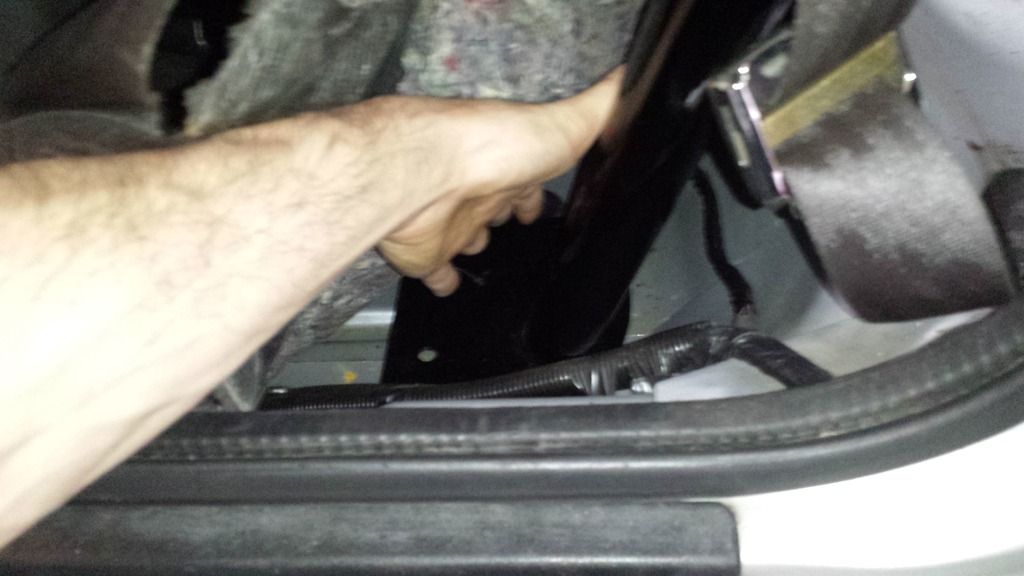
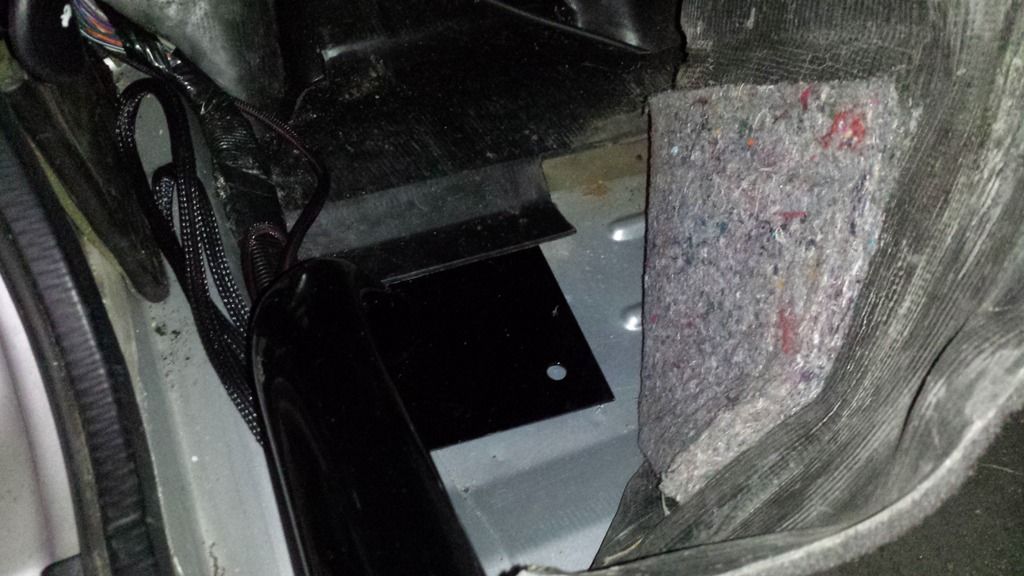
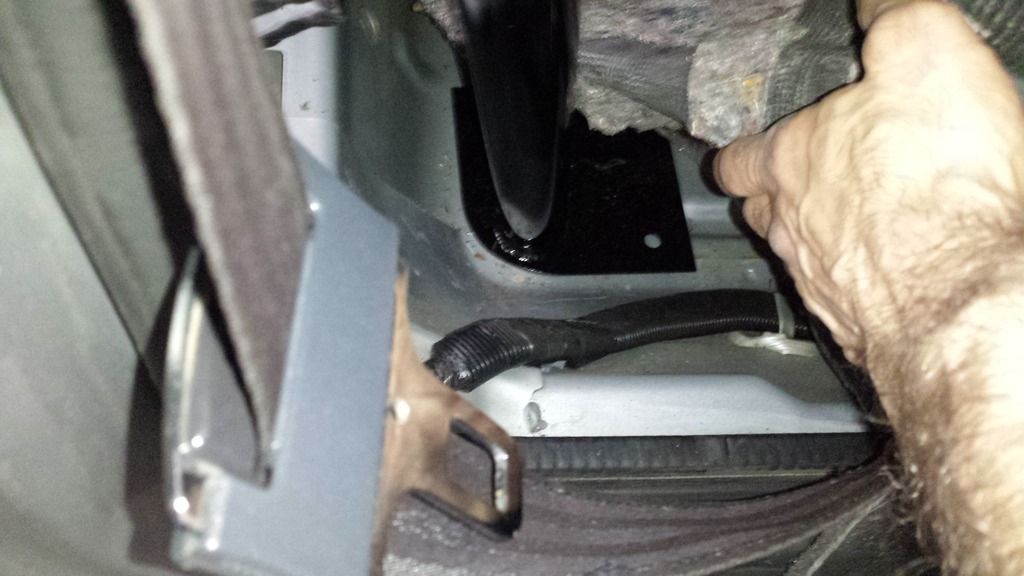
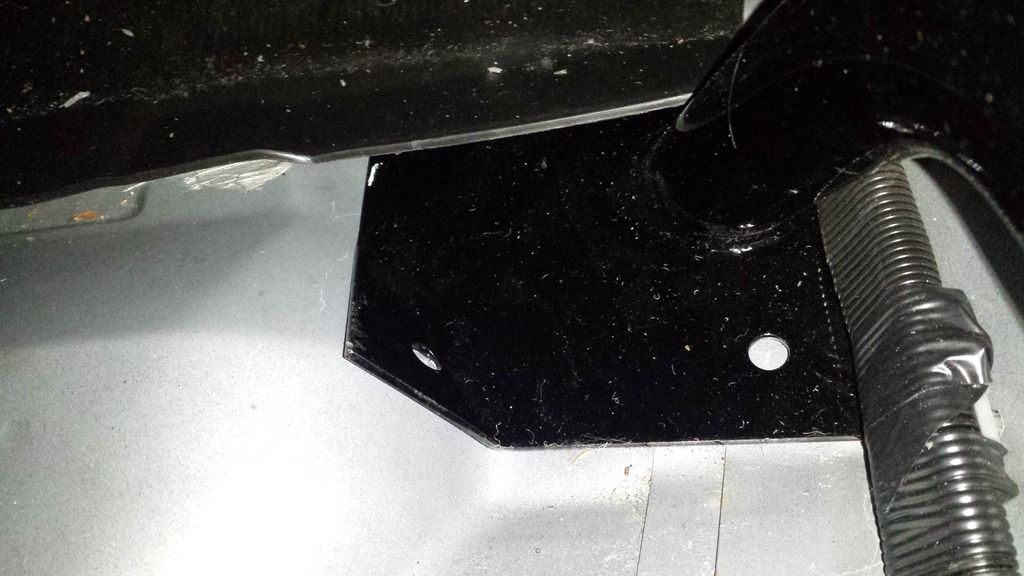
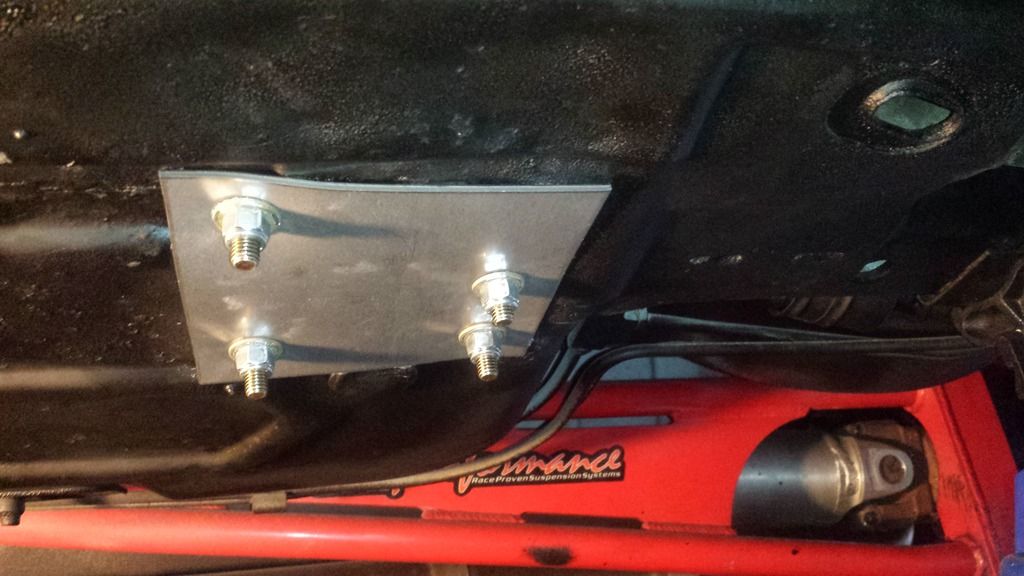
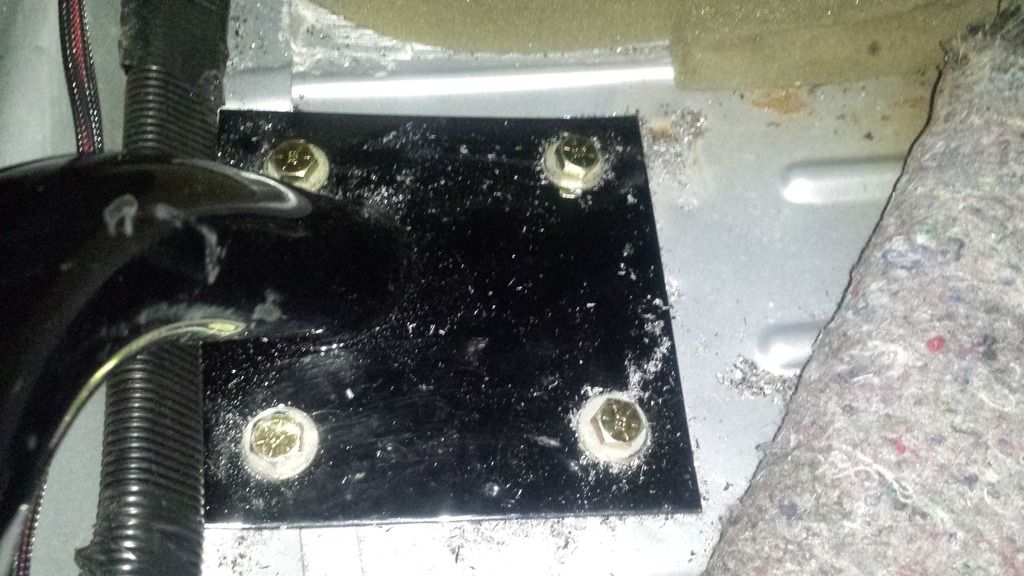
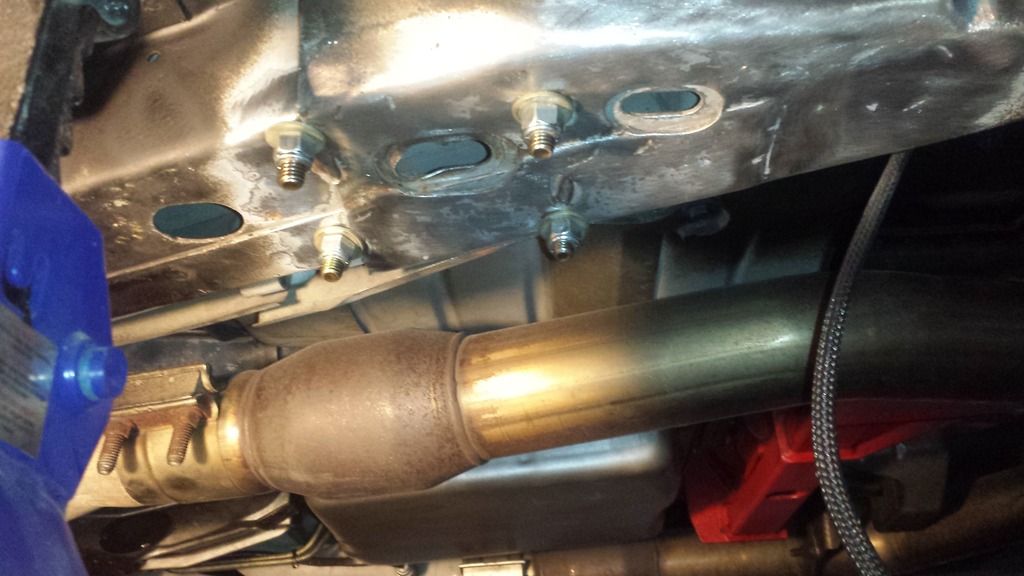
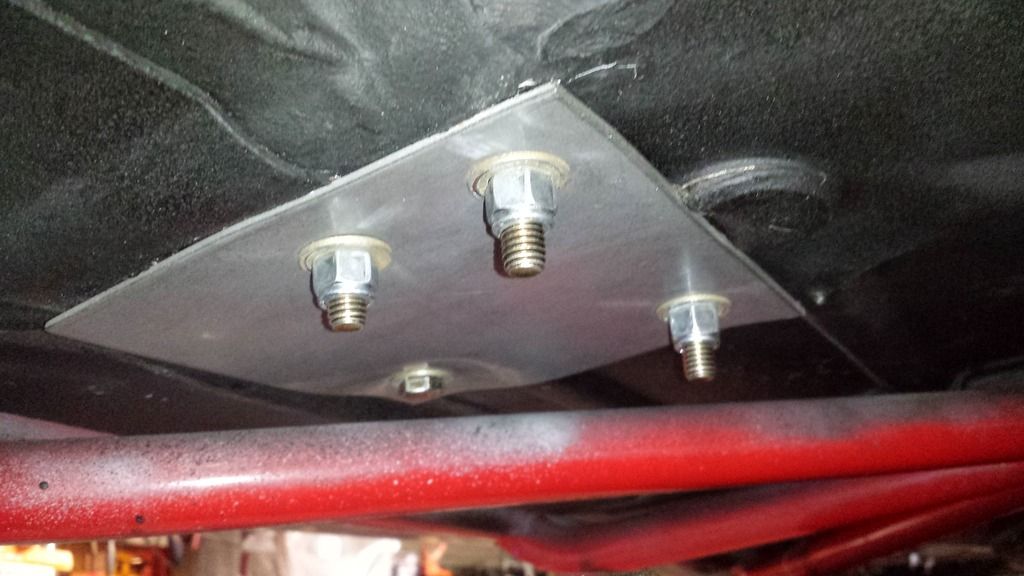
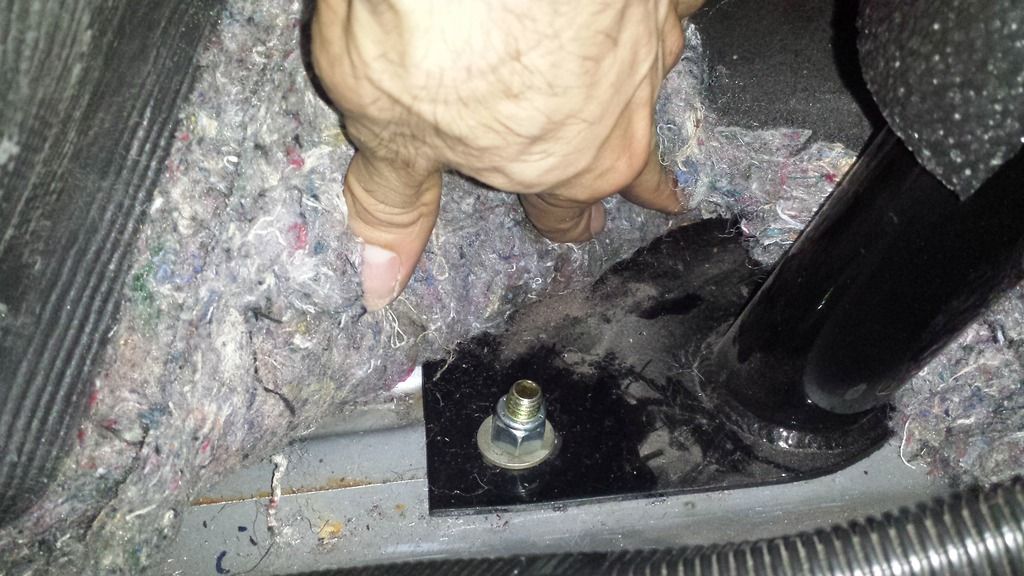
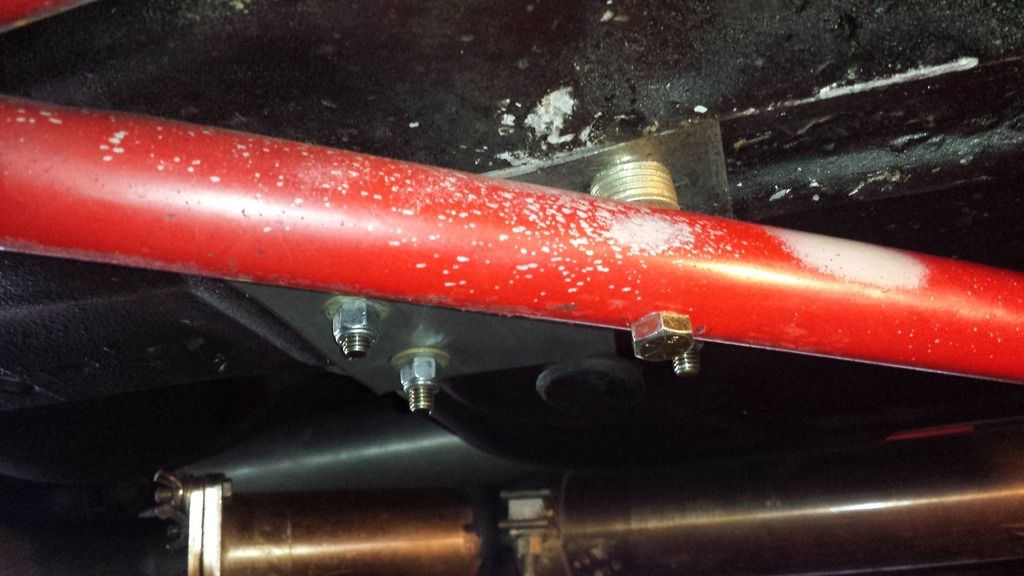
Drill 4 holes for each mid point-3/8" holes minimum. No washers came with my kit, buy at least 35 good washers. Plate goes under the car and plate already has holes drilled out. You have to figure it out and make sure all holes align..measure, measure, measure. I didn't understand when I read this in a thread before I purchased the roll bar, now I do. Tighten and torque mid points. Then on to front points
-
05-27-2016, 10:54 PM #10Member
- Join Date
- Apr 2014
- Location
- .
- Posts
- 125
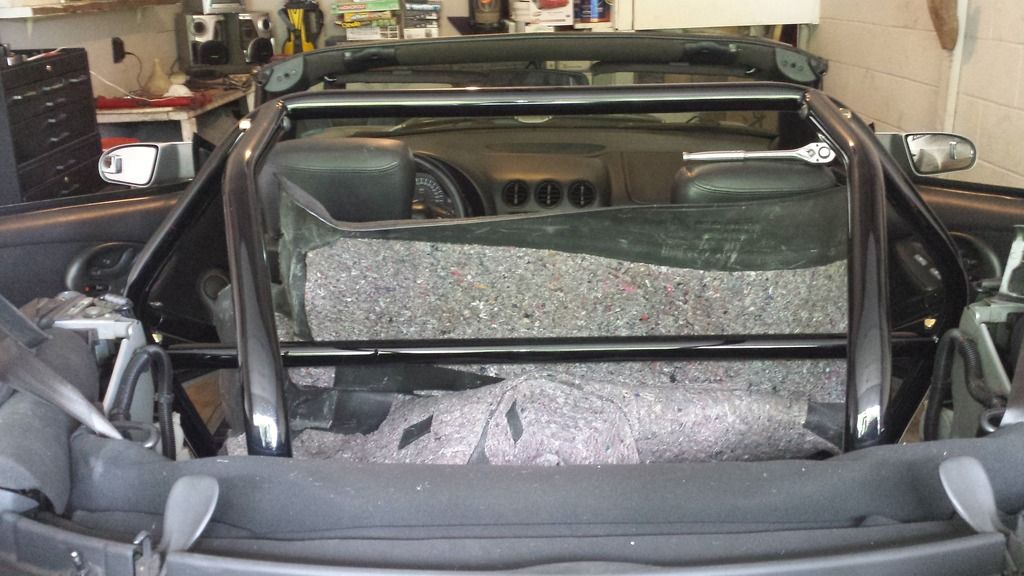
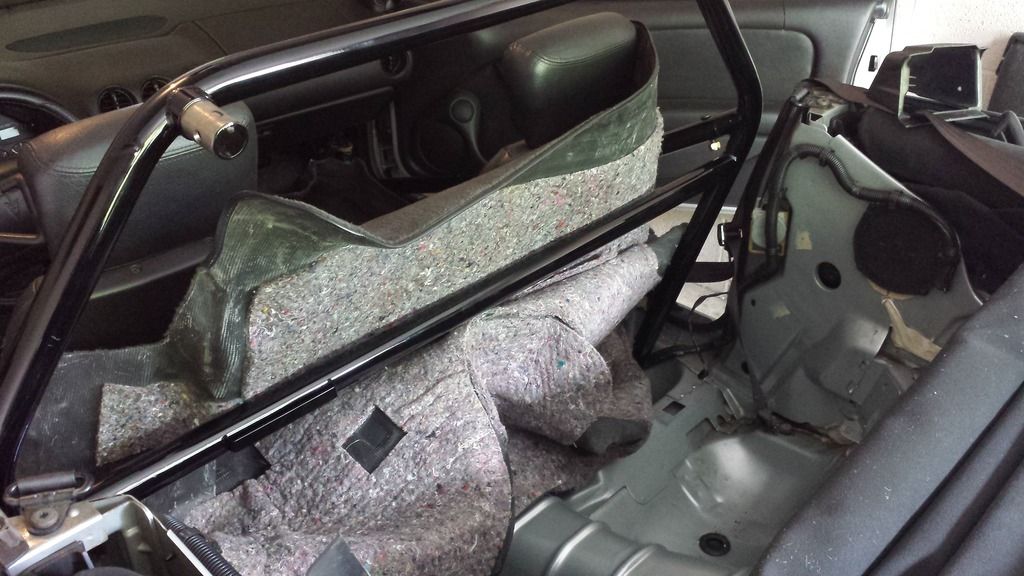
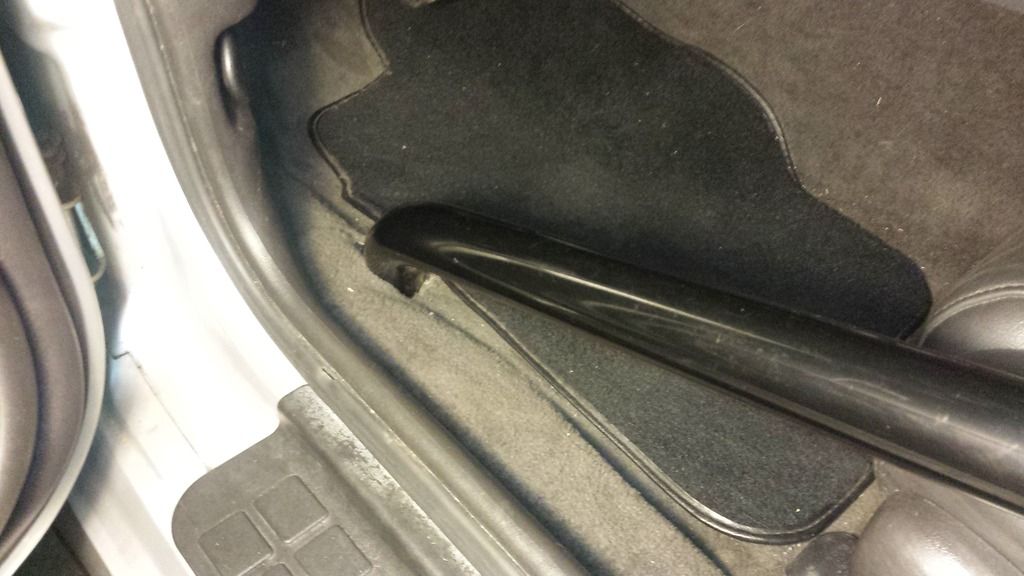
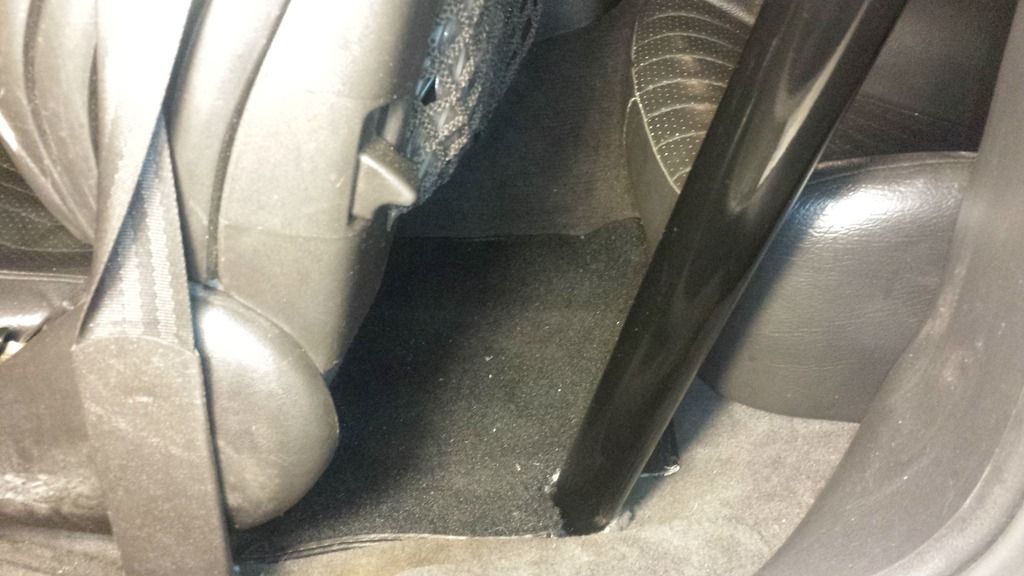
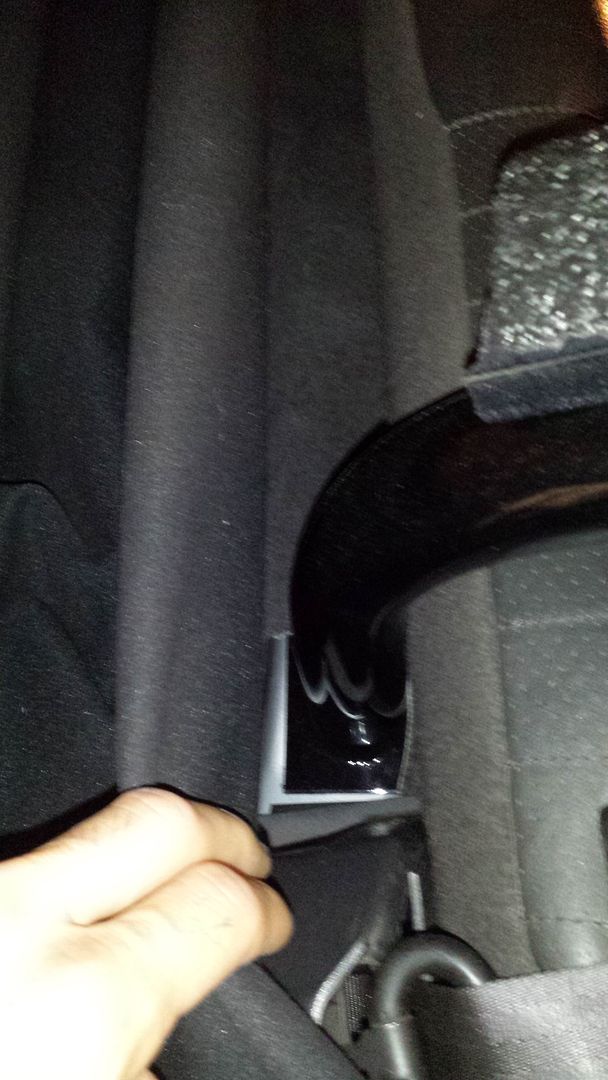
Front, mid, and rear carpet will have to be cut for the bars. I also cut my floor mats.
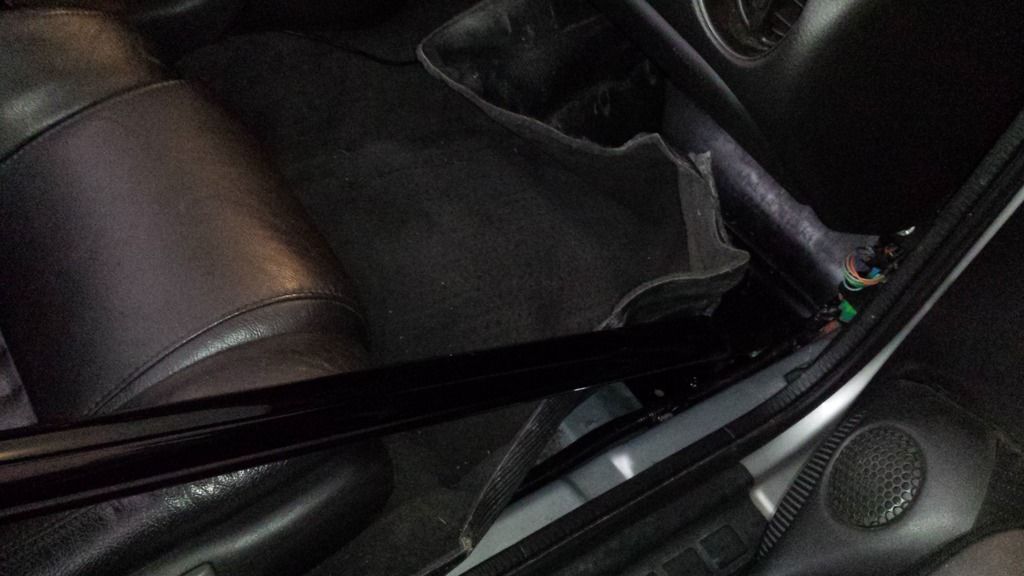

-
05-27-2016, 10:58 PM #11Member
- Join Date
- Apr 2014
- Location
- .
- Posts
- 125
Do a lot of vacuuming now.


-
05-27-2016, 11:06 PM #12Member
- Join Date
- Apr 2014
- Location
- .
- Posts
- 125
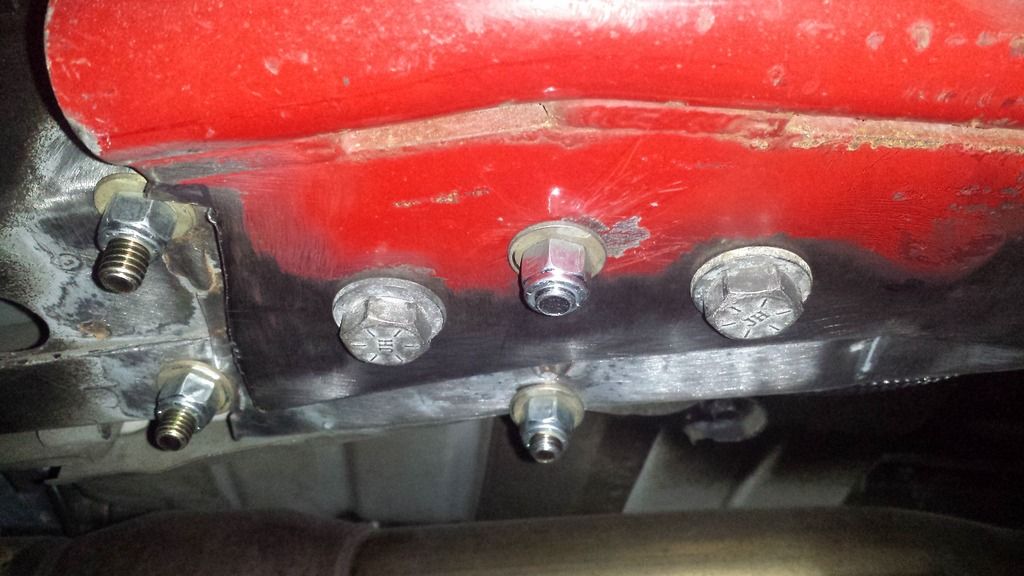
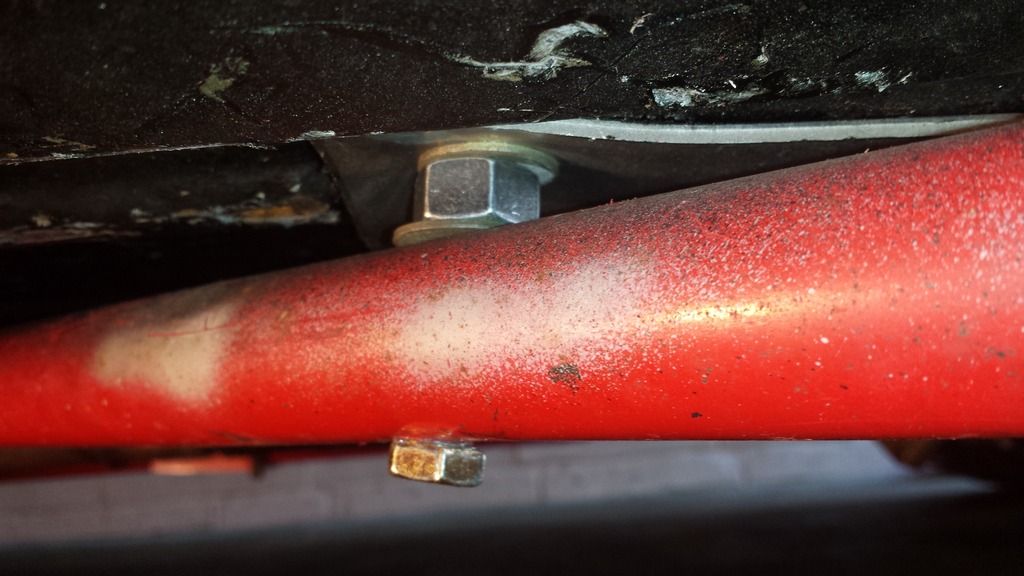
For those convertible owners running UMI 3 pt. subframe connectors, you're going to like this AND hate this.
At the mid points, you will have to flip one of the bolts and put the bolt in from the bottom to clear the triangular subframe bars.
At the front points, you have your work cut out for you. All depending on how your original drilled holes are through the floor pan and through the subframe, you will have a few holes to drill in your subframe connectors and potentially some grinding if the bolts are on the edge of the subframe connectors.
Longer bolts are needed here and longer drill bits are a must as well.
I got 2 bolts through my front passenger subframe connector and 1 bolt through my front driver subframe connector.

-
05-27-2016, 11:09 PM #13Member
- Join Date
- Apr 2014
- Location
- .
- Posts
- 125
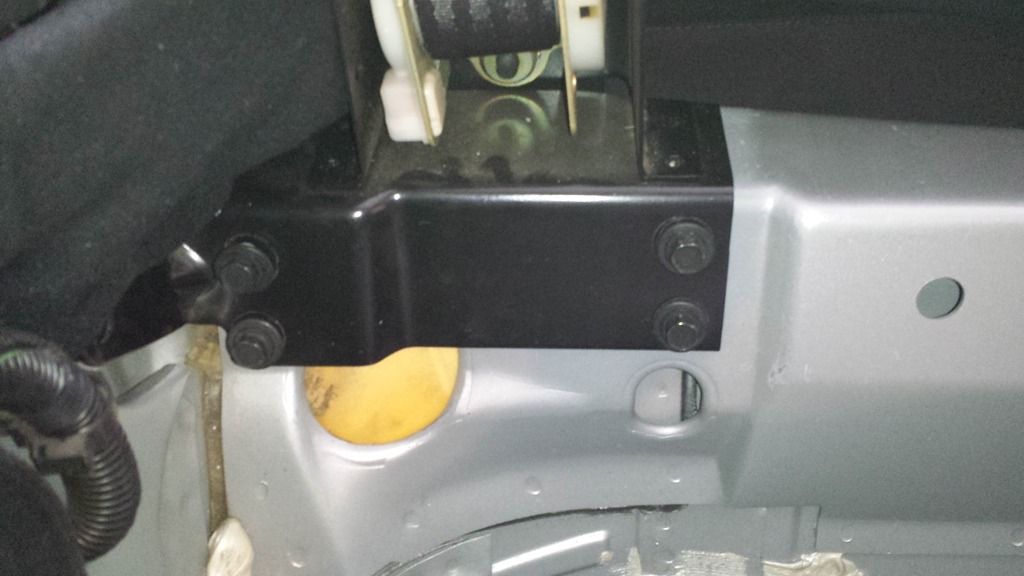
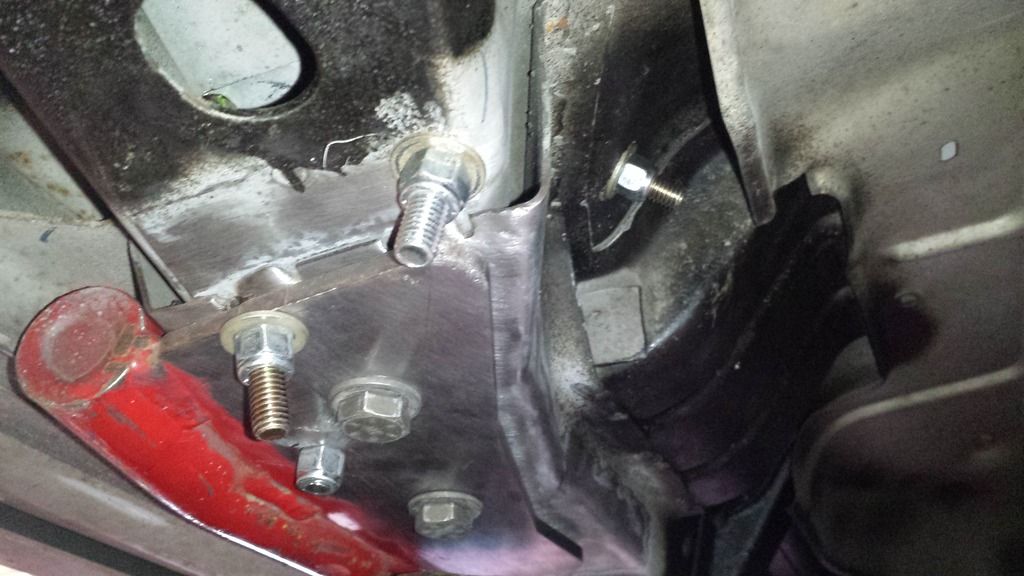
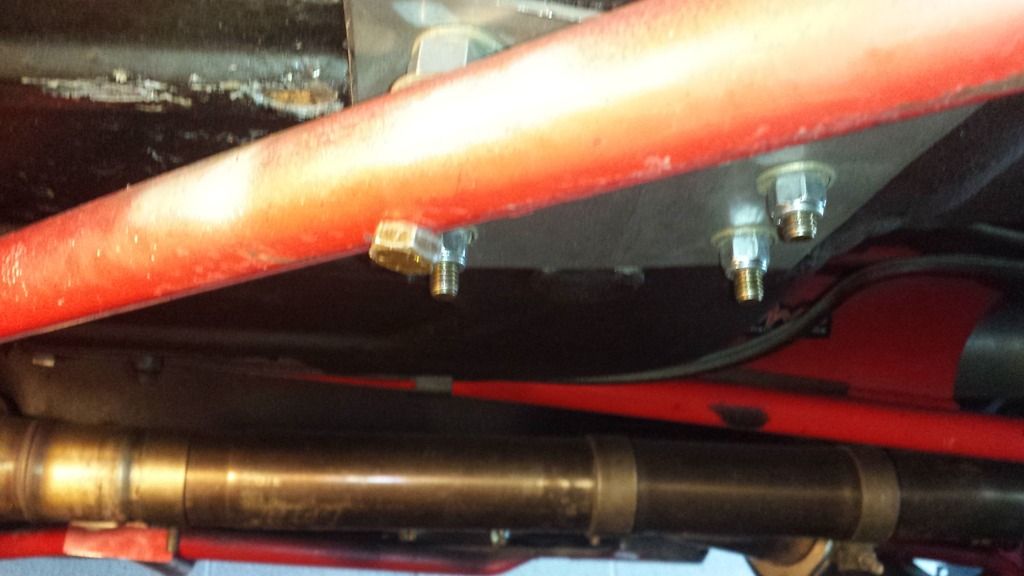
After reading some posts about the mid points being a weak spot (and seeing the overturned mustang pic with the rollbar midpoints coming through the floor), I came up with an idea and we'll see how good this turns out. I am open to all suggestions in how to strengthen these 2 points.
3" long, 3/8" grade 8 bolt.
7 hardened washers will fill in the space or a nut with washers works too.
One bolt on each midpoint of the rollbar is directly above the triangular subframe bars. Measure and drill and enjoy the peace of mind you should now have.
-
05-27-2016, 11:15 PM #14Member
- Join Date
- Apr 2014
- Location
- .
- Posts
- 125
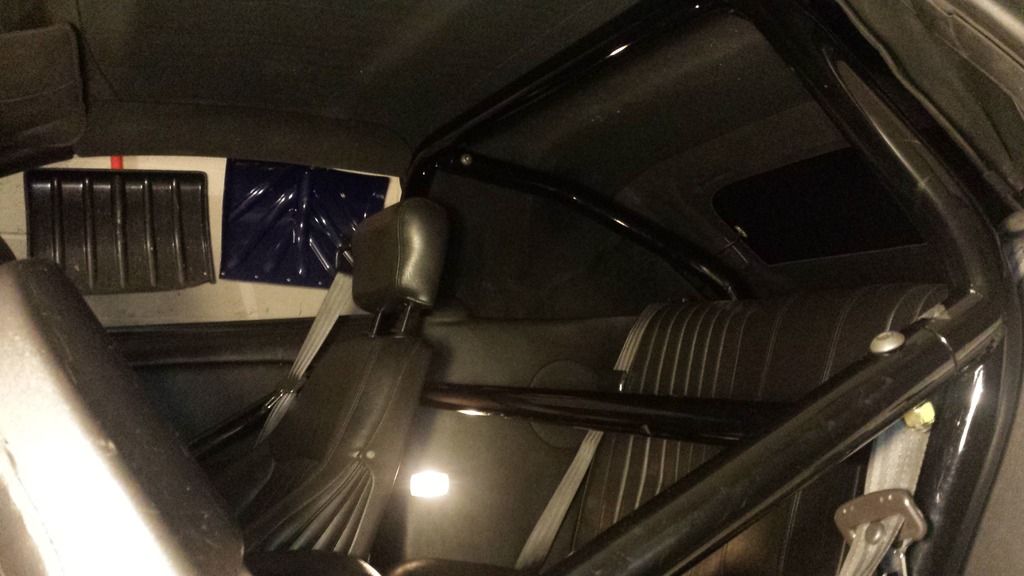
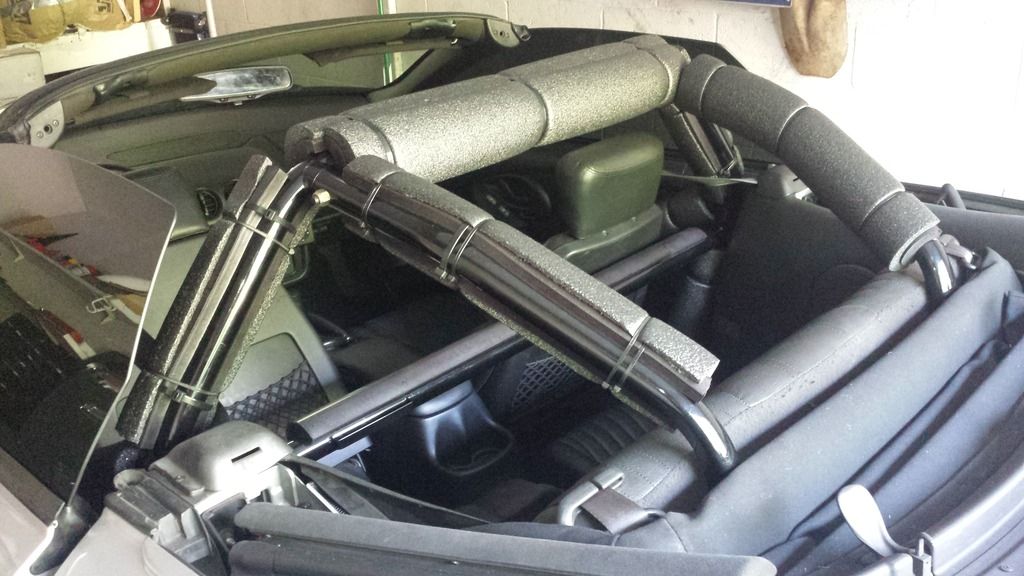
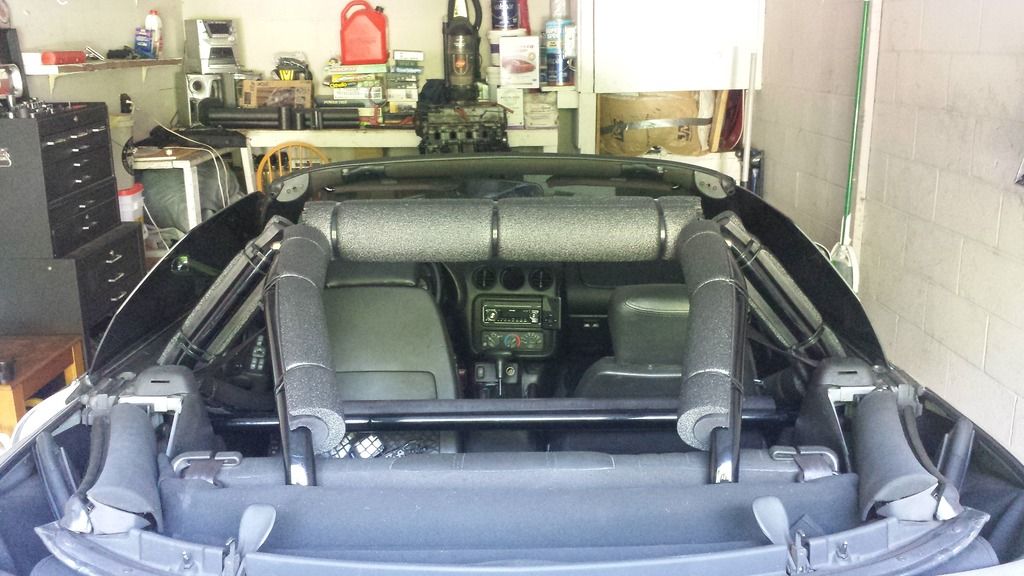
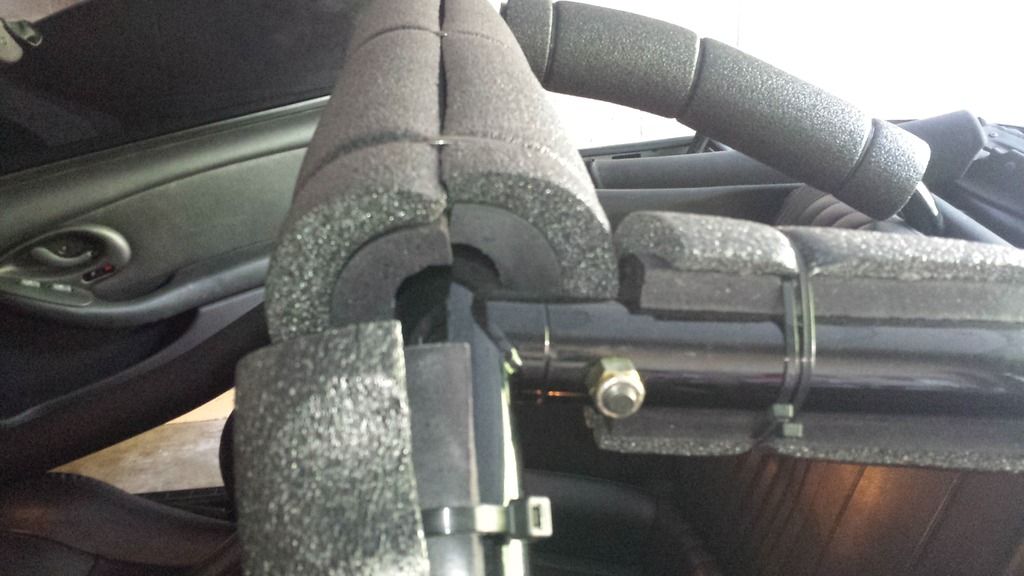
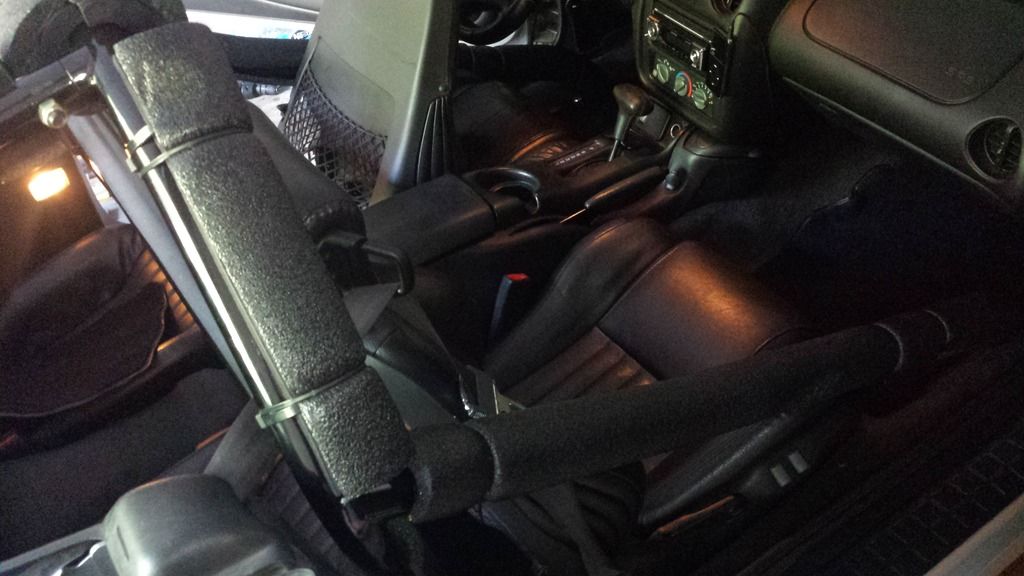
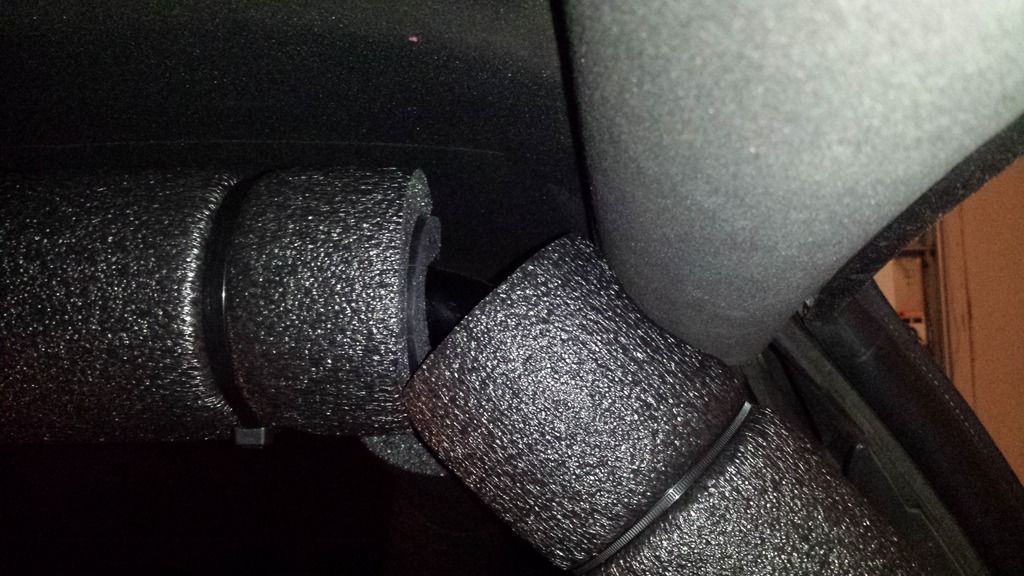
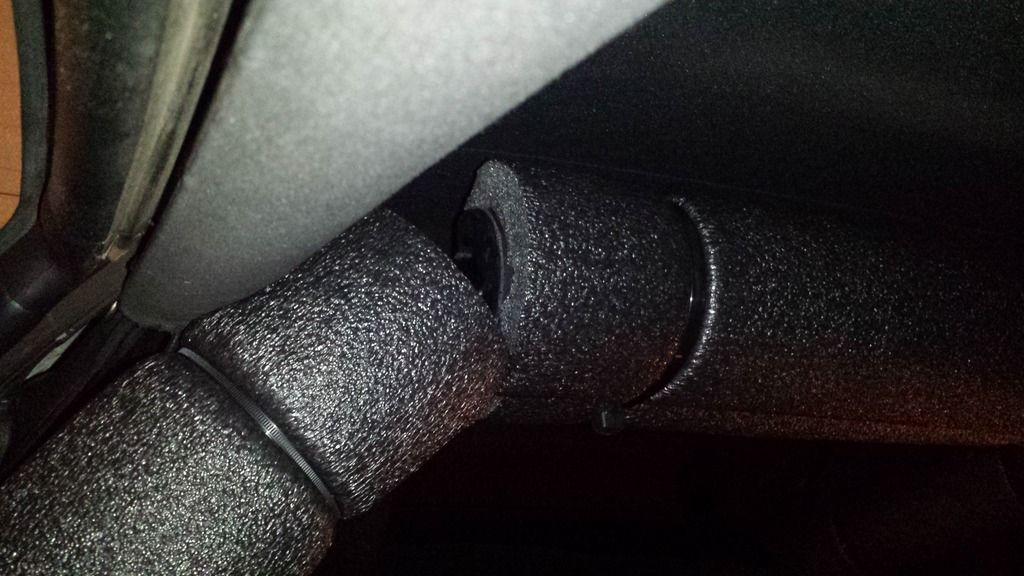
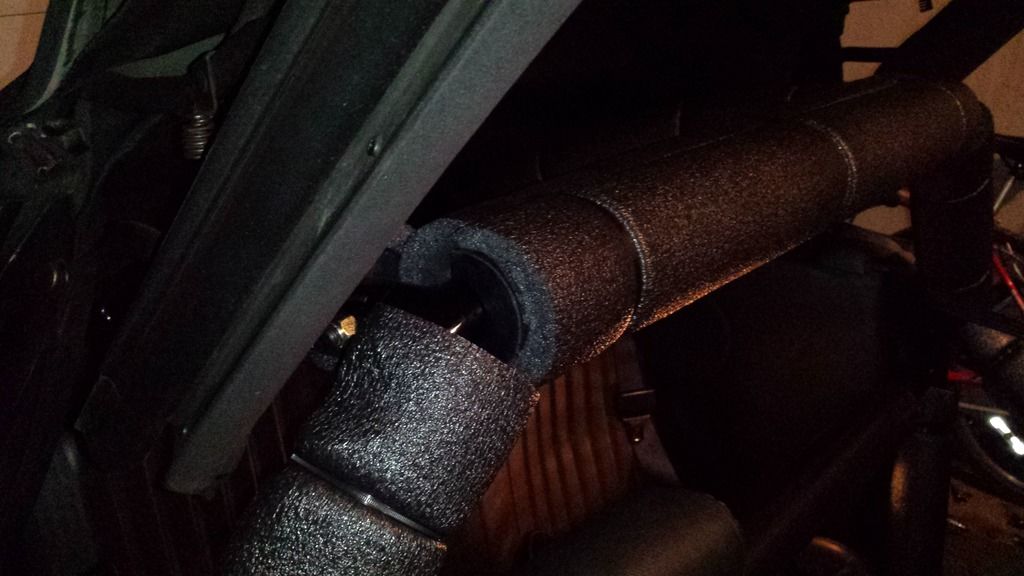
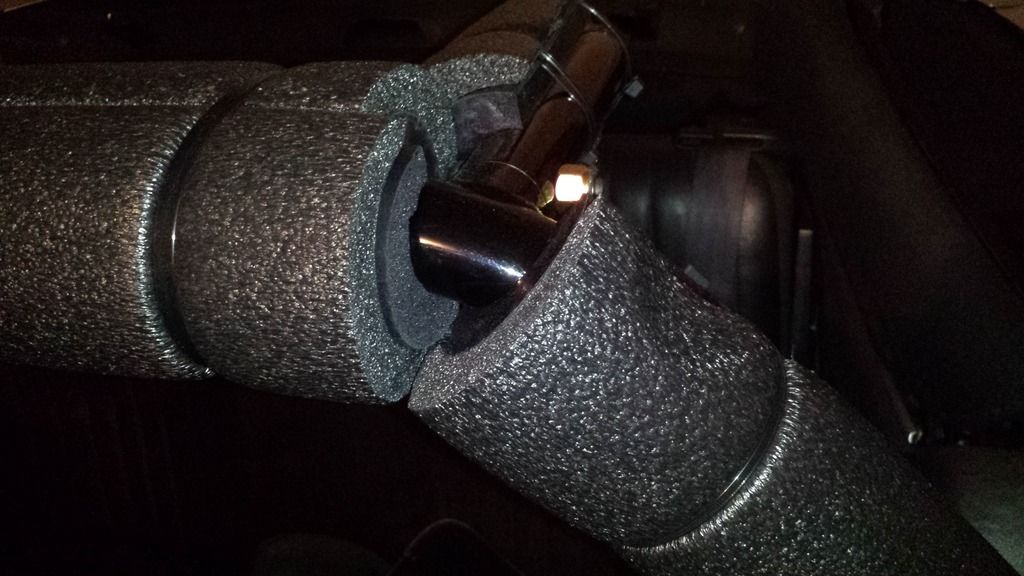
Rollbar padding pics.
I used Kirkey 99011 SFI high density 1.0" thick padding on the crossbar, top of main hoop, shoulder bars, and rear bars.
Self adhesive on the inside already and zip tied for extra measure. Use heat gun to bend, this stuff is VERY hard.
I also used Kirkey 99001 1" thick offset hole padding. Use on door bars, main hoop legs, and then on top of every SFI padding piece. No adhesive, use zip ties.
Have to put the final touches on the crossbar padding and then this rollbar is ready to get on the street.

-
05-27-2016, 11:18 PM #15Member
- Join Date
- Apr 2014
- Location
- .
- Posts
- 125
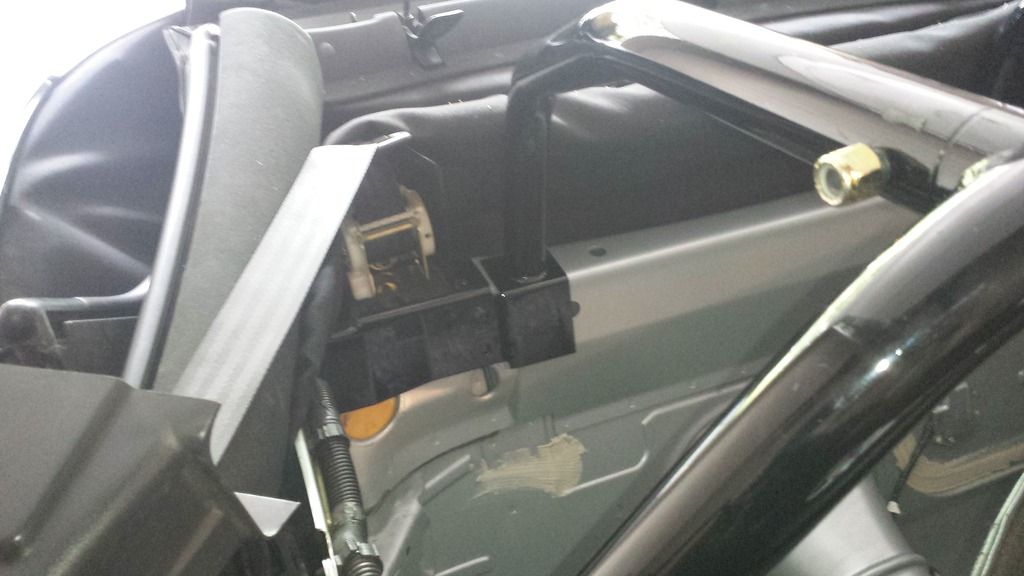
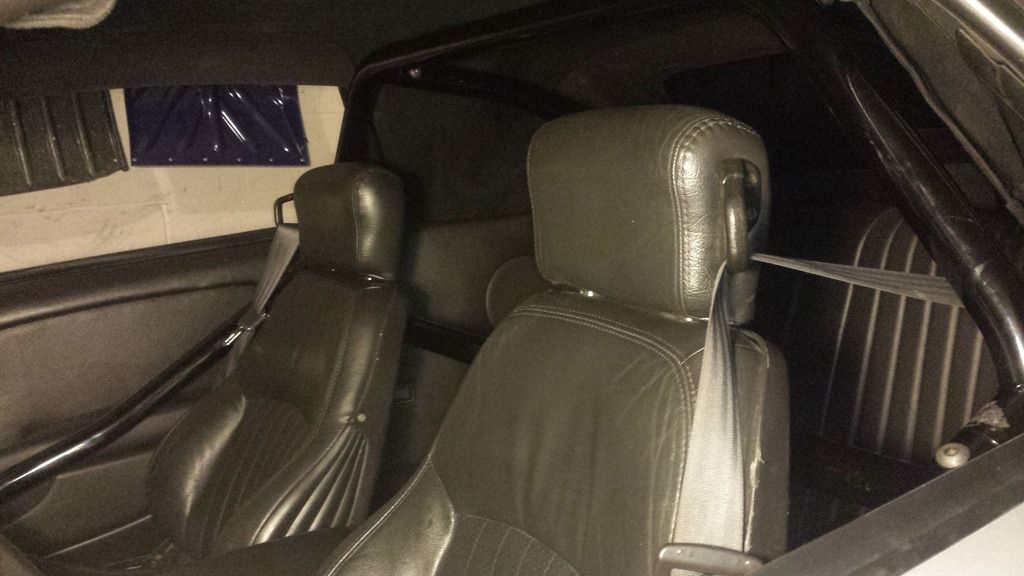
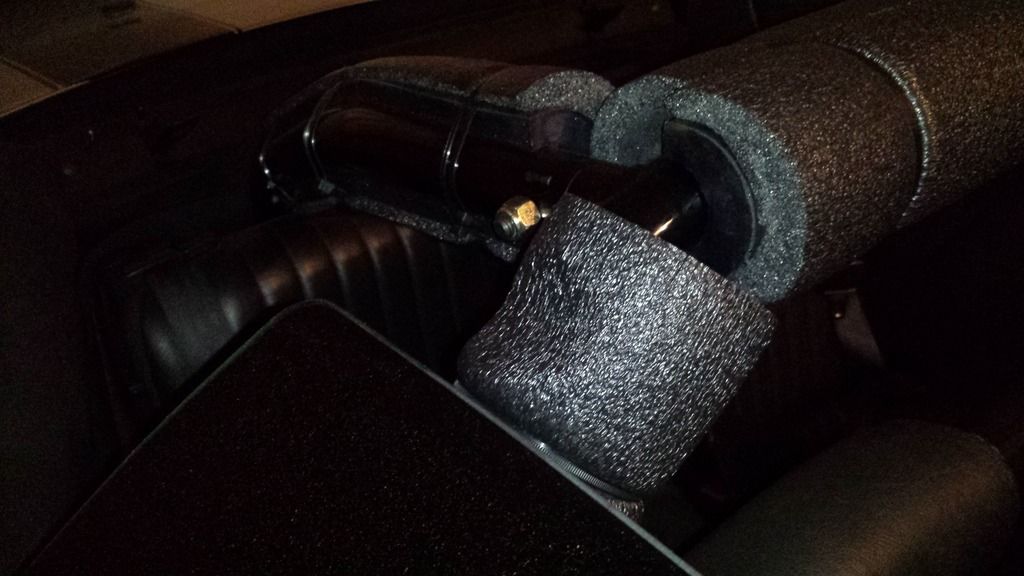
The convertible top doesn't touch any parts of the rollbar or even after I installed the SFI padding.
However, once I put the 2nd layer of padding on, the convertible top rests on top of the shoulder bar. Not a problem to me seeing as the soft top layer of padding just gets pushed down.
Also, here's a shot of the clearance at the rear bar mounting point.
-
05-27-2016, 11:49 PM #16Senior Member

- Join Date
- Mar 2010
- Location
- AZ
- Posts
- 1,480
Cayanne- 98 Z28 Vert M6
Wow. That is hard core!
Lid, Throttle Body, LS6 Intake, Heads, Cam, Magnaflow, LS7 Clutch, SFCs, STB, Panhard Bar, Strano Springs, Hollow Sway Bars, Poly/Roto LCAs, Konis, MGW Shifter
-
05-28-2016, 02:03 AM #17Veteran

- Join Date
- Feb 2009
- Location
- Mansfield, PA
- Posts
- 22,146
Black & Blue- '02 WS.6 / '07 Suburban
Very impressive!

-
05-28-2016, 05:13 AM #18Member
- Join Date
- Apr 2014
- Location
- .
- Posts
- 125
Thanks guys

-
05-28-2016, 09:04 AM #19Blown, Stroked, & Sprayed
- Join Date
- Aug 1999
- Location
- Arizona
- Posts
- 51,364
Black- 383 Procharged & N20 Vert
Very nice. Reminded me of my install.
-
05-28-2016, 02:16 PM #20Member
- Join Date
- Apr 2014
- Location
- .
- Posts
- 125
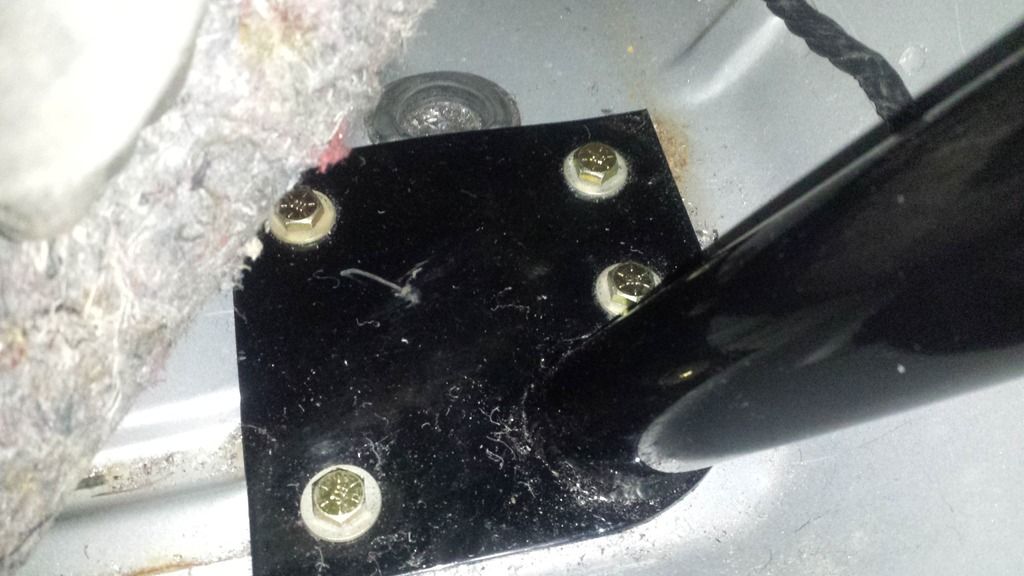
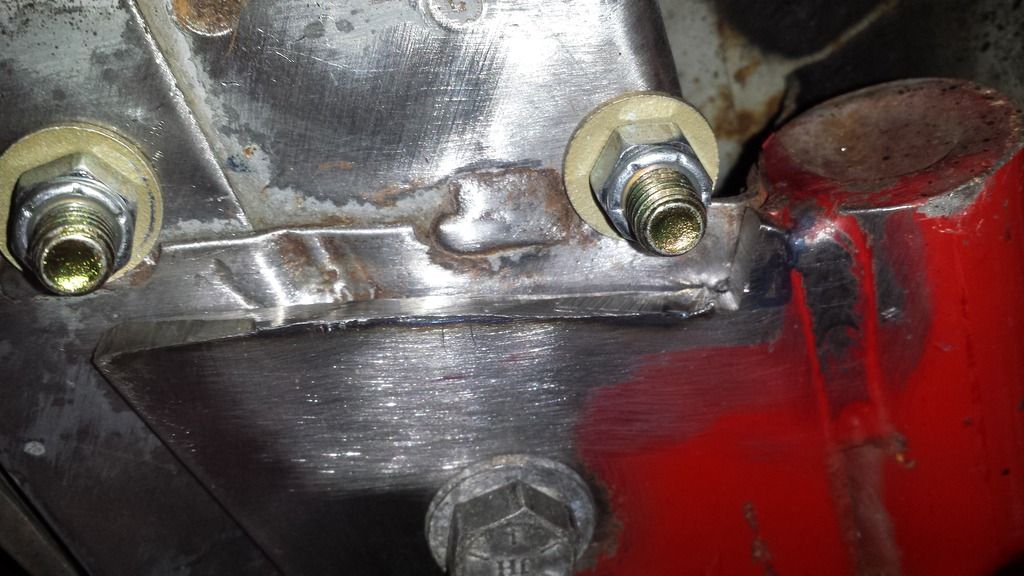
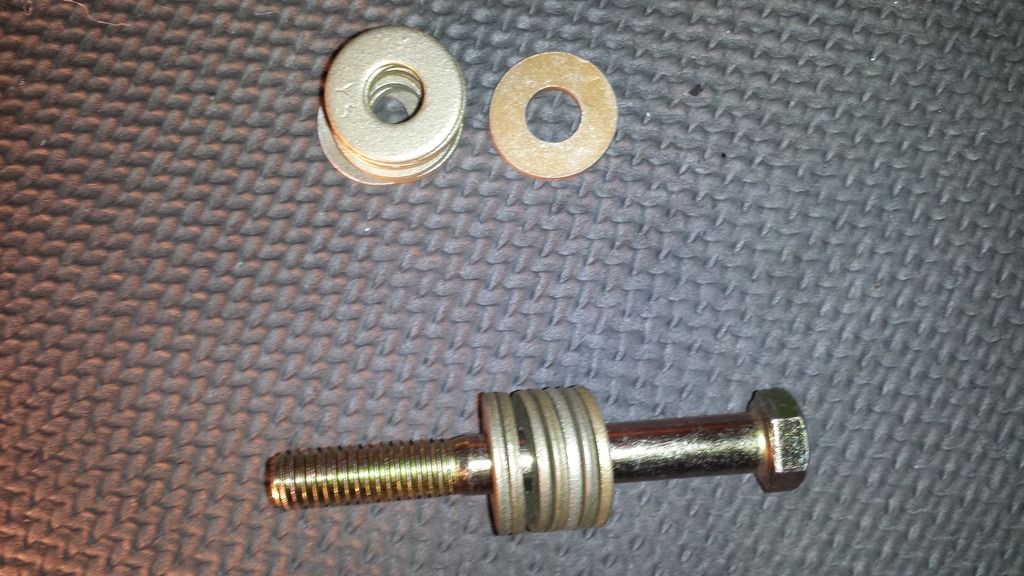
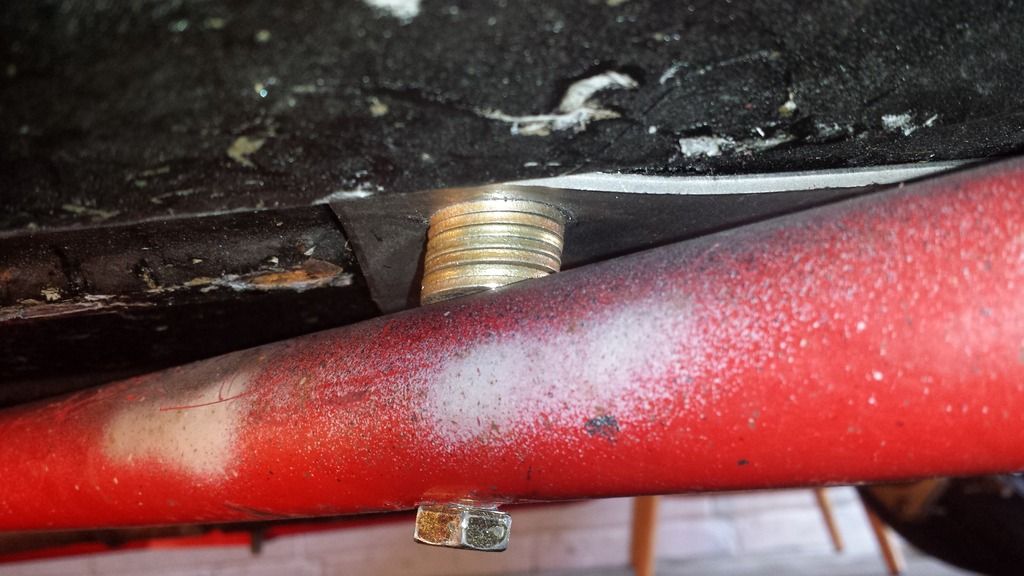
For these 3/8" bolts, 5/16" hardened washers from Lowes gave a very tight fit. There is no movement with these compared to the nut and washers stack.
7 washers on drivers side, 6 passenger side. Use a hydraulic jack on the plate to get as much space between the rollbar plate and the subframe connector. Getting the washers to line up will take a little bit of skill, ingenuity, and a lot of time.

 Reply With Quote


Thread Information
Users Browsing this Thread
There are currently 1 users browsing this thread. (0 members and 1 guests)
Similar Threads
-
Just some install info... S&W and Wolfe
By nabdrill in forum Suspension and HandlingReplies: 2Last Post: 03-27-2007, 01:57 PM -
Wolfe 6 pt NEW Cro-Mo Convertible
By DaveSchott in forum Parts For Sale / TradeReplies: 0Last Post: 02-14-2007, 06:31 AM -
Wolfe Bolt In 6pt Rollbar
By tonycook in forum Parts For Sale / TradeReplies: 2Last Post: 01-26-2007, 11:39 AM -
Wolfe bolt-in roll bar
By LS1M in forum Cowhands, Local Parts and Fish BaitReplies: 4Last Post: 11-08-2005, 08:26 AM -
Wolfe bolt-in roll bar
By LS1M in forum Parts For Sale / TradeReplies: 1Last Post: 11-02-2005, 09:38 AM

Bookmarks