
Results 61 to 80 of 83
Thread: 1970 Chevrolet Camaro
-
05-16-2016, 05:42 PM #61Veteran


- Join Date
- Feb 2009
- Location
- Mansfield, PA
- Posts
- 22,146
Black & Blue- '02 WS.6 / '07 Suburban
Thanks Scott and D.

I finished off the rear wheel wells this evening. Have to get the next batch of pics uploaded and posted.
-
05-24-2016, 06:26 PM #62Veteran
- Join Date
- Feb 2009
- Location
- Mansfield, PA
- Posts
- 22,146
Black & Blue- '02 WS.6 / '07 Suburban
I used a propane torch and paint stick to scrape off the accumulated undercoating in the rear wheel wells. After heating an area until the old undercoating darkens a bit it'll then scrape right off. Obviously, have to be careful playing with fire like this and I kept an extinguisher handy just in case. I also kept checking the interior of the car and trunk for smoke just in case something accidentally ignited.
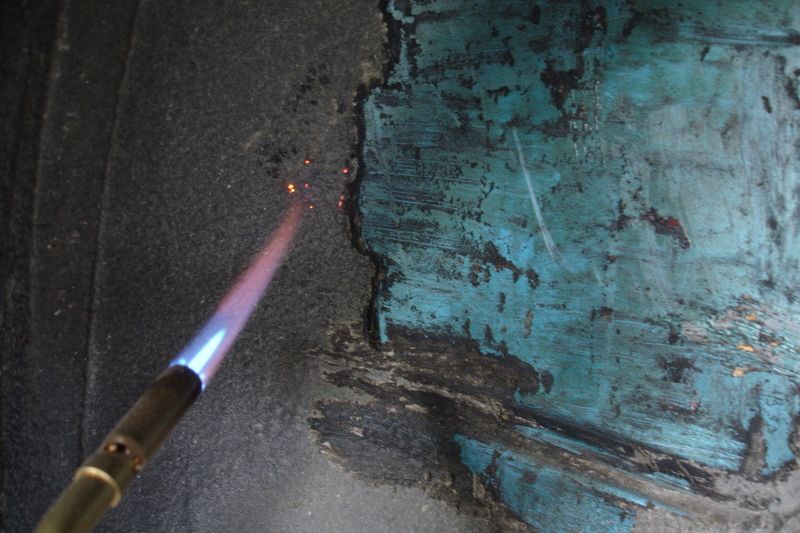

The original blue really shows through once the undercoating was scraped off. I masked off and covered everything with shopping bags, tape and aluminum foil before applying fresh rubberized undercoating. Once that had set up, I re-masked things and then painted the rear shocks in place.
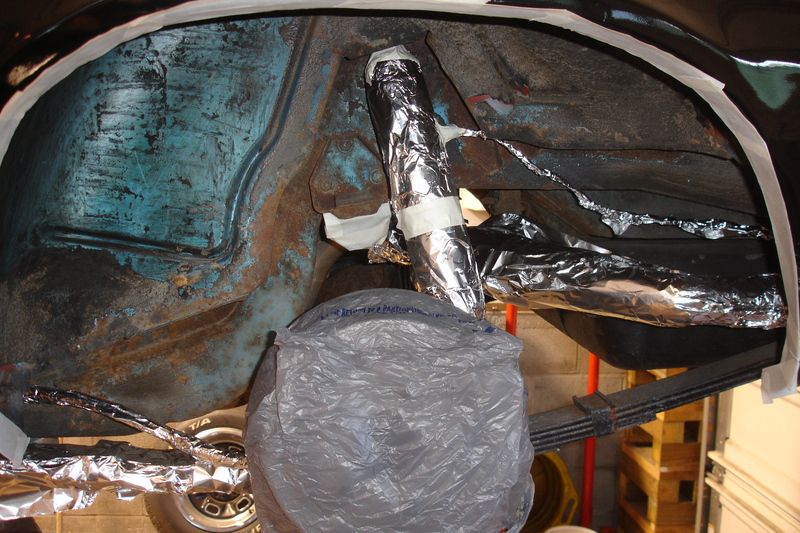
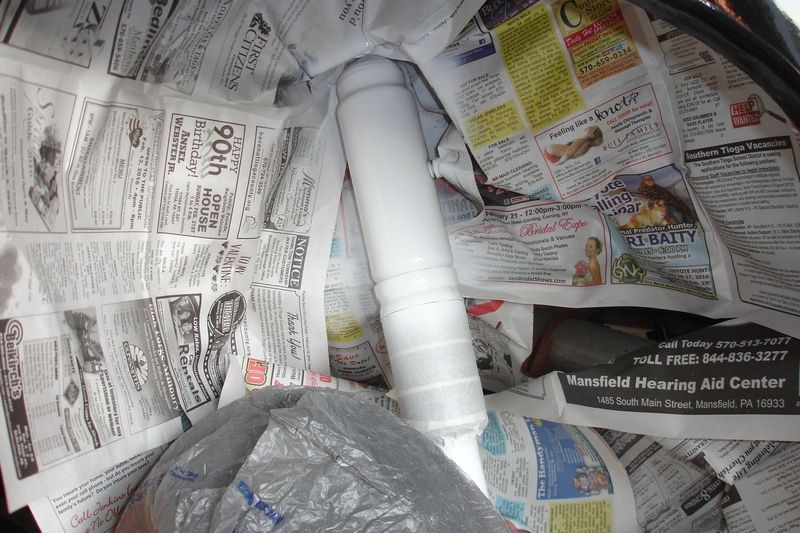
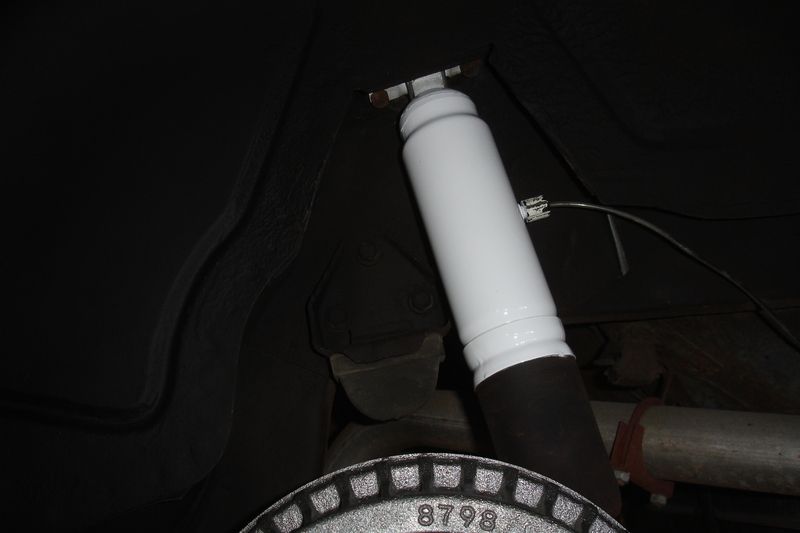
Unfortunately, the last pic came in a little dark so you really can't see the wheel well. It looks 1000% better than it did though. I will most likely apply the same undercoating on the bottom of the trunk floor when I drop the fuel tank again to replace the sender.
-
05-25-2016, 03:23 AM #63Veteran
- Join Date
- Feb 2009
- Location
- Mansfield, PA
- Posts
- 22,146
Black & Blue- '02 WS.6 / '07 Suburban
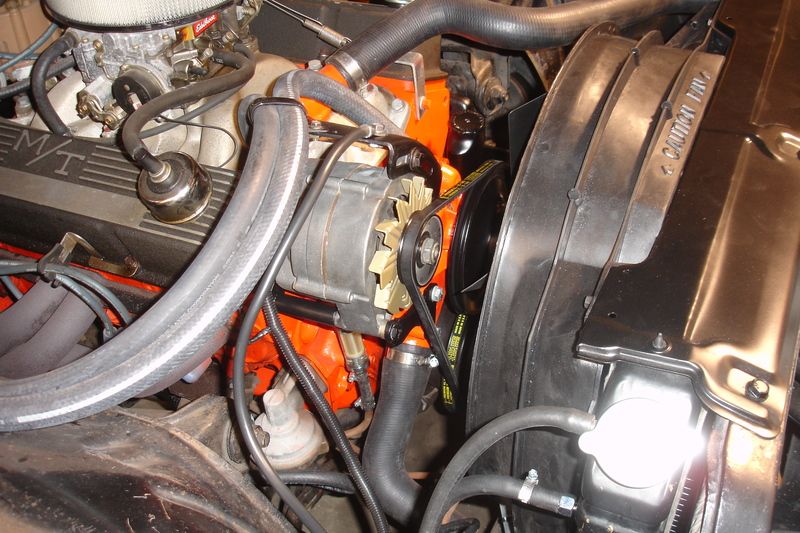
In addition to replacing the water pump, I was finally able to attack the pile of parts that we picked up at Spring Carlisle. This included the correct fan shroud, battery cables, radiator isolators (which are incorrect but I was able to make them work in the upper position), and a new fuel tank sending unit that I will hopefully install tonight. In addition, I added a supplemental transmission cooler, replaced the power steering hoses, and installed new belts.
I started by stripping everything off to remove the water pump, including the alternator, power steering pump, fan shroud, and fan.
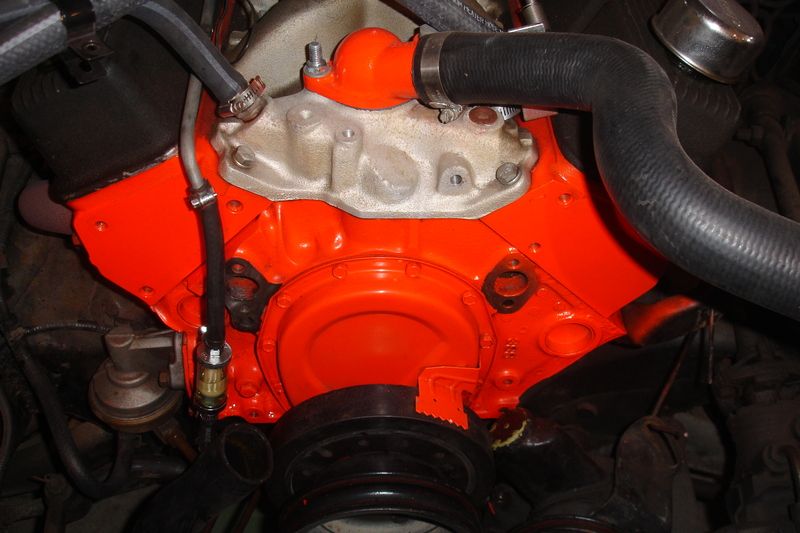
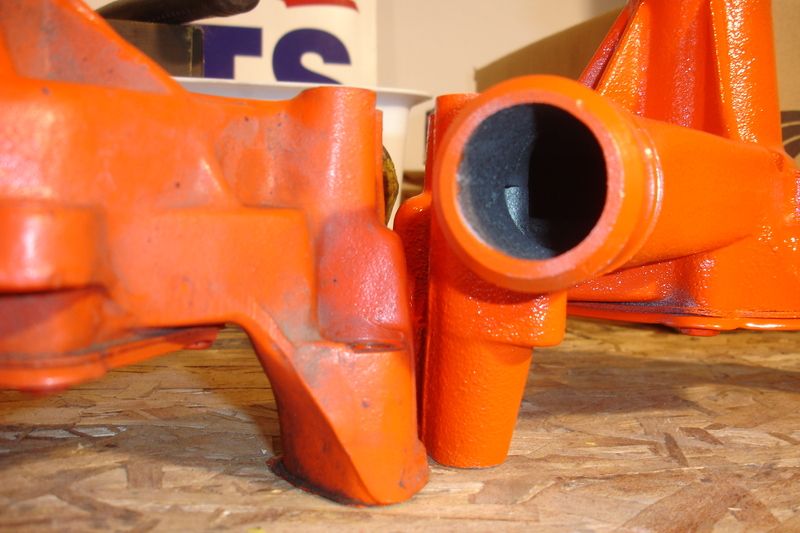
I read on-line that replacement water pumps these days can have some fitment issues and I am glad I checked before bolting on the new pump. I sourced the pump from Summit and went with a Stewart EMP cast iron unit. As I am going for the "stock" look under the hood there was no need to spend the $$ on a high dollar aluminum piece. I found that the hole for the power steering bracket was threaded about halfway through. In this setup, I actually need an unthreaded hole as the bolt goes all the way through and threads into a welded nut on the bracket. Drilling it out on my drill press fixed this problem. I also found that the mount for the pump was not the same width as what I needed. I mocked it up with three (3) washers, but ended up only using two (2) when I bolted everything together.
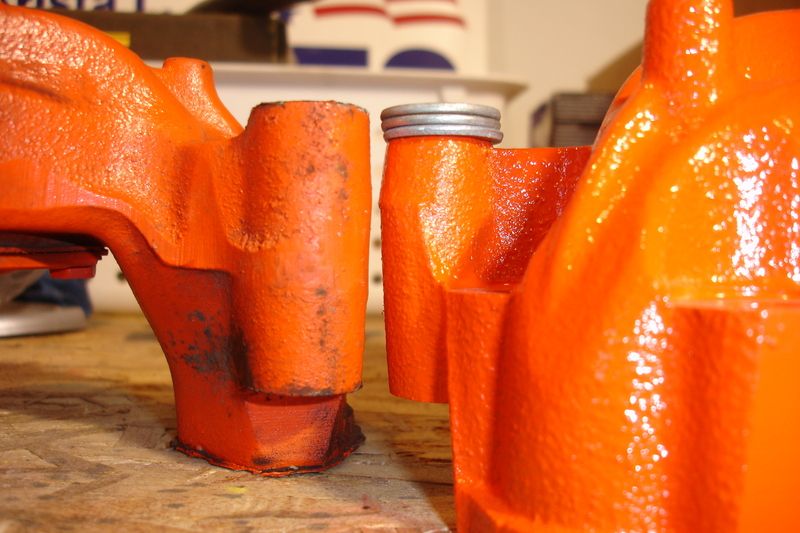
The passenger side of the water pump was spot on and no work was required.
With the modifications complete, I gave the gaskets a light coating of black RTV and installed the pump. Before installation, I also checked the torque on the pump's rear cover plate bolts. Sure enough, they were not evenly tightened and it is likely that it would have leaked down the road.
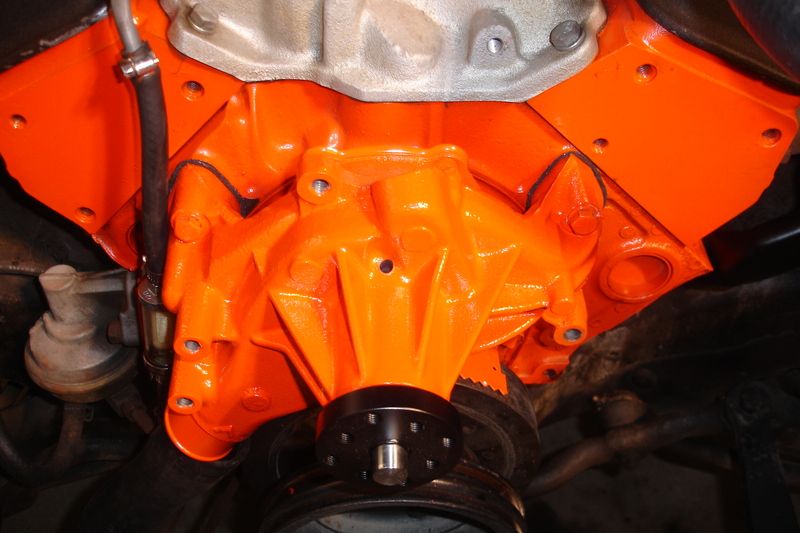
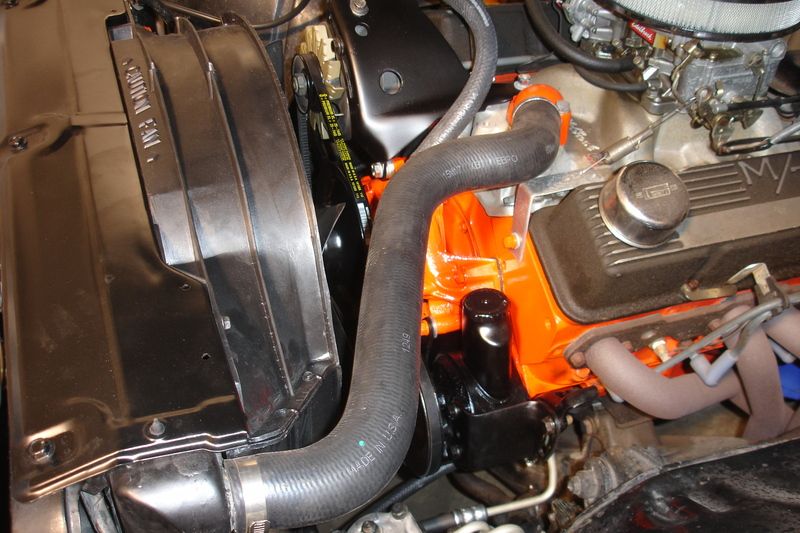
Once the pump was in place, I replaced the power steering hoses that appeared to be stock.
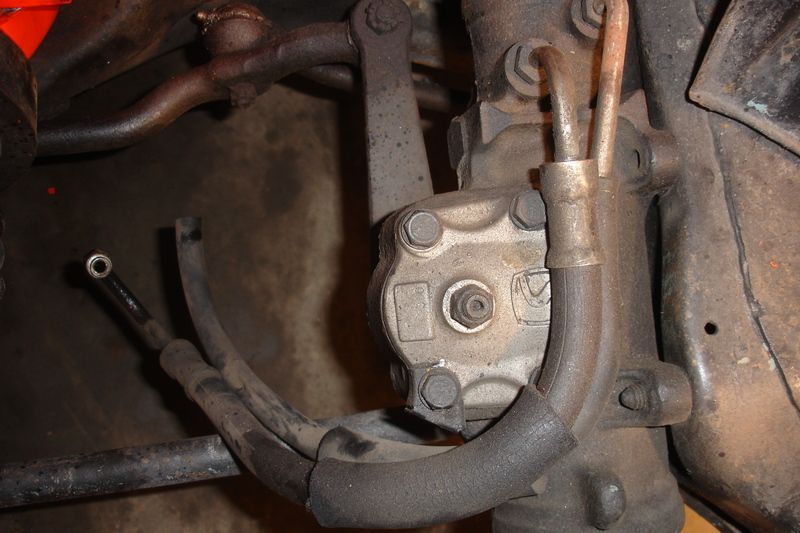
I sourced the new hoses from NAPA and found that the pressure hose had a significantly different bend in the end that attaches to the pump. In fact, as it came out of the box, it would have interfered with the steering pitman arm. After fussing with it for a bit, I ended up closing the bends a bit more and gained around 3/4" of clearance.
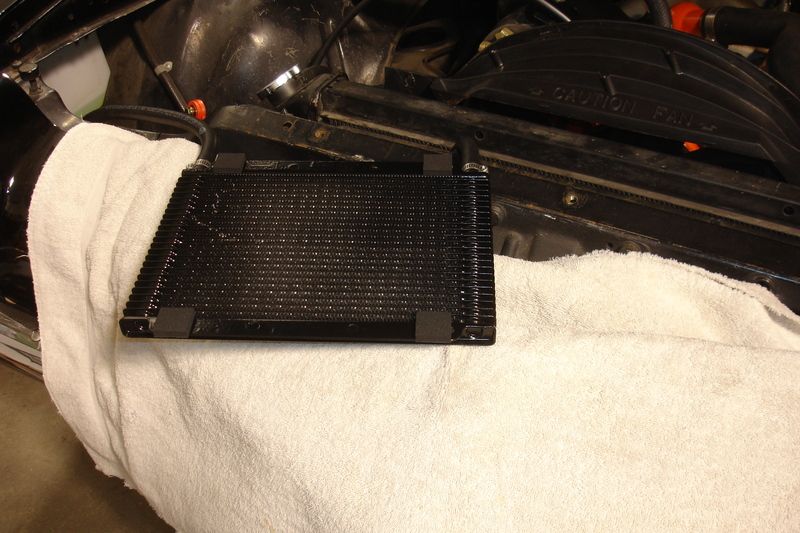
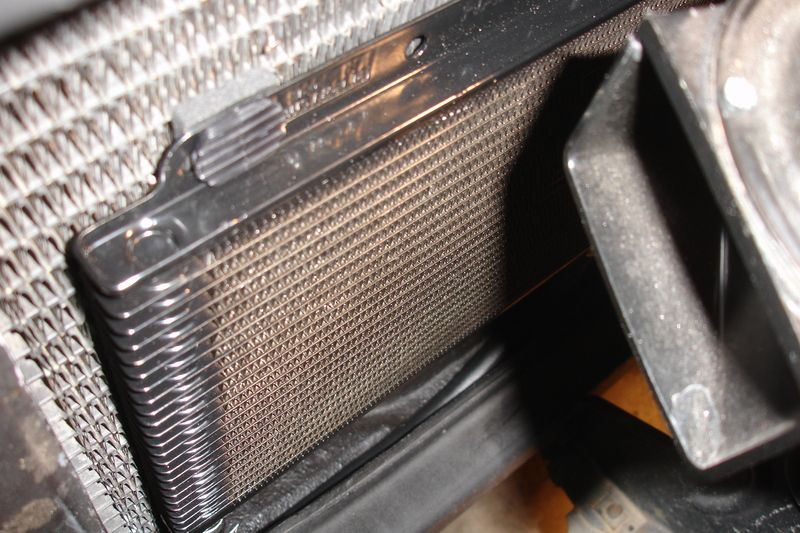
Last was the new power steering cooler. I had to jump on-line to determine which one of the cooler lines was flowing to the radiator and then installed the aftermarket unit according to the instructions. The fluid flows from the transmission, through the internal cooler in the radiator, and then through the front mounted auxiliary cooler and then back to the transmission.
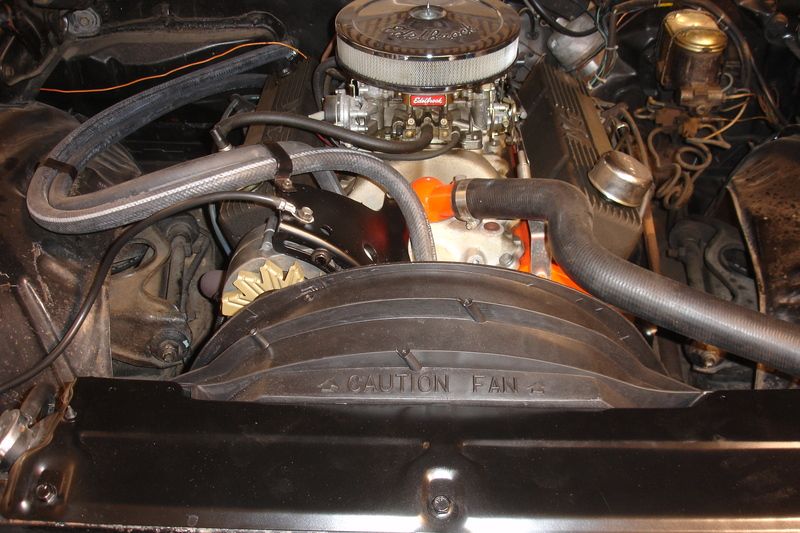
With everything buttoned back up, this is how she looks now under the hood.
-
05-25-2016, 03:29 AM #64Veteran
- Join Date
- Feb 2009
- Location
- Mansfield, PA
- Posts
- 22,146
Black & Blue- '02 WS.6 / '07 Suburban
For comparison, here are some additional pics of under the hood.
BEFORE:
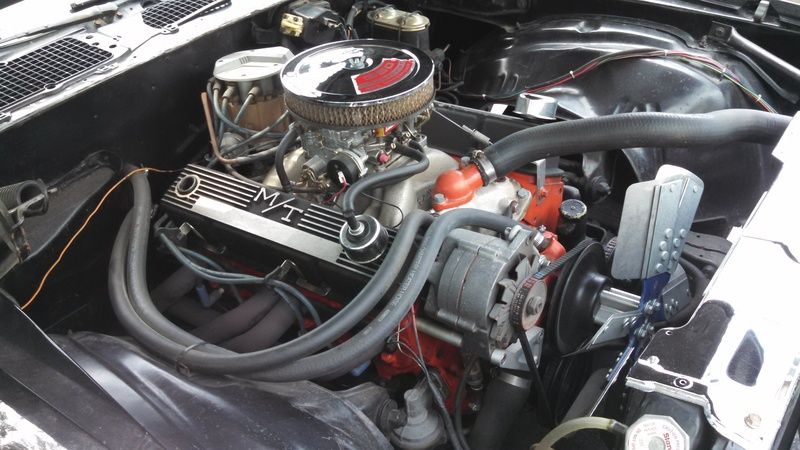
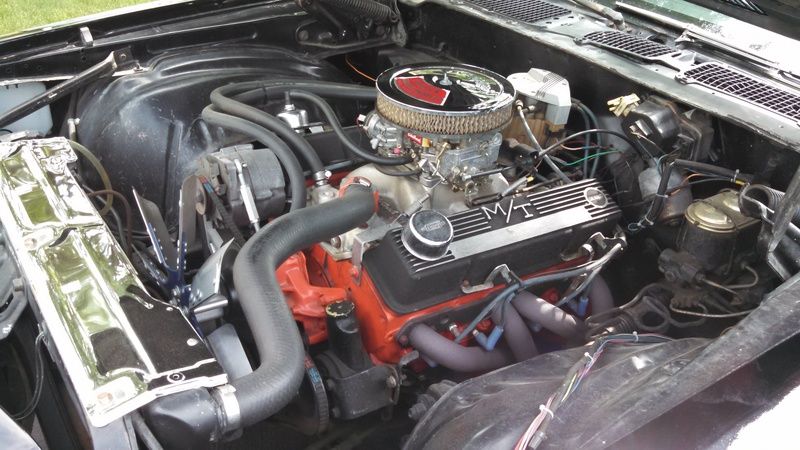
AFTER:
-
05-25-2016, 06:05 AM #65Junior Member
- Join Date
- Jan 2016
- Location
- US
- Posts
- 14
RTV tends to break down the gasket material and leaves the RTV to seal. Originally Posted by pajeff02

If I had a dollar for every gasket that leaked from this process, keep an eye on it
Sent from my SM-T530NU using Tapatalk
-
05-25-2016, 06:17 AM #66Spaz is My Mentor


- Join Date
- Feb 2009
- Location
- Florida Man Status Acheivement
- Posts
- 11,759
Navy Blue Metallic- 98 T/A w/ mods, 00 FBVert
Originally Posted by pajeff02

-
05-30-2016, 01:23 PM #67Veteran
- Join Date
- Feb 2009
- Location
- Mansfield, PA
- Posts
- 22,146
Black & Blue- '02 WS.6 / '07 Suburban
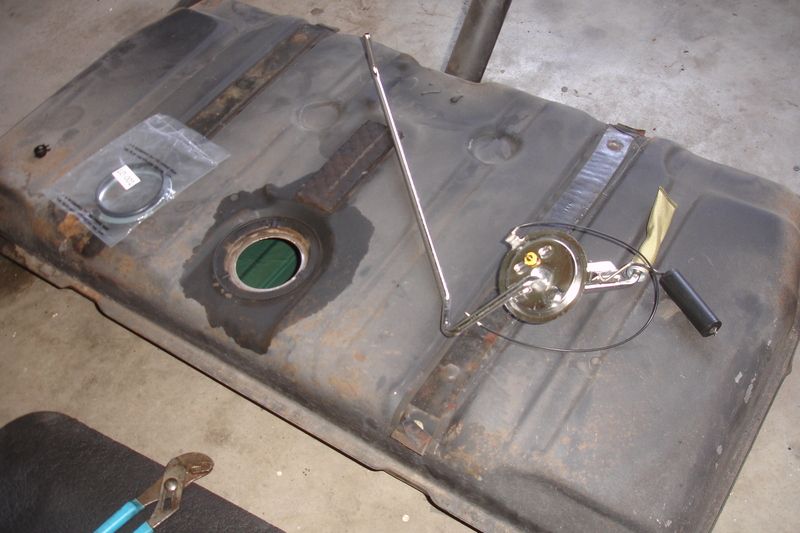
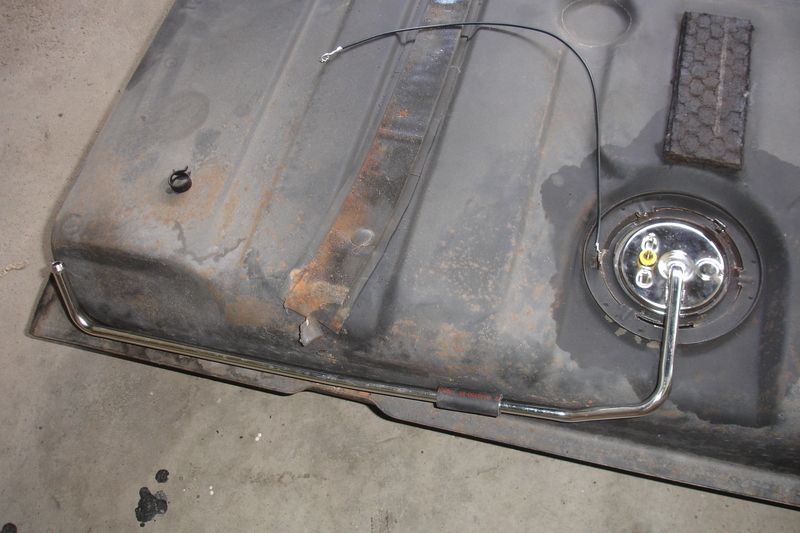
Swapped out the fuel sender this morning with one we picked up from an F-body vendor at Carlisle. I had to tweak it a bit for clearance and ended up using the stock lock ring versus the new one that came with the sender. Now we'll have to see if our fuel gauge woes have been remedied.
-
05-31-2016, 06:02 PM #68Veteran
- Join Date
- Feb 2009
- Location
- Mansfield, PA
- Posts
- 22,146
Black & Blue- '02 WS.6 / '07 Suburban
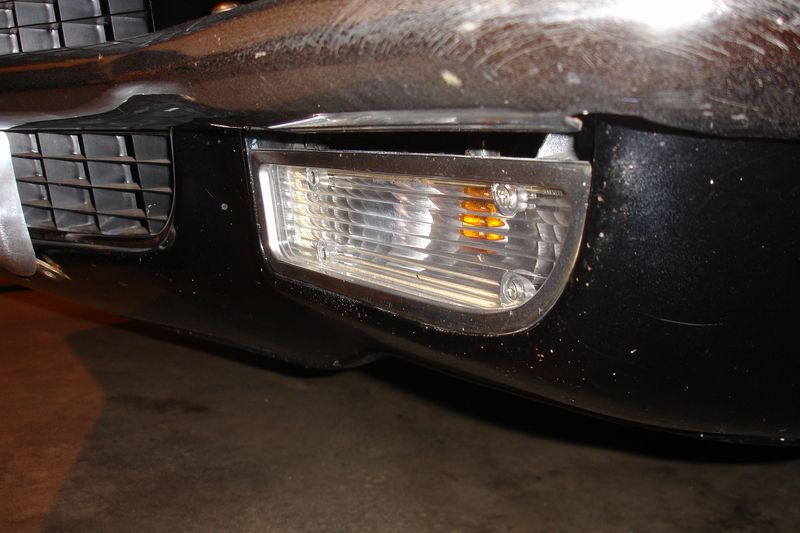
Figured out the fitment issue on the front turn signals. They were tipped in at the bottom and just did not fit into the opening in the lower valance as they should. I had them out before to swap a lense and simply did not take the time to look things over, although I did fiddle with them a bit before giving up.
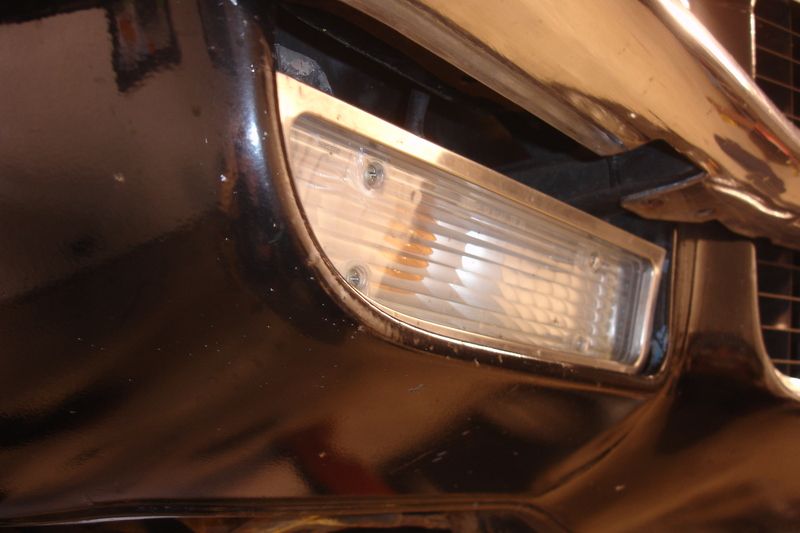
There are two screws that attach the turn signal housing to the body structure at the top, and two tabs at the bottom, one of which had a rubber bumper installed in it on each side. I could tell that the rubber bumper was pushing the assembly in at the bottom, so I simply removed them from both sides. This allowed the housings to stick through the opening and flush with the valance. I will have to look in the assembly manual to see what is up with the rubber bumpers, but for now they are positioned correctly.
-
06-01-2016, 03:21 AM #69Veteran
- Join Date
- Feb 2009
- Location
- Mansfield, PA
- Posts
- 22,146
Black & Blue- '02 WS.6 / '07 Suburban
Worked on the trunk floor this morning. Basically scraped off a few glops of seam sealer, unplugged the light harness, and masked off the inner quarters before vacuuming it all out with a brush. The floor is solid, just has a few spots of surface rust that needed coated. As we are installing a trunk mat, this is not concours restoration work, but simply application of a protective coating for now.
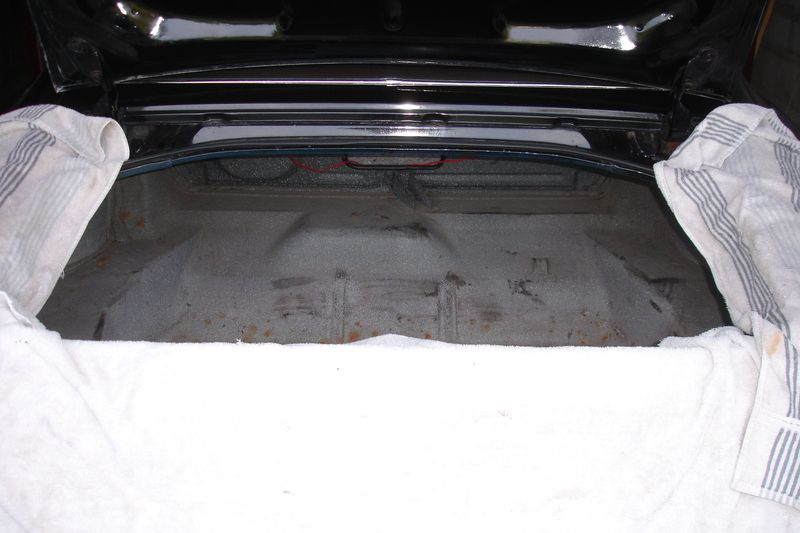
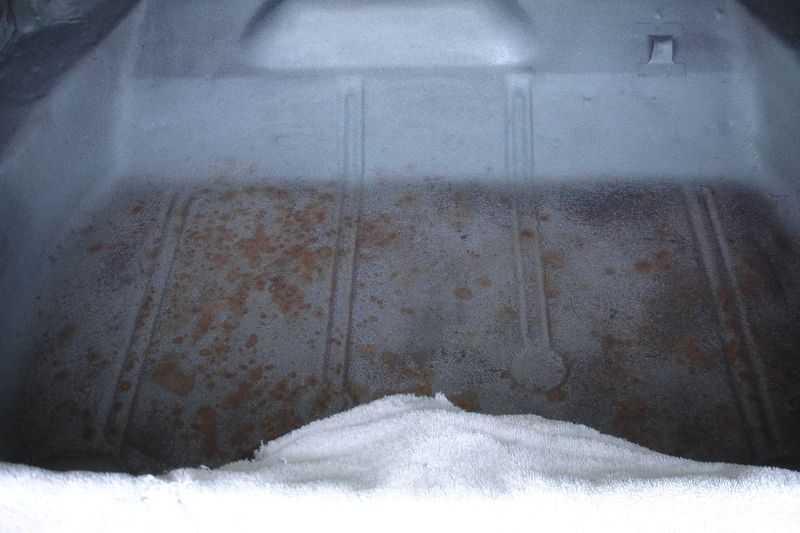
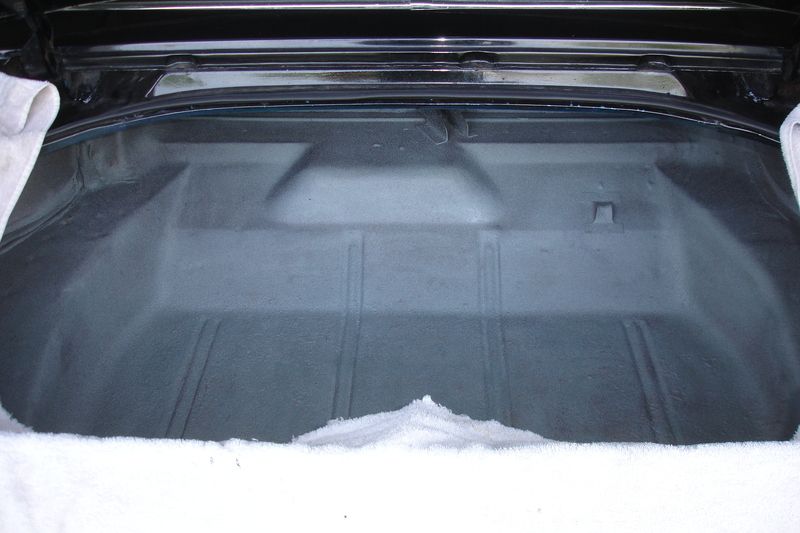
This took two (2) full cans of trunk paint sourced from Autozone. I may pick up one (1) more can to top coat the bottom portion of the floor again. We'll see how it looks after the paint has set up.
-
06-20-2016, 12:57 PM #70Veteran
- Join Date
- Feb 2009
- Location
- Mansfield, PA
- Posts
- 22,146
Black & Blue- '02 WS.6 / '07 Suburban
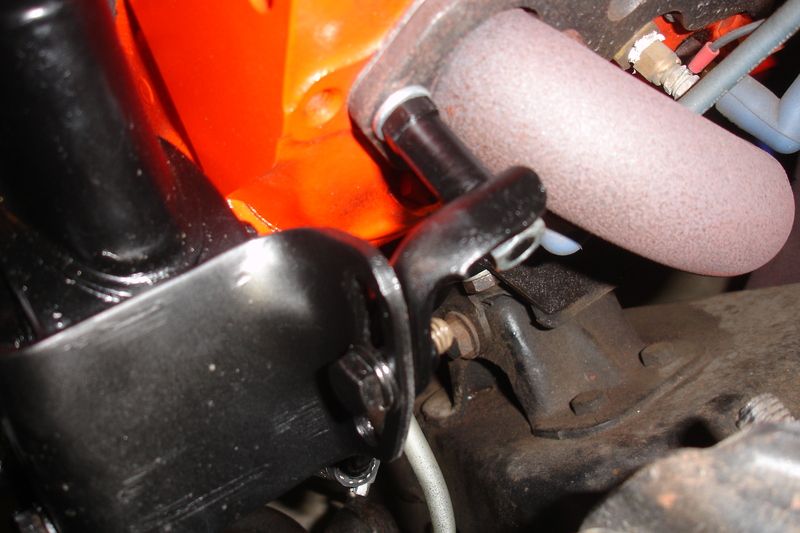
After swapping out the water pump, I realized that the power steering pump bracket had never been modified when the car was switched over from exhaust manifolds to headers. The stock bracket bolts to the front of the driver side manifold and without it the tension on the belt pulls the pump such that it pivots slightly on the remaining mounting bolt and the pulley becomes misaligned.
I searched on-line and after 61 years since inception there still isn't a decent aftermarket alternative. I found some large brackets that bolt to the front of the head and that was about it. After Googling some pictures, I copied a mounting setup that looked both simple and unobtrusive. I found the stud at NAPA in a set and cut it down to size. I then sleeved it by turning down a piece of brass pipe (no chance of rusting) and cut it to length on my lathe.
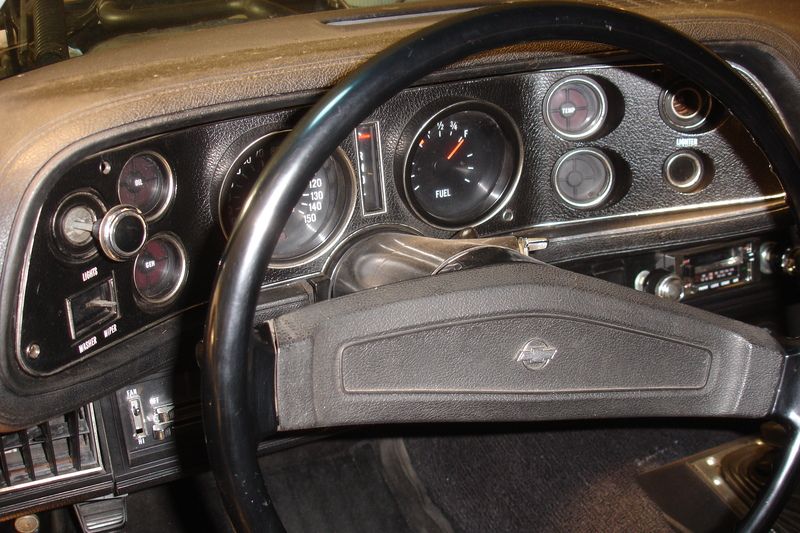
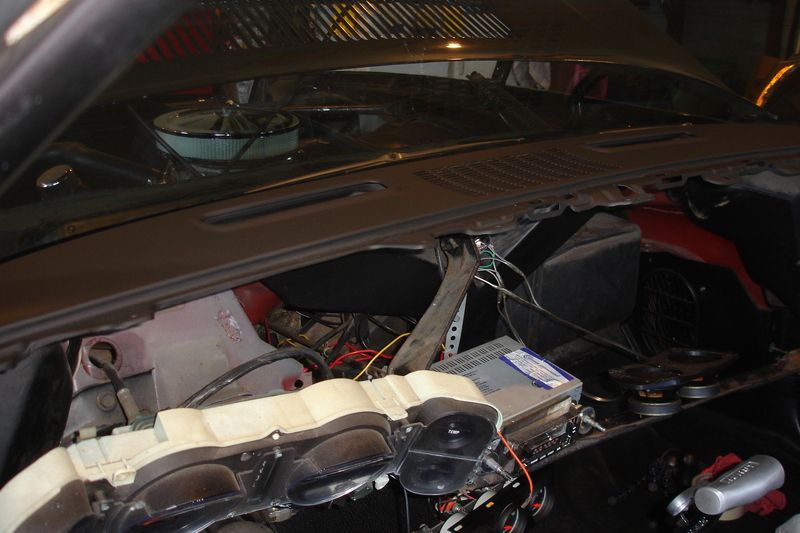
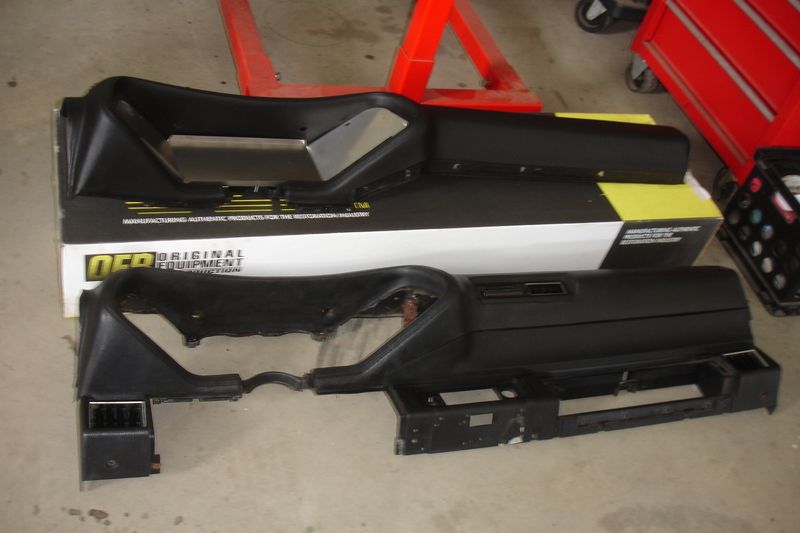
My last pre-Carlisle project was swapping out the dash and the instrument bezel. I thought this would be a simple project -- I was wrong, of course. My first issue was when I realized that the entire dash has to be removed to complete the swap. I assumed that the lower dash would stay in place while the top was removed. Second issue was when I found that the new dash does not come with any hardware. The original is attached at the top with three (3) brackets, and the new one calls for use of the original three (3), plus three (3) more. Our car came with exactly two (2) brackets so I was forced to cut and bend sheet metal to make the missing brackets.
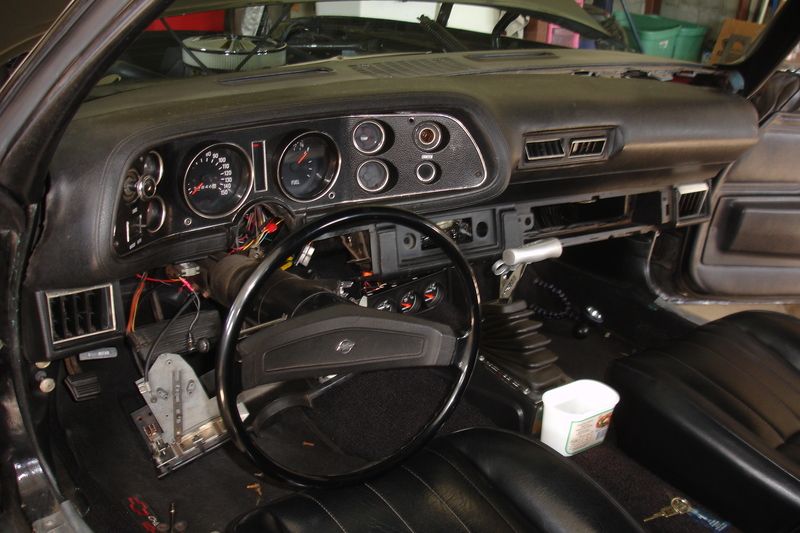
I also wanted to re-mount the dash speakers that had originally been secured by dropping the screws down through the grille. This took some thought and after ripping everything apart I elected to epoxy three (3) strips of plywood to the underside of the dash in order to have something to screw into. I painted the edges of the wood before securing them in place so that the wood would not show in direct sunlight.
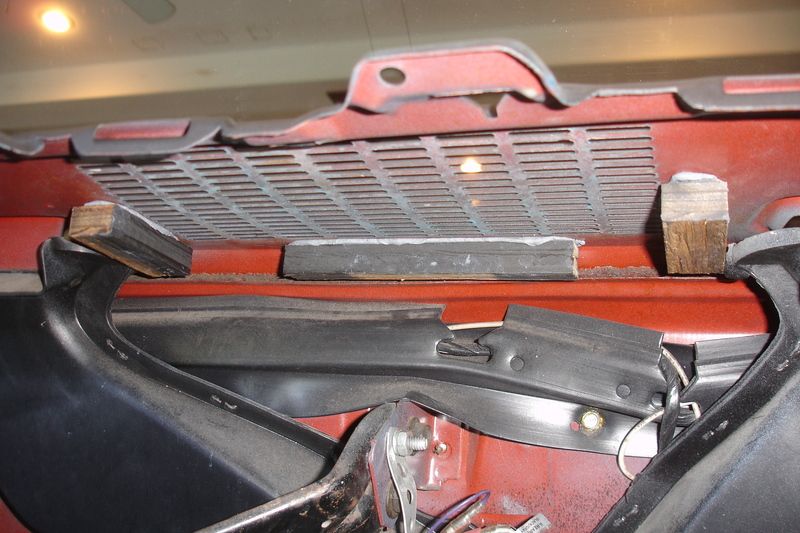

Before final installation of the speakers, I prepared the metal dash top for paint and masked everything off. There were marks from the screws, a chipped area on the passenger side, and without any way to really repair these areas separately I elected to paint the entire thing.
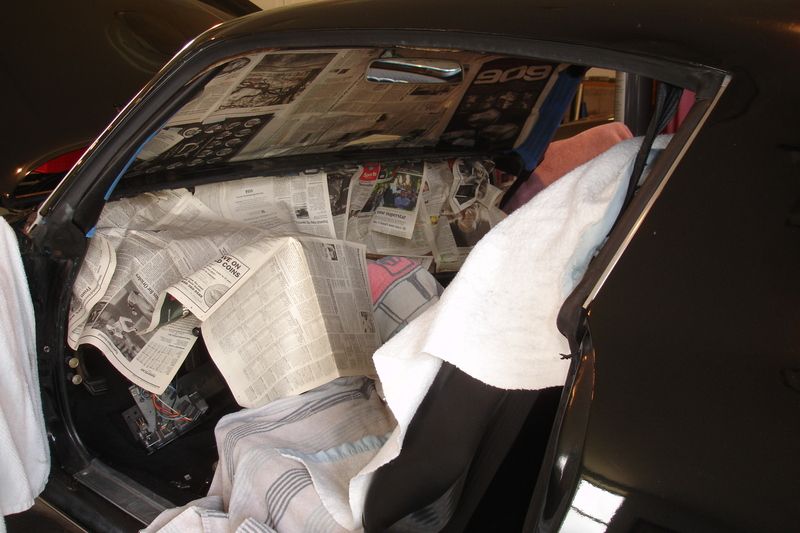
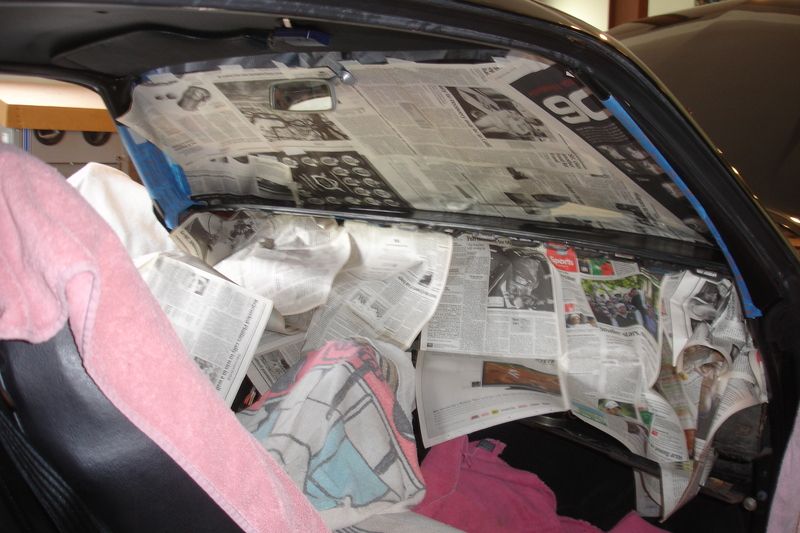
The final result came out good. I was concerned about the newspaper hanging into the wet paint and sticking, so I pressed small diameter plastic wire loom in between the dash and the masking to hold the paper up and away from the painted surface.
Last edited by pajeff02; 06-20-2016 at 01:02 PM.
-
06-21-2016, 04:43 AM #71Member
- Join Date
- Feb 2015
- Location
- Harrisburg, PA
- Posts
- 188
Silver- 1995 Firehawk
better you than me.
-
06-21-2016, 06:19 PM #72Veteran
- Join Date
- Feb 2009
- Location
- Mansfield, PA
- Posts
- 22,146
Black & Blue- '02 WS.6 / '07 Suburban
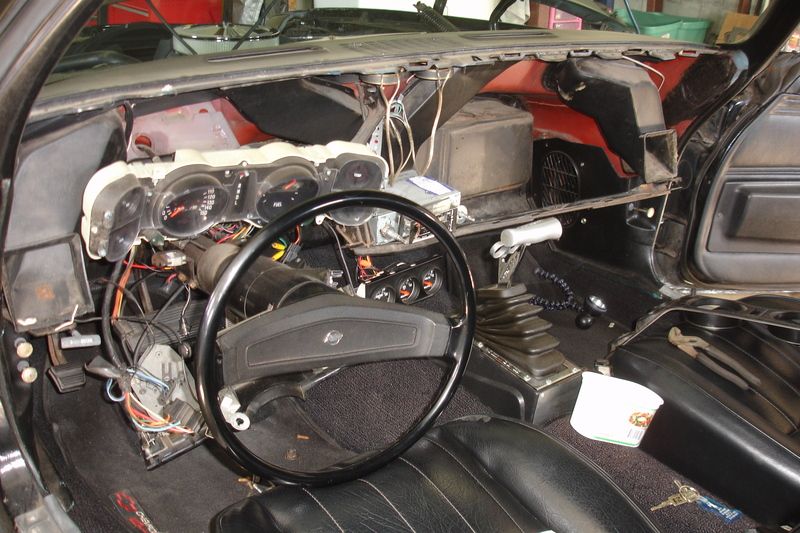
Picking up where I left off, I had mentioned that the new dash did not come with any hardware. I bolted the six (6) top clips to the studs along the top edge of the dash and then attached the lower dash using self tapping screws in place of the mixed hardware that came off it. I had to trim a bit off the detent on the driver side for the underdash vent assembly and I added two holes and a zip tie in the curved area on the right side to pull the two pieces together. I was originally going to have Dawn help me set the dash in place so as not to scratch the freshly painted metal top, but after looking things over I just went ahead and installed it by myself.
The clips slipped into the slots easily as I left the nuts loose so they could move around a bit. I rested the lower dash on the metal support bracket on the passenger side and then looked everything over before slipping underneath and snugging the nuts on the clips down. After that, everything bolted back into place without too much fuss and the alignment on the various components was actually quite good. I had one hole above the ashtray that I just could not find but it really wasn't an issue.
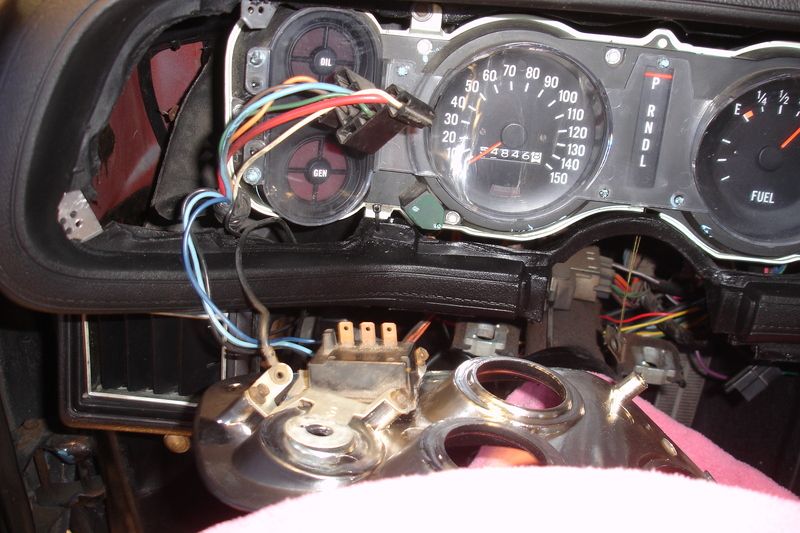
The only problem area I encountered was over top of the instrument cluster which has two large holes where screws go up from the bottom into the metal dash top. The screws would then push up on the top of the new dash and raise it up. At Carlisle, I looked at another one that had been removed from the box and noticed that there were no holes on the top lip in this area even though it did have the metal strip. I decided to carefully drill holes and install short screws that would pull the top of the dash down into place. I did this after returning from the show and, unfortunately, had to drop the lower dash, steering column and again pull the instrument cluster bezel to get my small drill into position.
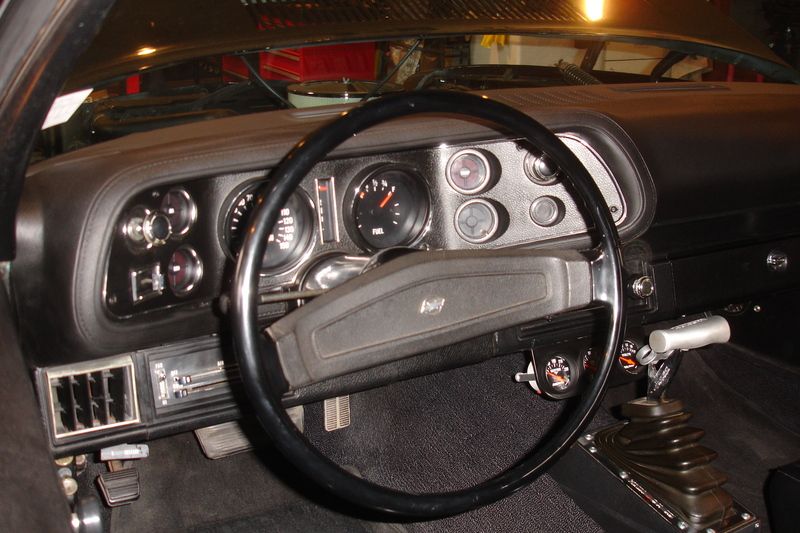
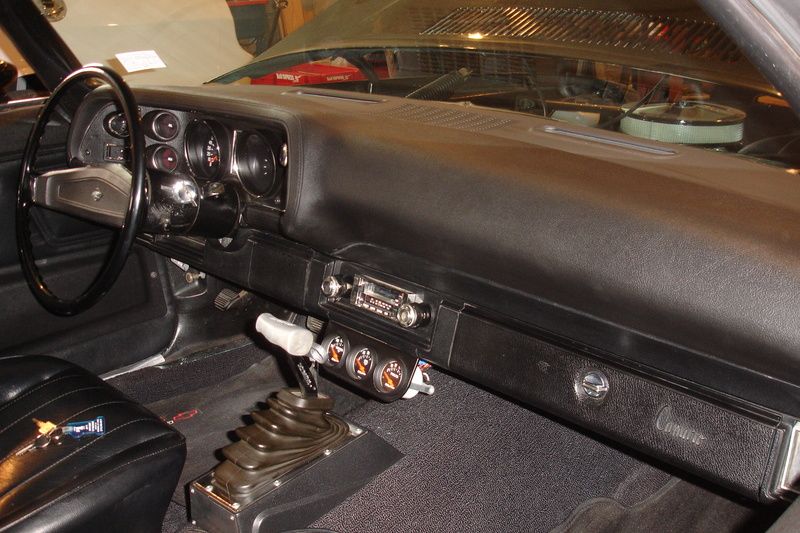
Once I did this the dash immediately settled into place and I found some plastic plugs in my collection of stuff that I pressed into the holes. Where they are positioned the plugs cannot be viewed and it does not appear that the lack of screws for the bottom lip are an issue. If I do notice it sagging in the future I can always install a second set of screws adjacent to the top ones. The new dash and instrument cluster bezel really dressed up the interior and Dawn was very pleased with how everything now looks. The dash in the car when we purchased it had AC vents in the center that were not hooked to anything and this, being a non-AC dash, eliminated them for a nice clean look.
-
06-23-2016, 04:42 PM #73She Moderator

- Join Date
- Jul 2008
- Location
- So Cal
- Age
- 60
- Posts
- 15,660
Arctic White- 2000 Camaro Z28
That looks really nice, Jeff

-
06-24-2016, 01:48 AM #74Veteran
- Join Date
- Feb 2009
- Location
- Mansfield, PA
- Posts
- 22,146
Black & Blue- '02 WS.6 / '07 Suburban
Thank you. Still a few things to address on the interior like the center of the steering wheel and kick panels, but overall it is 95% done at this point. We have enjoyed the hell out of driving this car.
I forgot to mention that the fuel gauge is still acting up. I did not bother testing the new one before installing it, but it seems to read about the same as the old one. I am going to have to drop the tank at least one more time to figure this out.
-
06-24-2016, 03:35 AM #75Member
- Join Date
- Feb 2015
- Location
- Harrisburg, PA
- Posts
- 188
Silver- 1995 Firehawk
Jeff that car was really nice sitting at Carlisle. I would be proud of it.
-
06-25-2016, 02:21 AM #76Veteran
- Join Date
- Feb 2009
- Location
- Mansfield, PA
- Posts
- 22,146
Black & Blue- '02 WS.6 / '07 Suburban
Thanks, Dan. And right back at you - your 'Hawk is super clean and just a gorgeous ride. I really liked that car.
-
12-20-2016, 08:06 AM #77Veteran

- Join Date
- May 2006
- Location
- Arizona
- Posts
- 12,557
You've been tinkering with this for a long time Jeff. Glad to see you are still enjoying it.
-
12-21-2016, 07:19 AM #78Veteran
- Join Date
- Feb 2009
- Location
- Mansfield, PA
- Posts
- 22,146
Black & Blue- '02 WS.6 / '07 Suburban
Thank you. It is a real fun car to drive and gets lots of looks out on the street. Still have more to do... but you know how that goes.
-
12-21-2016, 07:51 AM #79Senior Member

- Join Date
- Sep 2010
- Location
- Bel Air, Maryland
- Posts
- 1,675
Silver- '02 Trans Am WS-6, 6M
Maybe I'll have a write up like this for my WS6 in another 20 years 😜 Originally Posted by pajeff02
-
12-22-2016, 07:19 AM #80Spaz is My Mentor
- Join Date
- Feb 2009
- Location
- Florida Man Status Acheivement
- Posts
- 11,759
Navy Blue Metallic- 98 T/A w/ mods, 00 FBVert
I'm starting a "scrape" book to keep track of all that I've done to mine over the years. Part for memories, but also to keep track of parts, costs, etc...

 Reply With Quote


Thread Information
Users Browsing this Thread
There are currently 1 users browsing this thread. (0 members and 1 guests)
Similar Threads
-
1969 &1970 Chevrolet Camaro - One For Show, Two For Go!
By Ed Blown Vert in forum Camaro / SSReplies: 0Last Post: 01-29-2013, 02:20 PM -
Ring Brothers 1970 Chevrolet Camaro "Diversion"
By Ed Blown Vert in forum Classic MuscleReplies: 0Last Post: 11-04-2011, 04:40 AM -
1970 Chevrolet Camaro - Performance Minded
By Ed Blown Vert in forum Camaro / SSReplies: 0Last Post: 10-05-2011, 04:20 PM -
1970 Chevrolet Camaro and More - Local Heroes Redux
By Ed Blown Vert in forum Camaro / SSReplies: 0Last Post: 09-29-2010, 03:50 AM -
For Trade: For Sale 1970 Chevrolet Camaro Split Bumper
By fuzzyhall in forum Vehicles For Sale / TradeReplies: 2Last Post: 11-15-2008, 03:21 PM

Bookmarks