
Results 41 to 60 of 125
Thread: Transmission rebuild underway
-
01-10-2013, 01:36 AM #41Nightmare


- Join Date
- Sep 2007
- Location
- Cherry Point NC
- Posts
- 475
Red- 2000 Trans Am WS.6 M6
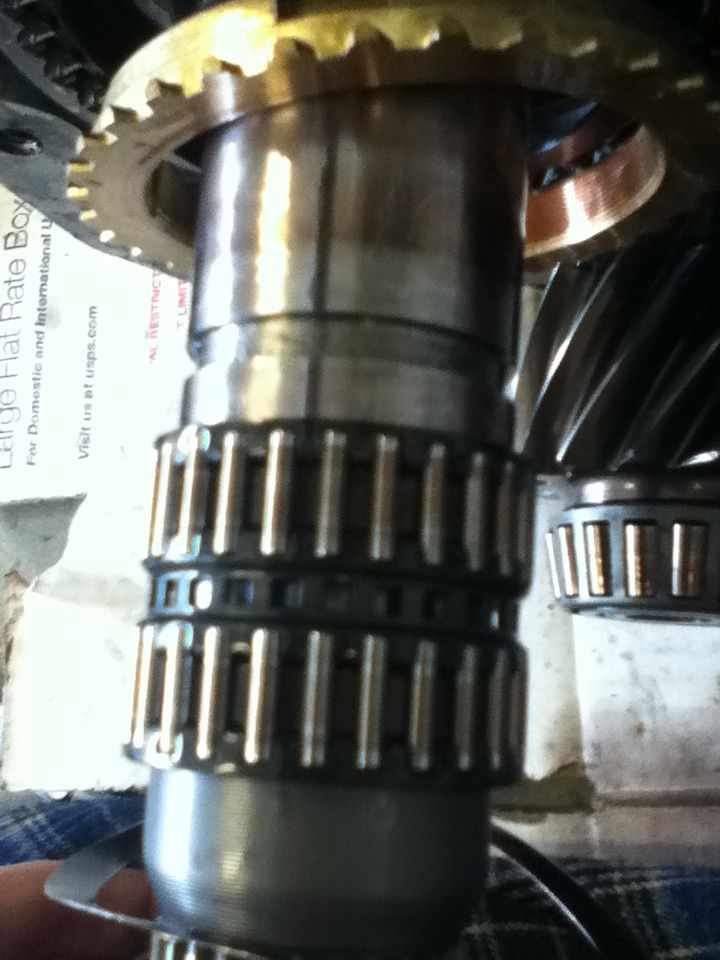
Underneath the reverse gear are a set of caged needle bearings. Remove and be extremely fragile with them when pulling off. Treat Everything in the transmission as if it were your baby. If you get frustrated get up and go do something else for a little bit. Because that bit of frustration might cost you $$$.
-
01-10-2013, 01:39 AM #42Nightmare
- Join Date
- Sep 2007
- Location
- Cherry Point NC
- Posts
- 475
Red- 2000 Trans Am WS.6 M6
It is not pictured, but there is a very thin (wave washer) behing the caged needle bearings remove that. Next as you see there is a (gold) ring (the blocker ring), remove this.Last edited by RedFenix_68; 01-10-2013 at 01:45 AM.
-
01-10-2013, 01:44 AM #43Nightmare
- Join Date
- Sep 2007
- Location
- Cherry Point NC
- Posts
- 475
Red- 2000 Trans Am WS.6 M6
next is this handy reverse shift fork. Yay Finally get to the forks! If you look closely there is another snap ring. This one is slightly different. This is called a (e-snap ring) because of the little holes. I did not have the other set of (e-snap ring) pliers, I just had the regular snap ring pliers. So i had to go through the process again with remove the e-snap rings manually. You can use the pliers that were designed to some what budge these rings enough to get something under them. I recommend that you just buy a set of adjustable e-snap ring pliers. Anyways, remove the ring
-
01-10-2013, 01:49 AM #44Nightmare
- Join Date
- Sep 2007
- Location
- Cherry Point NC
- Posts
- 475
Red- 2000 Trans Am WS.6 M6
After removing that e-snap ring, pull the reverse shift fork towards you a little bit. on the very right side in the picture the silver bar behind the shift fork there is another e-snap ring. Remove the ring. After that you should be able to remove the entire reverse shift fork, the 5th/6th gear cluster all at once. This part will be very fast.
-
01-10-2013, 01:50 AM #45Nightmare
- Join Date
- Sep 2007
- Location
- Cherry Point NC
- Posts
- 475
Red- 2000 Trans Am WS.6 M6

-
01-10-2013, 01:58 AM #46Nightmare
- Join Date
- Sep 2007
- Location
- Cherry Point NC
- Posts
- 475
Red- 2000 Trans Am WS.6 M6

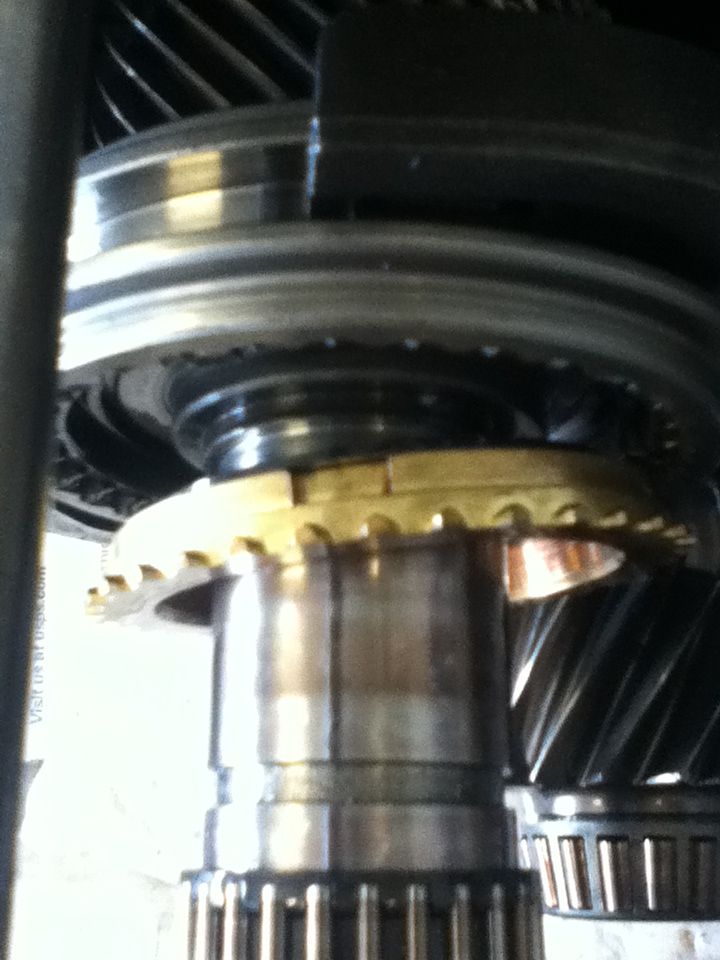
Remove the 5th/6th gear. you will see above the 5th and 6th gears are the another set of gears. These are actually apart of the (Gear) ratio.
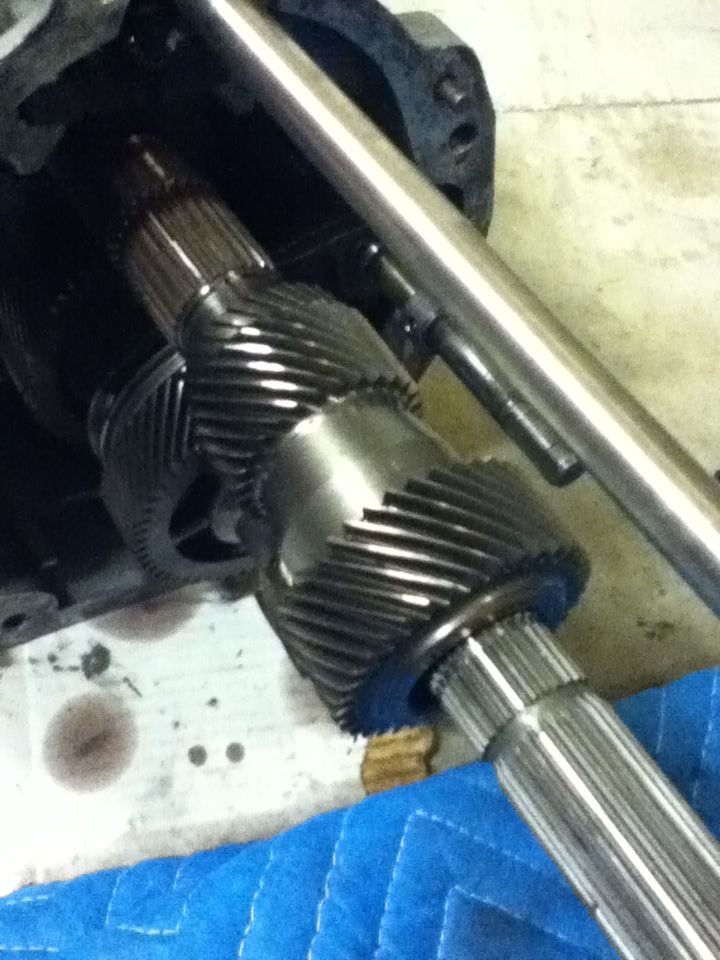
remove all of this at once lol. I hope i have not lost anyone at this point. Trust me once you get into the removal of these you will see what i am talking about. So the 5th/6th gear shift fork, the 5th/6th gears, and the 5th/6th driven gears will come right out (5th/6th driven gears are the ones pictured below the 5th/6th gears
-
01-10-2013, 02:05 AM #47Nightmare
- Join Date
- Sep 2007
- Location
- Cherry Point NC
- Posts
- 475
Red- 2000 Trans Am WS.6 M6
Now stand back and stretch a little and pat yourself on the back. You are almost to the part where you can remove the transmission case to reveal all of your other goodies. Moving on to the final steps before removing the case. now go to the cover plate and remove the 4 bolts where that skip shift solenoid is sticking out of. remove that plate to reveal the skip shift lever and the front offset leverLast edited by RedFenix_68; 01-10-2013 at 02:13 AM.
-
01-10-2013, 02:20 AM #48Nightmare
- Join Date
- Sep 2007
- Location
- Cherry Point NC
- Posts
- 475
Red- 2000 Trans Am WS.6 M6
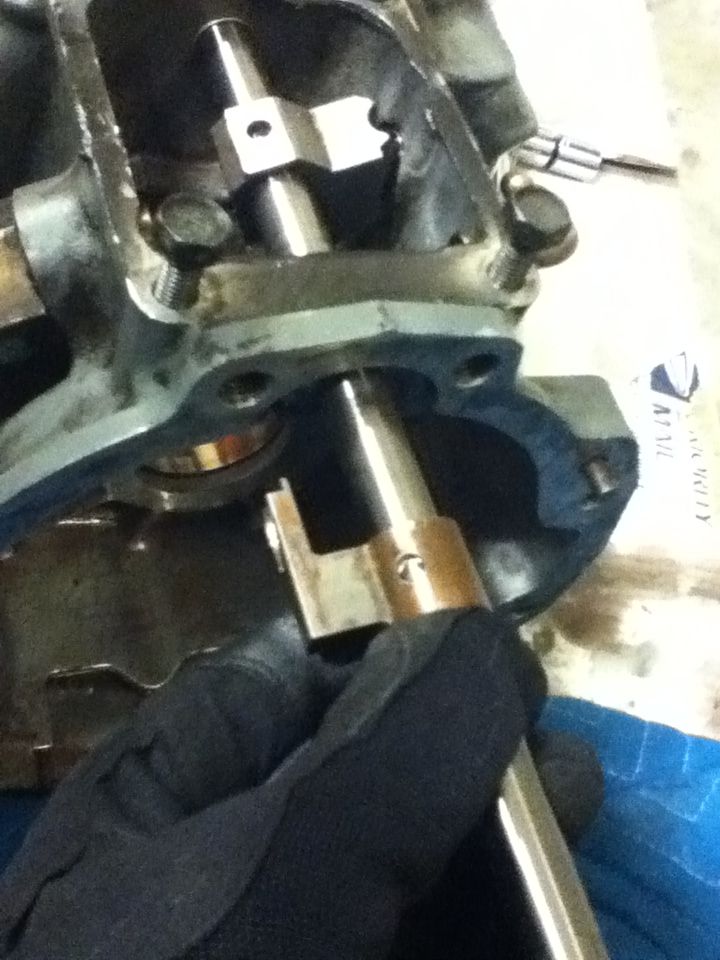
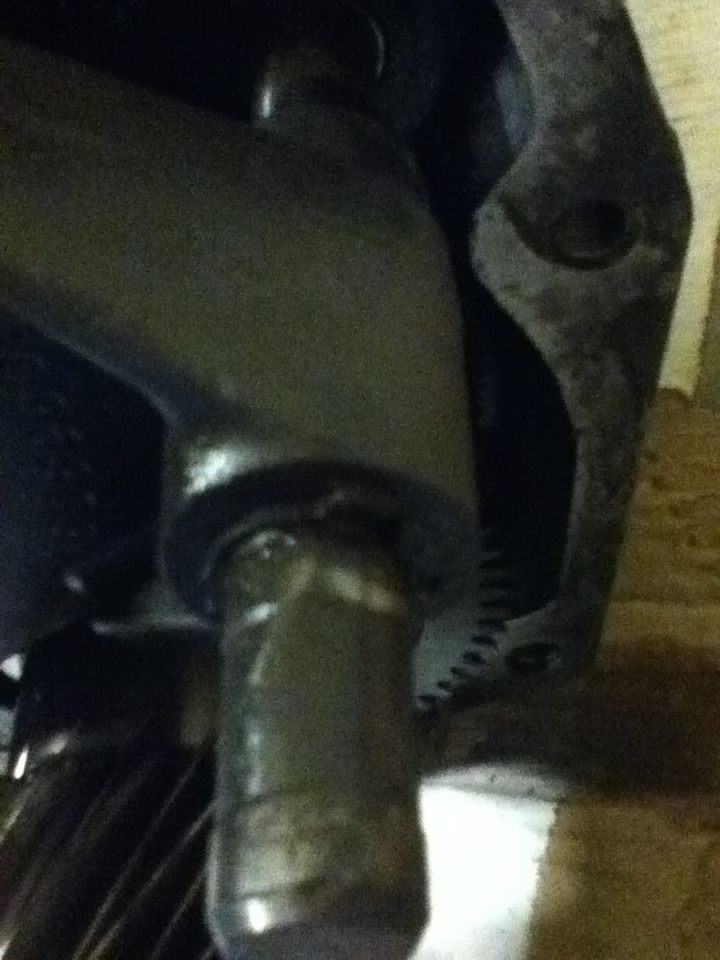
Moving on to the final steps before removing the case. now go to the cover plate and remove the 4 bolts where that skip shift solenoid is sticking out of. As you can see on the shift lever are the skip shift lever (brownish gold one in the back) and the front offset lever (one in the front). Now this is where it gets a little tricky. The front offset lever you need to knock the pin until it becomes loose (not off). do not worry if you knock the pin all the way through. The reason it tells you in the manual not to knock it all the way through is because under neath that little lever is a tiny ball and spring. Dont be afraid if you knock them out, lol they can go right back in. Anyways, now you can knock out the pin to that little skip shift lever all the way out (the brownish gold one in the back) and then slide the lever off of that shift lever rod. Now slide the offset lever off the rod as well. keep your hand underneath of it so that the ball an spring dont shoot out of the bottom. If it does it is not a big deal just dont lose the pieces haha.
-
01-10-2013, 02:21 AM #49Nightmare
- Join Date
- Sep 2007
- Location
- Cherry Point NC
- Posts
- 475
Red- 2000 Trans Am WS.6 M6
-
01-10-2013, 02:29 AM #50Nightmare
- Join Date
- Sep 2007
- Location
- Cherry Point NC
- Posts
- 475
Red- 2000 Trans Am WS.6 M6
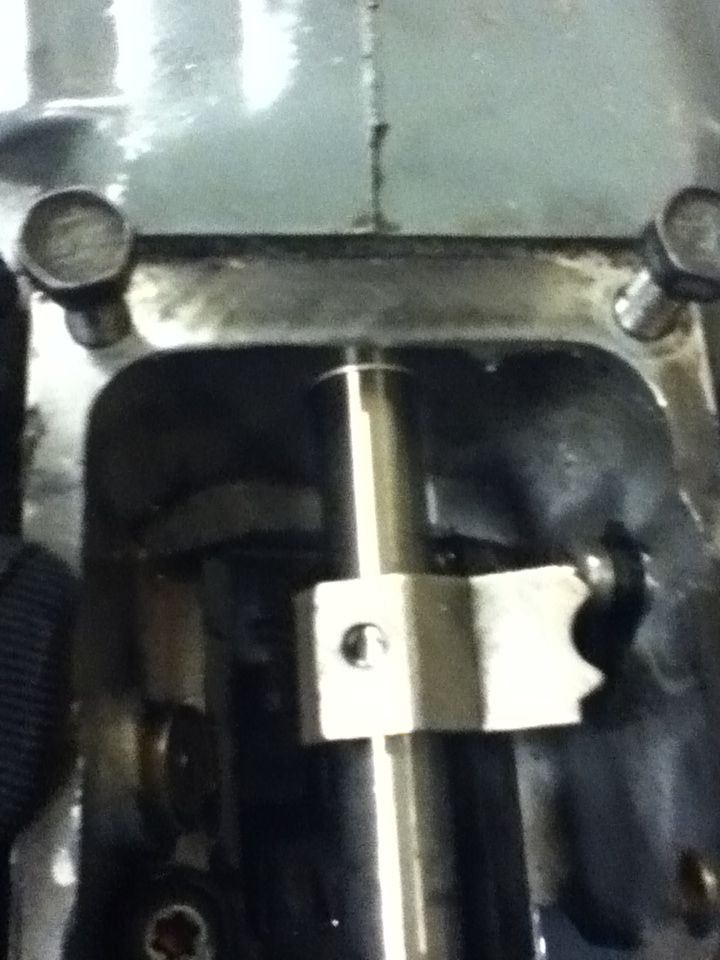
Ok this is where things are going to get a little tricky. Where those two holes are is just a little forward of where the skip shift lever and the offset lever are. They are star pattern (torx) bolts. Highly recommend you use a heat gun, or what i did was use a blow drier on those bolts and let that area heat up real well. by the way i went through 2 different t-40 fittings before i learned my lesson. I got a a named brand "lisle" T-40 fitting from O'Reilys. Now you are going to need to put a lot of ass into these two bolts. Be careful not to strip out your tool. Dont worry about the bolts they will eat your t-40 before you put a scratch into those bolts. Dont buy a cheap set of t-40 like duralast trust me they wont work. I ruined my friends t-40...thats how i know. I recommend you use a 1/2 inch wrachet wrench or a cheater bar to attach to the fitting to remove.
-
01-10-2013, 02:35 AM #51Nightmare
- Join Date
- Sep 2007
- Location
- Cherry Point NC
- Posts
- 475
Red- 2000 Trans Am WS.6 M6
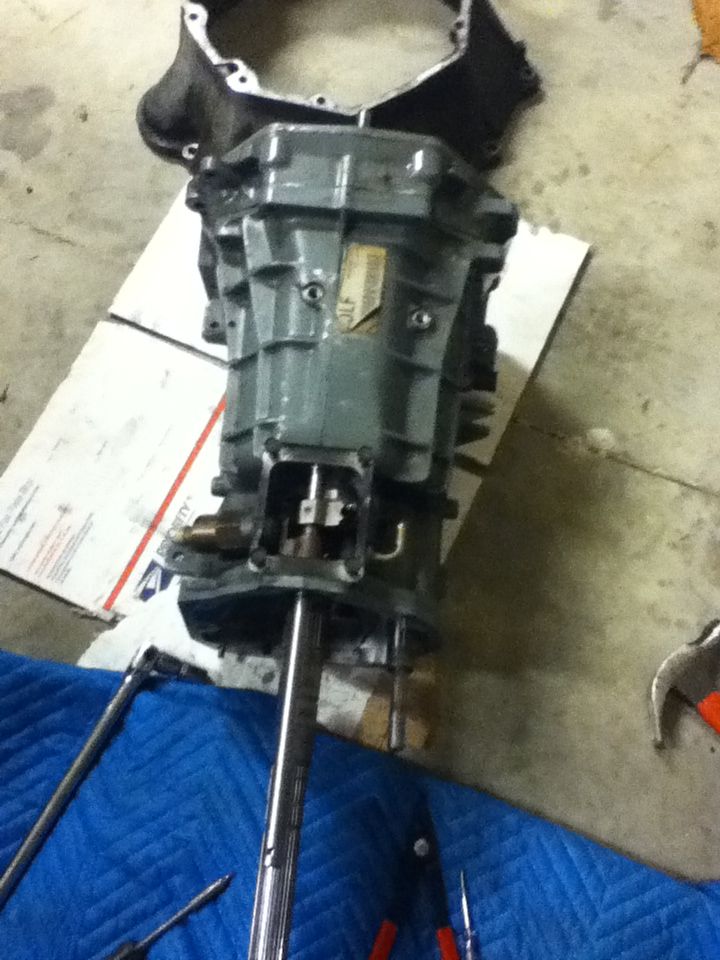
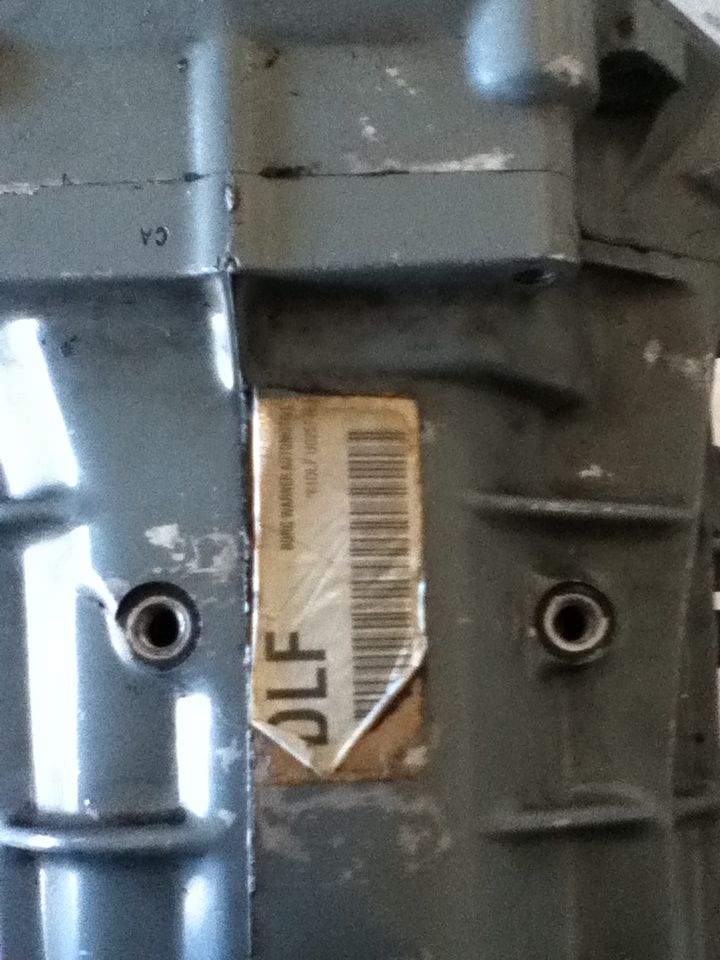
Now move to the front of your transmission. You will notice 10 or 11 bolts in the front of the transmission (or adapter plate) is what they call it in the manual. Now it tells you in the manual to set the transmission case up vertically then remove 8 out of the 10 bolts. I removed all of them at once, and then lifted the whole transmission case ontop on the transmission bell housing which was already removed from the transmission before the disassembly. Any ways remove the bolts and set the case up verticaly on the bellhousing.
-
01-10-2013, 02:40 AM #52Nightmare
- Join Date
- Sep 2007
- Location
- Cherry Point NC
- Posts
- 475
Red- 2000 Trans Am WS.6 M6
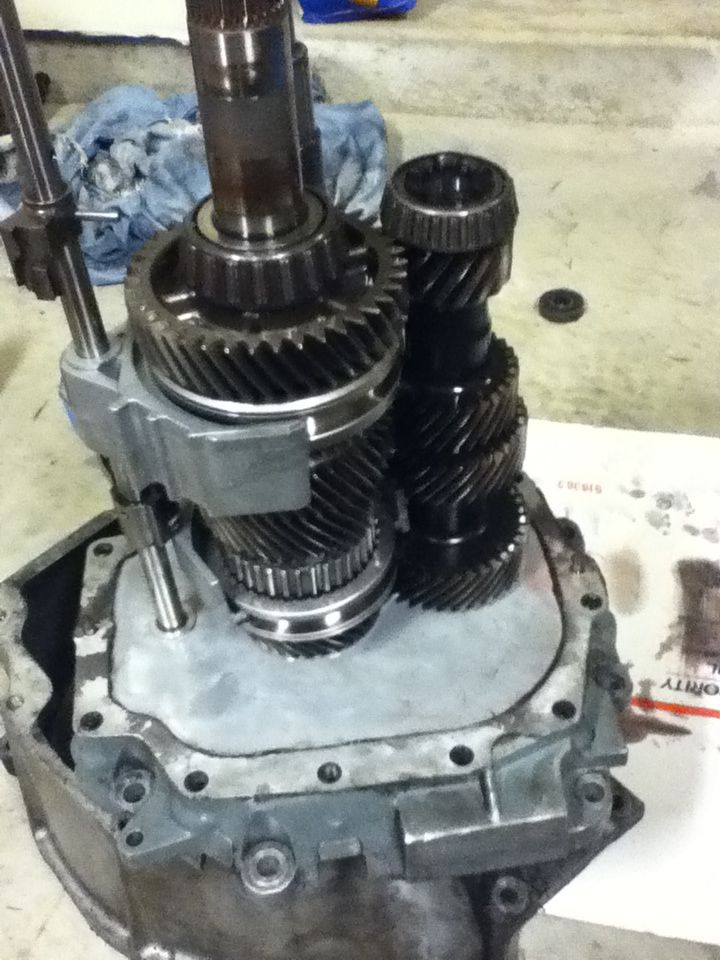
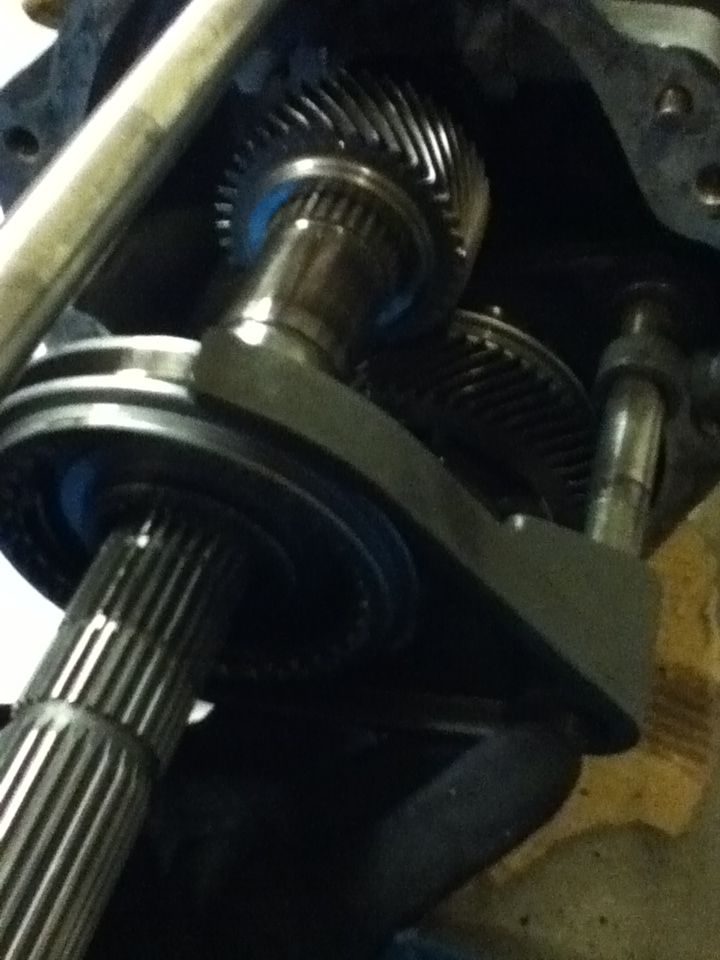
Congrats! you did it! the case is off and the gears are exposed! Now remember, when you go to pull the case off be very delicate at this point. You dont want to displace anything or accidentally knock over the main shaft or the output shaft as you are pulling the case up. Dont worry the shafts stand up fine and you have everything revealed. Stay tuned. I will post more pics of the 1st through 4th gear tear down. In the manual it tells you that you need a press. I will show you that you do not. But if you do have a press, obviously use that if you have one. Honestly though, you can do this with minimal resistance and it is probably eaier anyways. Ok thats all for now. I am tired and i have been up far past my bed time.
-
01-10-2013, 04:06 AM #53expensive tires

- Join Date
- Mar 2006
- Location
- phoenix
- Posts
- 1,951
white- 04 2500 4x4 crew cab
Sweet update. keep goin!
-
01-10-2013, 06:56 AM #54Member

- Join Date
- Mar 2011
- Location
- Waynesboro, Pa
- Posts
- 256
Mystic Teal Metallic:320c- 1998 Camaro Z/28
enjoying your progress keep it up!
-
01-10-2013, 10:10 AM #55Veteran

- Join Date
- Oct 2008
- Location
- Wherever life takes me
- Posts
- 12,526
Red- 02 35th LE Camaro SS
Nice information and photographs. Looking forward for more to come.
-
01-10-2013, 12:52 PM #56Nightmare
- Join Date
- Sep 2007
- Location
- Cherry Point NC
- Posts
- 475
Red- 2000 Trans Am WS.6 M6
Thanks guys. Sorry it took so long for the pictures. Depending on what time I leave work tonight I will try and post pictures on the tear down of 1st-4th gear.
-
01-10-2013, 01:07 PM #57Nightmare
- Join Date
- Sep 2007
- Location
- Cherry Point NC
- Posts
- 475
Red- 2000 Trans Am WS.6 M6
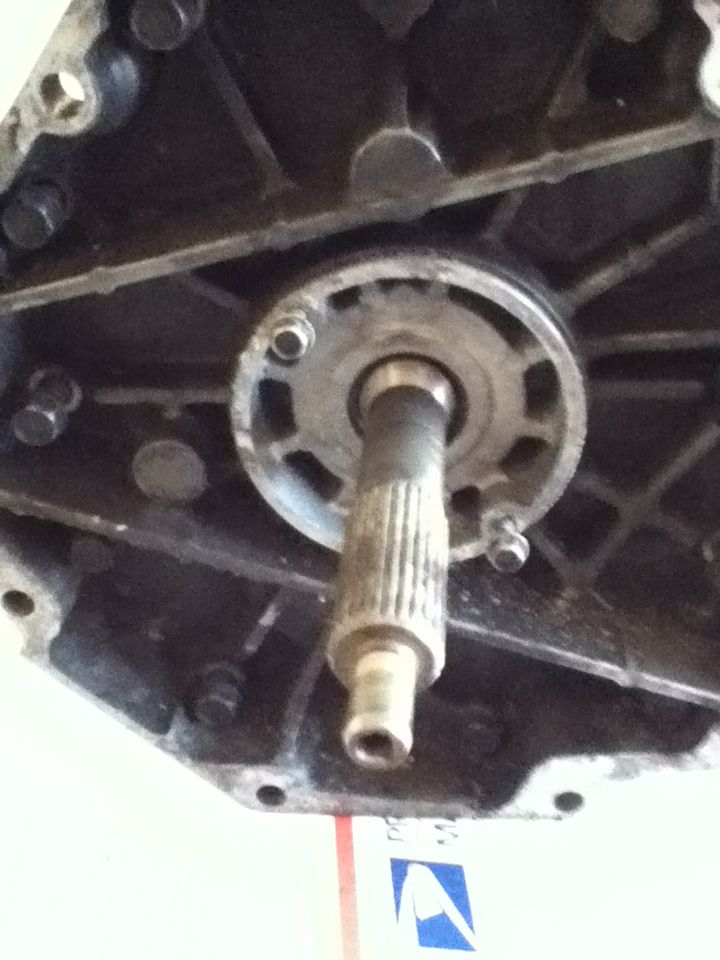
Also I am going to go and take the input shaft (shaft sticking out of the front of the transmission) to a local transmission shop for them to inspect it and tell me if they think it is good or bad. I will take a few pictures of the input shaft. There is considerably more wear on this than I previously thought. That and the output shaft is really old looking as well. More than likely I will be taking a few parts to the transmission shop to have them inspected and looked at.
-
01-10-2013, 09:24 PM #58Junior Member

- Join Date
- May 2009
- Location
- Santa Maria, California
- Posts
- 69
Black- 1998 Pontiac Formula LS6
Thanks for all the work in documenting and illustrating this tear-down. I replaced my original T56 with a new trans when I did my LS6 swap a year-and-a-half ago. I thought I had synchro problems which turned out to be a destroyed pilot bearing. Said pilot bearing scored the pilot/input shaft badly. I was wondering if it could be replaced simply from the front of the case. Your pics answered that question for me. I'm just going to have to wait until I can afford to have it rebuilt for a spare. I'm not ready to junk this T56, and I can't use it until it gets rebuilt.
-
01-10-2013, 10:01 PM #59Nightmare
- Join Date
- Sep 2007
- Location
- Cherry Point NC
- Posts
- 475
Red- 2000 Trans Am WS.6 M6
Im glad I could be of some use on here. Lol and ya you definitely can not just replace the input shaft by simply opening up the front. If you did, more than likely everything would probably fall out. Not the gears themselves but possibly the output shaft etc. If you guys need me to I can give a detailed list of the tools need for the job. Keep in mind I did this in my garage. Now as for the reassembly that will be a little more challenging. But I will keep you all informed. I probably wont be able to get my parts from the transmission checked out until this saturday. I am a little worried about the syncronizer assmblies. They show a little wear vs the new ones. And im starting to wonder if that was what was causing my 4th gear to pop out. The actual syncronizer itself looked good it was just the actual assembly that was questionable. The thing is though is the 5th/6th gear syncronizer assembly looked a little more worn down and i never had any issues. Who knows, regardless i need to take my parts in to get checked out Originally Posted by Mr_Rich

-
01-11-2013, 02:12 PM #60Nightmare
- Join Date
- Sep 2007
- Location
- Cherry Point NC
- Posts
- 475
Red- 2000 Trans Am WS.6 M6
Ok...so new update. And I finally hit my first wall
 . So today I took all of my transmission parts in to a local transmission shop to take a look at them and tell me what looked good and what needed replaced...needless to say not good
  . The input shaft I knew he was going to say was no good. Then he started checking out the wear on the countershaft (bad), reverse gear (worn/bad), syncronizer sliders (bad, and I cannot find any syncronizer sliders just by themselves only with the whole assembly). He also recommended to change all of the bearings rings etc.... Worst part was that I had not even had the 1st through 4th looked at because I reassembled it to move it around. I am going to probably get a 2nd and then a third opinion on the parts. It honestly just sounded like the transmission was a complete failure. The worst thing is that it only had 25k miles from a rebuild when the local shop fucked me on that! I babied the shit out of that car. So all that wear and tear was not from me! So the grand total so far excluding the 1st through 4th gear inspection is already at $1,204.12. Needless to say I am not to happy And i lost a huge amount of motivation on this. I figured he would point out a few things i myself could not see...but damn, it was pretty much the whole thing
 . So right now I am just in still water. I will update you guys later and find two more shops to look it over

 Reply With Quote
Thread Information
Users Browsing this Thread
There are currently 1 users browsing this thread. (0 members and 1 guests)
Similar Threads
-
Question: T-56 Transmission rebuild
By 2002ssslp in forum Manual TransmissionReplies: 7Last Post: 09-13-2011, 05:40 PM -
Transmission Rebuild Tools
By pajeff02 in forum ToolsReplies: 17Last Post: 06-01-2010, 01:04 PM -
Transmission rebuild in AZ?
By 1SICK02 in forum Manual TransmissionReplies: 10Last Post: 07-20-2008, 05:44 PM

Bookmarks