
Results 61 to 80 of 114
Thread: K-member swap and upgrades
-
03-04-2012, 09:59 PM #61Member


- Join Date
- Jun 2009
- Location
- Mass
- Posts
- 618
silver/black- 00 trans am,SLP,Ws6
subscribed
-
03-05-2012, 04:35 PM #62Veteran

- Join Date
- Feb 2009
- Location
- Mansfield, PA
- Posts
- 22,146
Black & Blue- '02 WS.6 / '07 Suburban
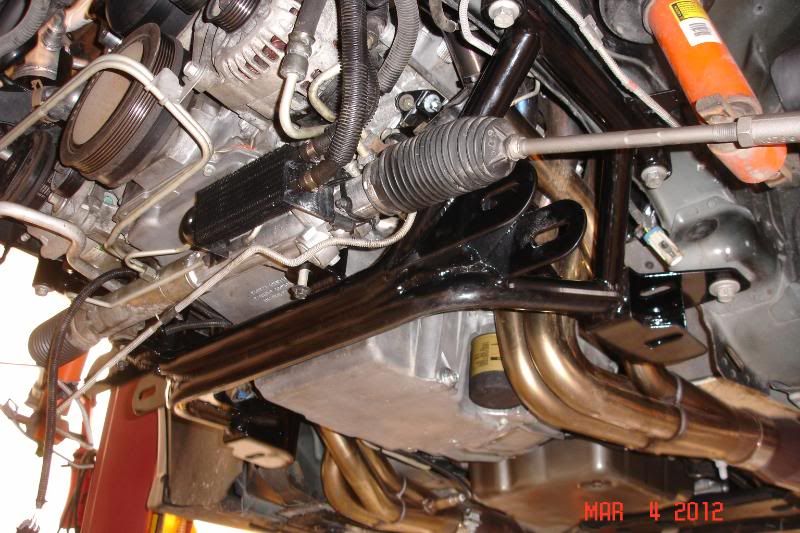
I was hoping that the K-member would go right up into place and everything would slide home... not quite. I checked and the instructions recommend tackling the motor mounts first and this meant unbolting them from the block to do so. On the driver side, I ended up installing the motor mount bolt from the front as the headers prohibited access from the back. Again, the alternator was pulled forward to provide sufficient clearance and was then bolted back in place. On the passenger side, there are two clearance issues. To the front, the A/C compressor bracket makes it impossible to insert the motor mount bolt. To the rear, the oil dipstick tube blocks the bolt, however, with the K-member lowered slightly on the passenger side, the bolt can be inserted from the back. After both bolts were in place and the nuts loosely installed, I then re-attached the motor mounts to the engine block and torqued them to 37 ft.lbs. I had just a bit of an issue on the top rear driver side bolt and had to use a pry bar to bring everything into alignment.
The K-member was then raised into position and again, with the use of a pry bar, the pins were lined up with the holes in the frame rails. The stock bolts are used to attach the K-member and there are aluminum washers that must be installed between the K-member and frame for the rearmost holes. UMI zip ties the spacers to the K-member to ensure they are properly positioned and not left out. The bolts were then torqued to 110 ft.lbs. per the instructions. Once the K-member was bolted in place, I worked the steering rack back into position and slipped the intermediate shaft over the rack. The steering rack bolts were installed from the bottom and torqued to 63 ft.lbs. I had to turn the steering wheel slightly to the left to access the clamp bolt on the intermediate shaft and then torqued the bolt to 35 ft.lbs.
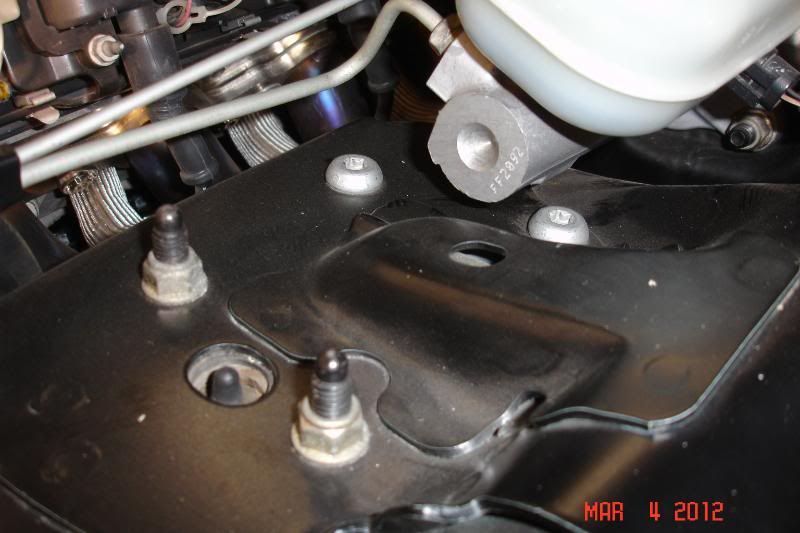
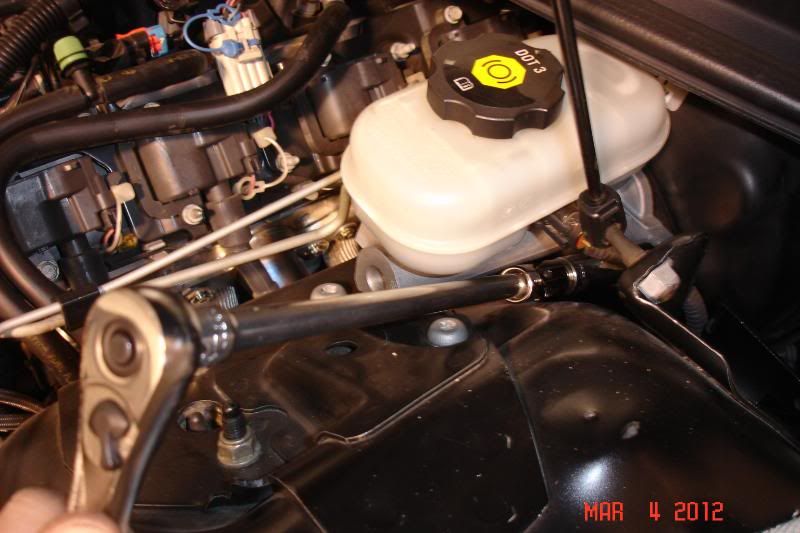
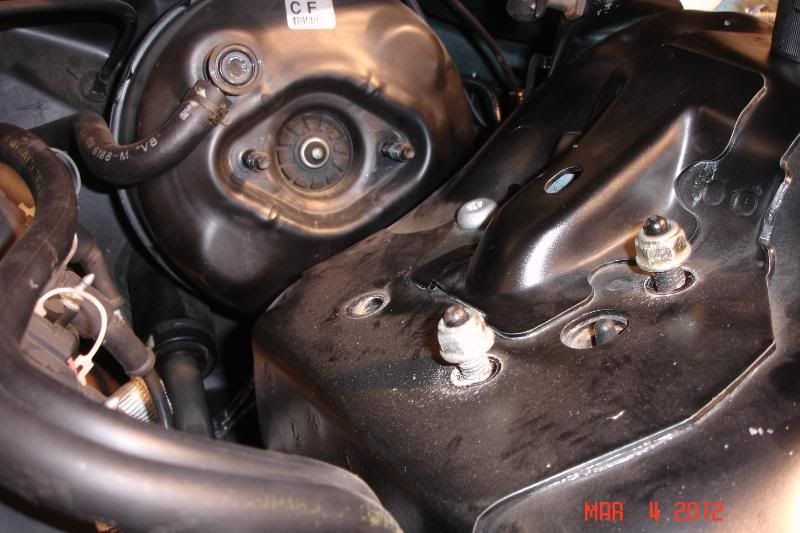
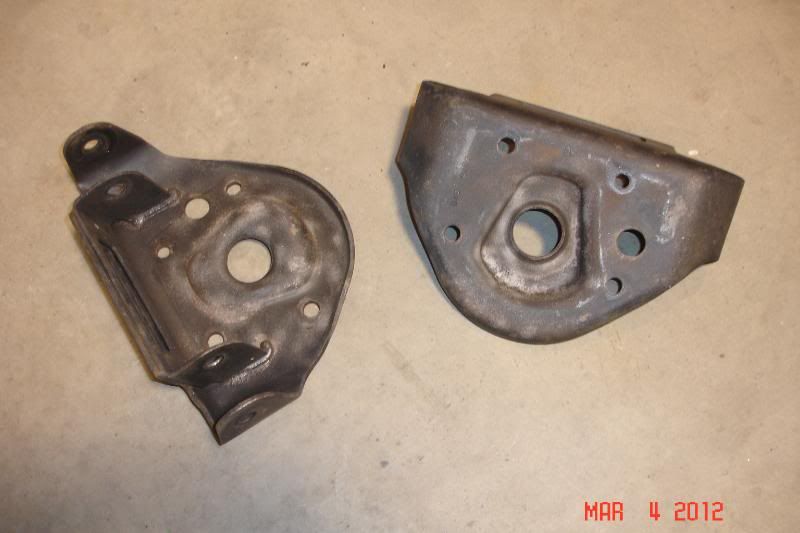
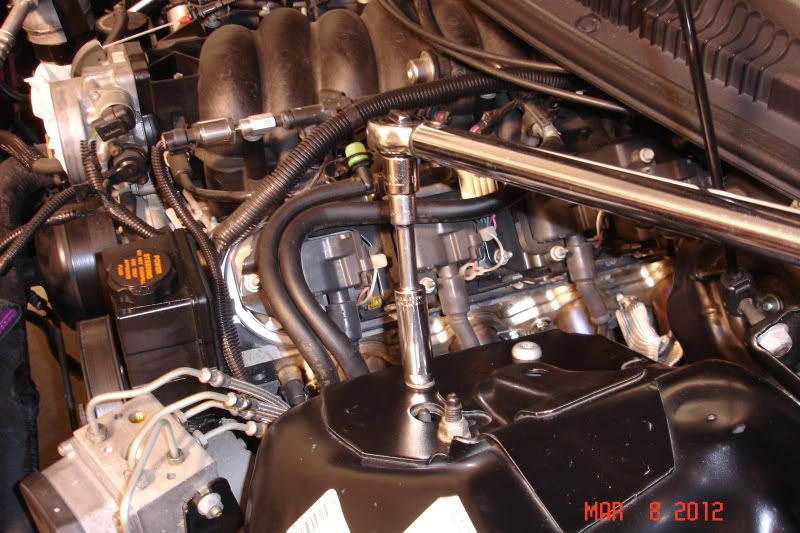
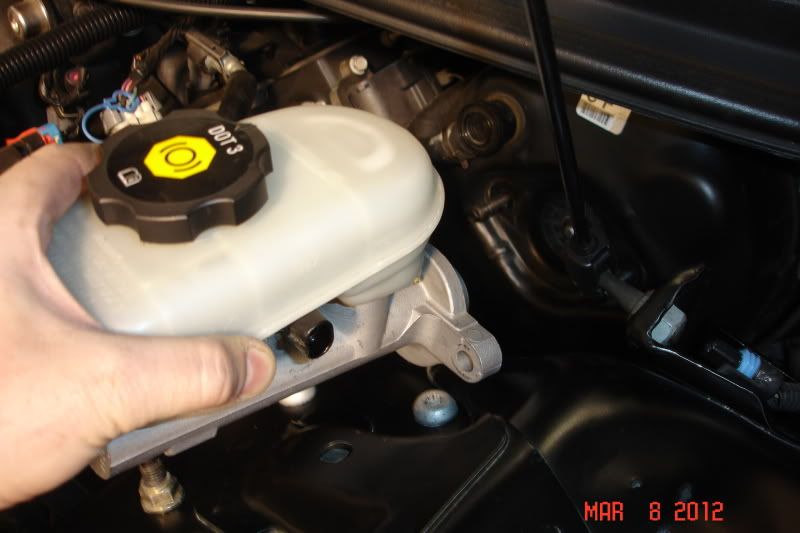
Now that the K-member is installed, I lowered the car to remove the spring and shock assembly. These are retained by a strange combination of bolts, nuts and torx head bolts. On the driver side, there is simply no way to access the rear outside bolt without removing the master cylinder. After unbolting the brake lines from the ABS block and line lock, the two nuts that retain the master cylinder are removed, the sensor connection unplugged and the entire assembly can then be lifted out. The springs and shocks are a bit heavy and care must be taken when removing them. After removal, the top plate that mounts the upper control arm simply lifts off.
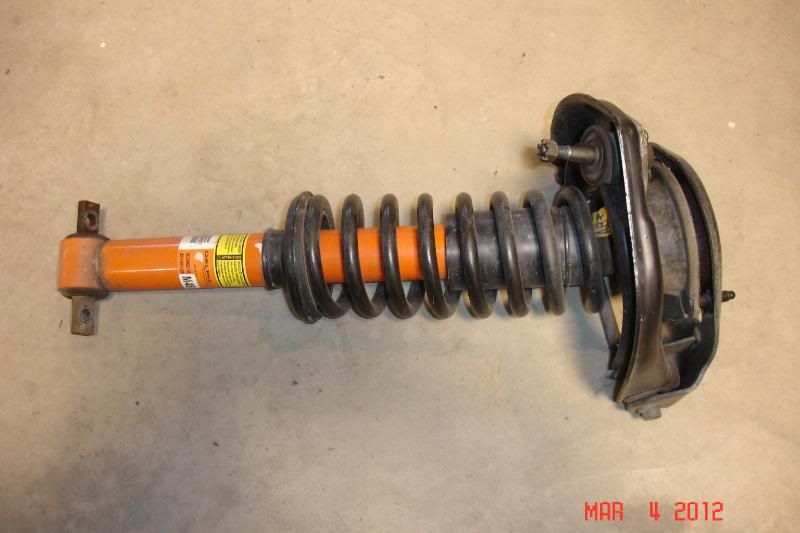
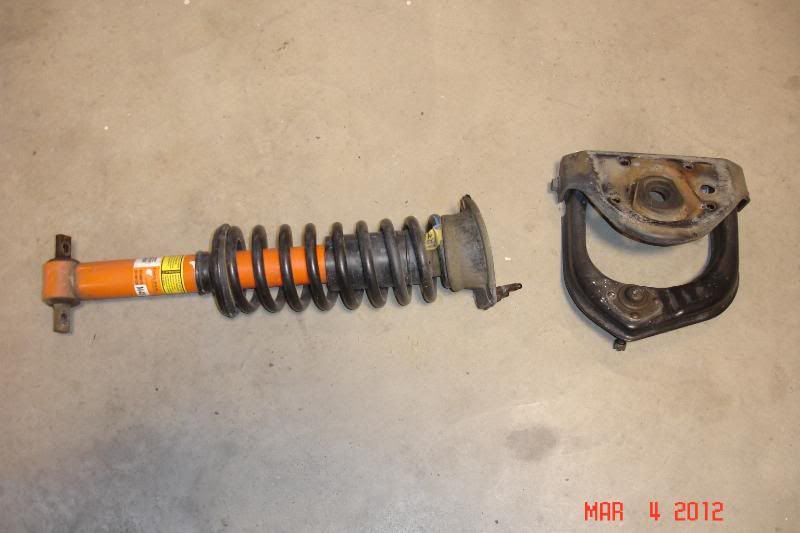
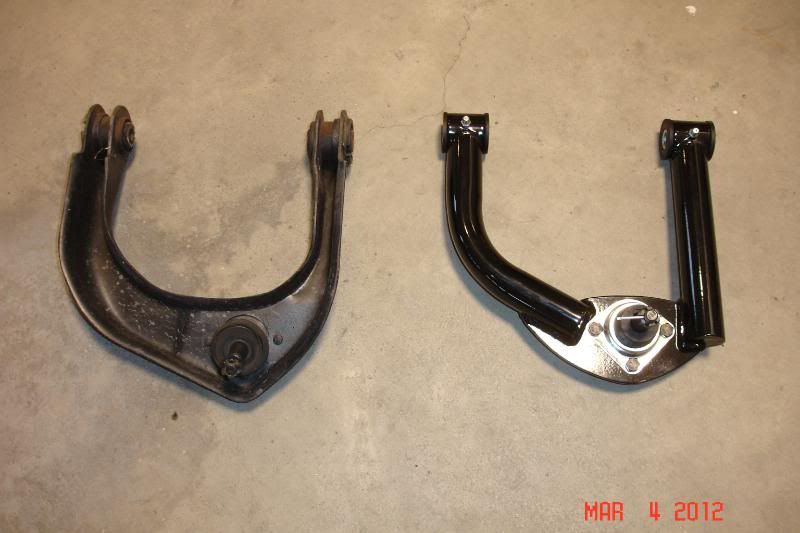
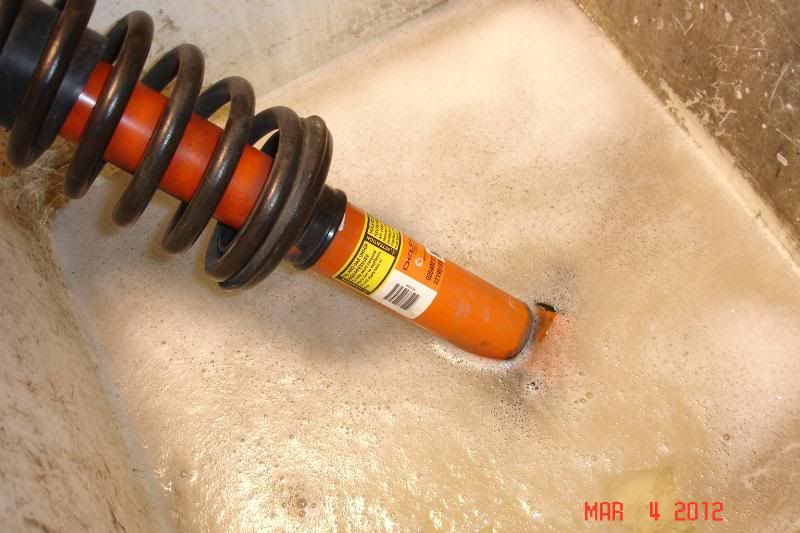
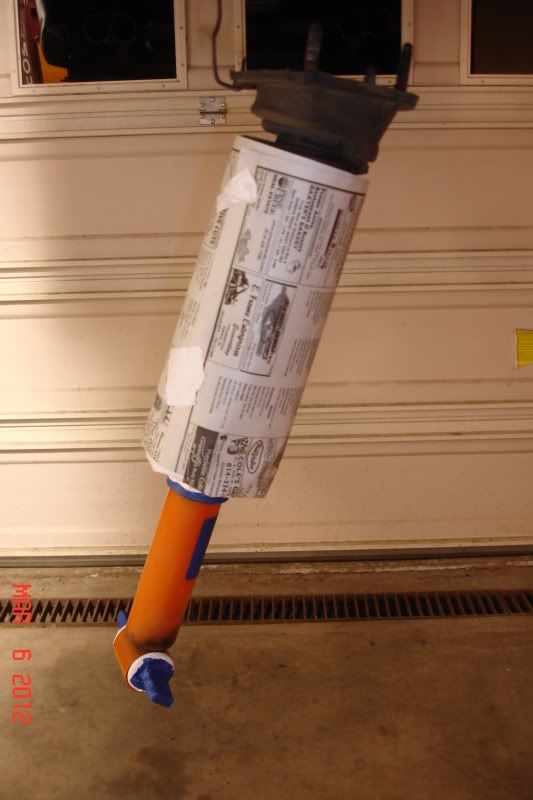
I then used my air gun to unbolt the control arms and upon inspecting everything found just a bit of rust on the mounting plates. I gave them a quick run through the blast cabinet and simply focused on removing the surface rust rather than stripping them entirely to bare metal. The plates were then painted and hung to dry while I started on restoring the lower portion of the shocks. I also layed the stock and UMI upper arms next to one another for a comparison pic. The shocks were first given a quick bath in hot soapy water and then blown dry. Using a spray can cap, I drilled a 7/8" hole in it and used this to mask off the rubber bushings so I could paint the mounts.


-
03-05-2012, 04:42 PM #63Veteran
- Join Date
- Feb 2009
- Location
- Mansfield, PA
- Posts
- 22,146
Black & Blue- '02 WS.6 / '07 Suburban
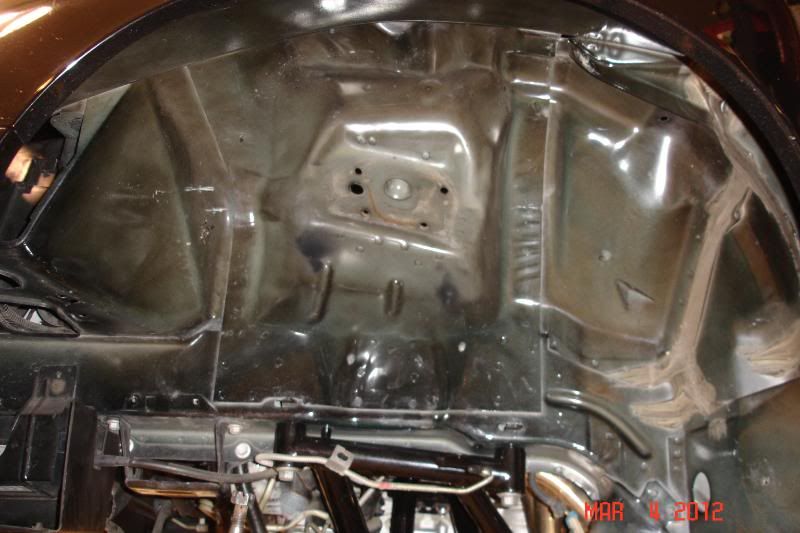
As part of the project, I am also installing new wheel well liners that I ordered from GM Parts Direct. The stock liners were showing their age and I found the replacements to be reasonably priced. The liners are retained by a set on 10mm bolts under the bottom front, three 7mm bolts around the inside and three plastic clips around the outside perimeter and under the back lip. To remove the plastic clips, gently unscrew the center portion using a phillips head screwdriver and once it protrudes by approximately 1/4" grasp it with your finger and gently work it out of the hole. If the clip spins, you may have to hold it by pressing on the flange with your finger while you unscrew the center pin. The liners are then pulled to the inside of the car and folded slightly closed to remove them. Once the liners were off the car, I then washed down each wheel well with hot soapy water. I'll install the new liners sometime later this week.
-
03-05-2012, 08:09 PM #64Member
- Join Date
- Jun 2009
- Location
- Mass
- Posts
- 618
silver/black- 00 trans am,SLP,Ws6
This better be going sticky

-
03-06-2012, 07:43 AM #65Electrical Engineer


- Join Date
- Jul 2009
- Location
- North of the Motorcity
- Posts
- 2,612
Custom Swirly Black- 2001 WS6 M6

Jeff, you make me feel lazy, lol, keep up the good work.
-
03-06-2012, 06:40 PM #66Veteran
- Join Date
- Feb 2009
- Location
- Mansfield, PA
- Posts
- 22,146
Black & Blue- '02 WS.6 / '07 Suburban
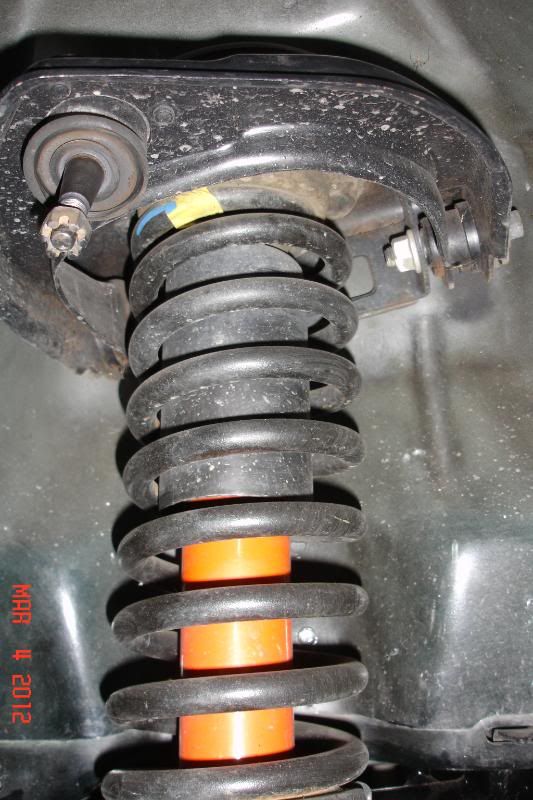
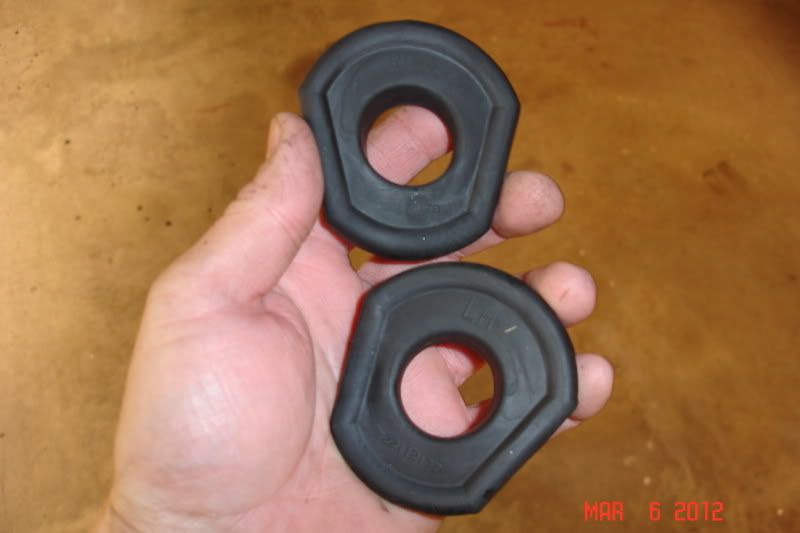
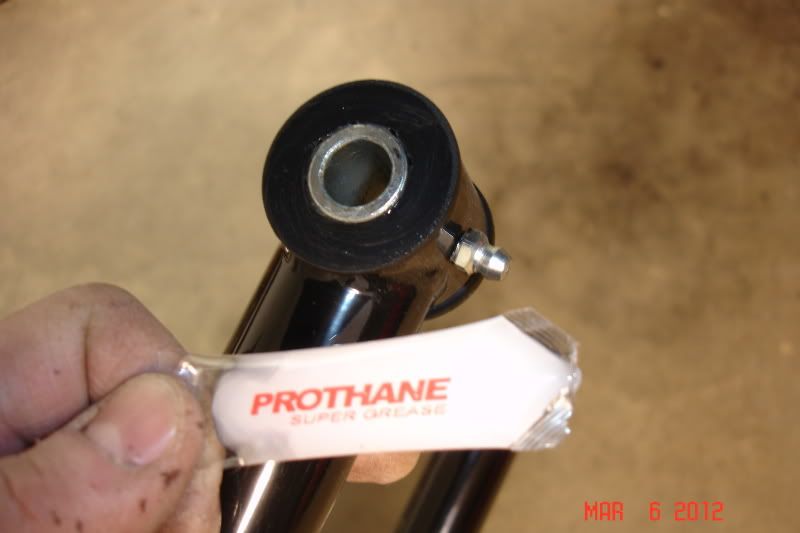
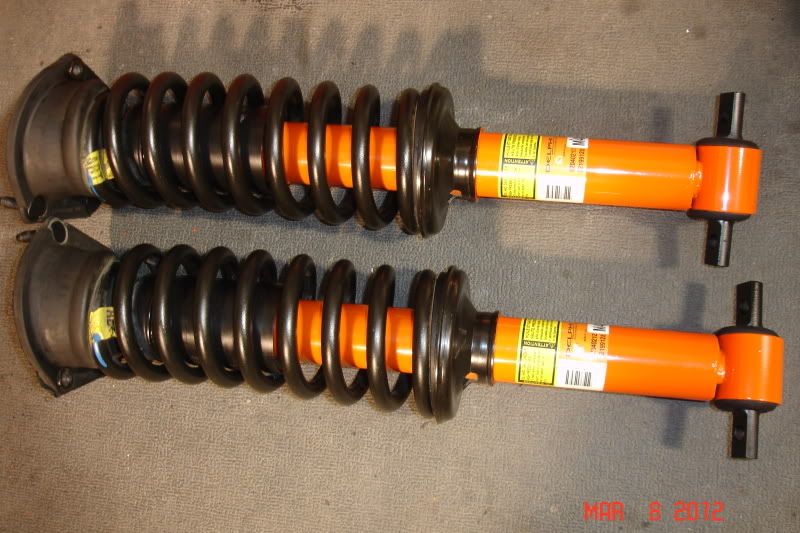
Tonight I masked off and painted the lower portion of each shock. I know... I should toss the stockers and invest in some Stranos and Konis. Maybe down the road I will do that, but for right now I just wanted to get these looking a little better. Between coats, I reinstalled the starter and then assembled the upper control arms to the mounting plates. The rubber inserts were removed and cleaned up when I blasted and painted the plates. The inserts are marked "L" and "R", as are the plates, so make sure they are properly matched. The UMI control arms come with a tube of Prothane's bushing grease and I lightly coated the end of each bushing before inserting the new arms into the plates. The arms are also directional and the curved part faces the front of the car. I couldn't find a torque spec in the manual or the instructions, so based upon the size of the bolt I guessed 50 ft.lbs. and that is what they were torqued to. I then checked each arm to ensure that it moved freely without any binding. I'll do a little more work on the springs and then should be able to start assembling the suspension and buttoning everything up underneath the car.

-
03-07-2012, 03:39 AM #67Veteran
- Join Date
- Feb 2009
- Location
- Mansfield, PA
- Posts
- 22,146
Black & Blue- '02 WS.6 / '07 Suburban
Forgot to mention -- Chevrolet Orange engine paint is just about a perfect match for the stock shocks. I found this out when I painted the rear shocks 2 years ago during the 12 bolt install project.
-
03-07-2012, 06:06 AM #68MEMBER

- Join Date
- Aug 2005
- Location
- Visalia Cali
- Age
- 49
- Posts
- 664
SILVER- 2000 Z/28
Nice work! Makes me feel lazy as well.
Lt's,SFC,3,600 Fuddle stall,Spohn Adj. tunnel mount torque arm, BMR LCA,Ls6 intake,Air lid,Under drive pulley,S60 rear,Frost tune and a few more things I cant remember.
-
03-07-2012, 06:48 PM #69Member

- Join Date
- Feb 2011
- Location
- Colorado
- Posts
- 109
Red- 1998 Z28
Awesome! Subscribed.

-
03-08-2012, 03:05 PM #70Member

- Join Date
- Oct 2010
- Location
- Wilkes-Barre Pa.
- Posts
- 135
Red/Black- 1989 Camaro IROC
looking good Jeff!!!
-
03-08-2012, 05:55 PM #71Veteran
- Join Date
- Feb 2009
- Location
- Mansfield, PA
- Posts
- 22,146
Black & Blue- '02 WS.6 / '07 Suburban
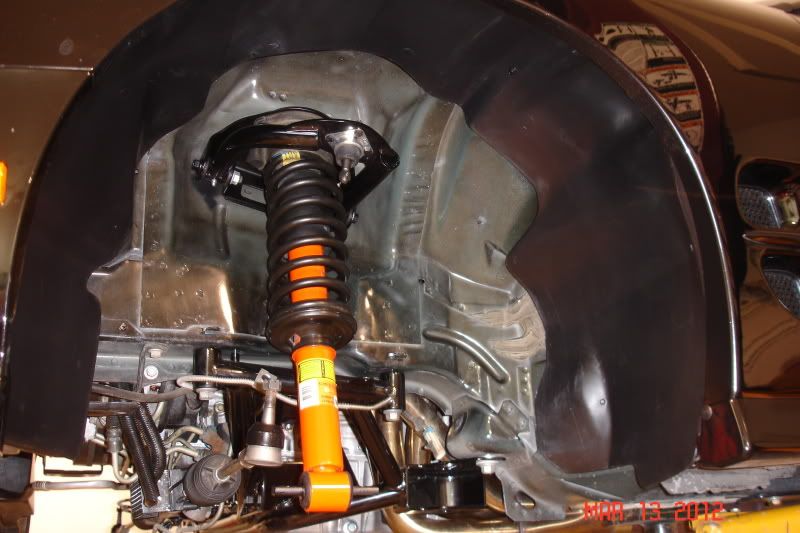
Thanks guys! Not a lot of progress tonight but a step forward nonetheless. I unmasked the shocks and springs and then cleaned the upper portion as best I could. The paint there is still intact so no need to do anything other than some scrubbing. I slipped the mounting plates back over the top of the shocks and carefully inserted the entire assembly into place, threading each of the two nuts per side on by hand to secure them. The shocks hung in place while I installed the bolts and then torqued everything to spec. The bolts were snugged to 37 ft.lbs. and the nuts to 30 ft.lbs. Not sure why the difference, but that is what the manual called for.
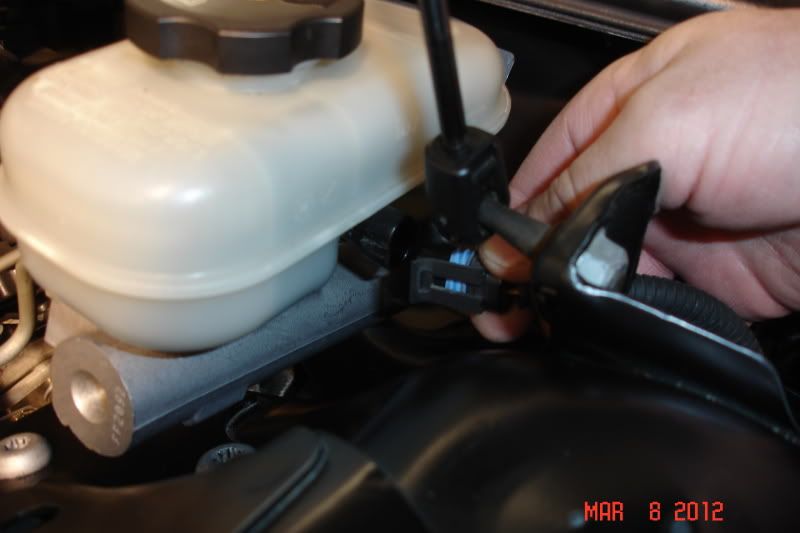
I then slid the master cylinder back over the studs in the firewall after carefully cleaning around the push rod and piston mounting surfaces. With the master cylinder loose, I installed the brake lines on the ABS block and line lock and then torqued the master cylinder nuts to 21 ft.lbs. Last step was to plug in the sensor harness on the left side of the master cylinder.
-
03-09-2012, 07:42 AM #72Spaz is My Mentor


- Join Date
- Feb 2009
- Location
- Florida Man Status Acheivement
- Posts
- 11,759
Navy Blue Metallic- 98 T/A w/ mods, 00 FBVert
Damn I never knew there was a sensor there.
-
03-09-2012, 09:32 AM #73expensive tires

- Join Date
- Mar 2006
- Location
- phoenix
- Posts
- 1,951
white- 04 2500 4x4 crew cab
Look at how clean that master cylinder is. Damn.
-
03-13-2012, 07:03 PM #74Veteran
- Join Date
- Feb 2009
- Location
- Mansfield, PA
- Posts
- 22,146
Black & Blue- '02 WS.6 / '07 Suburban
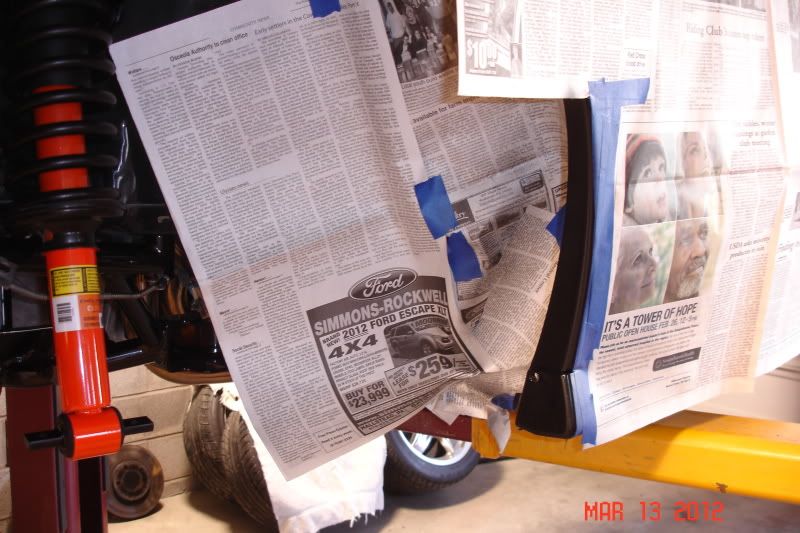
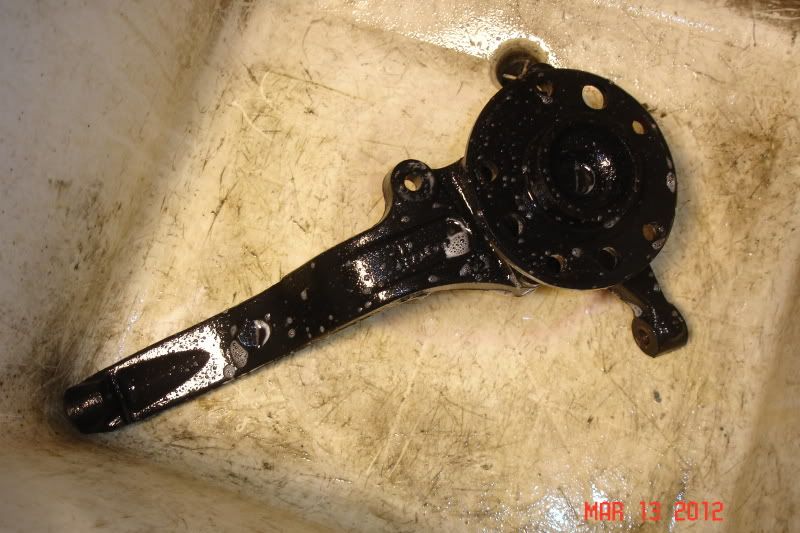
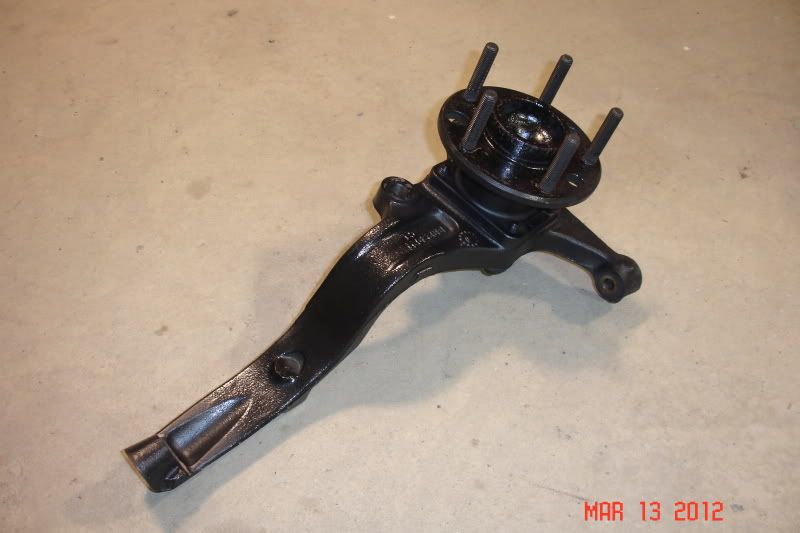
I took care of something that has been bothering me for quite a while now on our car. The front fender lips had a bit too much road rash on the back edges and the wheel well liners also had a beat look to them. I carefully masked off the roll on the fender lip, wet sanded the bad spots and then shot it with Krylon Fusion as a temporary fix. The car will eventually head back to my brother-in-law's body shop for another round of paint, but for now this made a world of difference. After the painting was done, I went to work cleaning up the front spindles with hot, soapy water and then blew them dry with compressed air. I had previously painted the spindles in early 2009 and they have held up well.
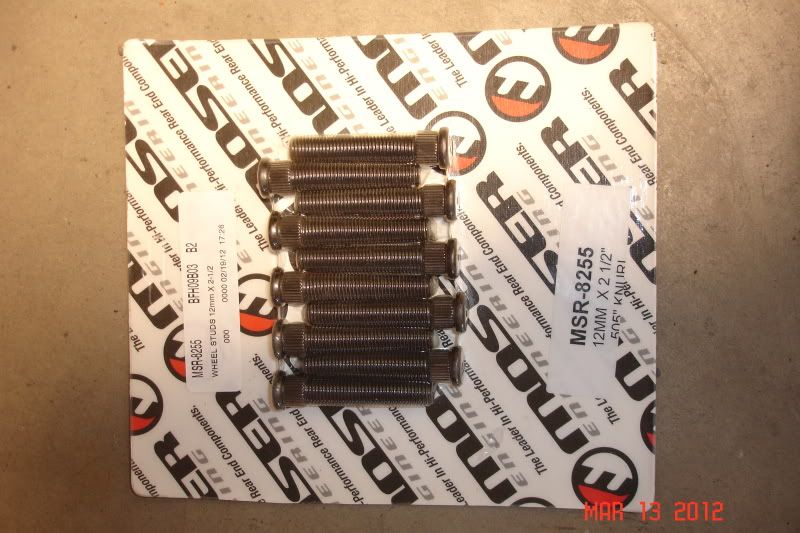
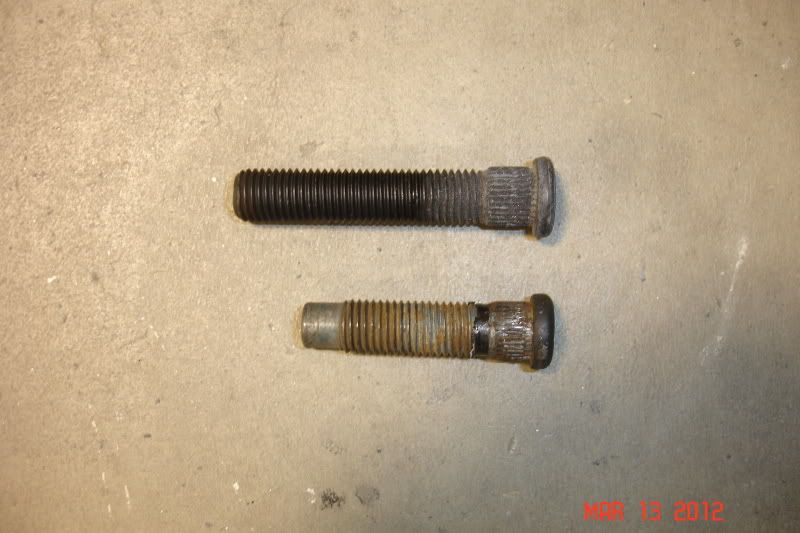
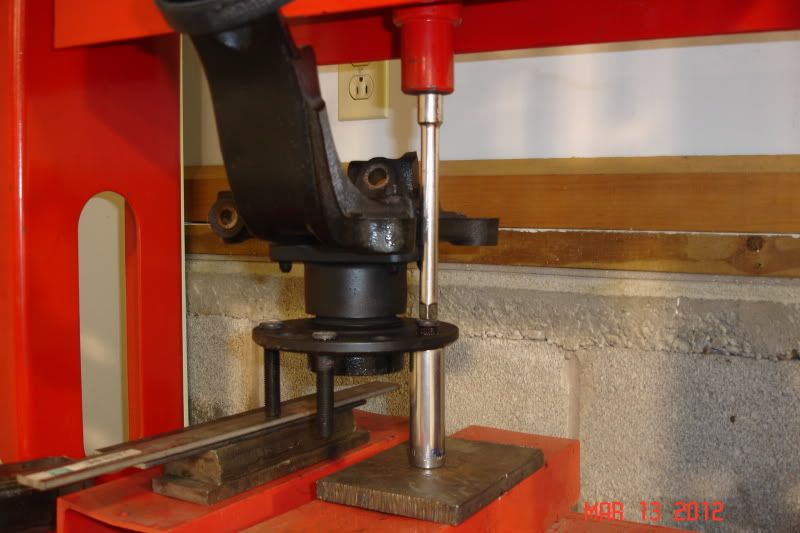
Once the spindles were clean, I then began installing the Moser wheel studs in the front hubs. The studs are just about an inch longer than stock and will keep me legal at the track with the Bogarts on the car. They are 12mm studs with a .505 knurl and come in at 2-1/2" long. It took a while to mock up the supports for pressing in the new studs, but once I had it figured out the whole process took less than 10 minutes per side. You can use your lug nuts to pull the new studs into place, however, there is some risk that they will spin and strip out the splines doing it this way. I prefer to press them in and use red Loc-tite on the splines for an added measure of grip.
I finished out the night by installing the new wheel well liners. I found that the new liners are not drilled for the three (3) bolts that secure them on the inner side. There were dimples in the mold, but some of them were clearly not positioned the same as my existing liners. I therefore laid the old liners on top of the new ones and then drilled through the holes in the old liners to ensure accurate hole placement.
-
03-13-2012, 07:08 PM #75Veteran

- Join Date
- Oct 2008
- Location
- Wherever life takes me
- Posts
- 12,526
Red- 02 35th LE Camaro SS
You should open up your own detailing shop Jeff.
-
03-14-2012, 03:01 AM #76Veteran
- Join Date
- Feb 2009
- Location
- Mansfield, PA
- Posts
- 22,146
Black & Blue- '02 WS.6 / '07 Suburban
Thanks! I much prefer wrenching on cars to polishing on them... just trying to get the car looking like it should.
-
03-14-2012, 06:40 PM #77Veteran
- Join Date
- Feb 2009
- Location
- Mansfield, PA
- Posts
- 22,146
Black & Blue- '02 WS.6 / '07 Suburban
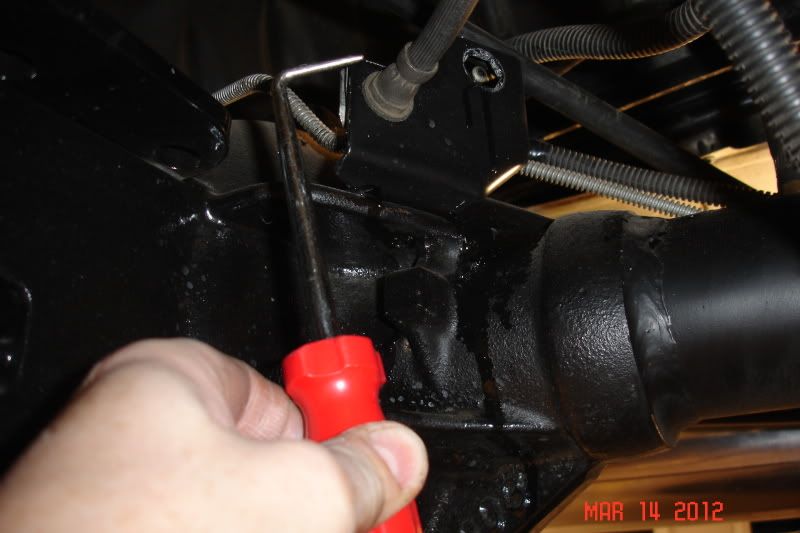
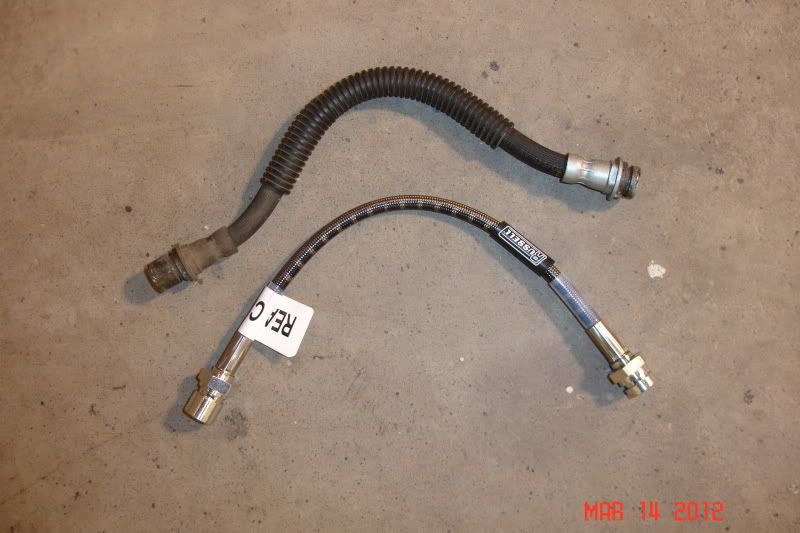
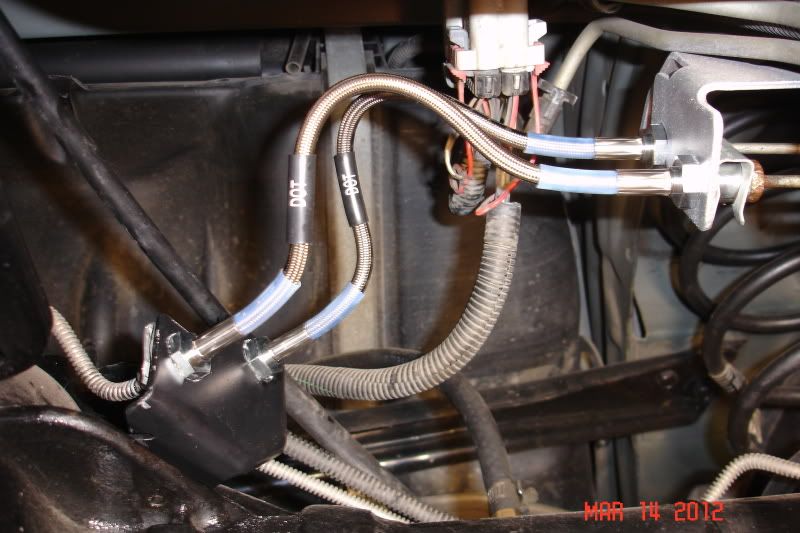
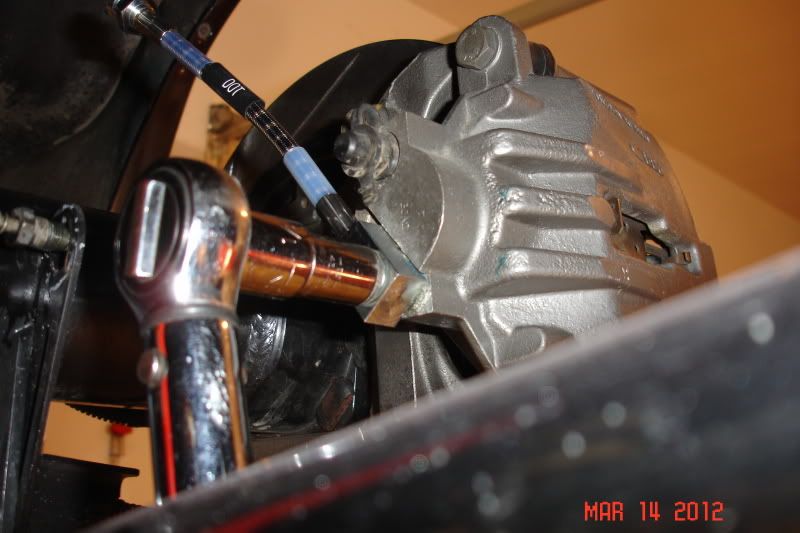
Decided to install the braided brake lines in the back of the car before working on the suspension tonight. Cars equipped with traction control have four (4) rubber brake lines in the back with two (2) on the driver side of the differential and one (1) at each end of the axle. The flare nuts are an odd mix of 12mm and 14mm and the hose ends are retained by spring clips that can be a bugger to remove. I used a right angle hose pick and a hammer to tap the clips out of the grooves and this seemed to work best. Access to the front fitting on top of the differential was a bit restricted, but overall it wasn't a difficult swap.
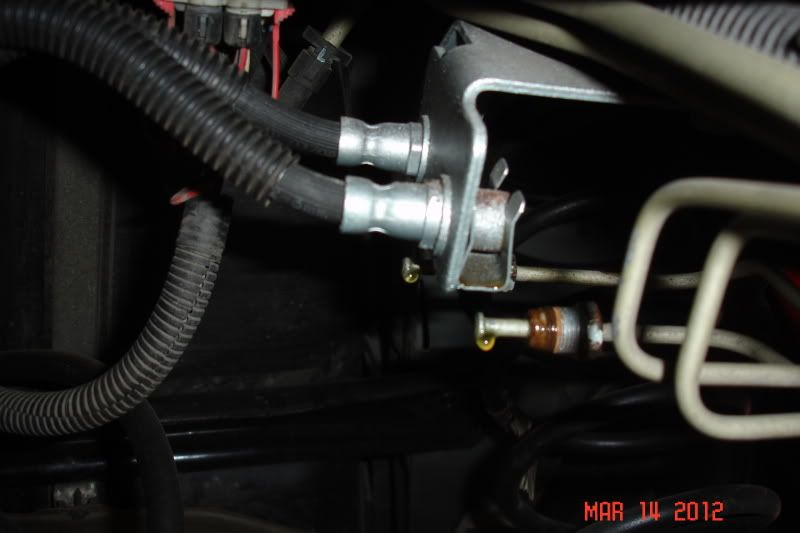

The Russell kit comes with six (6) braided lines, new washers for the banjo bolts and new clips to retain the hoses to the brackets. I carefully cleaned the end of each brake line and took the time to paint the center body bracket once the stock lines were removed. I found that the stock clips had a better grip than the circlips provided in the Russell kit. Therefore, upon installtion of the center lines, I used the stock pieces. This will prevent the hose ends from chafing against the bracket as the suspension moves. The flare nuts were all snugged and when I looked up the torque spec for the banjo bolts the manual called for 41 ft.lbs. That seems like an awful lot for a hollow bolt and I chickened out at around 35 ft.lbs. Once the lines were installed, I double checked their routing to ensure that everything had adequate clearance. The Russell hoses are a bit longer than the stock pieces but installed without kinking.
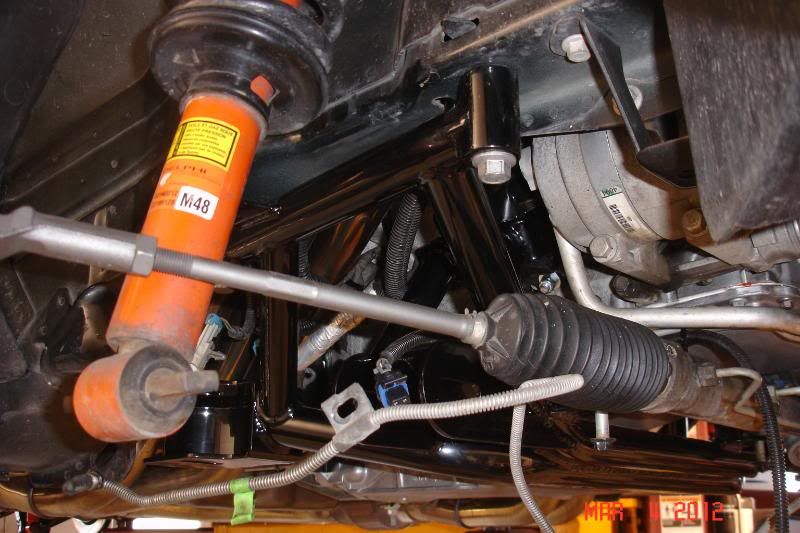
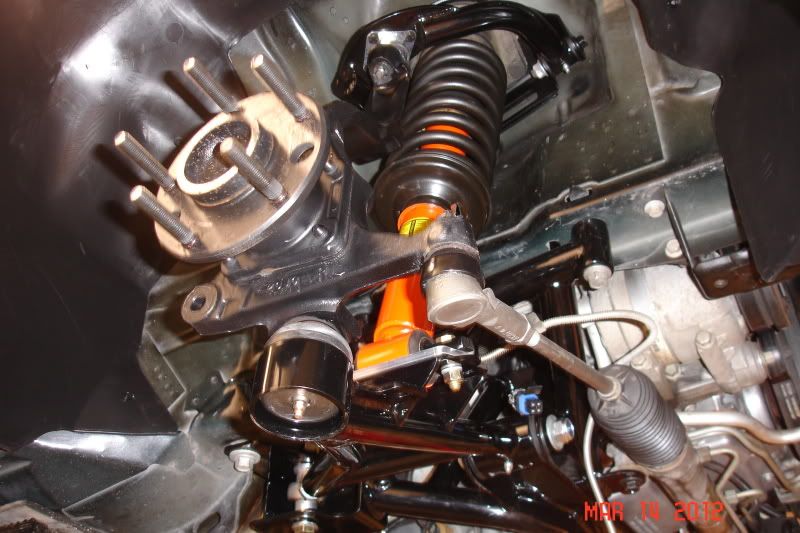
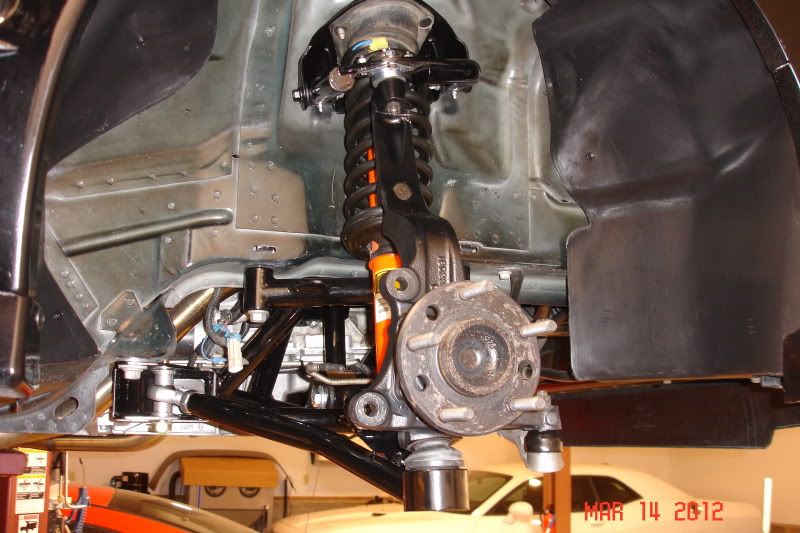
I moved back up front and worked on installing the passenger side suspension components. The lower A-arm has a polyurethane bushing in the front and a heim joint at the back with aluminum spacers. I found that even though both mounting brackets in the K-member are slotted, I had to unscrew the heim joint approximately 6 turns to obtain good alignment with the mounts. The UMI kit contains all new bolts with nylock nuts for a secure installation. I have no way of even guessing on proper wheel alignment, so I will most likely snug everything down centered in the adjustment slots. Once the A-arm was in place and the bolts slid through, I slipped the aluminum plate over the shock mount and dropped the bolts through from the top. The spindle was then dropped over the lower ball joint and I used an undercar screw jack to raise everything up so that I could slide the upper ball joint into place. I then loosely installed all the nuts and popped the tie rod into place. I'll look everything over tomorrow before tightening the bolts and moving on to the driver side.
Last edited by pajeff02; 03-14-2012 at 06:43 PM.
-
03-14-2012, 08:33 PM #78Member

- Join Date
- Nov 2009
- Location
- Bay Area
- Posts
- 126
Sebring Silver- 1998 Chevy Camaro Z28
I enjoy reading the article and its thoroughness
Everything is done just right and even a little more
Good work
-
03-15-2012, 03:39 AM #79Veteran
- Join Date
- Feb 2009
- Location
- Mansfield, PA
- Posts
- 22,146
Black & Blue- '02 WS.6 / '07 Suburban
Thanks, Jake. Hoping to wrap it up this weekend and get it to a garage for an alignment sometime next week.
-
03-15-2012, 06:07 PM #80Veteran
- Join Date
- Feb 2009
- Location
- Mansfield, PA
- Posts
- 22,146
Black & Blue- '02 WS.6 / '07 Suburban
I installed the driver side suspension this evening after making a quick run to pick up the trailer from winter storage at a friend's house. I snugged down the control arm bolts and will need to eyeball the alignment once I get the car back on the ground. I only have to go 4 miles to the garage on Tuesday and would rather not trailer the car if I can get things semi close. The tie rod ends were then torqued to 31 ft.lbs., upper balljoints to 39 ft.lbs. and lower ball joints to 81 ft.lbs. I'll need to check the alignment on the castle nuts for the cotter pins tomorrow. If they are off, you can tighten each of these nuts up to 1/6 additional turn to line up the holes. Never loosen a castle nut to achieve hole alignment. I was crunched for time, so no pics of anything this evening.

 Reply With Quote
Thread Information
Users Browsing this Thread
There are currently 1 users browsing this thread. (0 members and 1 guests)
Similar Threads
-
NEED HELP!! LS1 swap, HP upgrades
By spoonman4 in forum General HelpReplies: 13Last Post: 10-25-2013, 06:58 PM -
what upgrades should i do?
By Talon_II in forum Firebird / WS6Replies: 11Last Post: 03-04-2011, 11:26 AM -
Wanted: LS1 Swap K-Member 3rd Gen
By HP52TA in forum Parts Wanted / TradeReplies: 0Last Post: 11-10-2010, 06:44 PM -
Need help with some upgrades for an a4
By 02_WS6 in forum Automatic TransmissionReplies: 12Last Post: 04-17-2007, 07:49 PM

Bookmarks