
Results 1 to 20 of 21
Thread: Installing a deep pan
-
03-27-2012, 07:00 PM #1Veteran


- Join Date
- Feb 2009
- Location
- Mansfield, PA
- Posts
- 22,146
Black & Blue- '02 WS.6 / '07 Suburban
Installing a deep pan
Last year, we upgraded our car with a Performabuilt Level II transmission and 3,200 stall converter. Now that the car has a few miles on the new transmission it was time to change the fluid and I decided to upgrade the pan as well. The Performabuilt comes with a truck style transmission pan which is deeper than the stock F-body pan. It also comes equipped with a drain plug which is a nice thing to have when changing fluid. I actually purchased the B&M deep pan with the intention of installing it on our 2007 Suburban that I use as our tow vehcile. Unfortunately, I encountered a clearance issue and found that I would have to drop the exhaust to install the pan -- so I shelved that project. After completing the K-member swap, I measured the B&M pan and found that it would not hang much lower than the header collectors. I also checked with Chris (cpop98ws6) who runs a deep pan on his car to see what his experience had been. His car is lowered and I figured that if he hadn't had problems, our car (at stock height) would be ok as well.
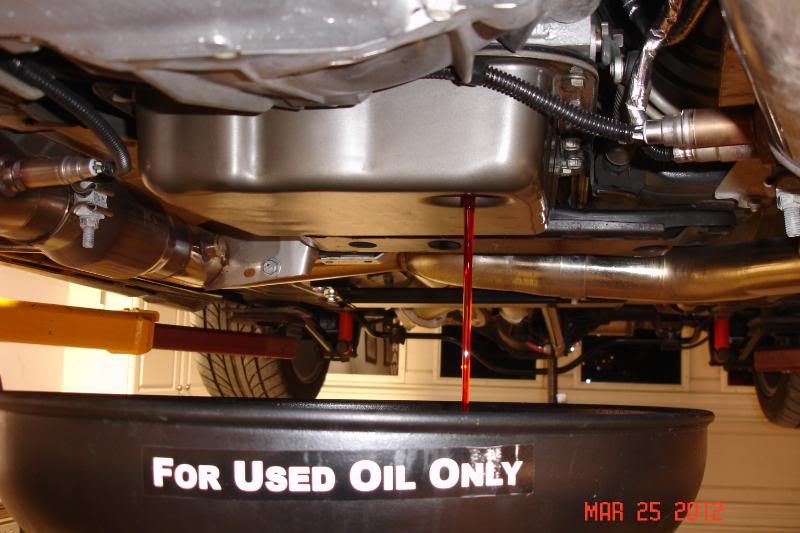
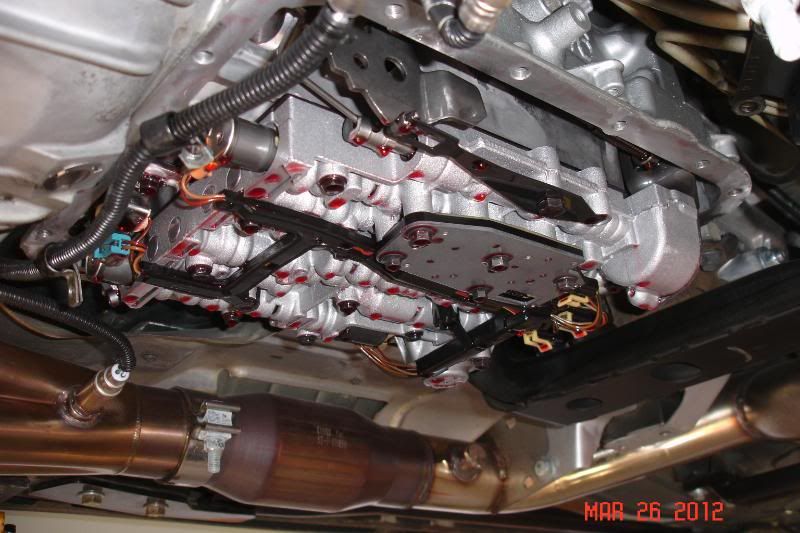
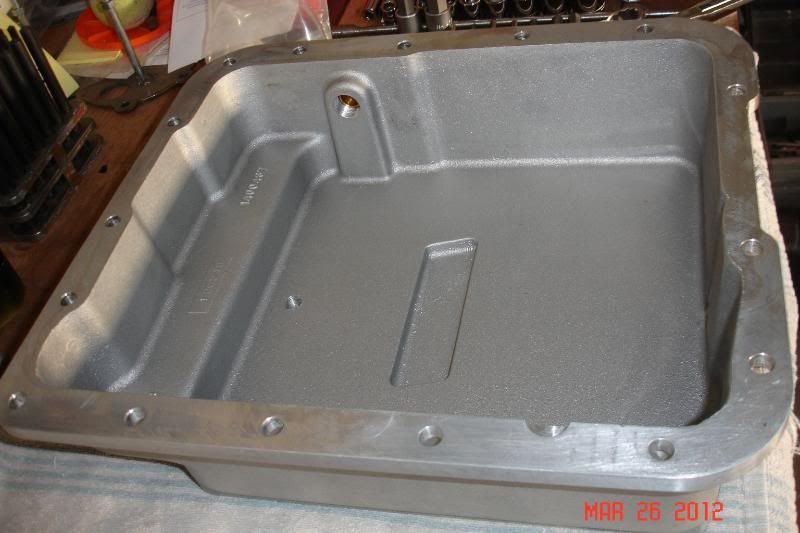
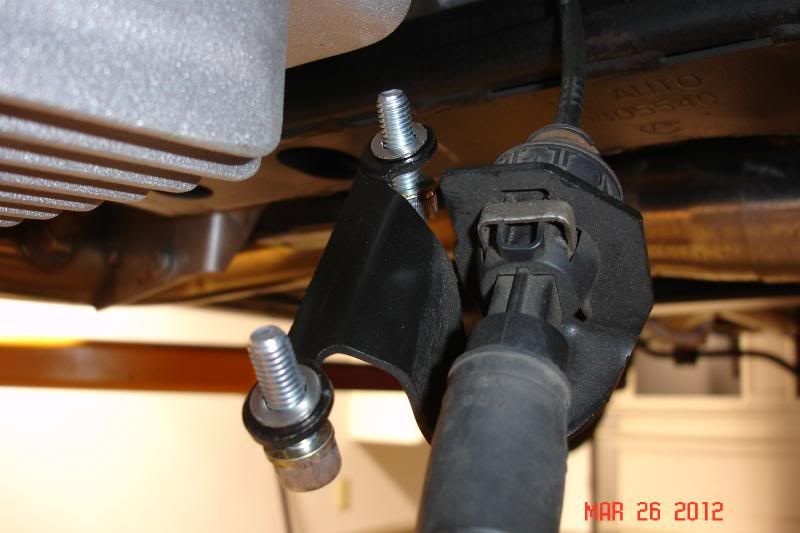
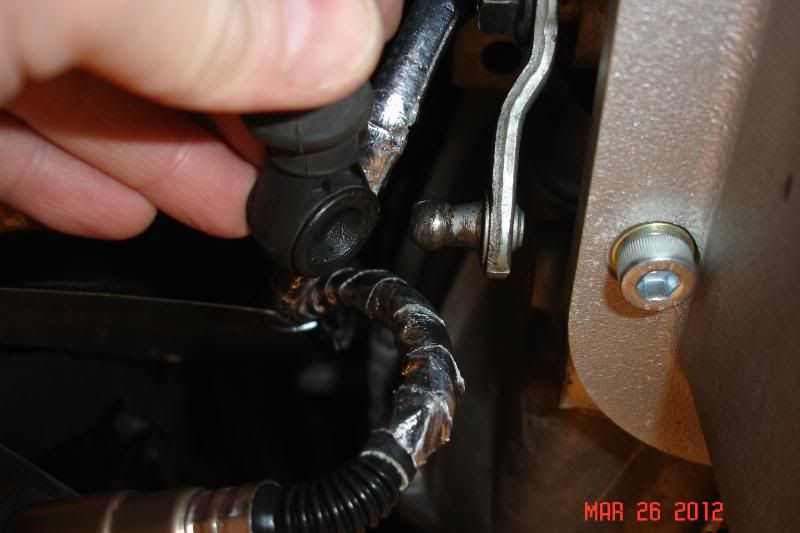
I started by unbolting the shift cable bracket and popped the end of the cable off the lever on the transmission with a flat head screwdriver. The cable was then tucked over top of the exhaust to hold it out of the way. The drain plug on the pan was removed to drain the fluid and I let it set overnight as transmissions seem to drip forever. For those without a drain plug, the only way to do it is remove the pan bolts on all but one side and then loosen them just a bit before breaking the seal. If it all breaks free and the bolts are too loose you will have a mess on your garage floor. But, if done carefully, the fluid can be drained after the initial gush by loosening the bolts a bit at a time while allowing the pan to tip further down. Once the pan is removed, the filter can be pulled out of the seal in the pump. In our car, I was utilizing a truck style filter which has a longer neck than a car filter -- this positions the filter correctly above the floor of the deeper pan that Performabuilt had originally installed. The new pan is quite deep and holds around 3 quarts more fluid according to the literature. It is also equipped with a magnetic drain plug and there is a plug in the side for other applications.
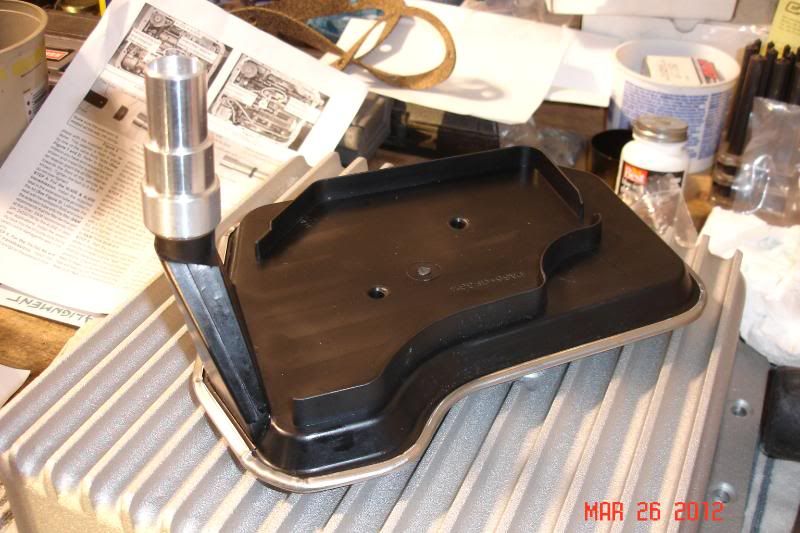
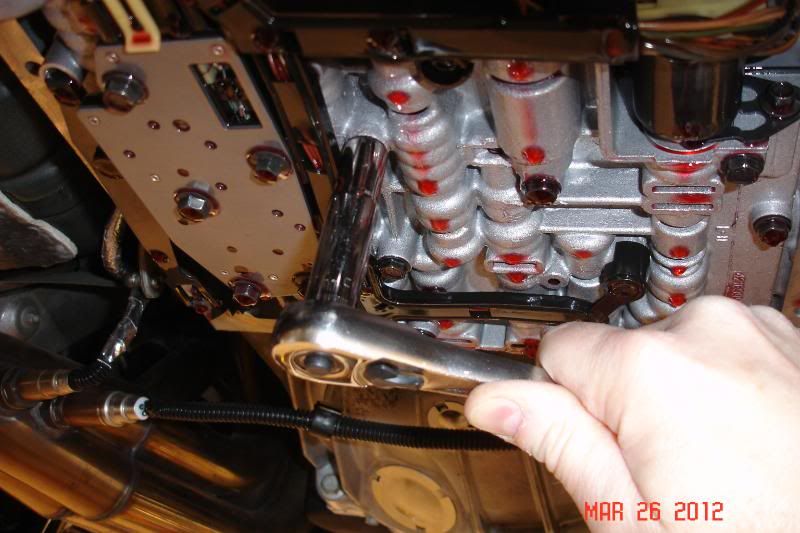
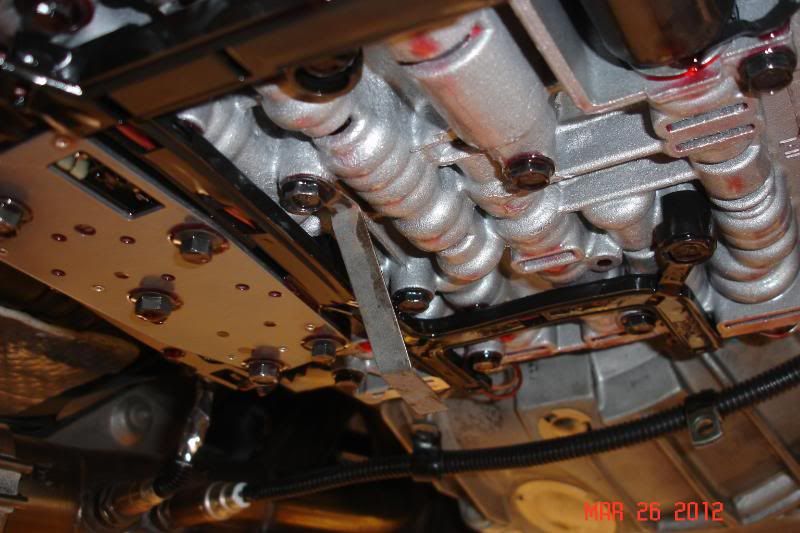
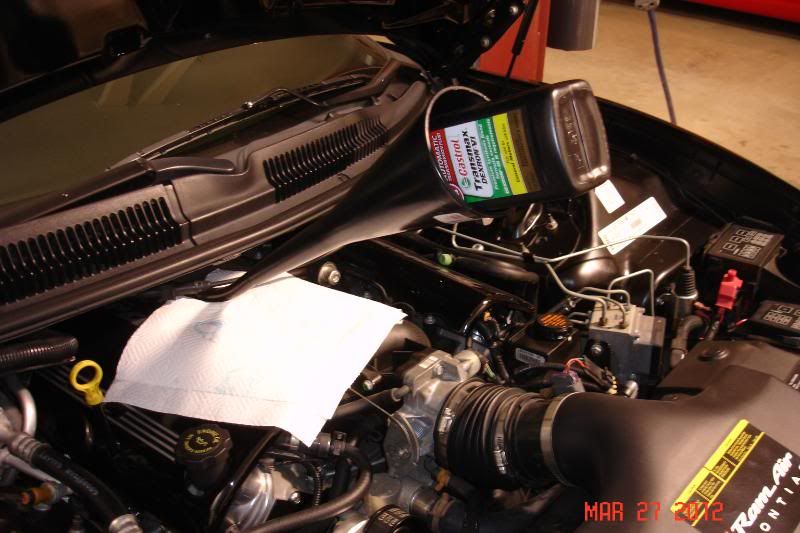
The instructions were not clear on which style filter -- car or truck -- to use with the new pan. There are aluminum extension tubes that are used to extend the filter to the floor of the pan. This kit included two styles of extensions and it was very clear which one I needed to use. In the pic, I have a truck style filter with the tube installed. This proved to be too long and I switched it over to a car style filter after checking with Chris on which one he had utilized. There is a small metal bracket that must be installed onto the valve body. This bracket holds the filter down against the bottom of the pan and prevents it from tipping out of the pump. The bracket is installed by removing a valve body bolt, orienting it towards the front of the car, and then reinstalling the bolt through the hole and torqueing it to 96 in.lbs.
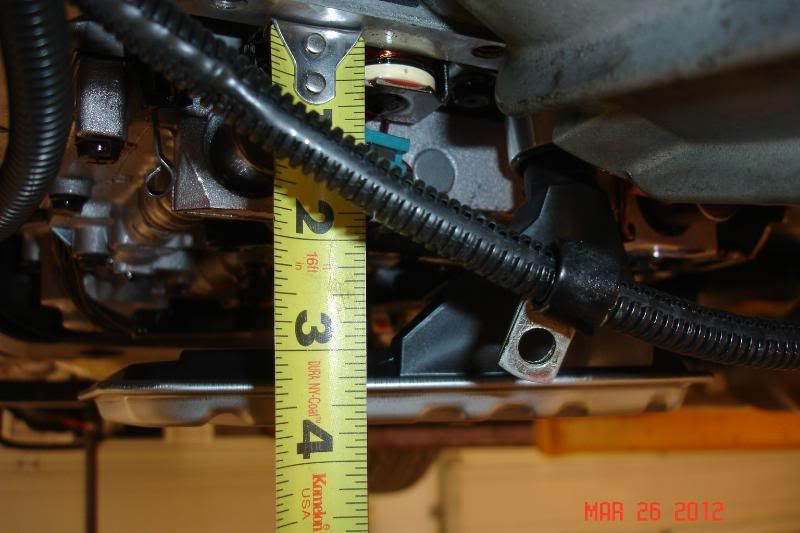
After test installing the filter, I measured the drop and found that it was at the correct height for the new pan. I did re-use the existing pump seal as it is less than a year old. Replacing them can be a bit tricky unless you have a tool that will allow you to tap them out. You can also utilize destructive means to collapse the metal collar of the seal as well. Neither method is a whole lot of fun and patience is recommended. A new seal can then be tapped in place with an appropriate size socket. In either event, always lube the seal with transmission fluid before inserting the filter neck.
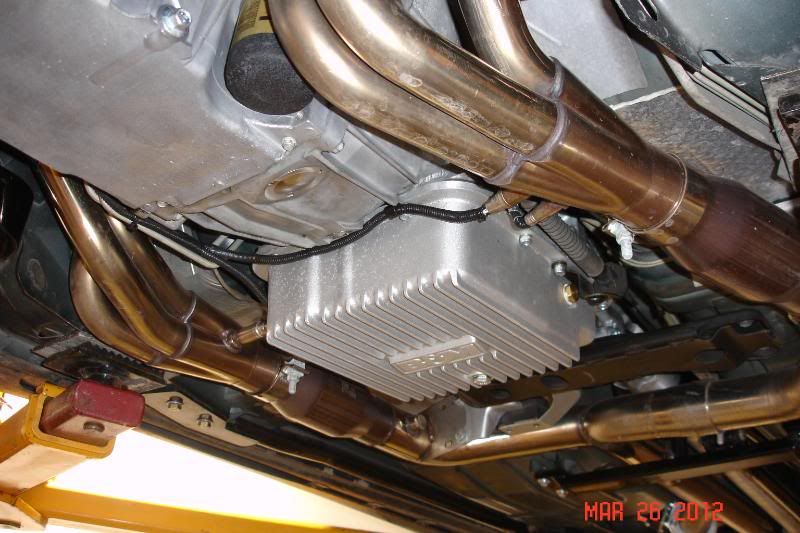
With the new filter in place, I washed out the new pan with spray brake cleaner to remove any manufacturing residue and dirt. I then wiped down the mating surfaces of the pan and transmission case with denatured alcohol and installed a new neoprene gasket onto the pan. A couple of bolts were threaded into the seal just enough to hold it in place as the pan was raised into position and the bolts started into the case. The shift cable bracket was then mounted to the pan rail and washers were inserted into the countersunk holes on the pan above the bracket. I used a long screwdriver as a lever to pop the cable back onto the shift lever. The bolts were then torqued to 12 ft.lbs. per the instructions from B&M. This is a bit more than you would torque the stock pan bolts which I believe call for 10 ft.lbs.
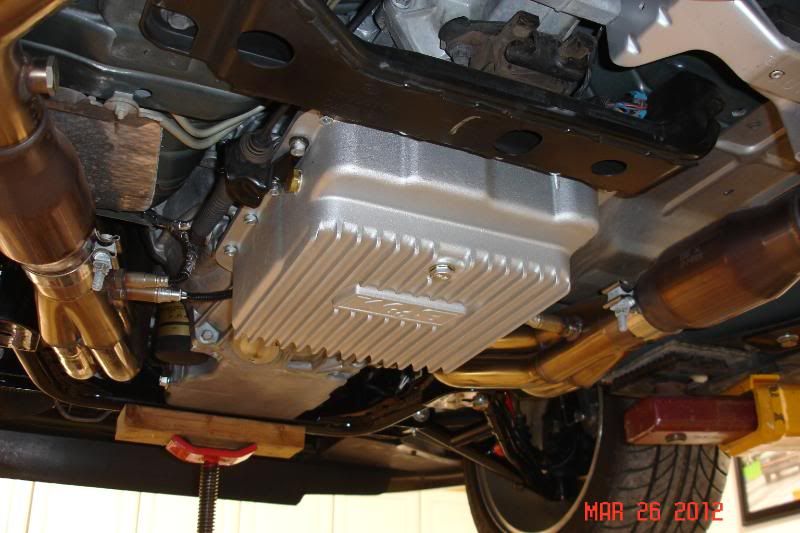
With the new pan in place, I snapped a few pictures and found that the undercar clearance would be about the same as the Kooks catalytic converters in the Y-pipe. Not too bad really considering the significant difference in size between the pans. The car was then dropped back down and filled with fresh Dexron VI semi-synthetic transmission fluid. Per the instructions, I started with 6 quarts before starting the engine and checking the level. I added a total of around 8-1/3 quarts to get to the warm level on the transmission dipstick. I'll now run the car and get the transmission up to operating temperature before verifying that the fluid level is correct. I understand that the 4L60E is a bit picky when it comes to fluid level and that it has to be right.

-
03-27-2012, 07:22 PM #2Your friendly policeman

- Join Date
- Jan 2012
- Location
- Alabama
- Posts
- 519
Bright Rally Red- 2001 Chevy Camaro Z28
I wish the bottom of my car was that clean. Nice write-up. I wish the factory pan had a drain plug.
2001 Chevy Camaro Z28 A4
SLP cold air intake/lid, SLP smooth bellow, Pacesetter LT's, ORY, Magnaflow exhaust, BMR STB, adjustable Panhard rod, SFC's, LCA's, 1LE sway bars, cross-drilled rotors
-
03-28-2012, 02:59 AM #3Veteran
- Join Date
- Feb 2009
- Location
- Mansfield, PA
- Posts
- 22,146
Black & Blue- '02 WS.6 / '07 Suburban
They make a drain plug kit that you can add to any transmission pan. I have never used one though, so cannot say if they are a worthwhile (and leak free) upgrade.
-
10-07-2012, 03:14 PM #4Former Mopar Man

- Join Date
- Jun 2011
- Location
- Branchville, NJ
- Posts
- 3,111
Silver & Blue- 02 Camaro SS, 04 GTO
Nice upgrade on the 4L60E trans. I am going to look into that swap for my wifes 04 GTO
My ride is a 2002 Camaro SS SLP #3296 with 30k, LTH, 3" Y, CME, Frost tune, K&N, ported TB, Blackwing lid, Bellows, MSD, Denso Iridium, and 85mm MAF, Bilsteins, Eibach springs, SLP strut brace, Adj. Panhard, TA Girdle, UMI, Pro 5.0, Nitto NT555
My wife has a 2004 GTO with the rare SAP, 18" wheels, K&N Cold Air System, MSD, Ported TB, Frost tune, Denso Iridium, Flowmaster cat-back, 3200 Yank, 75k
-
10-07-2012, 03:25 PM #5Member

- Join Date
- Jul 2012
- Location
- NorCal
- Posts
- 987
Sunset Orange Metallic- 2002 Camaro SS M6
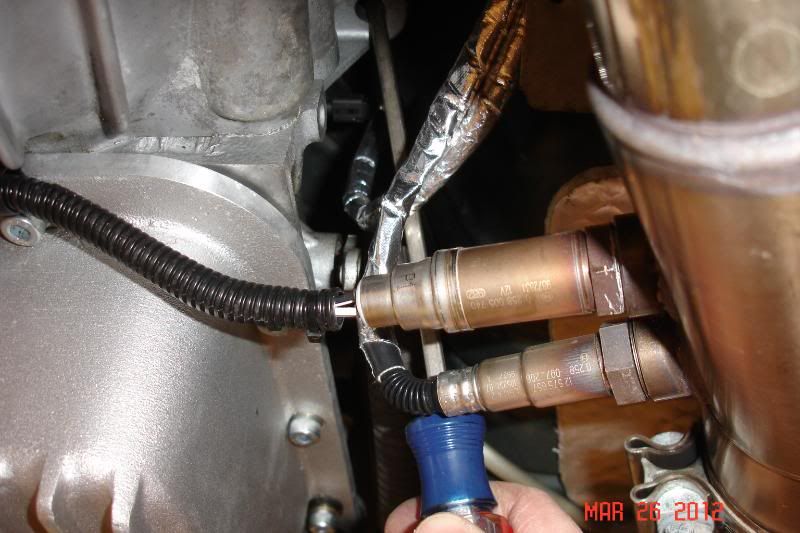
Nice write up.....Noticed two 02 sensors on the ds side? or is one something else? and do you have bands on both sides of your cats one at the header and one at the Y? just curious.
-
10-07-2012, 05:18 PM #6Veteran
- Join Date
- Feb 2009
- Location
- Mansfield, PA
- Posts
- 22,146
Black & Blue- '02 WS.6 / '07 Suburban
One is the Bank 1 O2 sender, the other is the sender for my pillar mounted wideband A/F gauge. The cats are welded to the Y pipe at the back. Only band clamps are at the front where they slide onto the headers.
-
10-07-2012, 07:29 PM #7Member
- Join Date
- Jul 2012
- Location
- NorCal
- Posts
- 987
Sunset Orange Metallic- 2002 Camaro SS M6
Thanks, mine are done the same here! i guess thats standard....was wondering if one could get away (without leaks) doing the bands@the Y pipe end? Reason is in case i have to put Ca. emissions cats back for the test then r/r them for the hi-flo kooks i have on now? & whats the purpose of having wb a/f gauge in your car besides knowing what your a/f ratio is -is it so you can adjust it on a later tune or? Originally Posted by pajeff02

-
10-08-2012, 03:24 AM #8Veteran
- Join Date
- Feb 2009
- Location
- Mansfield, PA
- Posts
- 22,146
Black & Blue- '02 WS.6 / '07 Suburban
The band clamps seem to work well. I do get moisture dripping from the joints as the engine and exhaust come up to full temp, so the seal is not 100%. I run our car at the track and like to monitor my A/F -- pretty much have gauges for everything, plus use a Hypertech to see the rest. Eventually, I will plumb the A/F gauge into my HP Tuners so I can datalog it on the street and at the track. This will also allow me to dial the VE table in if there are any discrepencies.
-
10-08-2012, 07:11 AM #9Veteran

- Join Date
- May 2006
- Location
- Arizona
- Posts
- 12,557
The factory GM pans for the trucks (which are deep pans) have a factory drain plug. Don't know why they didn't incorporate them into the passenger car pans. Originally Posted by FinZ28
-
10-08-2012, 11:04 AM #10Veteran
- Join Date
- Feb 2009
- Location
- Mansfield, PA
- Posts
- 22,146
Black & Blue- '02 WS.6 / '07 Suburban
If anyone is interested, I have a truck style pan with a drain plug that came on my Performabuilt. You just have to purchase a truck style filter that has the longer neck so that the filter extends down to the bottom of the deeper pan.
-
10-08-2012, 12:40 PM #11Senior Member

- Join Date
- Apr 2010
- Location
- Alabama
- Posts
- 3,625
Black/ Silver- 98 TA WS6/ 01 C5 Corvette
I may be interested in that, PM me the price. Originally Posted by pajeff02
1998 Trans Am WS6 - Phantom
421 CI LQ9, Tick Performance Custom Cam, TFS 255cc LS3 heads, Kooks 2" LT headers, Kooks 3" True Duals w/ high flow cats, FTP 104 lid, Speed Density Tune, 4" silicon tube, LS6 VCT, FAST 102 Intake, NW 102 TB, Oil Catch Can, SLP Bilstein Shocks w/ Vogtland Springs, CTS-V 4-piston Calipers w/C6 Z06 rotors, Stainless Steel Brake Lines, R1 concepts premium rotors, Hawk HP+ brake pads, VFN WSQ Hood, C5-R timing chain, SLP oil pump, E85 tune, Walbro 450 fuel pump, Deatschwerkz 95# injectors, Breathless performance headlights, Frost Tune, !HVAC.
(Coming Soon) BMR DSL, UMI TQ Arm
421 LQ9 14.8:1 on E85 Build/

-
10-08-2012, 07:37 PM #12Veteran

- Join Date
- Oct 2008
- Location
- Wherever life takes me
- Posts
- 12,526
Red- 02 35th LE Camaro SS
Nice write-up, Jeff. If I ever get my hands on an automatic, I might be doing this upgrade.
-
10-09-2012, 02:28 AM #13Veteran
- Join Date
- Feb 2009
- Location
- Mansfield, PA
- Posts
- 22,146
Black & Blue- '02 WS.6 / '07 Suburban
Thanks, Jon. Trans temps pretty much stay south of 180 degrees, even with the 3,200 rated stall torque converter.
-
01-14-2013, 11:14 AM #14Junior Member
- Join Date
- Nov 2012
- Location
- Roanoke, VA
- Posts
- 92
Sebring Silver- 2000 Trans Am
I know this is an old thread but I have a question. I just changed my fluid and filter this weekend and I'm guessing i have a truck pan the PO installed because it does have a drain plug (that was badly stripped). I installed the filter kit which I'm guessing is NOT for the deeper pan but the same as what was in it. Are bad things going to happen (ie starvation) without the deeper filter or can I leave it alone till next fluid change? Originally Posted by pajeff02
-
01-14-2013, 05:09 PM #15Veteran
- Join Date
- Feb 2009
- Location
- Mansfield, PA
- Posts
- 22,146
Black & Blue- '02 WS.6 / '07 Suburban
The correct filter will set just above the floor of the pan. Only way to tell is to remove the pan and take a measurement. The truck style pan with a drain should look like the very first pic in this thread. The stock shallow pan looks like this:

Honestly, draining the fluid only removes around half of the actual fluid in the system. You would be performing a more thorough flush by dropping the fluid again and checking your installed filter height.
-
01-14-2013, 09:57 PM #16Member
- Join Date
- Jul 2012
- Location
- NorCal
- Posts
- 987
Sunset Orange Metallic- 2002 Camaro SS M6
Looks good! you eat off that thing?
 are your headers ceramic coated?
-
01-15-2013, 03:55 AM #17Veteran
- Join Date
- Feb 2009
- Location
- Mansfield, PA
- Posts
- 22,146
Black & Blue- '02 WS.6 / '07 Suburban
Thanks. Headers are Kooks stainless.
-
01-16-2013, 03:36 PM #18Member
- Join Date
- Jul 2012
- Location
- NorCal
- Posts
- 987
Sunset Orange Metallic- 2002 Camaro SS M6
Yup i recognize them,same KooKs i have -but mine were coated before install with black coating for heat resistance i like the look of yours(natural stainless color) a lil better though...the guy that installed them recommended it so i went for it..anyway thanks. Originally Posted by pajeff02
-
01-16-2013, 06:21 PM #19Veteran
- Join Date
- Oct 2008
- Location
- Wherever life takes me
- Posts
- 12,526
Red- 02 35th LE Camaro SS
Interesting. I've never heard of anyone coating SS headers before.
Jeff - have yours discolored at all under the hood?
-
01-17-2013, 03:13 AM #20Veteran
- Join Date
- Feb 2009
- Location
- Mansfield, PA
- Posts
- 22,146
Black & Blue- '02 WS.6 / '07 Suburban
Yes they have. Kind of a dark yellowish coloration. It can be scrubbed off with a very fine scotch pad. I did clean the catback once last year in that manner.

 Reply With Quote
Thread Information
Users Browsing this Thread
There are currently 1 users browsing this thread. (0 members and 1 guests)
Similar Threads
-
Deep Blue
By SMWS6TA in forum Almost Anything GoesReplies: 10Last Post: 08-26-2015, 10:44 PM -
Seattle is Really Going off the Deep End...
By wileyCoyote in forum Political / Debate ForumReplies: 2Last Post: 10-07-2014, 08:49 AM -
I am in deep sh*t
By FSANE in forum Almost Anything GoesReplies: 52Last Post: 02-14-2011, 05:03 PM -
Diving in deep
By cuervo25_1 in forum Political / Debate ForumReplies: 8Last Post: 06-01-2010, 05:15 PM -
Deep dish or not?
By natews6 in forum Wheels and TiresReplies: 7Last Post: 05-24-2010, 07:35 PM

Bookmarks